

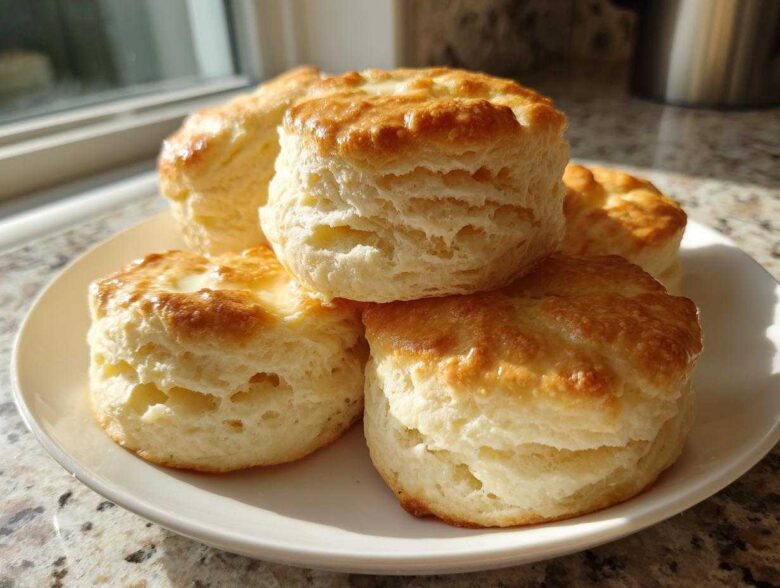
Oh my gosh, if there is one thing that instantly elevates a simple morning, it’s the smell of fresh, hot breakfast bread coming out of the oven. Forget those dry, sad little disks you get at the drive-thru! I spent years chasing that elusive perfect rise until I cracked the code for my Tall, Flaky, and Ultra-Fluffy Southern Buttermilk Biscuits. Seriously, these aren’t just regular biscuits; they have layers you can see, and they practically float apart when you pull them open!
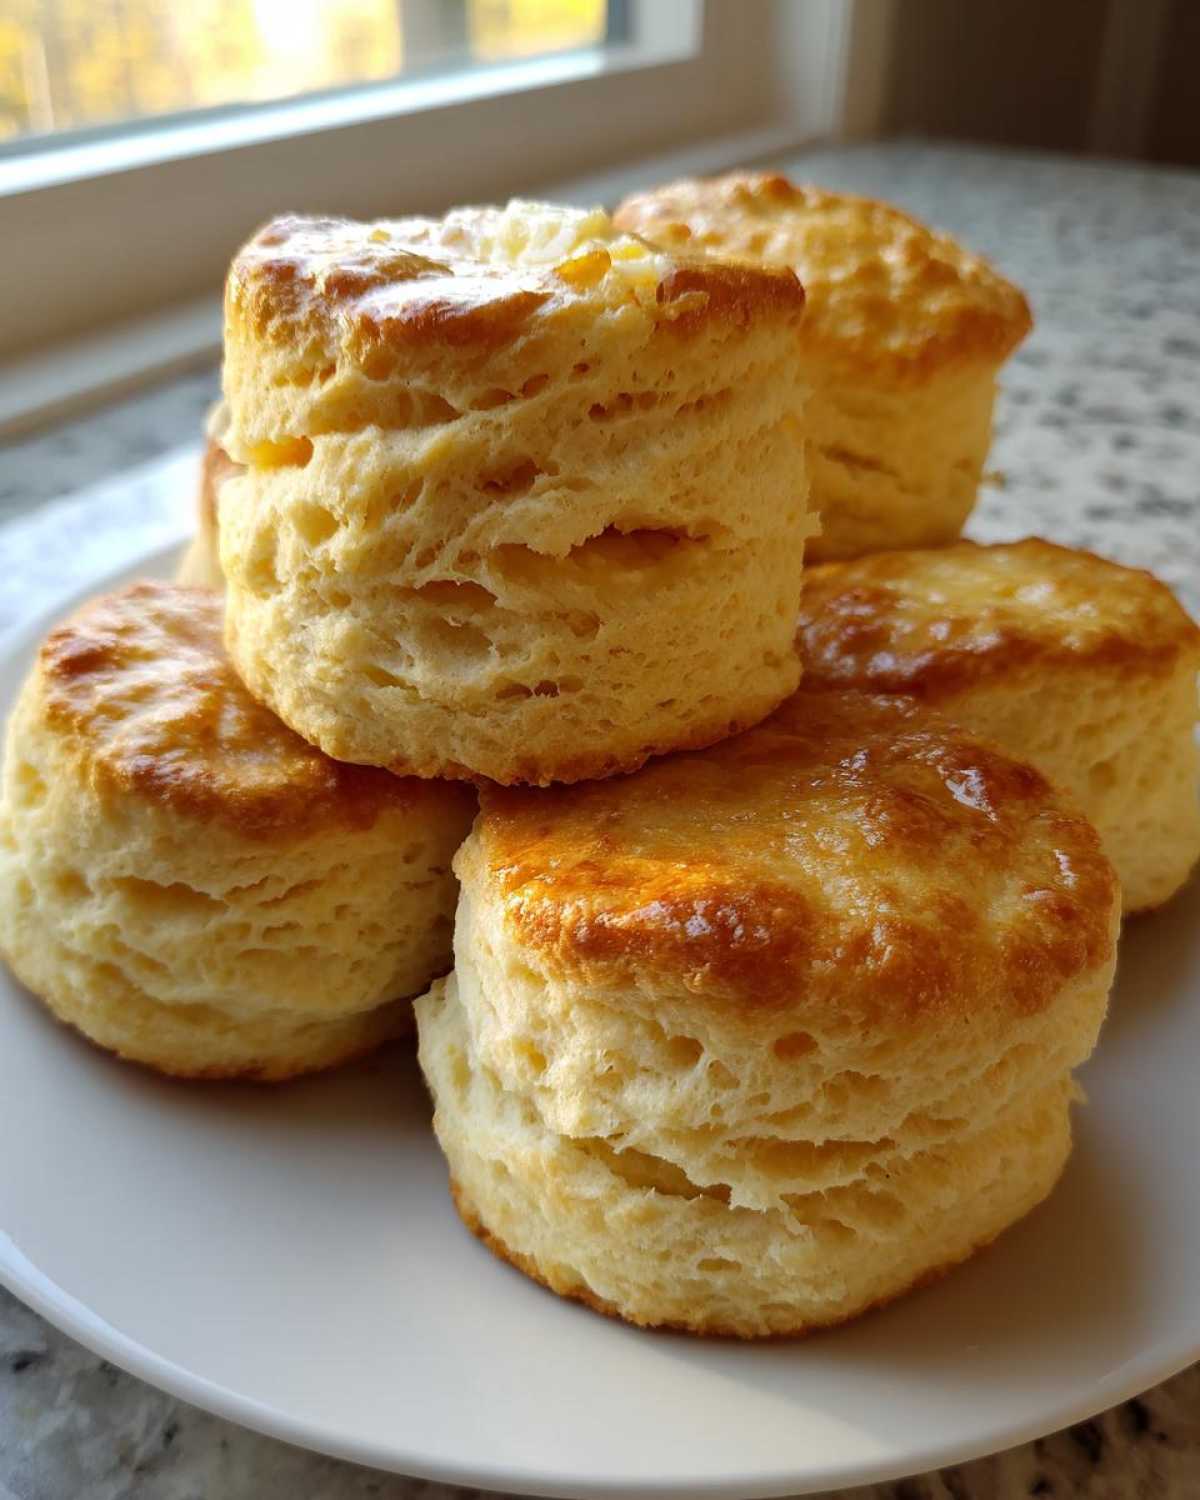
When I finally nailed the technique for these buttermilk biscuits—it all came down to keeping things cold and not fussing with the dough too much—I knew I had to share the secrets. Trust me, once you master this simple approach, you’ll never look back. They are buttery, they are tender, and they are just begging for a huge dollop of homemade gravy or sweet jam.
Before we jump into the recipe, take a peek at the background of this little corner of my kitchen. If you want to know more about how we share recipes around here, you can check out my little About Us page!
Why These Are the Best Buttermilk Biscuits You Will Ever Make
We’re not messing around here. These aren’t just tasty; they are texturally perfect. If you’ve ever had a biscuit flatten out halfway through baking, you know the sadness. We are talking about the kind of biscuits we dream about!
Achieving Maximum Fluffiness in Your Buttermilk Biscuits
The secret weapon for incredible height in your buttermilk biscuits is simple physics, really! You need ice-cold butter and ice-cold buttermilk. When that icy fat hits the hot oven, it steams like crazy, creating those amazing little air pockets that push the dough up, up, up! It’s all about that cold-shock!
Tips for Flaky Southern Biscuits
Flakiness comes from those layers, plain and simple. We build those layers by treating the dough gently. We mix until shaggy, then we fold it over itself a couple of times. This mimics what biscuits in old-school bakeries do, making sure you get those beautiful, distinct sheets when you pull them apart. It’s really satisfying peeling them open!
Why These Are the Best Buttermilk Biscuits You Will Ever Make
Listen, I’ve tried every lazy shortcut out there, and I’m telling you, these classic, from-scratch buttermilk biscuits are worth the tiny bit of effort. We are aiming for three things, and hitting all three means biscuit perfection:
- They are incredibly fluffy—tall enough to stack a couple high!
- They have visible, defined flaky layers that melt in your mouth.
- They are packed with that rich, comforting buttery flavor.
This truly is the best biscuit recipe for breakfast bread.
Achieving Maximum Fluffiness in Your Buttermilk Biscuits
Fluffiness, my friend, starts with temperature! If your butter isn’t rock hard, it will melt right into the flour, and you end up with a flat disc instead of a beautiful tower. Keeping everything that touches the dough—the butter, the buttermilk, even my mixing bowl sometimes—icy cold is the number one trick for tall buttermilk biscuits. Cold fat creating steam equals lift!
Tips for Flaky Southern Biscuits
Once the dough is mixed, we don’t knead it; we *fold* it. This layering process is what separates a good biscuit from a truly flaky Southern biscuit. We create those thin sheets of butter sandwiched between the dough layers. When that dough hits the heat, those sheets separate out beautifully, giving you those wonderful pull-apart textures. It’s magic, I tell you!
Ingredients Needed for Perfect Buttermilk Biscuits
Okay, let’s talk about what you need to gather before you even think about mixing! I know sometimes we all want a three-ingredient recipe, but for truly stunning, tender buttermilk biscuits that taste like they came straight from a Southern kitchen, we need a few essentials. Don’t panic; these are pantry staples!
For this recipe, you’ll need two cups of all-purpose flour, one tablespoon of baking powder to help them climb, a teaspoon each of salt and sugar for balance, six tablespoons of very cold unsalted butter cut into small cubes, and ¾ cup of ice-cold buttermilk. That’s it!
Ingredient Notes and Substitutions for Tender Buttermilk Biscuits
I can’t stress this enough: the success of these buttermilk biscuits hinges on the coldness of your fat and dairy. If your butter is soft, your biscuits will be tough. You must use cold butter cut into small cubes—think tiny dice! The buttermilk also needs to be straight from the fridge.
Now, what if your dairy runs out? If you absolutely *must* substitute the buttermilk, you can make a quick version by adding one teaspoon of white vinegar or lemon juice to ¾ cup of regular milk and letting it sit for five minutes until it curdles slightly. It works in a pinch, but trust me, proper full-fat buttermilk gives you that signature tang and moisture you want in these tender buttermilk biscuits.
Step-by-Step Instructions for Fluffy Biscuits
Alright, strap in! This is where we turn those cold ingredients into towering, flaky perfection. I’ve learned that the technique matters way more than the measurement when it comes to buttermilk biscuits. You need to move with purpose but act with restraint. Don’t rush the measuring, but don’t dawdle when mixing! We’re getting those layers built so these turn out into the fluffiest biscuits you’ve ever seen.
First things first: make sure your oven is already roaring hot—425 degrees or nothing! We want immediate action when the dough goes in. Get your sheet ready, too. If you like soft sides, put them close together; if you like crispy edges, give them space. It’s all about personal preference here!
Mixing and Cutting the Butter into the Flour
Grab your bowl with the dry stuff already whisked together—that’s your flour, baking powder, salt, and sugar. Now, add those little cubes of rock-hard butter. I swear by using my fingers because I can feel the temperature, but if your hands are warm, grab a pastry blender! You’re mashing and cutting until the butter pieces are about the size of small peas, or maybe a little smaller. If you keep working it until it looks like sand, guess what? No flaky layers! We need those visible chunks of butter hiding in the flour mix.
The Folding Technique for Layered Buttermilk Biscuits
This is the crucial step for incredible lift in your buttermilk biscuits. After you gently mix in the cold buttermilk until just combined—seriously, stop mixing when it looks shaggy—turn that dough onto your lightly floured surface. Pat it into a rough rectangle, maybe an inch thick. Now, fold it like you’re folding a business letter: fold one side over the middle, then bring the other side over the top. Give that dough a quarter turn (90 degrees) and gently pat it down to about ¾ inch thick again. See those lines forming? That’s layers being built! Repeat this fold one more time for truly epic buttermilk biscuits.
Baking and Finishing Your Homemade Buttermilk Biscuits
Once you cut your shapes straight down—remember, no twisting!—lay them onto your baking sheet. Pop them into that hot oven for about 12 to 15 minutes. Keep an eye on them; they should look beautifully golden brown on top. As soon as they come out, melt a little extra butter. Brushing that melted butter right over the tops of your homemade buttermilk biscuits while they are piping hot gives them that incredible buttery finish and keeps the crust tender. They are ready when they smell like heaven!
Expert Baking Tips for Perfect Buttermilk Biscuits Every Time
Even with the best recipe, sometimes the baking gods aren’t smiling on you, right? I’ve learned a few little tricks over the years that guarantee success for these buttermilk biscuits, even when my kitchen feels too warm or I have to rush. These aren’t in the main instructions, but they are total game-changers if you want those tall, flaky layers.
If you ever need to reach out with a baking question or just want to say hi, don’t forget you can always use my contact page! I love hearing from fellow bakers.
Here are my go-to secrets for making sure you nail those beautiful rises:
- Don’t Fear the Chill: If you are working in a warm environment—and butter melts fast—as soon as you finish folding the dough (before cutting the biscuits), wrap the whole slab tightly in plastic wrap and stick it in the fridge for 15 minutes. Chilling the dough firms up the butter again, ensuring maximum explosion in the oven.
- The Ruler Trick: If you want the absolute tallest buttermilk biscuits, use a thin sheet of rolled-out dough that is exactly one inch thick. Use your hands to gently pat it down after folding, but if you have a ruler handy, use it to check your height! Uniform thickness means uniform rising.
- The Steam Secret: For extra tender interiors, some people place an oven-safe metal pan on the bottom rack while preheating. Right before you put your biscuits in, carefully pour half a cup of hot water into that pan to create a burst of steam. Steam keeps the surface of the biscuits soft longer, allowing the interior structure to rise higher before the crust sets.
- Use the Right Cutter: I mentioned not twisting earlier, but seriously, this is vital! Twist the cutter, and you basically seal the outside edges shut, preventing that beautiful straight vertical rise. Press straight down firmly and lift straight up. You can even dip the edge of your cutter in flour before each cut for an extra-clean separation.
Follow these steps, and I promise your buttermilk biscuits will be the star of your breakfast table!
Variations on Classic Buttermilk Biscuits
Once you’ve mastered the basic technique—keeping it cold and folding gently—you realize this recipe is basically a blank canvas. It’s so sturdy and flavorful that you can certainly jazz it up for brunch or even a fun dinner side! You don’t need complex new recipes; you just need a couple of fun mix-ins to make these tender buttermilk biscuits feel extra special.
The key to success in these variations is still respecting the dough. If you’re adding something wet, like maybe extra sour cream, you might need to cut back slightly on the liquid buttermilk. But for dry additions, you can usually just toss them in when you are mixing the dry ingredients!
Savory Biscuit Twists
For us, the best savory addition is cheese. Sharp cheddar or Gruyère melts beautifully and adds such a gorgeous tang. Try stirring in about half a cup of finely shredded cheese right before you add the buttermilk. Another favorite combo in my house is fresh chives and a little bit of black pepper. It makes them perfect for eating alongside chili or stew.
You could also try folding in a couple of tablespoons of dried herbs like rosemary or thyme when you add the dry ingredients. Just remember, herbs are strong, so start small! These savory versions make a wonderful, comforting breakfast bread.
Making Them a Bit Healthier (Just a Little!)
Look, I’m not going to pretend a biscuit is health food, but if you want to switch things up slightly without sacrificing too much texture, try swapping out maybe a quarter of your all-purpose flour for whole wheat flour. It lends a slightly nutty flavor to your homemade buttermilk biscuits. You might need one extra splash of buttermilk, since whole wheat soaks up more liquid.
Another trick for adding complexity is using my favorite sugar substitute: molasses! Instead of the small bit of plain sugar in the dry mix, try swapping it out for a teaspoon of molasses for a darker color and richer background flavor. It pairs wonderfully with whole wheat flour.
Sweet Treat Biscuits
If you are leaning toward the sweeter side, think dessert! Cinnamon-sugar works amazing right on top. After cutting your rounds, brush them lightly with some melted butter and then dip the tops (just the tops!) into a mixture of cinnamon and sugar before baking. They come out smelling absolutely divine—just like a cinnamon roll, only flakier!
For a decadent touch, you can even fold in some finely chopped candied pecans or a few mini chocolate chips into the dough along with the cheese, if you’re feeling wild. Just treat them like chocolate chip cookies: don’t over-mix, or the chips will bake into nothingness!
Storing and Reheating Your Flaky Southern Biscuits
The biggest problem with making perfect buttermilk biscuits is usually that there aren’t enough left over! They taste a billion times better warm, but if you have any extras, you need to store them right away so they don’t get that sad, stale texture. A well-made biscuit should last a couple of days if you treat it right.
First rule: Do not store them in the refrigerator uncovered! They dry out way too fast in that cold air, even if the fridge is your usual spot for leftovers. The cold actually messes with the starches in the flour, making them hard.
The Best Way to Keep Them Fresh
If you plan on eating them within 24 hours, just let them cool completely first! Once totally cool, place them in an airtight container or a heavy-duty zip-top freezer bag. Squeeze out as much air as you can before sealing. They should stay lovely at cool room temperature for a full day. If you bake a huge batch, you’ll need to freeze the rest.
To freeze your buttermilk biscuits—and this is how you save them for a busy week—place them on a baking sheet and freeze until they are solid bricks. Once they are frozen solid, transfer them into a heavy freezer bag. When packed tight, they will happily last up to three months. Trust me; there’s nothing better than pulling out a frozen biscuit for a quick breakfast!
Reheating for That Fresh-From-the-Oven Texture
Okay, reheating is key to restoring that beautiful, flaky texture. The microwave will make them soft, but it won’t make them crispy or give them that fresh-out-of-the-oven lift. So, we’re going old school!
- Oven Method (Highly Recommended): Wrap your biscuits loosely in aluminum foil—this keeps them from getting too dry on the outside while they warm up. Pop them into a 350°F oven for about 10 minutes until they are heated all the way through.
- Quick Fix (If You’re In A Hurry): If you only have one or two, you can microwave them, but you *must* wrap them in a damp paper towel first. Microwave them for about 15 to 20 seconds on medium power. It won’t give you the flaky crispness, but it gets them soft enough to spread butter on!
If you’ve frozen them, skip the microwave entirely! Put the frozen buttermilk biscuits right into a 350°F oven (still wrapped in foil) for 20 to 25 minutes. They come out tasting absolutely brand new. It’s the best way to enjoy these buttery biscuits all week long.
Frequently Asked Questions About Making Buttermilk Biscuits
I get so many questions about what happens when things go sideways with this recipe—and trust me, I’ve made every mistake possible over the years! Hopefully, answering these common issues will help you achieve those perfect, tender results on your first try. We all want those gorgeous, flaky layers, and sometimes a small adjustment is all it takes!
Can I make these Easy Biscuit Recipe without Buttermilk?
Yes, you totally can, but I’ll warn you, it won’t taste *exactly* the same because buttermilk brings that essential tang and acidity that helps with the rise. If you’re in a pinch and need some easy biscuit recipe action right now, you can create a substitute! Just measure out one cup of regular milk—whole milk works best—and stir in one tablespoon of white vinegar or lemon juice. Let that sit on the counter for about five minutes until it starts to look a little curdled. That acidic mix can take the place of the buttermilk in a pinch, but make sure it’s still cold before you add it to the flour mix!
What is the secret to Melt in Your Mouth Biscuits?
Ah, the elusive melt in your mouth biscuits quality! If you’re chasing that ultra-tender result, you need to listen to my advice on handling the dough—it’s the same stuff I hammered home in the main instructions. The absolute biggest secret is keeping your fat, in this case, the butter, icy cold and cutting it into the flour until you only have pea-sized pieces left. You must stop mixing before it all disappears! Those little pockets of cold butter are what create steam, which produces those airy, soft layers. If you overwork the dough or let the butter get warm, you’ll end up with dense hockey pucks instead of heavenly bites.
If you’re researching baking safety or need to look at the site’s privacy policy, you can check those links out, but let’s focus on getting those biscuits risen!
Why didn’t my homemade buttermilk biscuits rise very tall?
This is the hardest one for people to figure out! Usually, when homemade buttermilk biscuits lay flat, one of three things happened. First, your leavening agent might be old. Check the date on your baking powder! If it’s old, it won’t create enough lift. Second, you might have overmixed the dough after adding the buttermilk. Overmixing develops the gluten too much, making the dough tough and preventing it from puffing up tall. Finally, make sure you pressed straight down with your cutter—twisting seals the edges, and they can’t soar upward!
Estimated Nutritional Data for Buttermilk Biscuits
Because we take our baking from scratch seriously, I always like to give a little heads-up on what you’re eating! You know I’m not a nutritionist, and every oven and ingredient brand varies, so take these numbers with a grain of salt—or sugar, in this case!
This information below is an estimate based on the standard ingredients listed above for one single serving of our fantastic buttermilk biscuits. If you’re doing a huge dinner party and making 16 smaller biscuits instead of 8 large ones, the numbers per biscuit will change quite a bit!
For more general information about how we handle recipes and data, you can always pop over to my disclaimer page.
- Serving Size: 1 biscuit
- Calories: 220
- Fat: 11g
- Saturated Fat: 7g
- Carbohydrates: 26g
- Protein: 5g
- Sugar: 2g
- Sodium: 350mg
See? Not too bad for a breakfast bread that tastes this incredible! You’re getting a little bit of fat that gives you those flaky layers, and that protein boost to keep you satisfied until lunchtime. Enjoy every single one of these buttery biscuits!
Share Your Experience with These Buttery Biscuits
Whew! Now that you have the secrets to the fluffiest, most incredible buttermilk biscuits known to humankind, I want to hear all about it! Did you manage those tall, majestic rises? Were your layers distinct and flaky? Seriously, baking is so much more fun when you share the results!
If you made a batch, please don’t be shy! Pop down into the comments below and let me know how they turned out. Did you serve them with sausage gravy, or did you go straight for the honey butter?
Rate this recipe using the stars provided—it really helps other bakers know that they too can achieve this level of breakfast perfection. I love seeing your photos when you share your gorgeous, buttery biscuits on social media. Tag me so I can celebrate your success! There is nothing better than seeing my readers master baking from scratch!
PrintTall, Flaky, and Ultra-Fluffy Southern Buttermilk Biscuits

Follow these steps to make tall, flaky, and tender buttermilk biscuits from scratch. This recipe focuses on cold ingredients and proper folding for maximum lift.
- Prep Time: 15 min
- Cook Time: 15 min
- Total Time: 30 min
- Yield: 8 servings
- Category: Breakfast
- Method: Baking
- Cuisine: American
- Diet: Vegetarian
Ingredients
- 2 cups all-purpose flour
- 1 tablespoon baking powder
- 1 teaspoon salt
- 1 teaspoon sugar
- 6 tablespoons cold unsalted butter, cut into small cubes
- 3/4 cup cold buttermilk
Instructions
- Preheat your oven to 425°F (220°C). Lightly grease a baking sheet or line it with parchment paper.
- In a large bowl, whisk together the flour, baking powder, salt, and sugar.
- Add the cold butter cubes to the flour mixture. Use a pastry blender or your fingertips to cut the butter into the flour until the mixture resembles coarse crumbs with some pea-sized pieces of butter remaining.
- Make a well in the center of the dry ingredients and pour in the cold buttermilk all at once.
- Mix gently with a fork just until the dough comes together. Do not overmix.
- Turn the dough out onto a lightly floured surface. Gently pat the dough into a rough rectangle about 1 inch thick.
- Fold the dough into thirds, like a letter (bringing one end over the center, then the other end over that). Turn the dough 90 degrees and gently pat it back down to about 3/4 inch thickness. This folding creates layers.
- Use a 2-inch biscuit cutter to cut straight down through the dough. Do not twist the cutter.
- Place the cut biscuits close together on the prepared baking sheet for softer sides, or further apart for crispier sides.
- Bake for 12 to 15 minutes, or until the tops are golden brown.
- For extra buttery flavor, brush the tops with melted butter immediately after removing them from the oven.
Notes
- Keep all your ingredients, especially the butter and buttermilk, very cold. Cold fat creates steam pockets, resulting in flaky layers.
- Do not twist the biscuit cutter. Press straight down and lift up to keep the edges clean, which helps the biscuits rise straight up.
- For the tallest biscuits, place them touching on the baking sheet.
Nutrition
- Serving Size: 1 biscuit
- Calories: 220
- Sugar: 2
- Sodium: 350
- Fat: 11
- Saturated Fat: 7
- Unsaturated Fat: 4
- Trans Fat: 0
- Carbohydrates: 26
- Fiber: 1
- Protein: 5
- Cholesterol: 25