

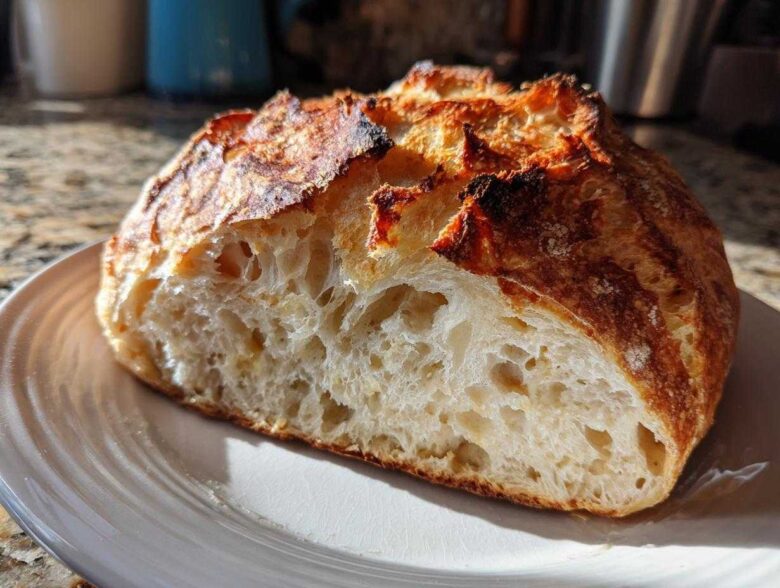
I used to think making real, crusty, bakery-quality bread was reserved for folks with giant mixers and endless patience. Seriously, kneading by hand? Not for me! But let me tell you, discovering this no-knead artisan bread recipe changed everything about how I view making homemade bread. This is, hands down, the easiest ‘from scratch’ loaf you will ever throw together. It’s perfect for absolute beginners. All you need is flour, water, salt, and yeast, and the magic happens while you sleep! You won’t believe how incredible this bread tastes just from using a Dutch oven. Forget fancy techniques; this is the real deal.
Why This No Knead Dutch Oven Bread is the Best Homemade Bread Recipe
I know what you’re thinking: 18 hours of waiting for bread? Yes! But the best part is that you aren’t actually doing anything for 17 of those hours. This is easily the most straightforward recipe for anyone wanting to bake an amazing artisan bread recipe at home without the arm workout. It really is the easiest bread to make at home because the time does all the hard work for you. My favorite part? The flavor development during that long, slow rise is just incomparable.
Achieving Crusty Bread Baking Results with Minimal Effort
The Dutch oven is our secret weapon here. When you preheat that heavy pot, the trapped moisture from the dough turns into steam right away. This steam is what stops the crust from setting too early. That initial steamy environment allows the dough to expand fully without drying out. That’s how you get that classic, crackly, crusty bread baking result that looks straight out of a professional bakery!
Essential Ingredients for Your Artisan Bread Recipe
We’re keeping this bread recipe super simple, which is why it’s so good! You only need four main things, plus a couple of options if you’re feeling fancy. Seriously, don’t try to mess with these ratios; they are perfected for this specific no-knead method. Trust me, using exactly 1 1/2 teaspoons of salt versus a tablespoon makes a massive difference in how this bread develops its structure.
Here’s what you need right now:
- 3 cups all-purpose flour
- 1 1/2 teaspoons salt
- 1/4 teaspoon instant yeast
- 1 1/2 cups cool water
- Optional: 1 tablespoon dried Italian herbs
- Optional: 2 tablespoons melted butter mixed with 1 clove minced garlic for brushing
Ingredient Notes and Substitutions for Perfect Bread
Keep the water cool, not lukewarm! Using cool water is vital because it slows down the yeast just enough to let those deep, complex flavors develop over the long rest time. We must use instant yeast here because it mixes in dry and activates immediately during the long room-temperature fermentation. If you only have active dry yeast, you must bloom it first in a little bit of warm water, but I really prefer instant for this recipe.
You can swap the all-purpose flour for bread flour if you want a tiny bit more chew, but stick with AP flour for that softer, crumbly interior texture we’re aiming for with this homemade bread.
Step-by-Step Guide: How to Make No Knead Bread at Home
Okay, time for the part where we put it all together! This no knead bread guide makes beginner bread baking totally foolproof. Don’t worry about the long wait time; that’s the easiest part, I promise. You just need to plan ahead a little bit, which is perfect for weekend baking!
Mixing and the Long Rest for Flavorful Bread
In your big bowl, whisk the flour, salt, and yeast until they are completely mixed—this is important! Then, just dump in the cool water and stir it with a wooden spoon until you can’t see any dry spots left. It will look super messy and sticky, like a wet mop in a bowl, and that’s exactly what you want. Cover it up tight and forget about it for 12 to 18 hours. When you come back, the dough should be doubled and full of giant, beautiful bubbles—that means the yeast is happy!
Mastering Dutch Oven Baking for This Bread
This next part takes confidence, but you can totally do this! About 30 minutes before the dough is done resting, put your empty Dutch oven, lid and all, into the oven and crank the heat up to 450 degrees F. We need that pot screaming hot! Once it’s preheated, carefully get that blistering hot pot out. Use parchment paper to gently drop your dough right into the center of the Dutch oven. Put the lid back on and bake it covered for 30 minutes. Then, pull the lid off to finish for another 10 to 15 minutes until it’s that deep golden brown color you only see in bakeries!
Tips for Success When Baking Your First Loaf of Bread
Baking this bread for the first time can feel a little nerve-wracking, especially with that hot Dutch oven involved! But don’t you worry, I have a few little tricks up my sleeve. My biggest piece of advice is this: You absolutely must let the bread cool completely before you slice into it. I know it smells amazing coming out of the oven, but cutting it hot releases all that wonderful trapped steam, and you’ll end up with a gummy center. Just let it sit on a wire rack for at least an hour!
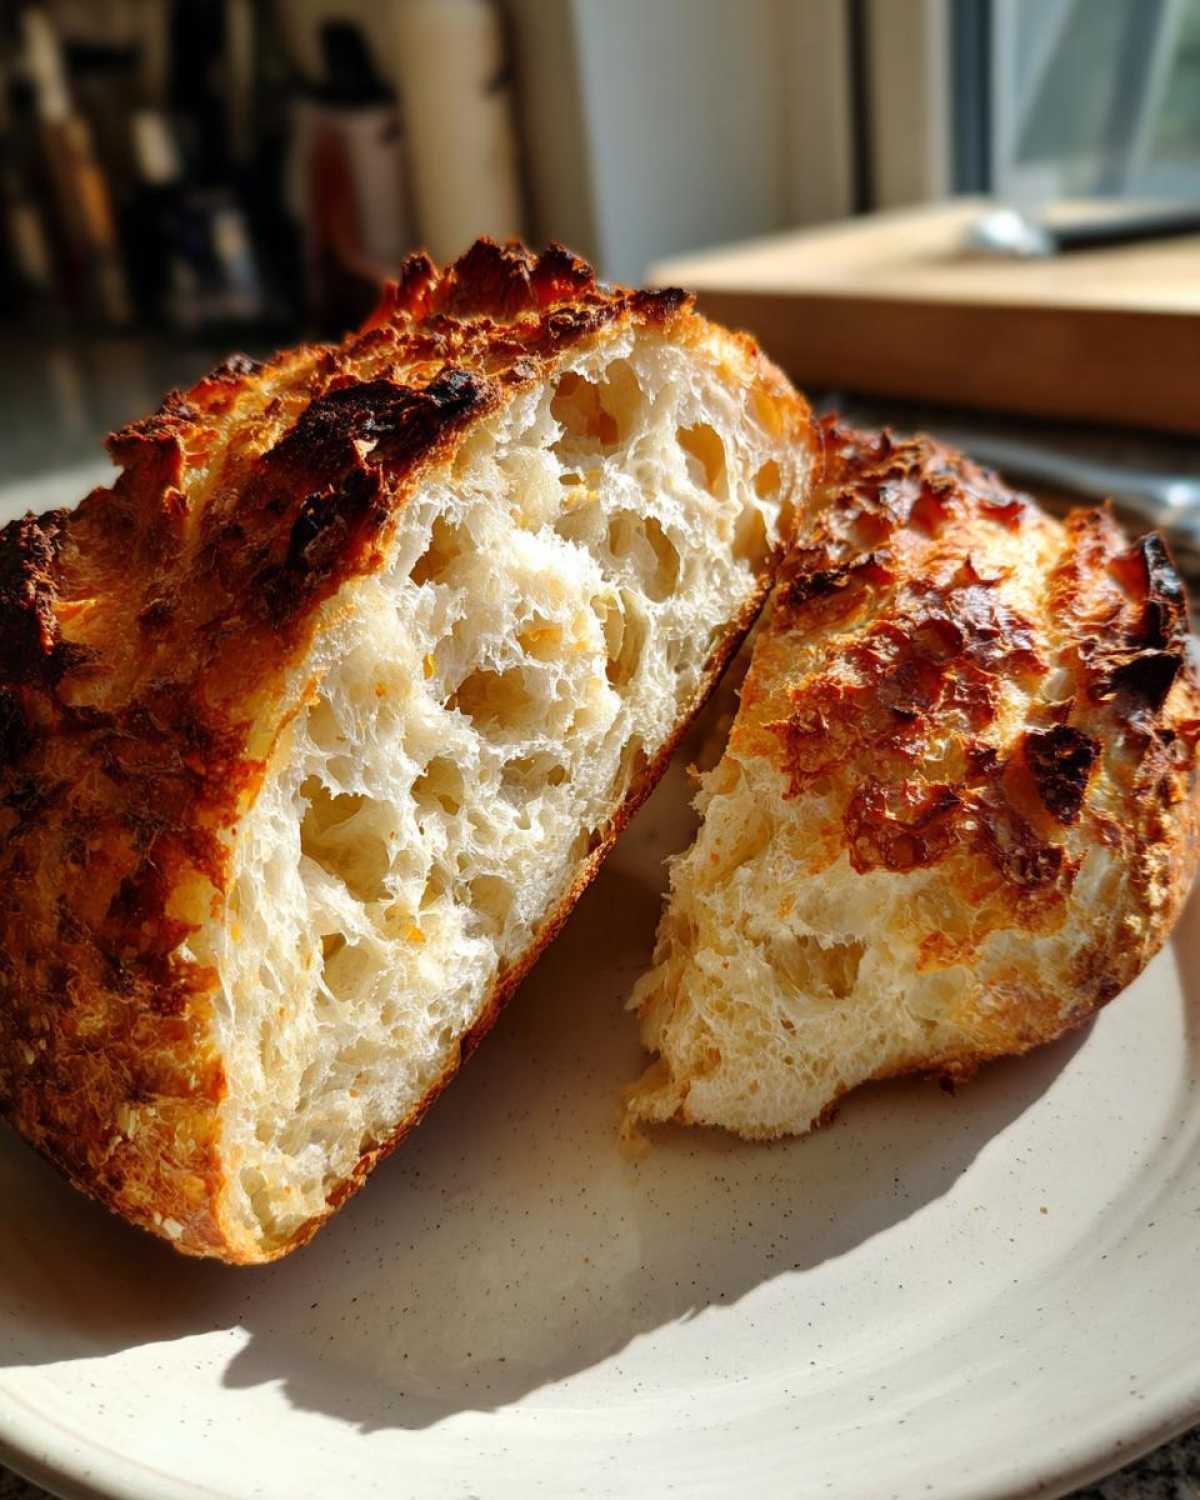
If you want that really dark, professional-looking crust—the kind that shatters when you tap it—don’t be scared to bake it longer without the lid on. Aim for a deep mahogany color, not just light blonde. Also, I always brush the top with a little melted butter right when it comes out of the oven. It adds instant richness and makes the kitchen smell 100 times better!
Flavor Variations for Your Homemade Bread Recipes
Once you’ve mastered this basic loaf, which is so simple, you’ll want to start playing around! This dough is a perfect canvas for adding all sorts of delicious things. If you’re looking for a savory touch, adding some onion powder or some dried rosemary right in with the flour works beautifully, making a fantastic Italian Herb Bread. If you’ve got a sweet tooth, try swirling in some brown sugar and cinnamon right before the final 30-minute rest—it’s heavenly!
You can even turn this into a quick garlic bread recipe by going heavy on the garlic butter when you pull the loaf out. Truly, the possibilities for homemade bread recipes are endless once you have this foundation down.
Creating Cheesy Bread Ideas with This Dough
If you want to turn this into cheesy bread ideas, you need to be patient! Wait until you scrape the dough out onto the counter just before that 30-minute rest. Gently spread the dough out a bit and sprinkle it generously with shredded mozzarella, Parmesan, or sharp white cheddar. Fold the dough over just a couple of times to trap the cheese inside, form your ball, and then proceed with the rest and baking steps. It melts perfectly inside!
Storing and Reheating Your Crusty Bread
Look, the hardest part about this bread being so delicious is that it disappears too fast! But if you do have leftovers, how you store it makes all the difference. Don’t put this beautiful crusty bread in a plastic bag right away; that traps moisture and turns your lovely crust soggy instantly! Just leave it out on the counter, cut-side down on a cutting board. I usually use a clean kitchen towel over the top after it’s fully cooled.
When you’re ready to eat it the next day, you have to refresh it. Pop a slice right back into a 350-degree oven for just three or four minutes. It comes out tasting exactly like it just came out of the Dutch oven. It revives that amazing crust perfectly!
Frequently Asked Questions About Making Artisan Bread
Can I use active dry yeast instead of instant yeast?
Yes, you totally can, but you have to treat it a little differently! Since active dry yeast needs to wake up first, you need to bloom it in about 1/2 cup of lukewarm (not hot!) water with a tiny pinch of sugar for about five to ten minutes until it gets foamy. Once it’s foamy, use that yeast mixture in place of the cool water in the main recipe. If you skip this blooming step, your beginner bread baking attempts will likely result in very flat bread, so don’t skip it!
Why is my no-knead bread dense?
A dense loaf usually comes down to a few things when making this simple bread recipe. The most common cause is temperature—either the room was too cold, and the yeast stalled, or you used hot water, which killed the yeast entirely. Also, make sure you are measuring your flour correctly. If you pack the flour into your measuring cup, you add too much, which deflates the dough. For airy, like soft dinner rolls, light fluffy interior textures, measuring lightly is key!
How long does this bread last?
Honestly, this crusty bread is usually gone in 24 hours in our house! Stored properly—wrapped loosely, not airtight—it keeps well at room temperature for about two full days. After that, the crust softens up a bunch. If you know you aren’t going to finish it, slice it up right away and freeze the slices! You can pop those slices directly into the toaster later for a quick bite.
Do I really need a Dutch oven for this recipe?
While the Dutch oven gives you that unbeatable artisan bread result with the perfect crust, it’s not strictly necessary if you’re trying to use what you have. You can use a cast-iron pot with a lid, or if you don’t have heavy cookware, you can bake the bread on a preheated baking stone or even a heavy baking sheet. Just remember the steam part! If you skip the heavy pot, you absolutely need to create steam by placing a pan of very hot water on the bottom rack of your oven while preheating, as detailed in the general notes. Find more baking tips over at our disclaimer page, but I really recommend trying the pot method first!
Estimated Nutritional Data for This Simple Bread
Now, I’ll be the first to admit I’m not a nutritionist, and honestly, when bread smells this good, counting calories feels a little tragic! But for those of you who need to know, here’s the ballpark estimate based on general recipe calculations. Remember, these numbers are just a starting point since your exact flour and yeast amounts might vary slightly.
- Serving Size: 1 slice
- Calories: 220
- Sugar: 1g
- Sodium: 350mg
- Fat: 1g
- Carbohydrates: 48g
- Protein: 7g
This data is based on standard preparation for one slice of this delicious loaf. As a gentle reminder, we always say that baking for love is the most important measure of success here, so don’t stress too much over these estimations!
Share Your Homemade Bread Success
I truly hope this no-knead bread works its magic for you too! If you loved the texture and that unbelievable crust, please tell me about it in the comments below. Did you stick with the plain version, or did you try adding garlic?
If you snapped a picture of your beautiful homemade loaf, tag me on social media! I absolutely live to see your baking wins. Happy baking!
PrintEasy No Knead Artisan Bread Baked in a Dutch Oven
Bake a crusty, flavorful artisan loaf at home with this simple no-knead recipe using a Dutch oven.
- Prep Time: 10 min
- Cook Time: 45 min
- Total Time: 13 hours 55 min
- Yield: 1 loaf
- Category: Baking
- Method: No Knead Baking
- Cuisine: General
- Diet: Vegetarian
Ingredients
- 3 cups all-purpose flour
- 1 1/2 teaspoons salt
- 1/4 teaspoon instant yeast
- 1 1/2 cups cool water
- Optional: 1 tablespoon dried Italian herbs
- Optional: 2 tablespoons melted butter mixed with 1 clove minced garlic for brushing
Instructions
- In a large bowl, whisk together the flour, salt, and yeast. If using herbs, mix them in now.
- Pour in the cool water and mix with a wooden spoon until a shaggy, sticky dough forms. Do not overmix.
- Cover the bowl tightly with plastic wrap and let it rest at room temperature for 12 to 18 hours. The dough will become bubbly and increase in volume.
- After the long rise, lightly flour a work surface. Scrape the dough out onto the surface. Gently fold the dough over itself a few times to form a rough ball.
- Place a sheet of parchment paper over the dough ball and let it rest for 30 minutes.
- About 30 minutes into this rest, place your empty Dutch oven (with the lid on) into your oven. Preheat the oven to 450 degrees Fahrenheit (232 degrees Celsius).
- Carefully remove the hot Dutch oven from the oven. Lift the dough using the parchment paper and gently place it into the hot pot.
- Cover the Dutch oven with the lid and return it to the oven. Bake for 30 minutes.
- Remove the lid. If you want a darker crust, continue baking uncovered for another 10 to 15 minutes.
- Carefully remove the bread from the Dutch oven. If using the garlic butter topping, brush it over the hot crust immediately.
- Let the bread cool completely on a wire rack before slicing.
Notes
- Using cool water helps control the fermentation process, leading to better flavor development during the long rest period.
- If you do not have a Dutch oven, you can bake the bread on a preheated baking stone, but you must create steam in the oven by placing a pan of hot water on the bottom rack.
- For a softer crust, brush the loaf with melted butter immediately after removing it from the oven.
Nutrition
- Serving Size: 1 slice
- Calories: 220
- Sugar: 1
- Sodium: 350
- Fat: 1
- Saturated Fat: 0
- Unsaturated Fat: 1
- Trans Fat: 0
- Carbohydrates: 48
- Fiber: 2
- Protein: 7
- Cholesterol: 0