

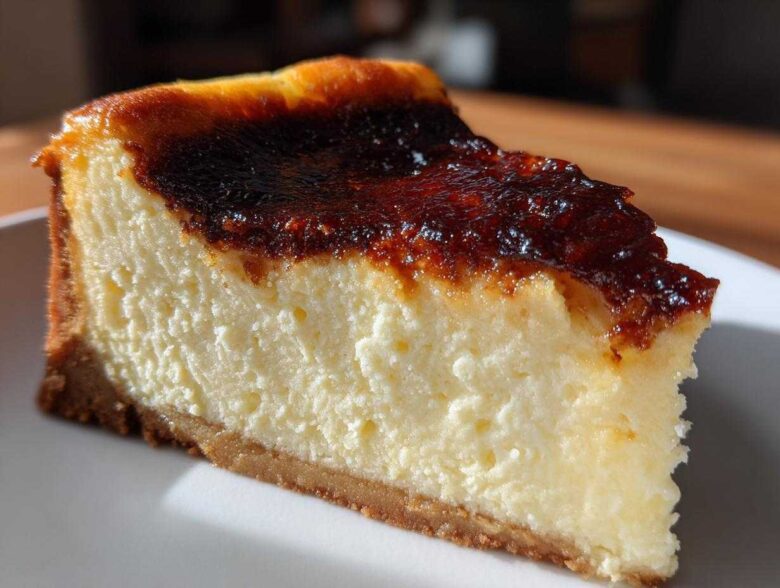
Oh, honey, have I got a dessert fusion for you that is going to rock your kitchen! Forget choosing between that creamy, dreamy texture of a classic cheesecake and the satisfying *crack* of a perfectly torched crème brûlée topping. This creme brulee cheesecake takes the absolute best of both worlds and blends them into something truly showstopping. I spent forever trying to nail that center—it has to be velvety, not dense or grainy, you know? And that topping? It needs to be paper-thin and shatter beautifully when you tap it.
Trust me, I’ve wrecked more than a few batches trying to get the cooling process just right so we don’t get those awful cracks. But I figured it out! This recipe is what I turn to when I need a serious gourmet indulgence without relying on a finicky water bath. It stays totally smooth, and the vanilla bean just sings. If you want Gourmet Cheesecake Ideas that taste like they came from a fancy bakery, keep reading. We’re about to make magic happen.
If you want to know a little more about where all these wonderfully chaotic recipes come from, you can always check out my story here!
Why You Will Love This Creme Brulee Cheesecake Recipe
Honestly, this recipe isn’t just a dessert; it’s an event! When you present this glorious thing, people think you spent days slaving away in the kitchen, but we know the secret: great technique makes it surprisingly straightforward. It absolutely deserves a place in your rotation of Gourmet Cheesecake Ideas.
- The Ultimate Texture Combo: You get that dense, rich, creamy vanilla cheesecake center that melts in your mouth, contrasted perfectly by that crisp, glassy, caramelized sugar shell. It’s heaven!
- No Fussy Water Bath Needed: I know, I know, water baths are terrifying. This technique is designed specifically for those of us who want a perfect bake without the worry of splashing water or cracked tops. It’s truly a No Water Bath Cheesecake win.
- Showstopper Status Guaranteed: Seriously, tapping that gorgeous, hard, amber topping with a spoon is the most satisfying sound in the world. This is pure Showstopper Desserts material, perfect for holidays or just when you need cheering up.
- Deep Vanilla Flavor: We aren’t skimping here. Using vanilla bean paste guarantees a rich, authentic flavor profile that complements the slight bitterness of the burnt sugar topping perfectly. Hello, Creamy Vanilla Cheesecake!
Gathering Ingredients for Your Creme Brulee Cheesecake
Okay, listen up because this step is crucial for any Baked Cheesecake Desserts, but *especially* for a luxurious Crème Brûlée Fusion Dessert like this one. If your ingredients aren’t ready, your texture is going to suffer. We are aiming for total, uninterrupted silkiness, so temperature control starts right now!
When shopping, grab full-fat ingredients—no low-fat shortcuts here if you want that genuine, decadent mouthfeel. And for the vanilla? Ditch the imitation stuff. That little bit of extra cost for real vanilla bean paste pays off ten times over in flavor!
For the Graham Cracker Crust Cheesecake Base
We want a sturdy, flavorful base that can handle the heavy filling. Think of it as the foundation to hold up our masterpiece!
- 1 1/2 cups graham cracker crumbs (You might need about 10 full squares crushed by hand or pulsed quickly!)
- 1/4 cup granulated sugar (Just a tiny bit to sweeten up the crumbs)
- 6 tablespoons unsalted butter, melted (Make sure it’s melted smoothly so it binds everything together.)
For the Creamy Vanilla Cheesecake Filling
This is where the magic happens! Remember, everything for the filling needs to be room temperature, especially that cream cheese. If it’s cold, you’ll end up with lumps, and we want zero lumps for peek-into-the-perfection look of a Creamy Vanilla Cheesecake.
- 3 (8 ounce) packages cream cheese, softened (I mean *softened*—leave it out for at least two hours until it gives easily when pressed.)
- 1 1/2 cups granulated sugar (Your main sweetener for the filling)
- 1 teaspoon vanilla extract
- 1/2 teaspoon vanilla bean paste (This is non-negotiable for that gorgeous speckled look and deep flavor!)
- 4 large eggs (Also cool, but not ice-cold from the fridge)
- 1/2 cup sour cream (Adds necessary tang and moisture)
- 1/4 cup heavy cream (For extra richness!)
For the Homemade Crème Brûlée Topping
This is the final, dramatic flourish. You only need one thing, but it has to be the right kind of sugar for easy caramelization!
- 1/4 cup granulated sugar (Use fine-grained sugar for the best, smoothest caramel layer.)
Essential Equipment for Perfect Creme Brulee Cheesecake
You can’t just throw this dessert together with any old baking pan, sweetie. Because we are dealing with a delicate cheesecake center that needs firm support, and a fiery topping that needs precision, you have to have the right tools ready to go. Getting these set up before you even start your crust saves so much time and prevents last-minute panicking!
If you skimp on the pan or decide to skip the torch, you are basically missing the entire point of this Crème Brûlée Fusion Dessert. So, let’s make sure you have these essentials ready for action for your Kitchen Torch Desserts adventure.
First thing’s first: you absolutely need a high-quality 9-inch springform pan. I mean it. Cheesecake batters are too soft and delicate to be baked in a regular pan, and trying to cut this beauty in an assembled pan after baking? Forget it. The springform just lets you easily release the sides once it’s perfectly chilled, giving you beautiful, intact edges ready for that sugary topping.
Next, the star of the show for the top: the kitchen torch! If you see recipes suggesting you use the broiler, those people are making scary gambles! The broiler is way too intense and you’ll end up with a burned top and a melted center, which is definitely not what we want for our Caramelized Sugar Crust Treat. A simple butane kitchen torch gives you control. You control the heat, you control the color, and you control the timing. It’s the only way to get that signature hard shell without heating up the chilled cheesecake underneath.
Oh, and a quick note on foil: trust me on this one. Even if you think your springform pan is leak-proof, it’s not. Wrap the bottom and sides tightly with heavy-duty aluminum foil. We’re avoiding any water seepage, even if we aren’t using a traditional water bath. This keeps your Graham Cracker Crust Cheesecake base dry and crisp.
Finally, make sure you have sturdy aluminum foil (yes, heavy-duty!) for wrapping the pan, and a good, sturdy wire cooling rack. That rack is part of the cool-down process, allowing air to circulate completely around the base so the bottom doesn’t get soggy while it settles after baking!
Step-by-Step Instructions for Baked Cheesecake Desserts
Now that all our ingredients are ready and gorgeous, it’s time to assemble! Remember, speed is your friend on some steps, but patience is your best friend on others, especially when it comes to cooling. Rushing the temperature change is how we get cracks, and we worked too hard for a cracked top. Follow these steps exactly, and you’ll see why this is one of the Best Cheesecake Recipes out there.
Preparing and Baking the Graham Cracker Crust Cheesecake
First spin up that oven to 325 degrees Fahrenheit! Before anything else, take that 9-inch springform pan we talked about and wrap the entire bottom and sides completely in heavy-duty aluminum foil. I mean wrap it tight—no sneaky water is getting in to ruin our Graham Cracker Crust Cheesecake foundation!
For the crust itself, just mix those graham crumbs, the small bit of sugar, and the melted butter right in a bowl until it looks like wet sand. Press it firmly and evenly into the bottom of your prepared pan. We need to pre-bake this for just 10 minutes. That little bit of heat sets the butter and warms the crumbs so they stick together like glue. Let it cool down while you make the filling.
Mixing the Smooth Creamy Vanilla Cheesecake Batter
Time for the filling! Start in your clean mixing bowl with that room-temperature cream cheese. Beat it on medium speed until it’s absolutely, positively smooth—no lumps allowed! Then slowly add that main portion of sugar, the vanilla extract, and that wonderful vanilla bean paste. Mix until it’s just combined and looks soft.
Next, gently mix in the sour cream and heavy cream. Now for the eggs: add them one at a time, mixing on the absolute lowest speed only until the yolk disappears. I cannot stress this enough: Do not overmix once the eggs are in! Overmixing slams air into the batter, and that air expands during baking, causing those dreadful cracks we hate! We want it barely combined before pouring it over your slightly cooler crust.
The Slow Cooling Method for No Water Bath Cheesecake
Bake the whole thing for about 55 to 65 minutes at 325°F. You’ll know it’s done when the edges look set, but the very center still has a tiny, gentle wobble—like Jell-O! This is the key to our No Water Bath Cheesecake success.
Now, don’t touch that oven door! Just turn the oven off completely. Prop the door open just a crack—maybe stick a wooden spoon in there so it doesn’t slam shut. You need to let the cheesecake cool down in that slowly decreasing heat for a full hour. This slow transition prevents the quick temperature shock that causes sinking and cracking. After the hour, pull it out, let it sit on the counter until it’s totally cool, and then wrap it up tight and chill it in the fridge for at least six hours, but honestly, overnight is best!
Mastering the Caramelized Sugar Crust Treat Finish
Okay, my friend, the hard part is done! We have a perfectly chilled, creamy canvas ready for its crown. Remember, you only apply this topping right before you serve it, otherwise, that beautiful crispness melts right back into the cream cheese. Don’t skip the overnight chill—it makes the sugar top work so much better!
Take your beautiful, cold cheesecake out and sprinkle that reserved 1/4 cup of sugar evenly all over the top. Use a fine, even layer; you don’t want thick clumps, or you’ll just end up with burnt spots. Now, bring out your kitchen torch! Hold it a few inches away and move the flame constantly across the sugar. It will bubble, turn amber, and then—*poof*—you have that stunning, hard Caramelized Sugar Crust Treat. It hardens fast!
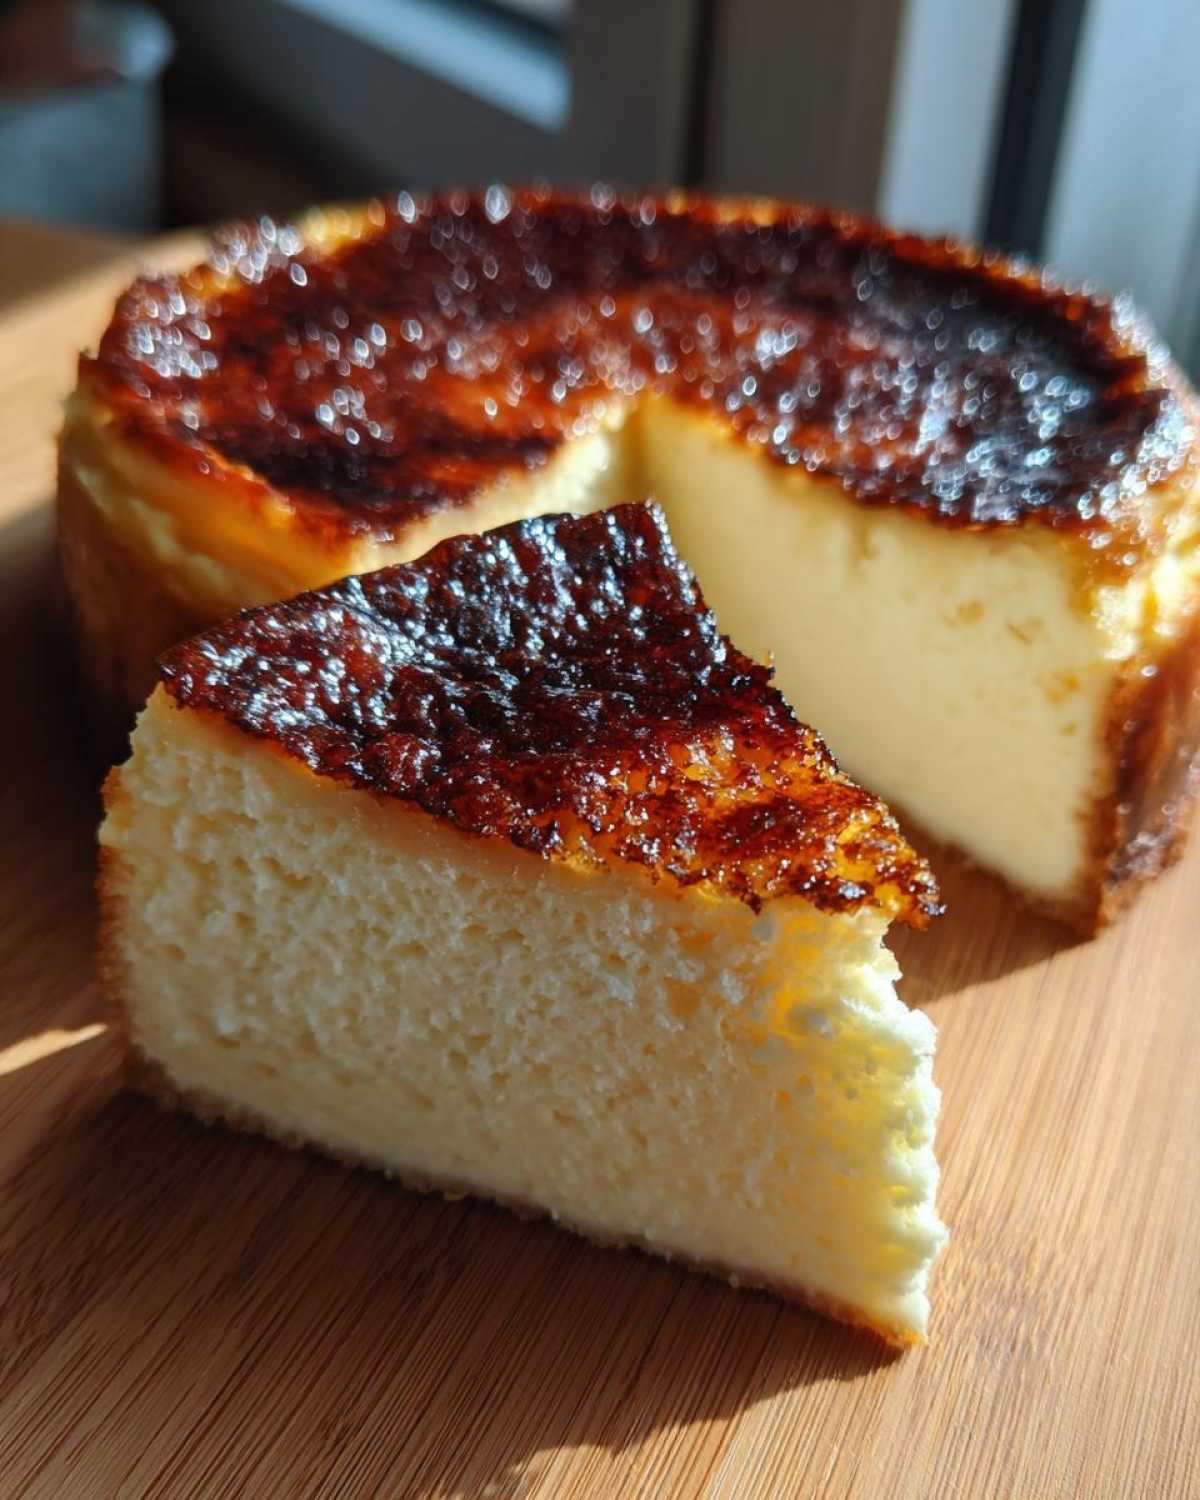
If you absolutely, truly, cannot find a torch, I have a confession: you *can* use the broiler. But you have to watch it like a hawk! Put the rack on the highest setting, place the cheesecake top shelf, and watch it every five seconds. As soon as it’s bubbling and deep gold, pull it out! It’s risky, but better than nothing for this Dessert Mashup Recipe.
Tips for Success with Your Creme Brulee Cheesecake Recipe
You’ve baked it, it cooled perfectly, and now it’s chilling like a rock star in the fridge. Fantastic! Before we talk about storage, I want to give you just a few hard-earned pointers. Getting this Creme Brulee Cheesecake Recipe right is about nailing the temperament of the dessert, especially regarding temperature and timing.
These tips are the ones I wish someone had hammered home when I first tried this recipe for an Elegant Holiday Baking attempt!
- The Overnight Chill Is Not Optional: Seriously, if you try to serve this after just four or five hours in the fridge, the texture will be wonky, and the topping won’t set right. The cream cheese needs that full eight hours (or better yet, overnight!) to firm up completely. A well-chilled cheesecake is the only thing sturdy enough to handle the heat of that torch without melting underneath.
- Keep That Torch Moving Constantly: When you get to the finishing step, your natural instinct will be to hold the flame steady over one spot until it turns dark brown. Don’t do it! You are caramelizing sugar, not lighting a bonfire. Keep the flame moving in small, overlapping circles. You want an even, golden amber color across the entire surface. If you stop, you burn the sugar. If you move too fast, you get pale spots. It takes practice, but trust me, it’s worth the effort for that crisp Caramelized Sugar Crust Treat.
- Beware the Warm Plate: When you go to sprinkle that final layer of sugar on, make sure the cheesecake is cold and sitting on a cool surface, ideally the wire rack it chilled on. If you put it down on a warm counter or a room-temperature serving plate, you risk warming up the very top layer of cheese just enough that the sugar starts melting before you even get the torch lit.
- Use the Right Sugar for the Topping: I noted it earlier, but it bears repeating for this Indulgent Baked Goods masterpiece: Use plain white granulated sugar for the topping, not that dark brown sugar we used in the batter. Brown sugar has molasses crystals that burn too quickly and taste bitter when torched. We want pure, clean caramel flavor for that classic Homemade Crème Brûlée Topping!
Storage and Reheating Instructions for Indulgent Baked Goods
I know, I know, you made a glorious Creme Brulee Cheesecake that serves 12, and suddenly you have leftovers! Don’t panic about saving this beauty. Storing this type of Indulgent Baked Goods requires one very specific rule, almost an oath sworn to the sugar gods: never store the topping on the cake!
The second that beautiful, hard, glassy crust touches the cold, moist air of the refrigerator, it starts doing what sugar does best: soaking up moisture. That gorgeous *crack* that took us so much effort to achieve will turn into a chewy, sad, sticky film overnight. So, unless you plan on eating the entire thing in one sitting—which, tempting as that is—you have to keep the topping separate.
For storage, once the cheesecake has fully chilled (remember, overnight is best for a firm slice), carefully slide a spatula underneath and transfer the entire thing to a serving plate or just leave it in the springform base if it fits your fridge shelf. Cover it loosely with plastic wrap or foil, making sure the wrap doesn’t completely seal the top, and pop it in the fridge. It keeps beautifully like this for up to four days.
If you have any concerns about freshness or want to know more about what goes into making these recipes safe and sound, check out our privacy commitment.
Now, when you want to serve those remaining slices—maybe you’re having family over tomorrow—just slice off what you need. Then, take your reserved topping sugar and sprinkle a fresh, even layer on just those slices you are serving immediately. Torch it, let it crackle for just a minute while it cools down, and serve them fresh! That way, every slice has that amazing, crisp, fresh-from-the-torch finish it deserves. That’s how we keep this dessert tasting like the ultimate Dessert Mashup Recipe every single time, even if you only have one slice left!
Frequently Asked Questions About Creme Brulee Cheesecake
Whenever I share this recipe, people always have a few key questions about execution—which totally makes sense, because it involves two very different techniques coming together! Don’t worry if you’re feeling a little nervous; I’ve got you covered below with the things that always come up when folks try this for the first time. We want your Creme Brulee Cheesecake experience to be flawless!
Can I make this Creme Brulee Cheesecake Recipe ahead of time?
Yes, absolutely! In fact, I highly recommend it. This recipe, like most great Baked Cheesecake Desserts, tastes better after it’s had a good, long rest. Chilling it overnight lets those creamy vanilla notes deepen and makes it slice like a dream. The only thing you *must* do at the last minute is apply that sugar topping and torch it. If you sugar and torch the cake the night before, the moisture from the fridge will soften that beautiful crust, and you’ll lose that amazing *crack* we’re aiming for. Store the bare, chilled cake covered, and torch only right before serving your Indulgent Baked Goods!
What is the best way to get a perfectly smooth, creamy cheesecake?
This falls right back into ingredient temperature and mixing effort! For guaranteed silkiness, treat your cream cheese like gold. It must be completely softened—take it out early, like hours early, or even cut it into cubes to speed up softening. Beat the cream cheese alone until it’s smooth city before you even look at the sugar. The biggest mistake people make is over-beating after adding the eggs. Mix the eggs in on the lowest speed just until the streaks disappear. If you whip air in, you get air pockets when it bakes, leading to a less-than-perfect texture for your Creamy Vanilla Cheesecake!
Are there variations like Creme Brulee Cheesecake Bars?
Oh, I love the idea of turning this into bars! It’s a great way to make fun little party treats, perfect for things like potlucks or cookie trays. To adapt it for Creme Brulee Cheesecake Bars, you’ll want to use a 9×13 inch pan instead of the 9-inch springform. You’ll likely need to use the full recipe batch. Since the layer of batter will be much thinner in a 9×13 pan, you must watch the baking time closely—it will bake much faster than the deep springform! Start checking for doneness maybe around 40 minutes. You’ll still want to do the slow cooling process, though, to keep the top smooth, and remember, top with the sugar mantle right before serving!
If you have any specific questions about ingredients or baking science, please read our official disclaimer to understand that these are my tested home kitchen results!
Estimated Nutritional Data for This Decadent Dessert
Okay, let’s talk real talk about fueling up on this incredible Decadent Dessert. Because this is a rich, multi-component recipe featuring cream cheese, butter, and sugar, it is certainly not a low-calorie treat! But hey, some things are worth every single bite, right?
I pulled together the estimates below based on standard measurements for a slice of this glorious Crème Brûlée Fusion Dessert. Just remember, these numbers are estimates! How much butter you use, or the exact size of your slice (and I’m certainly not judging if your slice is bigger than standard!), can change things up a little. These figures reflect one generous slice, yielding 12 servings total.
For anyone who needs more detailed information regarding food preparation standards, please remember that all recipes here are shared from my kitchen to yours, and you can read about our general testing standards on a technical level over at our policy page.
- Serving Size: 1 slice
- Calories: 450
- Sugar: 35g (Yes, that’s the caramel and the filling!)
- Fat: 30g
- Saturated Fat: 18g
- Carbohydrates: 40g
- Protein: 9g
- Cholesterol: 120mg
See? It’s definitely an indulgent bake! Pair a slice of this creamy goodness with a strong coffee, and you have yourself the perfect ending to any major meal. Enjoy every single bite!
PrintCrème Brûlée Cheesecake
A recipe for a rich, creamy cheesecake topped with a hard, caramelized sugar crust, combining classic cheesecake and crème brûlée flavors.
- Prep Time: 25 min
- Cook Time: 65 min
- Total Time: 7 hours 30 min
- Yield: 12 servings
- Category: Dessert
- Method: Baking
- Cuisine: American
- Diet: Vegetarian
Ingredients
- 1 1/2 cups graham cracker crumbs
- 1/4 cup granulated sugar (for crust)
- 6 tablespoons unsalted butter, melted
- 3 (8 ounce) packages cream cheese, softened
- 1 1/2 cups granulated sugar (for filling)
- 1 teaspoon vanilla extract
- 1/2 teaspoon vanilla bean paste
- 4 large eggs
- 1/2 cup sour cream
- 1/4 cup heavy cream
- 1/4 cup granulated sugar (for topping)
Instructions
- Preheat your oven to 325 degrees Fahrenheit. Wrap the outside bottom of a 9-inch springform pan tightly with heavy-duty aluminum foil.
- Prepare the crust: Mix graham cracker crumbs, 1/4 cup sugar, and melted butter. Press the mixture firmly into the bottom of the prepared springform pan. Bake for 10 minutes. Let cool slightly.
- Prepare the filling: Beat the softened cream cheese until smooth. Gradually add 1 1/2 cups sugar, vanilla extract, and vanilla bean paste. Mix until just combined.
- Beat in the sour cream and heavy cream. Add the eggs one at a time, mixing on low speed after each addition until just incorporated. Do not overmix the batter.
- Pour the filling over the cooled crust in the springform pan.
- Bake the cheesecake for 55 to 65 minutes, or until the edges are set and the center has a slight jiggle.
- Turn off the oven. Prop the oven door open slightly and let the cheesecake cool inside the oven for 1 hour.
- Remove the cheesecake from the oven and let it cool completely on a wire rack. Cover and refrigerate for at least 6 hours, preferably overnight.
- When ready to serve, sprinkle an even, thin layer of the remaining 1/4 cup sugar over the top of the chilled cheesecake.
- Use a kitchen torch to melt and caramelize the sugar until it forms a hard, amber crust. Serve immediately after the topping hardens slightly.
Notes
- For a smooth filling, make sure your cream cheese is fully at room temperature before mixing.
- If you do not have a kitchen torch, you can place the sugared cheesecake under a preheated broiler for 1-2 minutes, watching constantly to prevent burning.
- This cheesecake sets best when chilled overnight.
Nutrition
- Serving Size: 1 slice
- Calories: 450
- Sugar: 35g
- Sodium: 250mg
- Fat: 30g
- Saturated Fat: 18g
- Unsaturated Fat: 12g
- Trans Fat: 0.5g
- Carbohydrates: 40g
- Fiber: 1g
- Protein: 9g
- Cholesterol: 120mg