

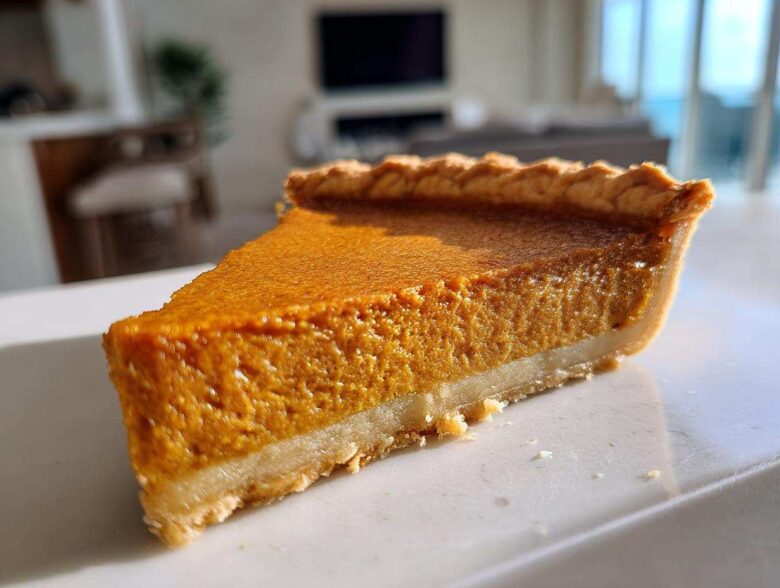
You know that smell that just screams ‘home’ and ‘holiday’ all at once? For my family, that scent is sweet potato pie baking low and slow in the oven. It’s more than just a dessert; it’s the centerpiece of every Thanksgiving table, and honestly, I spend all year dreaming about that perfectly smooth filling.
Forget those dry, crumbly versions you sometimes get—we’re making the real deal here. I’ve spent years perfecting this recipe after getting notes from my Aunt Lou, who makes the best Southern style sweet potato pie known to man. This isn’t just a recipe; it’s a piece of tradition carefully guarded. We’re aiming for the ultimate creamy Southern sweet potato pie, the kind that melts right in your mouth and disappears the second it hits the table.
Why This Is the Best Sweet Potato Pie Recipe You Will Make
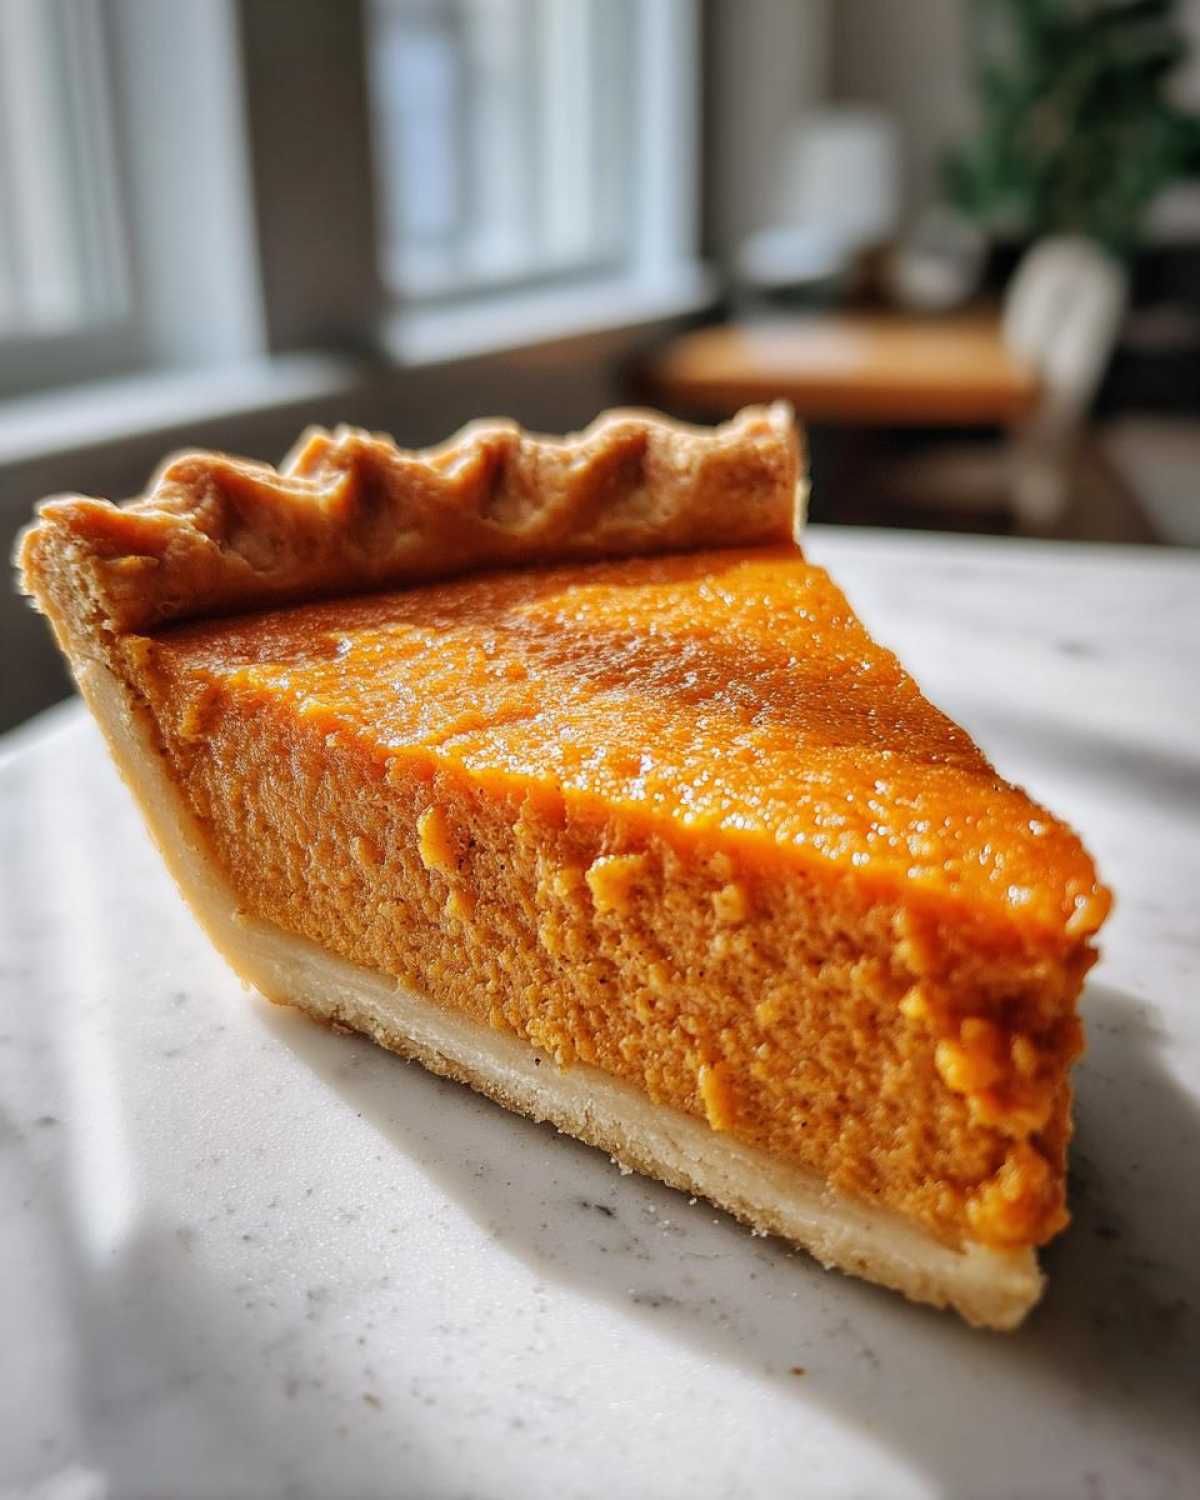
If you’re searching for the absolute best sweet potato pie recipe out there, stop looking! What sets this one apart, truly, is the texture we achieve. We aren’t messing around with anything grainy; we are going for that decadent, silky smooth creamy sweet potato pie filling that just screams Southern comfort.
Trust me, once you try this approach, you won’t go back to store-bought fillings. It’s easy to follow, but the results look and taste like they took days!
Key Features of Our Traditional Sweet Potato Pie
- Unbelievably velvety texture—no grit allowed!
- The spice blend hits that perfect ‘old fashioned sweet potato pie’ balance—warm but not overwhelming.
- It sets up beautifully, meaning no messy, cracked tops when you slice it.
- It freezes like a dream, making it perfect for early holiday baking prep!
Gathering Ingredients for Your Sweet Potato Pie
Okay, we’re moving into the fun part! Any good baker will tell you that your final result is only as good as what you start with. I’m real particular about my ingredients for this traditional sweet potato pie. It’s not overly complicated, but picking the right sweet potatoes makes all the difference between a dessert that’s just ‘good’ and one that makes people ask for your recipe immediately.
We are going for pure richness here, which means we need good quality butter and rich dairy. Don’t try to sneak in low-fat versions of anything—this pie deserves the best! I’ve laid out everything you need below so you can grab your supplies ahead of time. This is your checklist!
Essential Ingredients for Creamy Sweet Potato Pie Filling
- 1 standard 9-inch unbaked pie crust (store-bought or homemade)
- 2 cups cooked and mashed sweet potatoes (about 3 medium potatoes)
- 1 cup granulated sugar
- 1/2 cup packed light brown sugar
- 1/2 cup (1 stick) unsalted butter, melted
- 1/2 cup whole milk
- 1/2 cup evaporated milk
- 2 large eggs, lightly beaten
- 1 teaspoon vanilla extract
- 1 teaspoon ground cinnamon
- 1/2 teaspoon ground nutmeg
- 1/4 teaspoon ground ginger
- 1/4 teaspoon salt
Ingredient Notes and Substitutions for Your Sweet Potato Pie
Now that you have the list, I want to talk a bit about these ingredients because those little details make the difference between a good pie and that legendary, super-creamy pie everyone talks about. Don’t worry about linking to our privacy policy right now; focus on the sweet potatoes!
The biggest hurdle for most folks when making a sweet potato pie from scratch is the texture. We are aiming for pure silkiness, remember? That means how you treat those sweet potatoes matters way more than you think.
Achieving the Perfect Sweet Potato Pie Texture
Please, please, please skip the can if you can manage it! Cooking your own sweet potatoes gives you such a cleaner, brighter flavor. I usually bake mine—pierce them all over, wrap them in foil, and bake at 400 degrees until they are totally soft, like butter.
After they cool down enough to handle, the secret weapon for that famous creamy sweet potato pie filling is pressing them through a fine-mesh sieve. Yes, it takes muscle, but oh my goodness, it removes every tiny bit of stringiness. If you absolutely must use a food processor, run it for a good long time until you see no flecks whatsoever. Remember, we are chasing that smooth, velvety finish.
Crust Options: Flaky vs. Sweet Potato Pie with Graham Cracker Crust
The recipe lists a standard 9-inch unbaked crust, which is usually my go-to for a classic look! If you choose the flaky pastry route, make sure it is completely chilled before you fill it, otherwise, those buttery layers will just shrink away from the dish when it hits the heat.
But listen, if you want to try something different for one of your holiday pie recipes—especially if you’re making sweet potato pie bars recipe—go for that Graham Cracker crust! It adds a wonderful sweet, sandy crunch that contrasts beautifully with the filling. You just take about 1 1/2 cups of crumbs, mix it well with 1/4 cup melted butter and 2 TBSP sugar, press it firmly into your dish, and bake it alone for about 10 minutes before pouring in the filling. It’s an easy win if you are pressed for time!
Step-by-Step Instructions for Traditional Sweet Potato Pie
Okay, now that we have our perfect filling base ready to go, let’s get this pie into the oven! This isn’t one of those recipes where you just dump everything in and hope for the best. We want that gorgeous, uniform texture, so we start by making sure our mixture is totally homogenous before we bake it. Don’t rush this part!
Preparing the Sweet Potato Pie Filling Base
First things first, make sure your oven is heated up to 350 degrees Fahrenheit. You want that heat ready when your pie is assembled. In a big bowl—the same one you used to mash those beauties—start by beating your sweet potatoes with the sugars until they look nice and unified. I use a hand mixer on low speed here; it keeps splattering down to a minimum!
Next, we add the liquids: the melted butter, the whole milk, and that crucial evaporated milk, followed by your two lightly beaten eggs. Don’t whisk too aggressively! We aren’t trying to incorporate tons of air here; we want density, not lightness. Stir until everything is just combined. Then, toss in your vanilla and all those wonderful spices—cinnamon, nutmeg, ginger, and salt. Keep mixing until you can’t see one single streak of unmixed ingredient. It should look, honestly, almost like silk. Pour that glorious mixture right into your unbaked pie shell.
Baking and Setting Your Sweet Potato Pie
Slide that pie onto the middle rack. It bakes for about 50 to 60 minutes. Here’s the secret: when you test it, the edges should look firm, but if you give the pan a very gentle nudge, the very center should still have a slight, soft wiggle—we call that ‘the jiggle test.’ If it sloshes around, give it another five minutes.
The hardest part of this entire process is waiting afterward! Because this is such a creamy sweet potato pie filling, it needs time to fully set up outside of the oven heat. Let it cool completely on a wire rack for at least two full hours before you even *think* about slicing it. If you cut it too soon, you’ll just have sweet potato soup on a plate. Trust me on that two-hour cool-down; it ensures you get beautiful, clean slices every single time!
Tips for the Ultimate Southern Style Sweet Potato Pie
We’ve got the smooth filling down, which makes this a fantastic homemade soul food dessert. But to make it truly unforgettable—the kind folks talk about until next Thanksgiving—we need to talk about flavor depth. Those three original spices are great, but sometimes the sweet potato flavor needs a little push to really sing.
This is where we move from just following directions to actually baking with intuition. A little extra something in the spice cabinet can elevate this from simple holiday fare to the star of the show.
Spiced Sweet Potato Dessert Flavor Adjustments
The cinnamon, nutmeg, and ginger are the backbone, no question. But if you find your sweet potato pie tastes a little… flat, try adding just a tiny, tiny pinch of freshly ground black pepper. I know, I know—pepper? Yes! It doesn’t make the pie spicy; it just brightens up the sweetness of the potato and highlights the cinnamon. It’s an old trick I picked up that really makes a difference in a traditional sweet potato pie.
Also, try swapping out just a tiny bit of the nutmeg for allspice. Allspice brings a little complexity—a hint of clove and pepper all in one—that just makes the whole flavor profile feel richer and more layered. Don’t overdo it; we are talking about a whisper of flavor, not a shout!
And one last thing about sweetness: my recipe calls for a set amount of sugar, but if your sweet potatoes were on the less-sweet side, you might need a quarter teaspoon more brown sugar for that perfect profile. Taste the raw mixture just to be sure before you pour it into the crust—it should taste slightly sweeter than you want the final baked pie to be, since baking mutes some of that initial punch!
Serving Suggestions and Sweet Potato Pie Topping Ideas
The hard work is done, your pie is set, and now it’s time for the fun, final presentation! This pie is gorgeous all by itself, honestly. It stands up so beautifully, making it one of my favorite thanksgiving dessert ideas because it travels well and looks stunning on any platter. But toppings? That’s how you take it from great to truly unforgettable.
While some folks like to get fancy with intricate lattice work or glaze patterns, I always lean toward simplicity when it comes to a rich, spiced dessert like this. The filling is the star, and we don’t want the topping to fight with those classic cinnamon and nutmeg notes.
Classic Toppings for Your Finished Sweet Potato Pie
If I’m serving this pie warm—which is lovely on a chilly evening—a simple dollop of something cool is all you need. Homemade whipped cream is my absolute go-to. It doesn’t need tons of sugar; just heavy cream beaten until medium peaks form, maybe with a tiny drop of vanilla. The contrast between the warm, spiced pie and the cold, light cream is just heaven.
For texture, you cannot beat toasted pecans. Toasting them first wakes up their flavor immensely. Just toss them lightly in a dry pan for about five minutes until you can smell them, then sprinkle them over the top right before serving. They add that satisfying little crunch against the silky filling.
And for those days when you just want that elegant, dust-of-snow look? A light dusting of powdered sugar using a fine-mesh sieve looks fancy, but takes two seconds. If you want to double down on the spice flavor, mix your powdered sugar 50/50 with some extra ground cinnamon before you dust it over the top. Minimal effort, maximum impact!
Storage and Make Ahead Holiday Desserts for Your Sweet Potato Pie
If you’re like me when the holidays roll around, you are trying to get ahead wherever possible! Baking multiple desserts in one day is just chaos waiting to happen, so I love that this sweet potato pie is one of those fantastic make ahead holiday desserts. You can absolutely bake it a day or two early, and honestly, I think it tastes even better the next day once the filling fully settles and the spices have time to deepen up.
The key to storage is airtight protection. You don’t want that beautiful spiced aroma fading into your fridge air!
For refrigeration, wrap the cooled pie tightly—I mean *tightly*—in plastic wrap, trying not to press it directly onto the surface of the filling if you’ve already added whipped cream topping (if you haven’t topped it yet, even better!). It keeps beautifully in the fridge for up to four days. Just pull it out about 30 minutes before serving if you prefer it at room temperature rather than chilled.
Now, freezing is my secret weapon for really busy years. You can freeze a completely cooled, uncovered sweet potato pie for about an hour until it’s firm, then wrap it tightly in plastic wrap, followed by a layer of heavy-duty aluminum foil. It freezes wonderfully for up to three months!
When you are ready to thaw it, just move that wrapped pie straight into the refrigerator overnight. Let it sit on the counter for an hour before serving. The wonderful thing about this particular recipe is that the filling is so stable, it handles freezing and thawing like a champion. No cracks, no weeping—just pure, creamy goodness ready for your party!
Frequently Asked Questions About Making Sweet Potato Pie
I get so many messages after the holidays asking for clarification, and that’s totally fair—baking complex desserts can bring up a few tricky spots! Think of this as the little troubleshooting section where we tackle all those last-minute worries so your pie comes out perfect. Feel free to drop any other sweet potato pie questions in the comments below!
Can I use sweet potato puree instead of mashing for this sweet potato pie?
Yes, you absolutely can use canned puree, but you have to be careful. Canned puree is usually much wetter than freshly cooked and mashed sweet potatoes. If you decide to use it, make sure you measure out exactly 1 1/2 cups of the can’s contents, and look for brands that are mostly just sweet potato. If your puree seems watery at all, I usually suggest draining it through a fine-mesh sieve for about an hour before measuring. Remember, extra moisture equals a softer, less set pie, and we are aiming for that famously stable, creamy sweet potato pie filling here!
What is the ideal way to reheat leftover sweet potato pie?
If you’ve kept your leftovers refrigerated, you don’t want to shock that beautiful filling with a blast of heat, or you risk cracking the top! The best way to reheat a slice is slowly. Unwrap the piece, place it on a microwave-safe plate, and use about 30% power for about 45 seconds at a time until it’s just warmed through—not steaming hot. If you want to reheat a whole or half pie, wrap it in foil and place it in a 300-degree oven for about 15 minutes. This gentle heat warms it evenly without drying out those lovely edges.
How do I prevent the edges of my sweet potato pie from burning?
This is a classic issue, especially because sweet potato pie needs a long bake time! If you notice the crust edges are getting too brown about halfway through the baking time (around the 30-minute mark), you need to protect them. Take a small strip of aluminum foil—maybe half an inch wide—and gently crimp it around the edge of the pie crust. It acts like a little shield against the direct heat. Just remember to take that shield off for the last 10 minutes if you want the crust to be a beautiful golden color.
Is traditional sweet potato pie similar to pumpkin pie?
Oh, they are certainly cousins, but they are definitely not the same! Both are custard-style pies using cooked squash/root vegetables, eggs, and sweet spices. However, sweet potatoes inherently have more moisture and a slightly different starch makeup than pumpkin puree, which usually results in a denser, richer, and often creamier final texture for the sweet potato version. Plus, the spice profile often leans heavier toward the cinnamon and nutmeg in the sweet potato pie, making it a truly unique classic American dessert experience!
Nutritional Estimates for This Classic American Dessert
So, we all know that a truly decadent, creamy sweet potato pie isn’t exactly health food, right? And honestly, that’s perfectly okay! We make these kinds of desserts for joy, for gatherings, and for those moments where we just need a taste of home. But because I believe in being totally upfront with you all—since you trust me with your holiday pie recipes—I wanted to give you a general ballpark figure for what one slice of this beauty contains.
Please keep in mind these numbers are just estimates based on the ingredients listed above, assuming you used a standard store-bought pastry crust and the exact measurements provided in the recipe. Nutrition facts can swing wildly depending on the sugar you use or the size your sweet potatoes ended up being!
Think of this section as just friendly information, not a reason to skip dessert! Here’s the breakdown for one generous slice:
- Serving Size: 1 slice
- Calories: 350
- Sugar: 35g
- Fat: 16g (with about 8g saturated fat)
- Protein: 5g
- Carbohydrates: 50g
- Cholesterol: 60mg
- Sodium: 250mg
That 35 grams of sugar is where most of the energy and sweetness comes from, which is pretty typical for a rich pie made sweet potato pie from scratch. The fat comes mostly from that lovely melted butter and the dairy we use to make the filling utterly irresistible. If you’re watching sodium or sugar for health reasons, remember you have total control here—you can reduce the sugar slightly, though I warn you, it affects that creamy set just a little bit!
We’re baking for memories, not for macros, so enjoy every last bite of this classic American dessert. Just be sure to check out our official disclaimer for the full scoop on how these estimates are calculated!
Share Your Experience Making This Sweet Potato Pie
Whew! We made it together through the mashing, the mixing, and the long, agonizing wait for it to cool! Now that you have whipped up your own batch of what I truly believe is the finest creamy sweet potato pie filling around, I absolutely want to hear all about it.
Don’t just make this recipe and vanish, okay? Baking is a conversation, and I love seeing how you bring your own kitchen magic into my family’s recipe! Did you try adding pecans to the filling? Did you stick with the traditional flaky crust, or did you take the leap and make that graham cracker crust I mentioned?
Please take a minute to leave a star rating right below—that helps other folks who are intimidated by holiday baking know that this recipe is reliable and totally worth the effort. I truly appreciate everyone who takes the time to share their results!
If you snapped a photo of your perfectly set, beautifully spiced creation—maybe sitting next to the pumpkin pie on a busy holiday table—tag me on social media! Seeing one of these glorious pies sitting proudly on your counter is honestly the best part of my week. Happy baking, and I can’t wait to read your sweet potato pie triumphs!
PrintThe Ultimate Creamy Southern Sweet Potato Pie (A Traditional Classic)

Make a rich, creamy Southern-style sweet potato pie from scratch. This traditional recipe yields a perfectly spiced filling and a flaky crust, ideal for holiday gatherings.
- Prep Time: 20 min
- Cook Time: 60 min
- Total Time: 140 min
- Yield: 8 servings
- Category: Dessert
- Method: Baking
- Cuisine: American
- Diet: Vegetarian
Ingredients
- 1 standard 9-inch unbaked pie crust (store-bought or homemade)
- 2 cups cooked and mashed sweet potatoes (about 3 medium potatoes)
- 1 cup granulated sugar
- 1/2 cup packed light brown sugar
- 1/2 cup (1 stick) unsalted butter, melted
- 1/2 cup whole milk
- 1/2 cup evaporated milk
- 2 large eggs, lightly beaten
- 1 teaspoon vanilla extract
- 1 teaspoon ground cinnamon
- 1/2 teaspoon ground nutmeg
- 1/4 teaspoon ground ginger
- 1/4 teaspoon salt
Instructions
- Preheat your oven to 350 degrees Fahrenheit (175 degrees Celsius). Place your unbaked pie crust into a 9-inch pie dish.
- In a large bowl, combine the mashed sweet potatoes, granulated sugar, and brown sugar. Mix until smooth.
- Add the melted butter, whole milk, evaporated milk, and beaten eggs to the sweet potato mixture. Stir well to combine.
- Stir in the vanilla extract, cinnamon, nutmeg, ginger, and salt. Mix until the filling is completely smooth and creamy.
- Pour the sweet potato filling into the prepared pie crust.
- Bake for 50 to 60 minutes, or until a knife inserted near the center comes out mostly clean. The center may still jiggle slightly.
- Let the pie cool completely on a wire rack for at least 2 hours before slicing. This allows the filling to set fully.
- Serve at room temperature or slightly chilled.
Notes
- For the creamiest texture, press your cooked sweet potatoes through a fine-mesh sieve or use a food processor until completely smooth before measuring.
- If you prefer a Graham Cracker crust, use 1 1/2 cups of graham cracker crumbs mixed with 1/4 cup melted butter and 2 tablespoons of sugar, pressed into the dish, and bake for 10 minutes before adding the filling.
- This pie tastes best made one day ahead and refrigerated overnight.
Nutrition
- Serving Size: 1 slice
- Calories: 350
- Sugar: 35
- Sodium: 250
- Fat: 16
- Saturated Fat: 8
- Unsaturated Fat: 8
- Trans Fat: 0
- Carbohydrates: 50
- Fiber: 4
- Protein: 5
- Cholesterol: 60