

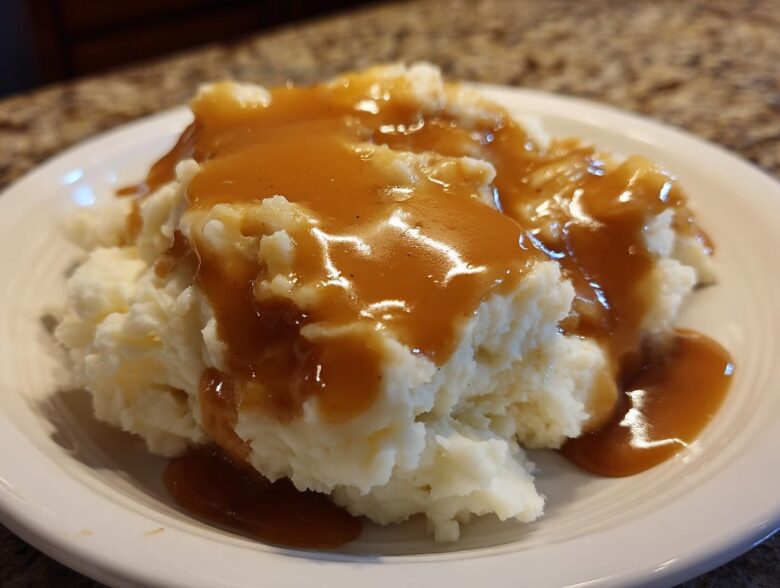
Oh, there is nothing on this earth that screams pure, unadulterated comfort quite like the smell of fresh gravy bubbling on the stovetop. Seriously, it’s a hug in a bowl! Forget those sad, thin packets you buy at the store—we are making the real deal today. This is my absolute pride and joy: the easiest 10-minute **chicken gravy** recipe you will ever try. I spent years perfecting this because every Sunday dinner and every holiday needed that perfect, creamy sauce to elevate mashed potatoes or sink into biscuits.
I finally nailed the ratio that works whether you have glorious pan drippings or just a carton of broth. My Aunt Carol would always stress over this part of the holiday meal, but I learned from her mistakes—and from the amazing cooks profiled over at our team—that simplicity wins. This version is foolproof, I promise! This homemade sauce is genuinely foolproof, and while I strive for perfection, that doesn’t mean we can’t take shortcuts sometimes. It genuinely takes less time than waiting for water to boil.
Why This Easy Chicken Gravy Recipe Works Every Time
I know what you’re thinking: gravy is complicated, right? Wrong! That’s what I used to think until I stopped overthinking it. This recipe isn’t about fancy techniques; it’s about creating a fantastic, savory sauce quickly. It really delivers on that promise of being quick comfort food.
- Speed is key: We are talking about ten minutes, maximum. If your mashed potatoes are getting cold, this gravy will be ready before you can even find a clean spoon.
- Basic pantry stuff: You don’t need exotic spices or rare ingredients. Just the basics: fat, flour, and broth.
- Total versatility: Whether you just roasted a chicken and have amazing drippings, or you’re making chicken broth gravy from scratch, this recipe molds itself to what you have on hand. It’s incredibly forgiving, which is why I trust it so much.
Ingredients for Your Homemade Chicken Gravy
When you’re keeping things simple, it’s super important that the few ingredients you *do* use are good quality! You can’t hide behind piles of spices here; this is a straightforward, savory sauce recipe, so let’s talk specifics. Remember, clarity here builds trust in the final product. You’ll notice I’m very particular about the broth, and you should be too!
For our base, you need three tablespoons of fat. This is usually chicken fat if you just pulled a bird out of the oven, but if you’re winging it, butter works beautifully. Then, you need the same amount—three tablespoons—of all-purpose flour. Don’t try to eyeball the flour; for gravy consistency, the ratio has to be right!
Then comes the liquid: two cups of chicken broth. Please, if you can swing it, reach for the low-sodium kind. You’ve got salt coming later, and we want control over the sodium. Finally, just half a teaspoon of salt and a quarter teaspoon of pepper. That’s it! If you’re being fancy later, that’s when we talk about optional drippings.
Mastering the Roux: The Foundation of Great Chicken Gravy
Alright, listen up, because this is where all the amateur gravy-makers go wrong. You can have the best chicken broth in the world, but if you mess up the roux—that magical flour-and-fat paste—your **chicken gravy** will be lumpy or taste like raw flour. It is the absolute foundation!
The ratio we are using here is simple: equal parts fat to flour. Three tablespoons of fat, three tablespoons of flour. I put mine over medium heat and whisk it in until it’s just a smooth paste. Be brave and cook it for a solid minute or two, stirring constantly. You want it to start smelling just a little bit nutty—not brown, mind you, just cooking off that starchy raw taste. This step builds the flavor depth for the whole **savory sauce recipe**, so don’t rush it!
Handling Pan Drippings for Richer Chicken Gravy
Now, if you’ve just pulled a beautiful roast chicken out of the oven, you have a huge advantage! That liquid gold sitting at the bottom of your roasting pan? That’s flavor, baby. If you have enough fat—we need three tablespoons total—you can measure that out right away. If you only have two tablespoons of chicken fat, that’s fine! Just melt one extra tablespoon of plain butter in the pan alongside those drippings. This little boost makes the difference between good gravy and the best **homemade chicken gravy** people talk about for weeks!
If you’re trying to make **gravy without drippings**, no sweat. Just melt the full three tablespoons of butter right in your saucepan. It’s easier than you think, and the result is still fantastic. That’s why this **easy chicken gravy** recipe is so great for beginners!
Step-by-Step Instructions for Quick Gravy Sauce
This is where the magic happens, and you’ll see how fast this chicken gravy comes together once your roux is ready. Remember, speed is the goal here, so have your broth measured out and waiting nearby. Don’t walk away from the stove for even a second in this phase!
Once your roux smells nutty and cooked—that slightly toasted aroma means you’re good to go—it’s time to introduce the liquid. Slowly, and I mean slowly, pour in your two cups of chicken broth. This is the moment that separates the lumpy messes from the silky sauces. You have to whisk continuously while you pour. If you dump it all in at once, you’re guaranteed a clumpy disaster! Whisk hard and fast until that flour paste is totally dissolved into the broth.
Once everything is incorporated, turn the heat up slightly until the mixture just begins to simmer. Keep whisking it occasionally as it heats up. You’ll notice it transforming right away—it goes from looking like murky water to a proper sauce, coating the back of your spoon beautifully. Let it simmer for about three to five minutes. This little bit of time allows the thickening to set properly. Over that time, you can check out my terms while you wait, just kidding! Wait until it’s thick enough to hold a line when you draw a spoon through it.
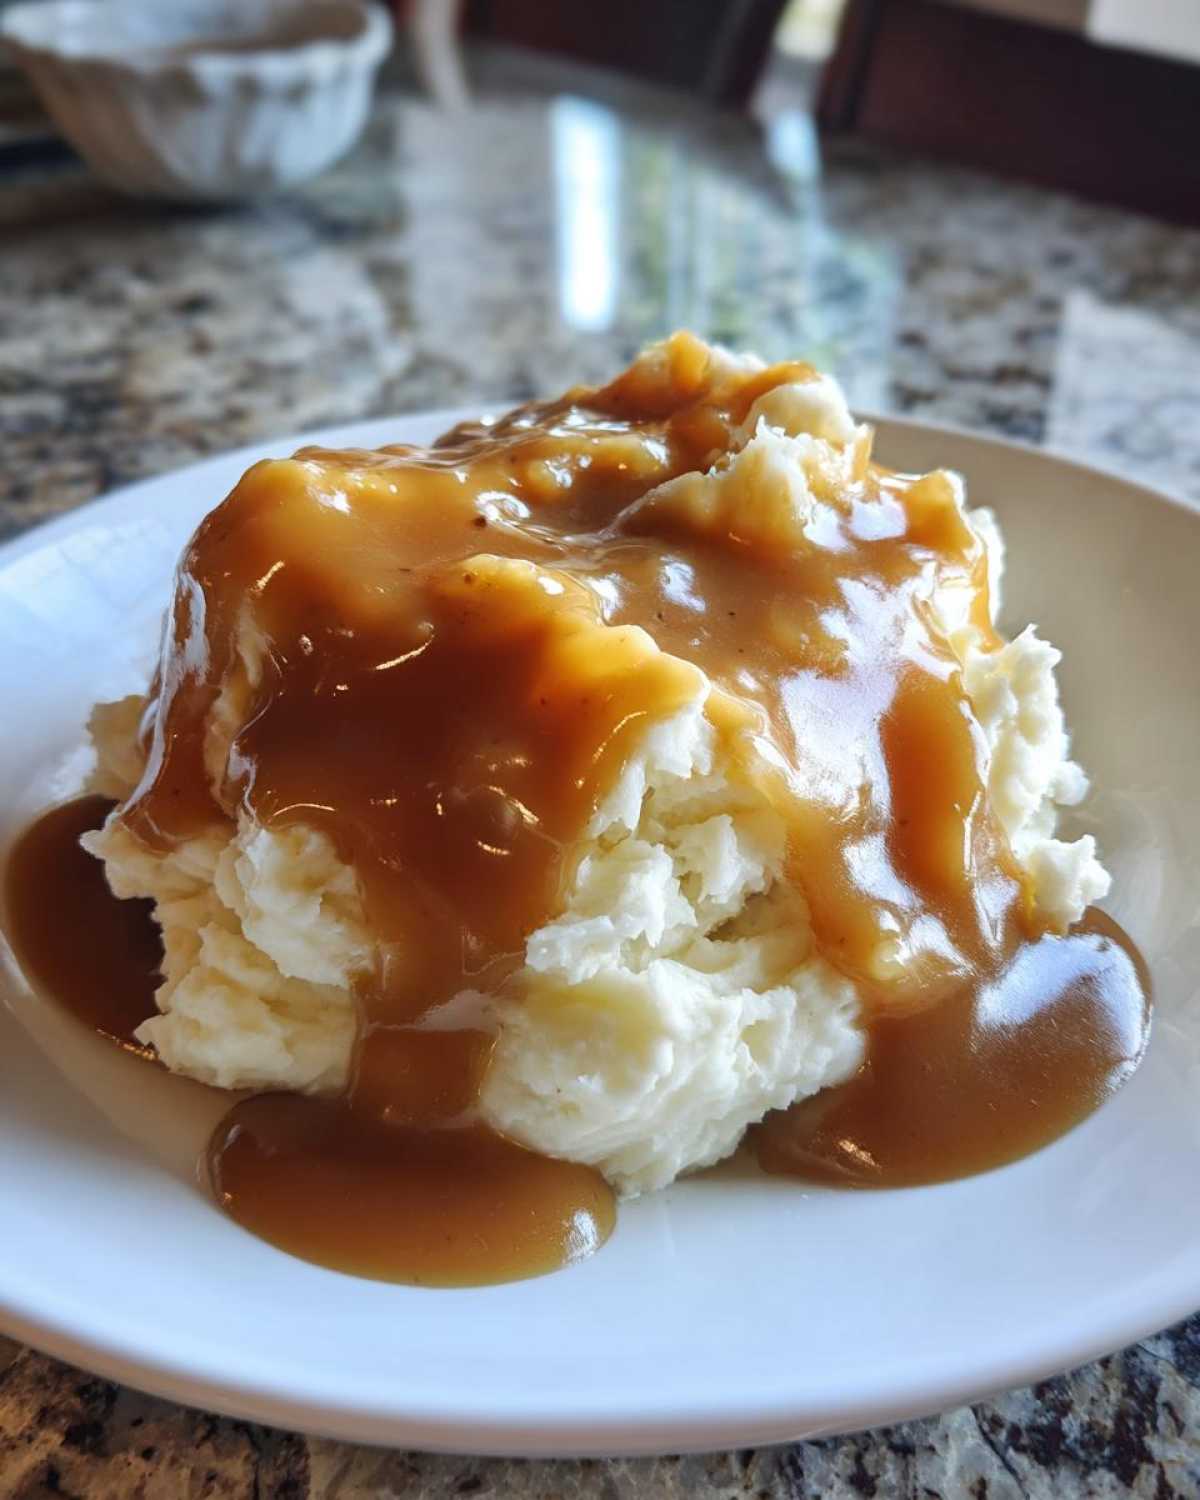
When you pull the pan off the heat, finish it off! Stir in that salt and pepper we talked about. This is your only real chance to taste and adjust before serving, so make sure it tastes perfectly seasoned for your palate. Serve this amazing **skillet gravy** immediately over whatever you cherish most, like huge piles of creamy mashed potatoes!
Tips for Perfect Creamy Chicken Gravy
You’ve made the roux, you’ve whisked in the broth, and now you’re simmering. This is where you earn your e-a-t stripes! I always tell folks that this chicken gravy isn’t just about following steps; it’s about using your senses. If you cooked your roux for that happy, nutty smell we discussed, you’re golden. But sometimes things need a little nudge. If you skipped the low-sodium broth—oops!—you might find your seasoning is too fierce once you add the salt.
My biggest pro tip is seasoning *off* the heat. Once you pull that pan off the burner, give it a final taste test. A little salt here or a tiny grind of pepper can wake the whole sauce up. If you think it’s under-seasoned, taste it again after it rests for thirty seconds—sometimes the flavor blooms as it cools slightly. And trust me, if you want a thicker sauce, your best bet is cooking it just a minute or two longer. That simmering time is crucial for a truly luscious texture!
Troubleshooting Common Chicken Gravy Issues
Even the best cooks have gravy hiccups, so don’t panic if you have a little issue. Lumps are my number one nemesis, and they almost always happen because I got impatient pouring the broth. If you see lumps forming, grab a whisk and work *hard* on that one spot until that flour blob disappears into the liquid. It usually releases faster than you think!
Now, what if your sauce is just stubbornly thin? Maybe you like your comfort food gravy really coating that baked potato? The recipe tells you to avoid slurry mixes, but sometimes, desperate times call for desperate measures! If you absolutely must fix thinness fast, whisk one teaspoon of cornstarch into one tablespoon of cold water until it’s totally smooth. Then, whisk that slurry into your simmering gravy slowly until it thickens up. It works like magic, but rely on cooking it longer first. If it’s too thick, just splash in another tablespoon or two of warm chicken broth and whisk until you hit that perfect, pourable consistency. See? Easy fixes!
Serving Suggestions for Your Simple Homemade Sauce
Honestly, the hardest part of making this chicken gravy is figuring out where to put it all! It’s truly the definition of **comfort food gravy**. The second it hits the pan, my family starts grabbing plates for immediate deployment. Naturally, it’s spectacular spooned thick over creamy mashed potatoes—it melts right into them, creating that perfect salty, savory puddle.
But don’t stop there! This **roast chicken sauce** is fantastic drizzled over fluffy rice if you need something simple to soak it all up. Or how about slathered generously over buttermilk biscuits for a quick lunch, maybe even alongside some cornbread? If you’re having a holiday spread, this gravy goes just as well over turkey as it does chicken. Truly, anything that needs a boost of rich, savory flavor deserves a generous pour of this sauce. It instantly makes any meal feel heartier and more special!
Storage and Reheating Instructions for Chicken Gravy
You made so much, or maybe you just love leftovers—I get it! This hearty **chicken gravy** keeps beautifully in the fridge for about four days. You just need a good, airtight container. Don’t just dump it in a bowl uncovered; that encourages a skin to form on top, which is annoying later.
When you’re ready for round two, pull it out and put it in a medium saucepan. It will look super thick, maybe even gelatinous, and that’s totally normal! Don’t panic. Just whisk in a splash of warm chicken broth or even just water while you heat it gently on the stovetop. Keep stirring until it gets that perfect, pourable consistency again. It comes back to life so fast, which means seconds are just as good as the first serving!
Frequently Asked Questions About Chicken Gravy Recipe
I get so many messages about tweaks and substitutions, which is honestly what I love to hear—it means you’re actually cooking! Here are some of the most common things folks ask me when they’re whipping up this quick gravy sauce. Before we dive in, just a reminder that you can always check out my latest updates on our policies if you ever have questions about the site!
Can I make this chicken gravy without any drippings?
Absolutely, yes! This is probably the #1 question I get. If you didn’t roast a chicken today, no sweat at all. You simply swap out the chicken fat component entirely and use three full tablespoons of regular unsalted butter when you build your roux. It still creates a fantastic, creamy base. It’s designed to be flexible, so whether you need a true **gravy without drippings** or you happen to have them, you’re covered. Both ways turn out delicious!
How can I make this chicken gravy thicker or thinner?
Consistency is all about preference, right? For thicker gravy, you only have two real options when you’re already past the roux stage. First, simmer it longer! Cook it uncovered, stirring occasionally, and let some of that liquid evaporate. That’s the best way because it concentrates the flavor. If you need it thick *right now*, you can always make a slurry: whisk one teaspoon of cornstarch into two teaspoons of cold water until smooth, then whisk that into your simmering gravy until it bubbles and thickens. If it’s somehow too thick, just splash in a splash of warm chicken broth or water and whisk until you hit that sweet spot!
What is the best type of liquid for this chicken broth gravy?
Hands down, the best liquid for boosting flavor is the combination of broth and pan juices. If you have any of those glorious, salty, browned bits left in your roasting pan from your roast chicken, scoop about two tablespoons of that liquid into your saucepan before adding your measured broth. It adds incredible roasted dimension. But, if you are making a **simple homemade sauce** from scratch, good quality low-sodium chicken broth is the star. It provides that savory backbone without overpowering the natural flavors of the roux. Anything else, like water or vegetable stock, just dulls the final flavor too much for my liking!
Nutritional Estimate for This Savory Sauce Recipe
I always feel a tiny bit guilty making something this delicious, but here’s the breakdown! These numbers are my best guess for a standard serving size—about a quarter cup—using the butter-only option, so keep in mind that using reserved chicken fat might shift things slightly. Remember, this is just an estimate, and you can always check my basic disclaimer if you have specific dietary needs!
- Calories: Around 75
- Fat: About 5g
- Protein: Near 2g
- Carbohydrates: Roughly 5g
It’s a simple, classic sauce, meaning it’s great for adding comfort without overloading the plate!
Share Your Experience Making This Chicken Gravy
Wow, I hope you gave this a shot! Honestly, standing there watching that beautiful, thick **chicken gravy** coat your spoon is one of the great small joys of cooking, isn’t it? I really want to hear how it turned out for you!
Did you manage to get it perfectly smooth on your first try? Let me know in the comments below! I’m dying to know what you poured it over. Was it classic mashed potatoes? Did you dress up some biscuits? Or maybe you served it as one of your famous **Holiday Dinner Sides**? Tell me everything!
If you shared a photo of your masterpiece on social media, tag me! It absolutely makes my day to see your results. Keep practicing that roux, and you’ll never need a packet again. Feel free to reach out anytime via the contact page if you have more questions!
PrintEasy 10-Minute Homemade Chicken Gravy

Make a simple, savory chicken gravy in ten minutes using pan drippings or just chicken broth. This sauce is perfect for mashed potatoes or roast chicken.
- Prep Time: 5 min
- Cook Time: 10 min
- Total Time: 15 min
- Yield: About 1.5 cups
- Category: Side Dish
- Method: Stovetop
- Cuisine: American
- Diet: Low Calorie
Ingredients
- 3 tablespoons chicken fat or butter
- 3 tablespoons all-purpose flour
- 2 cups chicken broth (low sodium preferred)
- 1/2 teaspoon salt
- 1/4 teaspoon black pepper
- Optional: 2 tablespoons reserved pan drippings from roasted chicken
Instructions
- If using pan drippings, measure 3 tablespoons of fat from the roasting pan and place it in a medium saucepan over medium heat. If not using drippings, melt 3 tablespoons of butter in the saucepan over medium heat.
- Whisk the flour into the melted fat or butter. Cook, stirring constantly, for 1 to 2 minutes until the mixture forms a smooth paste (a roux) and smells slightly nutty. Do not let it brown.
- Slowly pour in the chicken broth while whisking continuously to prevent lumps.
- Bring the mixture to a simmer, still whisking occasionally. Let it cook for 3 to 5 minutes until the gravy thickens enough to coat the back of a spoon.
- Remove the saucepan from the heat. Stir in the salt and pepper. Taste and adjust seasoning if needed.
- Serve immediately over your preferred dish.
Notes
- For a richer flavor when using drippings, substitute 1 tablespoon of the butter with 1 tablespoon of the collected pan drippings.
- If you prefer a very thick gravy, cook the roux for an extra minute or use 4 tablespoons of flour instead of 3.
- To make this gravy without drippings, simply use 3 tablespoons of butter and 2 cups of chicken broth.
Nutrition
- Serving Size: 1/4 cup
- Calories: 75
- Sugar: 0.5
- Sodium: 350
- Fat: 5
- Saturated Fat: 3
- Unsaturated Fat: 2
- Trans Fat: 0
- Carbohydrates: 5
- Fiber: 0.2
- Protein: 2
- Cholesterol: 5