

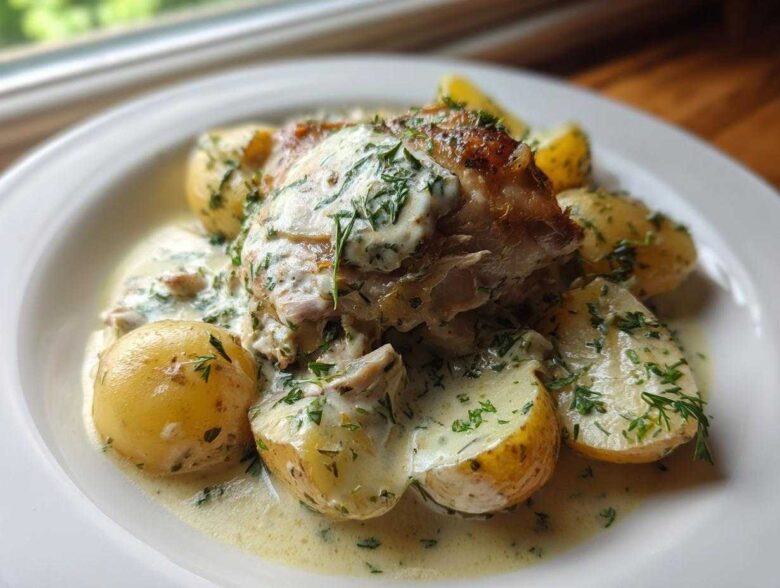
Listen, I know what you’re thinking. Braising sounds like something you save for a slow Sunday afternoon, right? Not anymore! Today, we are unlocking the secret to making the most unbelievably tender, fall-off-the-bone **braised chicken thighs**—and we’re doing it all in one pan. Honestly, mastering **braised chicken thighs** has been a game-changer for my weeknight dinners.
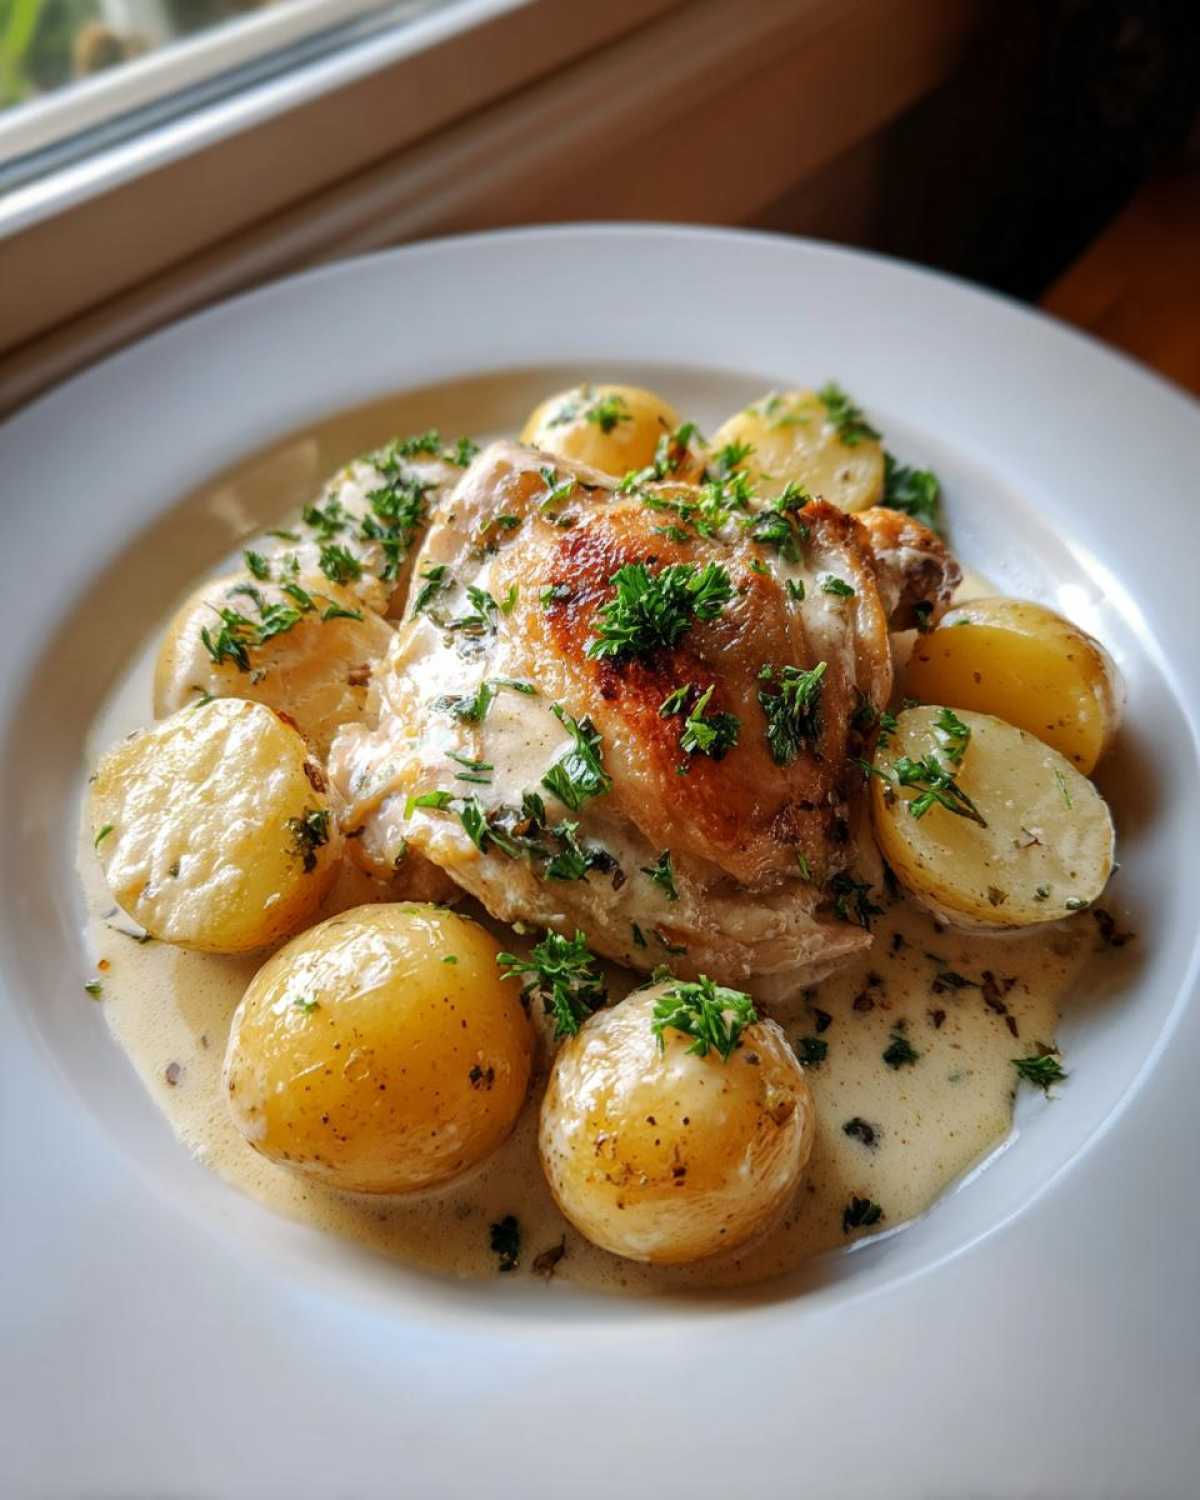
I’m sharing my go-to: One-Pot Creamy Garlic and Herb Chicken Thighs with Potatoes. Forget scrubbing a million pots; this is pure comfort food magic. The skin gets that beautiful golden crispness before we tuck everything under a lid, letting the steam and garlic work their wonders until the sauce turns velvety. Trust me, you’re going to want to soak up every last drop of that creamy sauce!
If you want to dive deeper into standard cooking practices and why we even bother with low and slow cooking methods, you can always read up on the basics over at our kitchen philosophy page.
Why This Creamy Garlic and Herb Recipe Makes the Best Braised Chicken Thighs
This isn’t just another recipe; it’s my blueprint for achieving peak **comfort food chicken** every single time. We follow three major steps that guarantee success, which is why I feel so confident sharing this as the **tender chicken thighs recipe** you’ll keep coming back to!
- The Initial Sear: We never skip browning the skin first! That deep golden color locks in flavor and gives us those amazing little bits stuck to the bottom of the pot that turn into pure gold later.
- The Gentle Simmer: Braising means low and slow. We let the moisture from the broth and the potatoes gently tenderize the meat without harsh boiling.
- The Cream Finish: Adding the cream right at the end thickens the sauce beautifully without curdling, making it rich instead of watery.
It’s simple culinary science, really, but it delivers results that feel gourmet!
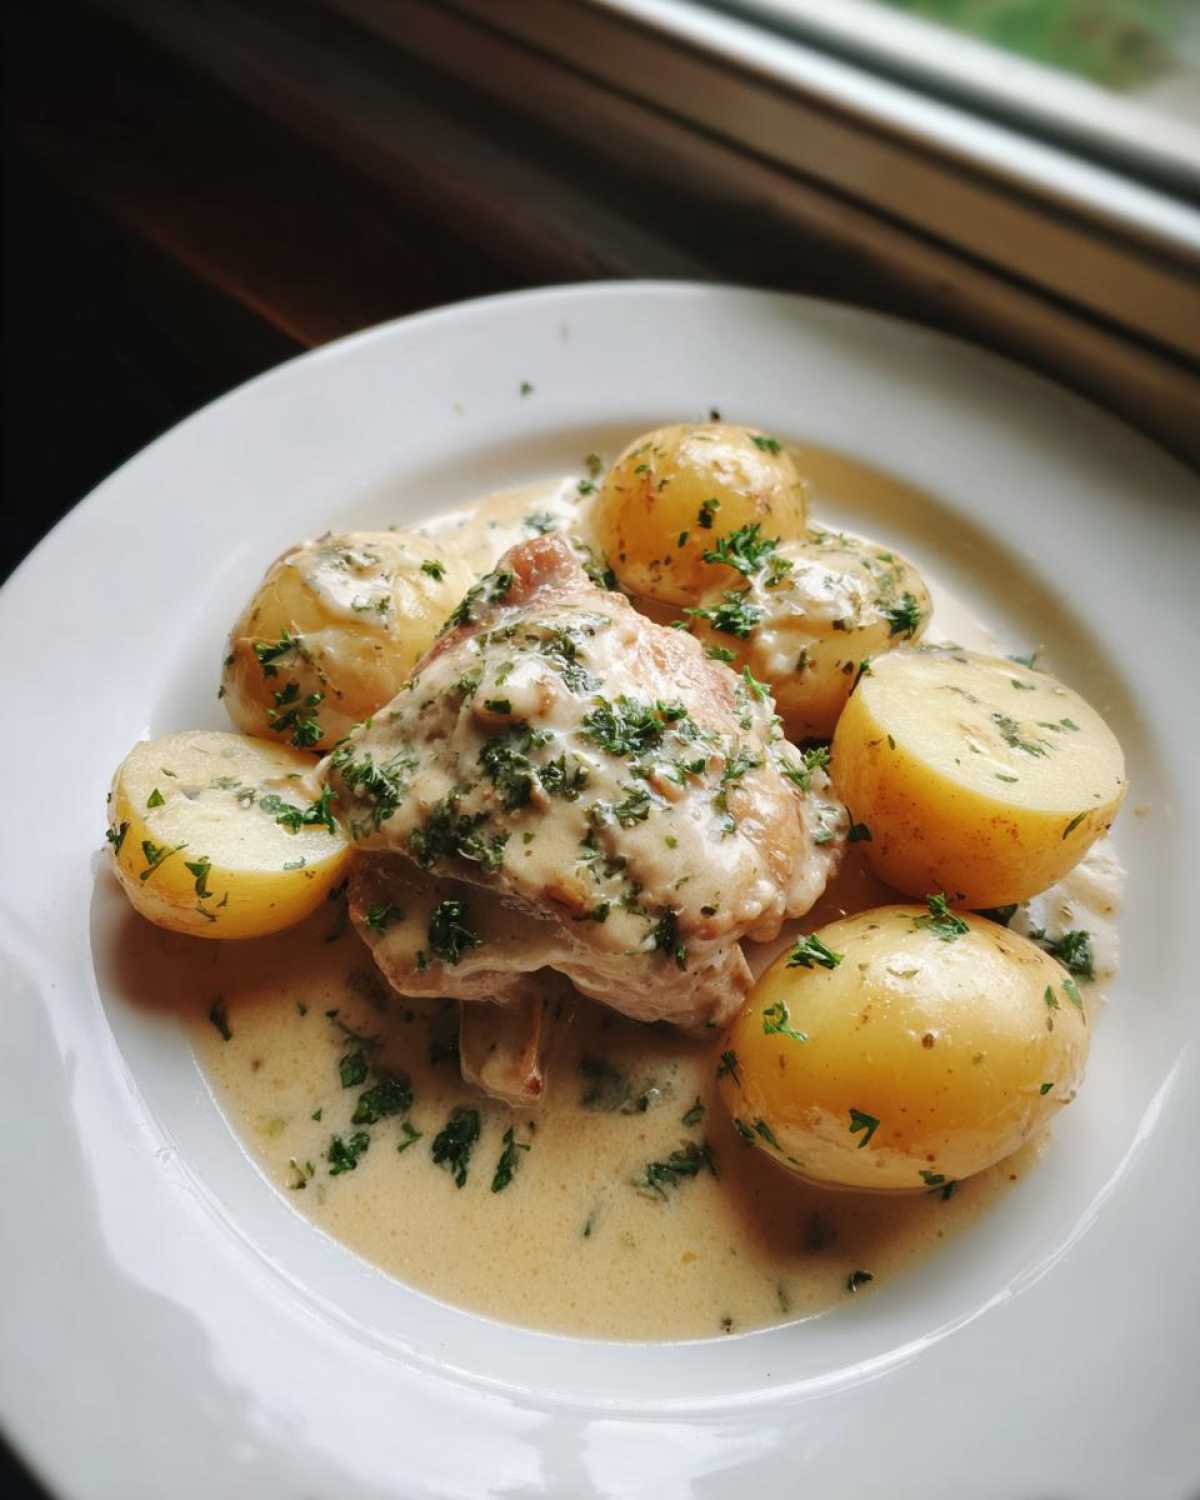
Achieving Fall Off the Bone Chicken Texture
When you want that “break apart with a fork” feeling, it all comes down to time and temperature. The combination of the chicken sitting in that warm, steamy broth—even above the liquid line where the skin is setting—breaks down all those tough connective tissues. It’s like magic, but it’s just patient cooking. You can’t rush it, but once it hits that sweet spot, the meat just surrenders. That’s your **fall off the bone chicken** moment!
Making a Flavorful Chicken Sauce Recipe in One Pot
The best part about using a Dutch oven for **braised chicken thighs** is everything builds flavor right where the chicken cooked! After we sear those thighs, those brown bits, called fond, are where the real party starts. We sauté the onions and garlic right in the remaining oil and chicken drippings. When you pour in the broth and scrape it all up, you’re creating the foundation for an incredible **flavorful chicken sauce recipe**. It’s the definition of maximizing flavor with minimal effort.
If you love these savory, developed flavors, you need to check out my classic home-style chicken dinner post for another hearty option!
Essential Ingredients for Perfect Braised Chicken Thighs
Okay, the ingredient list for this dish is short, which is fantastic for those busy evenings, but those few items have to be spot on. Remember, we’re relying on quality here because we don’t have a ton of fancy spices doing the heavy lifting. You absolutely must start with six bone-in, skin-on chicken thighs. Don’t skimp on the bone or the skin; they bring so much moisture and richness to our sauce later on!
Next up, make sure your onion is nicely chopped up, and we need four cloves of garlic minced—don’t be shy with the garlic, honestly! For the potatoes, I love using about a pound of small Yukon Golds, halved or quartered; whatever size makes sense for you. We need one cup of good quality chicken broth and half a cup of heavy cream for that luxurious finish. Lastly, a teaspoon of good dried thyme and heaps of salt and pepper are non-negotiable for seasoning the meat properly.
If you’re pairing this with some greens, make sure you check out my tips on garlic herb roasted veggies—they cook beautifully alongside this main dish!
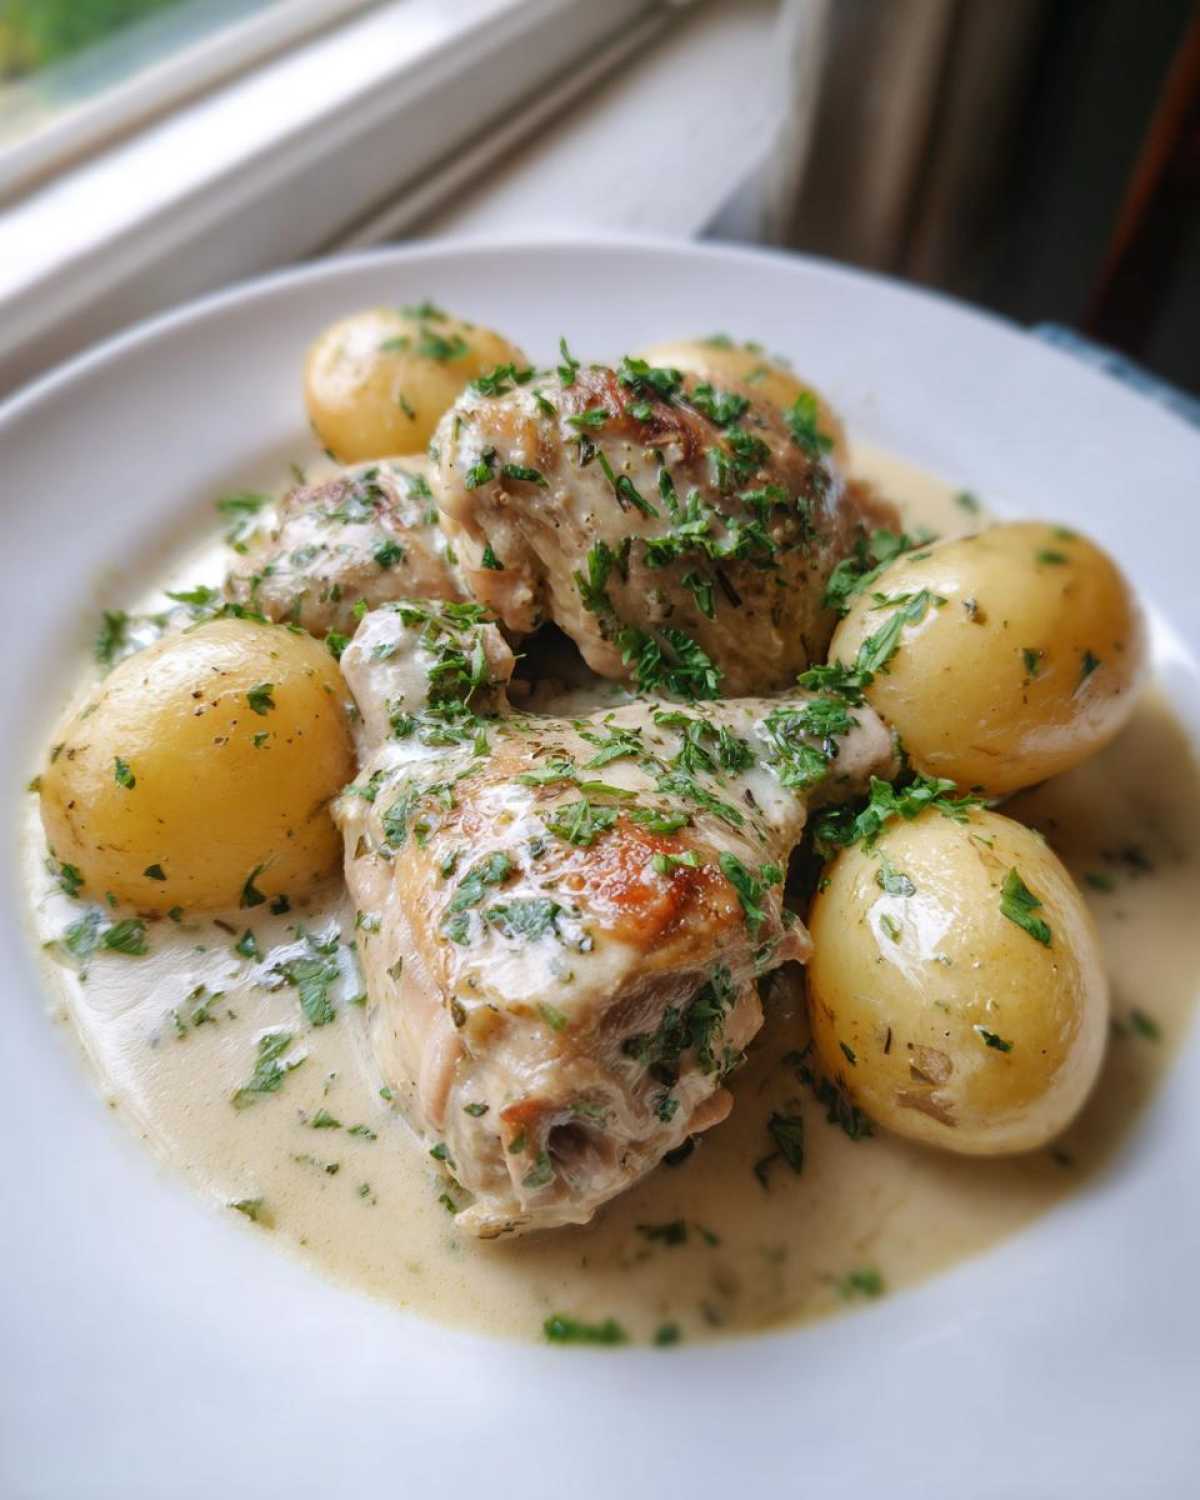
Ingredient Substitutions for Your Simple Chicken Braise
I always preach about sticking to the recipe, but life happens! If you don’t have heavy cream on hand, don’t panic; you can use half-and-half, but you might need to simmer it a little longer to thicken up the sauce properly. Some people skip the thyme, but if you do, use about one tablespoon of a good Italian seasoning blend instead—it keeps that **simple chicken braise** flavor profile intact.
If Yukon Golds are sold out, red potatoes work just fine, though they get a little softer. As for the chicken, if you absolutely must go skinless, just be aware that your sauce won’t be quite as rich, and you definitely miss out on that gorgeous crisp layer you get before the braise!
Step-by-Step Instructions for One Pot Chicken Thigh Recipes
This process is where the magic truly happens, and since we’re just using our Dutch oven, cleanup is a breeze—which is exactly what we want for a fantastic **one pot chicken thigh recipe**!
First things first, season those thighs generously like you mean it. Then, crank that heat up medium-high and get your olive oil shimmering. We’re cooking these until they are deeply golden brown, and that takes patience! Don’t try to speed it up; we need that color. After the chicken comes out, we melt the onions into that beautiful residue left in the pot, adding the garlic for just a minute until you can really smell it.
Toss in the potatoes, broth, and thyme; scrape up all those brown bits—that’s flavor gold! Bring that mixture just to a gentle bubble, and then nestle the chicken thighs right back in there. Make sure the skin side is pointing up towards the lid, not submerged in liquid! Cover it, drop the heat low, and walk away for 30 minutes. This is the core of the braise and will ensure they cook evenly.
Once that’s done, take the lid off! Give it a good stir and pour in that heavy cream. Let it simmer uncovered for another 10 to 15 minutes. This lets the sauce thicken thanks to the starch from the potatoes and the richness of the cream. Finish it off with fresh parsley. If you want to see more tips on using that amazing Dutch oven, check out the guide on Dutch oven chicken dinners!
Browning the Skin for Maximum Flavor in Your Braised Chicken Thighs
Seriously, don’t rush Step 2! You need that oil hot enough that when you put the thighs in, they start sizzling immediately. If you crowd the pan—maybe trying to put all six in at once—the temperature drops, and the thighs start steaming instead of searing. That steam equals soggy skin, and who wants that on their **braised chicken thighs**? Work in batches if you have to, giving each piece a full five to seven minutes per side until it’s mahogany brown and crispy!
The Braising Process for Tender Chicken Thighs Recipe
The 30-minute covered simmer is where we transform tough meat into magic. Covering the pot traps the steam, creating a humid environment that cooks the meat evenly and melts the connective tissue. Remember, we want skin-side up when you return them to the pot. Why? Because we want the top of the skin exposed to the gentle heat of the steam to keep it moist and tender during this low-heat phase. If the skin is submerged, it will just get rubbery!
Tips for Success When Making Savory Chicken Thigh Recipes
We’ve got this amazing creamy sauce going, but I know some of you—like me—also crave that little bit of texture back in the skin after braising. So here’s a trick straight from my own kitchen notes for when you’re making these **savory chicken thigh recipes**!
After the long braise and the cream has thickened the sauce, if you want that skin to snap just a little, simply remove the pot from the heat, carefully wipe any excess liquid off the top of the skin with a paper towel, and slide the whole Dutch oven under a preheated broiler. Watch it like a hawk for those last two minutes, though! The high sugar content in the sauce means things can go from golden brown to burnt in a flash.
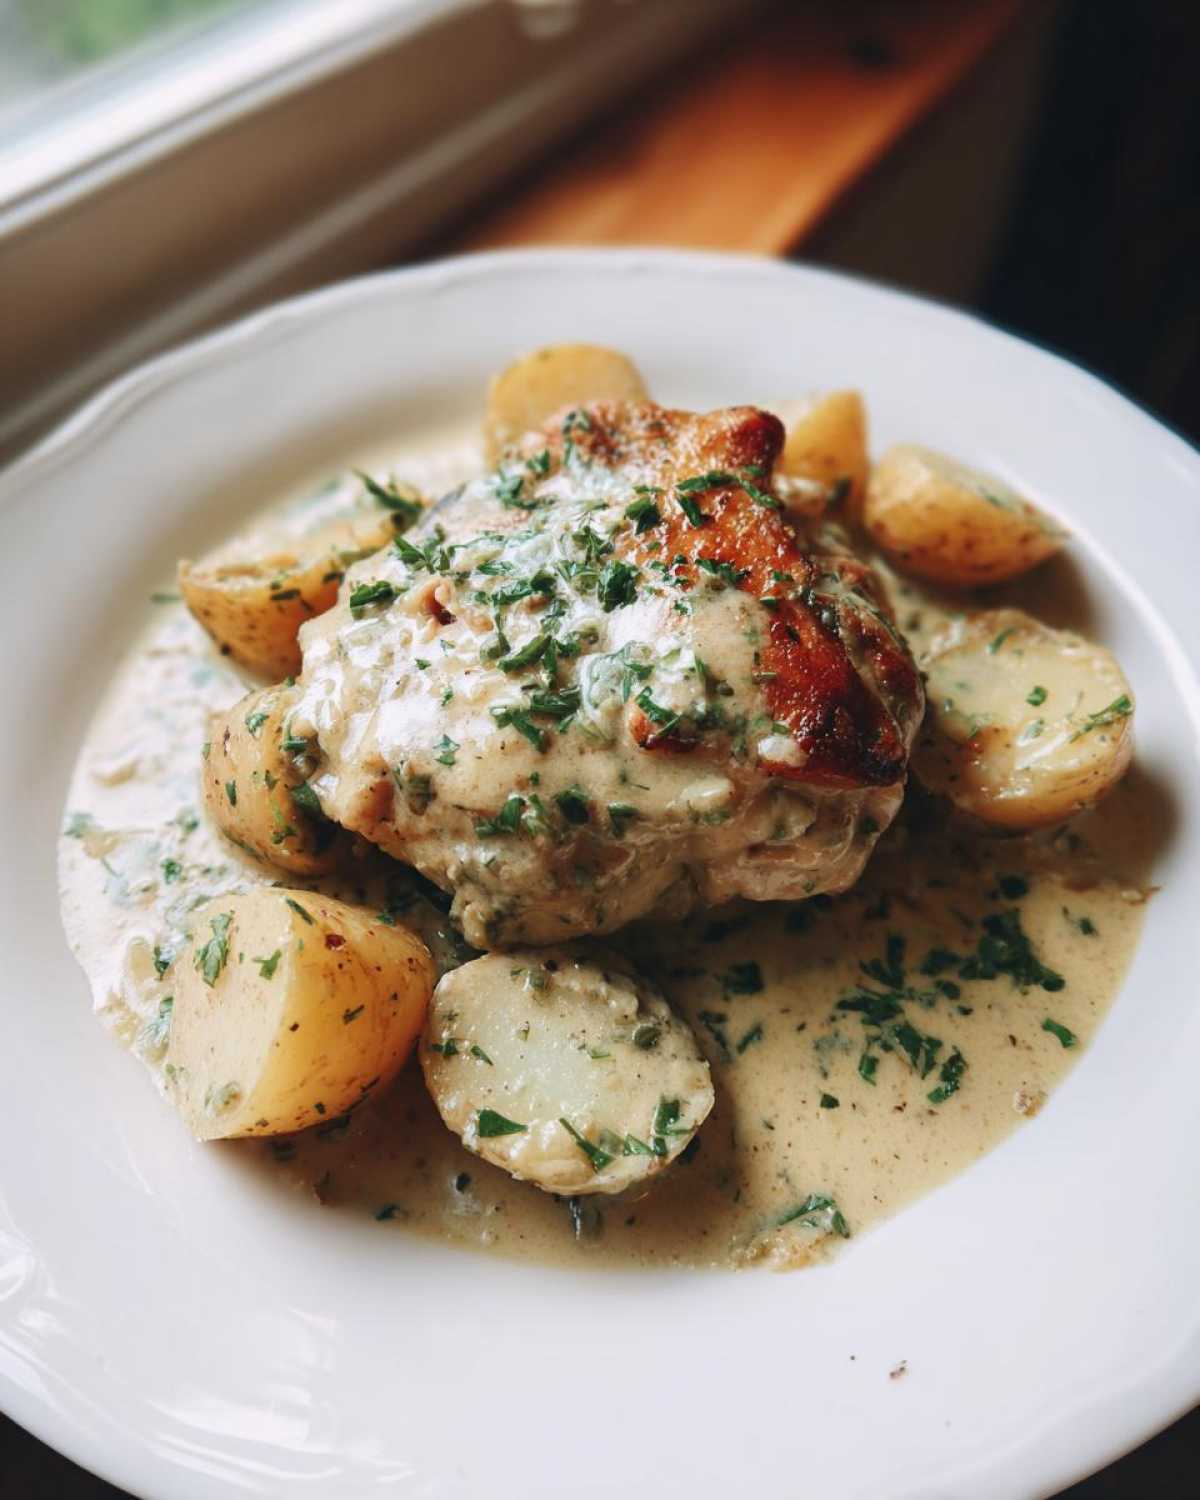
Another thing I’ve learned: these reheat perfectly. If you’re prepping this ahead, just store the chicken and sauce separately from the potatoes if you can, or just reheat slowly on the stovetop. They stay juicy, which is the goal!
For more tricks on keeping any chicken juicy, you might want to check out my thoughts on the ultimate all-purpose marinade, though this braise really doesn’t need it!
Making Easy Braised Chicken Thighs for Weeknight Chicken Dinner Idea
I always hear from people who think braising sounds too complicated for a Tuesday night, but that’s absolutely not true when you follow this recipe! The beauty of using one pot—my trusty Dutch oven—is that the prep is super fast, maybe 15 minutes max. We get the browning done first, toss in the vegetables and liquid, cover it, and then you are hands-free!
That’s what makes this my favorite **weeknight chicken dinner idea**. You can chop the potatoes while the chicken is searing, and everything else is just stirring and waiting. Minimal active cooking time means you aren’t stuck over the stove the whole evening. And cleanup? It’s almost nonexistent because everything cooks in that single pot. If you’re looking for more simple, satisfying meals, you know where to find them in the dinner section!
When you need something hearty, comforting, and quick to get on the table, these **easy braised chicken thighs** deliver every single time. It feels like a slow-cooked meal, but it’s ready in just about an hour!
Storage and Reheating Instructions for Your Braised Chicken Thighs
One of the best things about making a big batch of **braised chicken thighs** is knowing you have leftovers waiting for you! These creamy, savory chicken thighs taste just as good, if not better, the next day once those herbs have really sunk into the potatoes.
When you’re done eating, let any leftover chicken and sauce cool down to room temperature first. Never put super hot food directly into the fridge, you know? Then, transfer everything immediately into an airtight container. Glass containers are my favorite because they heat evenly later, but any secure container works. You want to refrigerate them within two hours. They will keep beautifully for about three to four days.
Reheating is where you have to be a little gentle to keep that moisture locked in. I strongly suggest using the stovetop. Scoop your portion into a small saucepan, add just a tiny splash of extra chicken broth or water—maybe a tablespoon—to prevent scorching, and heat it slowly over medium-low heat, stirring occasionally until it’s warmed through. This keeps the sauce from separating.
If you are totally pressed for time and have to use the microwave, keep the power setting to about 70% power. A lower power setting heats more gently and helps the meat stay juicy. If you’re reheating a lot, the oven set low (around 300°F) works great too, covered tightly with foil to hold in the steam.
For more hearty, stew-like leftovers that freeze well, you might want to compare notes with my cheeseburger soup recipe—it freezes like a dream!
Frequently Asked Questions About Braised Chicken Thighs
I get so many questions after people try this method for the first time! It’s great that you’re curious about tweaking recipes. It means you’re cooking with confidence! Here are some of the most common things people ask about perfecting their **braised chicken thighs**.
Can I use skinless chicken thighs for this braised chicken thighs recipe?
Oh, you certainly can, but you’ll miss out on a couple of key things! First, the chicken skin renders fat during the searing step, and that fat is what we use to start cooking the onions and garlic—it’s crucial for building that deep flavor base. Second, if you use skinless, your sauce won’t be quite as rich because you aren’t getting that deep flavor contribution from the rendered fat.
Texture-wise, skinless thighs braise beautifully and stay incredibly tender, so you’ll still get great meat! Just make sure you add a little extra solid fat—maybe an extra teaspoon of olive oil or a half-tablespoon of butter—when you sauté the onions to make up for the missing chicken fat.
How long do I braise chicken thighs in a slow cooker?
If your Dutch oven is busy or you just love the ease of a slow cooker for **juicy slow cooker chicken thighs**, swapping over is pretty simple! You’ll follow the exact same steps for seasoning and searing the chicken thighs first—you absolutely must skip that step in the slow cooker. Otherwise, you’ll end up with rubbery texture!
Once you’ve added your potatoes, broth, and seasonings—just put everything straight into the slow cooker insert, nestling the chicken on top (skin side up, remember!). Cook on LOW for 5 to 6 hours, or on HIGH for 3 to 3.5 hours. The cream goes in during the last 30 minutes of cooking, uncovered if possible, to let that sauce thicken up.
For anyone looking for excellent technique guides when you’re just starting out, I have a beginner guide to braising that breaks down the low-and-slow science better than I can here!
Serving Suggestions for Creamy Braised Chicken
Now that you have this incredibly rich, **creamy braised chicken** swimming in savory sauce, you need the perfect supporting cast, right? Even though the potatoes are already in the pot, which makes this a pretty complete meal, we absolutely must have something to sop up every last bit of that glorious sauce. That’s my firm stance on any dish involving a built-in gravy!
First on my list, always, is something crusty. A warm, crusty baguette is just non-negotiable in my house. Slice it thick, brush it lightly with olive oil, and toast it until it’s just barely tender inside. It’s perfect for scooping up the potatoes and soaking up the garlic-herb sauce leftover on your plate.
If you want to lean into the herby flavor and add a little fresh contrast to balance the richness, a super simple side salad is the answer. Think mixed greens, maybe a few thin slices of cucumber, dressed with nothing more complicated than lemon juice, a dash of olive oil, salt, and pepper. It cuts right through the creaminess perfectly.
For something warm and substantial that isn’t another potato, try serving this over a bed of egg noodles or even some creamy polenta. But if you’re feeling ambitious and want to truly upgrade your bread game, you have to try my recipe for easy homemade garlic butter naan bread. Seriously, dipping that warm, buttery naan into the sauce? It’s life-changing.
Estimated Nutrition for These Braised Chicken Thighs
I always get asked about the numbers, especially since this dish is so rich with that creamy sauce and potatoes! I pulled the data based on the recipe serving four people, using the bone-in, skin-on thighs as written. Keep in mind, these figures are just estimates—they fluctuate like crazy depending on the size of your chicken and exactly how much heavy cream you decide to drizzle in!
Remember, this is a hearty, satisfying meal, so that fat content reflects the deliciousness of the skin and the cream. For a more detailed look at how we approach nutrition writing across all our site content, please take a peek at our official kitchen disclaimer page.
Here’s the breakdown for one serving (one thigh, potatoes, and sauce):
- Calories: 550
- Fat: 38g (That includes about 15g Saturated Fat from the cream and skin—worth every bite!)
- Carbohydrates: 25g
- Protein: 35g
- Sugar: Only about 3g! Isn’t that great? Most of the sweetness comes from those lovely carrots we didn’t use, but the carrots in the potatoes are minimal.
- Sodium: 450mg (This is lower than many restaurant versions because we control the broth and salt, which is a huge plus for homemade **braised chicken thighs**!)
This recipe is designed to be a complete, satisfying **dutch oven chicken dinner** all on its own, giving you big flavor without relying on excessive sugar!
PrintOne-Pot Creamy Garlic and Herb Braised Chicken Thighs with Potatoes

Make tender, juicy chicken thighs and potatoes in one pot using a rich, creamy garlic and herb sauce. This recipe is simple for weeknight cooking.
- Prep Time: 15 min
- Cook Time: 55 min
- Total Time: 70 min
- Yield: 4 servings
- Category: Dinner
- Method: Braising
- Cuisine: American
- Diet: Low Lactose
Ingredients
- 6 bone-in, skin-on chicken thighs
- 1 tablespoon olive oil
- 1 large yellow onion, chopped
- 4 cloves garlic, minced
- 1 pound small potatoes (like Yukon Gold), halved or quartered
- 1 cup chicken broth
- 1/2 cup heavy cream
- 2 tablespoons fresh parsley, chopped
- 1 teaspoon dried thyme
- Salt and black pepper to taste
Instructions
- Season the chicken thighs generously with salt and pepper.
- Heat the olive oil in a large Dutch oven or heavy-bottomed pot over medium-high heat. Brown the chicken thighs, skin-side down, for 5 to 7 minutes until the skin is golden. Remove the chicken and set aside.
- Reduce the heat to medium. Add the chopped onion to the pot and cook until softened, about 5 minutes. Add the minced garlic and cook for 1 minute until fragrant.
- Add the potatoes, chicken broth, and dried thyme to the pot. Scrape up any browned bits from the bottom of the pot. Bring the liquid to a simmer.
- Return the chicken thighs to the pot, nestling them among the potatoes, skin-side up.
- Cover the pot and reduce the heat to low. Let the chicken braise for 30 minutes.
- Remove the lid. Stir in the heavy cream. Continue to simmer uncovered for another 10 to 15 minutes, or until the potatoes are tender and the sauce has thickened slightly.
- Stir in the fresh parsley. Taste the sauce and adjust salt and pepper as needed before serving.
Notes
- For crispier skin, place the pot under the broiler for the last 2 minutes after the braising liquid has reduced, watching carefully to prevent burning.
- You can substitute dried herbs with 1 tablespoon of a mixed Italian seasoning blend.
- This dish reheats well the next day.
Nutrition
- Serving Size: 1 thigh with potatoes and sauce
- Calories: 550
- Sugar: 3
- Sodium: 450
- Fat: 38
- Saturated Fat: 15
- Unsaturated Fat: 23
- Trans Fat: 0
- Carbohydrates: 25
- Fiber: 3
- Protein: 35
- Cholesterol: 140