

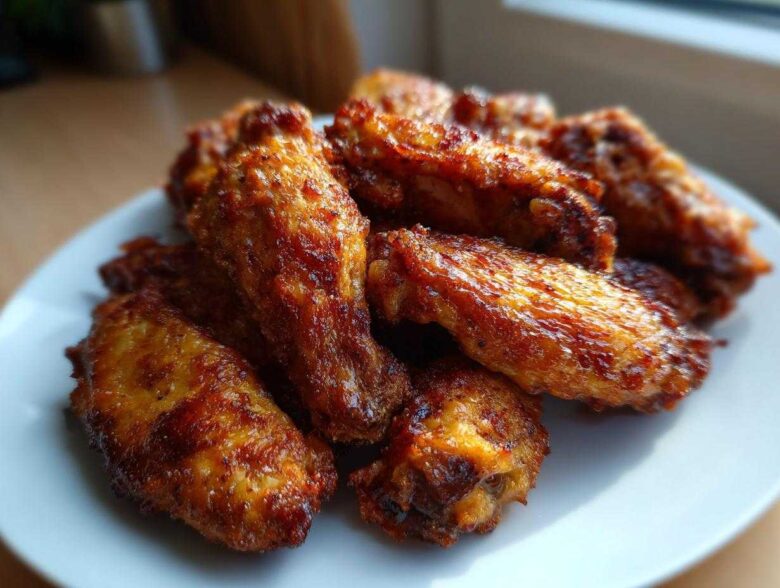
Okay, can we just talk for a second? I know the search for the perfect crispy baked chicken wings feels impossible sometimes. You want that shatteringly crisp skin, the kind that makes that awesome crunch when you bite into it, but you absolutely do *not* want to deal with a giant vat of sputtering hot oil. I get it! Frying is messy, and honestly, sometimes I just want these on a Tuesday night without needing a full HAZMAT cleanup in my kitchen. Well, after years of testing, I finally cracked the code. This recipe is the one. Forget soggy oven wings; this simple technique guarantees juicy inside crispy outside wings every single time. Seriously, you’re going to toss out your deep fryer for wing night!
If you want to know more about the folks behind these game-changing recipes, you can always check out our team right over here. It took a little trial and error, but trust me, once you see this magic happen, you’ll never go back. It’s all about knowing what the skin needs to dehydrate just right!
Why This is the Best Baked Wing Technique for Crispy Baked Chicken Wings
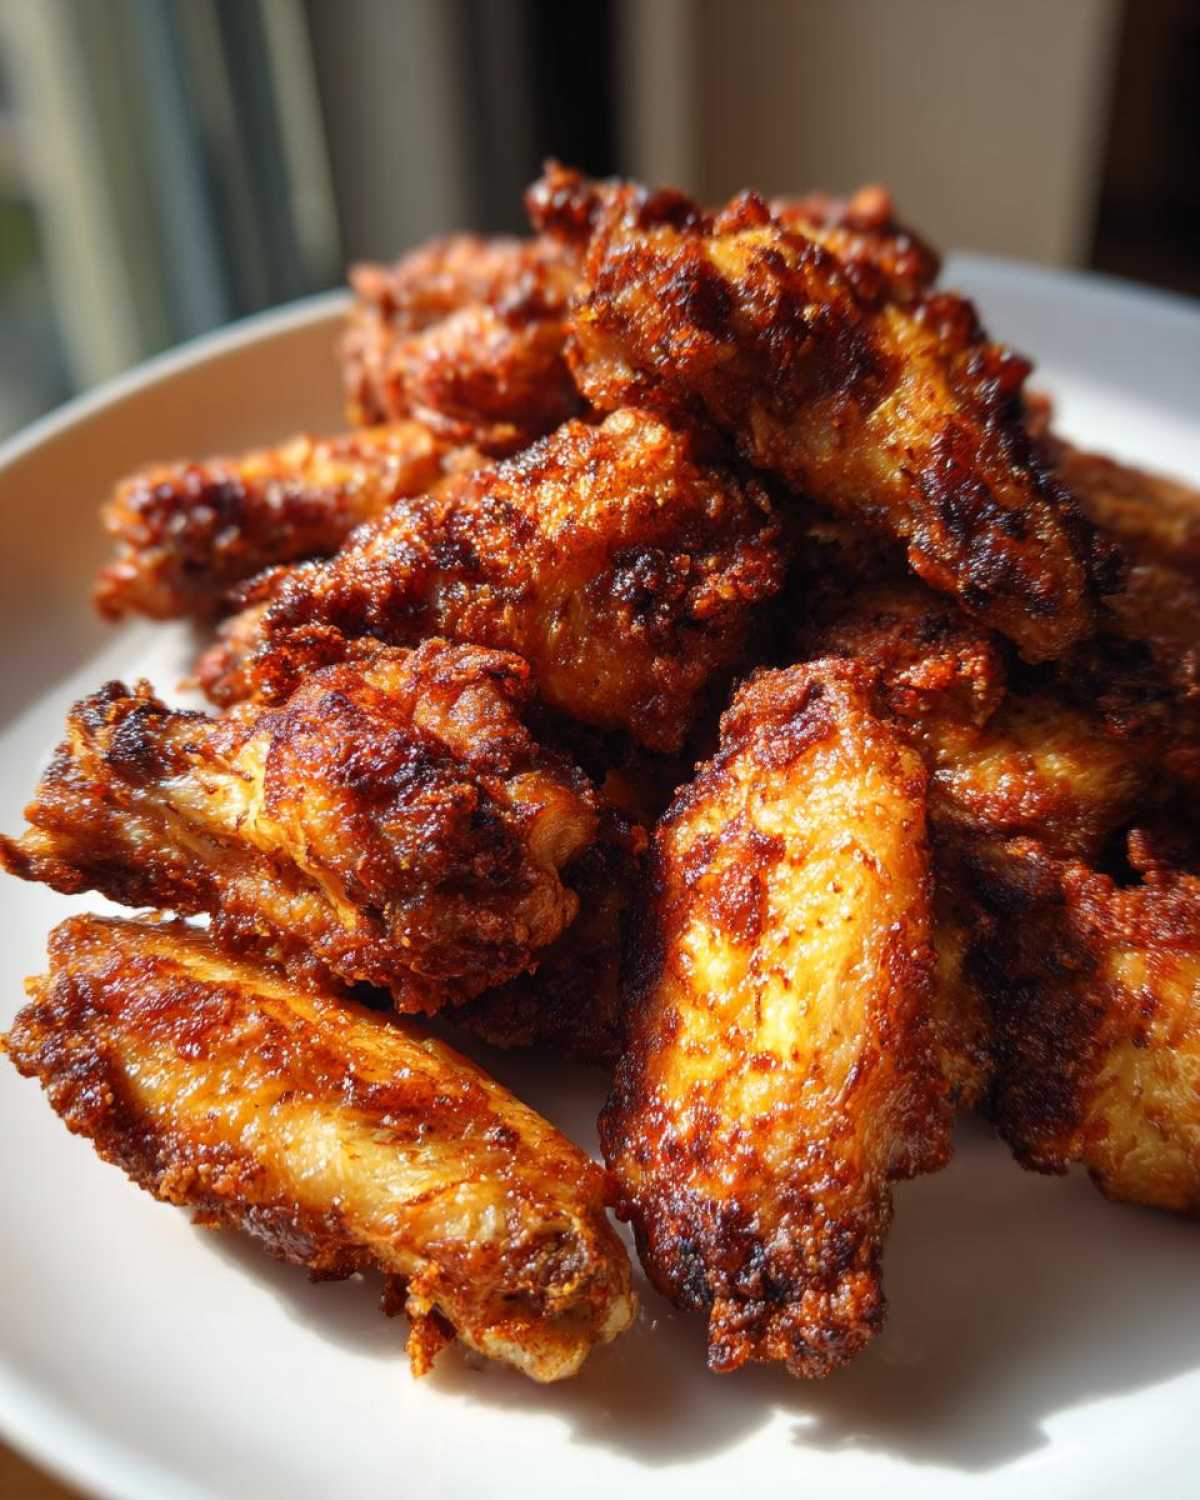
Okay, forget everything you thought you knew about oven baked chicken wings. The real game changer, the absolute secret to achieving that perfect crunch without frying, is one seemingly innocent little item: baking powder. I know, it sounds like something you use for biscuits, but trust me on this one; it’s the key to the whole operation. This method delivers exactly what everyone wants: juicy inside crispy outside wings.
When you toss the wings in this mixture, you are setting yourself up for success. This technique is truly the secret to crispy baked wings, and you get all the texture with none of the deep-fry hassle. It’s perfect for Weeknight Chicken Wings or when you need something quick for a party!
The Science Behind Chicken Wings with Baking Powder
So, why does this work? It’s super simple kitchen chemistry! Baking powder is alkaline, which means it raises the pH level on the surface of the chicken skin when it bakes. This simple change helps tenderize the proteins right on the surface.
What happens then? That raised pH level radically speeds up the drying process in the oven. We are basically making the skin way drier on the outside before it even has a chance to steam itself soggy. When you bake them high and dry, you get this beautiful, delicate, shatteringly crunchy shell. It’s an absolute must-know tip for any serious home cook!
Gathering Ingredients for Your Crispy Baked Chicken Wings
Alright, let’s talk about what you need to get these incredible crispy baked chicken wings on your table. The ingredient list is super short, which I absolutely love, especially when I’m rushing to get appetizers ready before the game starts. Don’t worry about complicated marinades here; the magic is entirely in the dry rub blend!
You’ll need about two pounds of wings—make sure you separate them into the flats and the little drumettes. It helps them cook so much more evenly, and honestly, I think the flats get crispier! The core dry ingredients are simple: salt, black pepper, garlic powder for a savory kick, and maybe a tiny whisper of cayenne if you like just a little heat.
And of course, the absolute star: baking powder. Seriously, don’t try to skip this! We also use just a touch of olive oil, but mostly, this recipe relies on that dry coating to do all the heavy lifting. It’s so easy, even for your first attempt at easy chicken wing recipe!
Ingredient Notes and Substitutions
I want to save you any potential heartbreak, so here are my specific notes on a couple of items. First up, the banking powder: if you can, use the aluminum-free kind. It doesn’t leave any weird metallic aftertaste that some folks claim regular baking powder does. I’ve noticed a slight difference when making Dry Rub Baked Wings this way.
Now, I know life happens, and maybe you’re staring at an empty baking powder canister. If you *absolutely* have to substitute, cornstarch is the second-best thing we’ve found for making these homemade crunchy wings. It works similarly by aiding dehydration, but you might need to bake them an extra five minutes. I still prefer the baking powder way, though; it just seems to give that extra lift!
Also, make sure your salt and spices are fresh! Old spices just don’t pack the punch needed when you’re looking for that explosion of flavor in a simple party wing recipe.
Essential Equipment for Extra Crispy Wings Recipe
Okay, you have your ingredients; now let’s talk tools. For this Extra Crispy Wings Recipe to work its magic, you need the right setup. It’s not complicated, promise! But there are three pieces of equipment that I consider non-negotiable if you want that perfect crunch we’ve been talking about. These aren’t fancy gadgets; they are just smart pieces of standard gear!
First, you absolutely need a good, sturdy baking sheet—the biggest one you have is usually best, just so we aren’t crowding things later on. Second, grab a few rolls of paper towels. I mean it—grab like half a roll. The dryer the wings are before they go in, the crispier they get, so don’t skimp on the drying step!
Then you need a large mixing bowl for coating everything evenly. But here is the real secret sauce equipment: you must use a wire rack that fits inside that baking sheet. If you try to bake these directly on foil or on the sheet pan itself, the bottom of the wing will steam in its own juices, and you’ll end up with sad, floppy bottoms. We are aiming for crunchy all around!
The wire rack allows all that hot oven air to circulate completely underneath the wings. This passive convection is what dries out the skin on the bottom side while the top side is crisping away under the heat. It’s like giving your wings their own little balcony to relax on while they bake to perfection. Trust me, getting that air underneath is the actual key to mastering these homemade crunchy wings!
Step-by-Step Guide to Perfect Crispy Baked Chicken Wings
Okay, we’ve got the gear, we’ve got the magic powder; now it’s time to make the food! This process is so straightforward, but you cannot rush the initial prep work. If you skip the drying step, you might as well order pizza instead. Seriously, the entire success of these crispy baked chicken wings hinges on making sure that skin is bone dry before we even think about turning on the oven. The total cook time here clocks in right around 45 minutes, which is totally winnable for a weeknight meal!
Preparing the Wings: Drying and Coating
First things first: paper towels. Get those wings out, separate them if they came joined, and just pat, pat, pat them dry until you can almost hear the skin squeak. I mean it—I use half a roll every time. Moisture is the enemy of crispiness, so attack that water! Once they are parched, grab your big bowl.
Now for the rub, which is the real secret to crispy baked wings. In a little separate bowl, mix up that baking powder, salt, pepper, garlic powder, and cayenne if you’re using it. Don’t just sprinkle it over the top; you need to coat every single inch of chicken. Dump the dry wings into the bowl with the rub and gently toss everything with your hands until every flat and drumette is dusted evenly. If you see any bare spots, give it another toss. That coating needs to be uniform!
The High-Heat Baking Process for Crispy Baked Chicken Wings
Get that oven hot! I preheat mine to 425 degrees Fahrenheit (about 220 Celsius). Prepare your rack and foil setup we talked about, and lay those coated wings out on the rack. The key rule here is spacing: leave a little space between every single wing. If they are touching, they steam each other, and boom—soggy skin again! We want maximum surface area exposed to the hot air for these crispy baked chicken wings.
Bake them for about 25 minutes just like that. Then, you get to flip them over! Now, this is where we crank up the heat to push that crispiness over the top. Bump the temperature up to 450 degrees Fahrenheit (230 Celsius) and slide them back in for another 20 to 25 minutes. You’ll know they are done when they look deeply golden brown and they sound hollow when you tap them lightly. That high, intense heat really locks in the crunch!
Saucing Your No Fry Chicken Wings
This is the moment of truth, folks, and this is where so many people ruin a truly perfect batch of crispy baked chicken wings! The biggest mistake you can make is saucing them too early. If you coat them while they are still cooking, that moisture from the sauce steams the skin we worked so hard to dry out and crisp up. Don’t do it!
The wings need to come out of the oven looking totally golden and unbelievably crunchy. Right then, pull them out, toss them into a clean, empty bowl, and pour on your sauce—whether it’s your famous spicy BBQ or just some melted butter and Frank’s Red Hot. Give everything a really vigorous toss so every piece is coated, and then serve them immediately! That quick toss maintains the majority of that amazing crunchy texture we are chasing in these No Fry Chicken Wings.
Now, what if you *really* want that thick, sticky coating like you get at a restaurant? I have a little trick for that, but you have to be fast. If you toss your wings in sauce and you want it to adhere perfectly, you can put them back onto the wire rack (still spaced out!). Then, stick them under a very hot broiler for just 60 to 90 seconds. You absolutely must watch them like a hawk because the sugar in the sauce burns fast! This flash-broil glazes them perfectly without making them soggy.
Serving Suggestions for Game Day Chicken Wings
These wings are the superstars of any gathering, whether it’s a casual Tuesday night dinner or the biggest Super Bowl party of the year. For ultimate low-effort Game Day Chicken Wings, I sometimes skip the sauce entirely! If you use a really flavorful dry rub—like a Cajun blend or my favorite smoky paprika mix—they are fantastic served exactly as they come out of the oven with a side of cool Ranch or blue cheese dressing for dipping.
If you are going the sauced route, classic Buffalo is always a winner, obviously. But don’t forget about creamy Garlic Parmesan Baked Wings! Right after you pull them from the oil-free bake, toss them in melted butter, minced fresh garlic, and loads of grated Parmesan cheese. That combination melts beautifully onto the hot, crisp skin.
For BBQ lovers, toss them generously in a thick, smoky BBQ sauce. These Party Wing Recipes are always the first ones gone. Trust me, once your friends realize they are getting fried-level crunch from the oven, they’ll never ask you to deep fry again!
Tips for Success and Troubleshooting Common Issues
I’ve spent countless hours perfecting this method, so I want to save you any frustration! Even with a great recipe, sometimes things go sideways, right? Usually, when these crispy baked chicken wings don’t turn out shatteringly crisp, it boils down to one of three things, and they are all totally fixable!
First, the biggest failure point: sticking. If your wings are glued to the rack when you try to move them, that means the underside steamed. Even with the baking powder, if you don’t have air circulation, you lose the crunch on the bottom. If you’re nervous about cleaning crusted-on bits later, here’s my pro tip: always line that baking sheet with heavy-duty aluminum foil *before* you place the wire rack on top. This catches any drips or stray coating, making cleanup a breeze, but leave the rack completely uncovered so air can flow freely beneath the wings.
Troubleshooting Wing Crispiness
If your wings look done but they still feel a little floppy—especially if you were aiming for those textbook Extra Crispy Wings Recipe results—it’s almost always about moisture control. Go back to Step 1: Did you pat them aggressively dry? I mean, like you are trying to soak up every molecule of water from the skin. If they were even slightly damp going in, they will steam.
The other reason? Temperature. Did your oven actually reach 425 degrees before you put them in? Maybe your oven runs a little cold. If you suspect that, give it an extra 10 minutes of preheating time. Remember, we are going for high heat to mimic frying!
If they are browning too fast before the inside is cooked, that means your oven might be too hot, or you placed the wings too close together. Always leave a little gap between each piece. They need their own space to breathe and crisp up evenly!
Making Ahead and Storage
These wings are definitely best right out of the oven, but they are surprisingly great for parties because you can prep most of the work ahead of time. You can totally mix your dry rub (baking powder, salt, spices) and keep it in an airtight container for up to a month. That saves time when you are cooking for a big crowd!
You can even coat the wings with the dry rub mixture up to an hour before you plan to bake them. Just coat them, arrange them on the rack, cover the whole thing loosely with plastic wrap, and set it in the fridge. That extra hour in the fridge actually helps dehydrate the skin even more while it rests, promoting even better crisping!
But, if you have leftovers? Never store sauced wings overnight—they will always get soft. If you have leftover *plain* dry-rubbed wings, store them in an airtight container in the fridge. To reheat and bring back some crunch, spread them on a clean baking sheet and pop them in a 400-degree oven for about 8 to 10 minutes. They crisp right back up!
Estimated Nutritional Information
Now, I always feel a little bad sharing nutrition facts because, honestly, when you are eating something this delicious, who is really counting? But since these are technically my famous healthier chicken wings because we skipped the deep fryer, I know some of you appreciate knowing the breakdown. These numbers are just *estimates*, mind you, based on a typical mix of flats and drumettes coated lightly with a standard Buffalo sauce.
If you’re looking for exact carb counts or sodium levels, especially if you use a specialized homemade rub or a very sugary BBQ sauce, you might need to plug your exact products into a tracker. For the most accurate usage details, always check our site’s main disclaimer page right here.
Per serving (which we set at 4 wings, but you know you’re eating more!), here’s what you can generally expect:
- Calories: Around 250
- Protein: A robust 26 grams—these are great for keeping you full!
- Fat: Roughly 15 grams (a lot less than deep-fried, I promise!)
- Carbohydrates: Very low, usually just 1 gram, which is fantastic for anyone keeping an eye on sugar intake.
- Sodium: About 350 mg, depending heavily on how much salt you add in your dry rub.
See? This is why I love this recipe for those quick baked appetizers. You get all that fantastic flavor and crunch without blowing your entire day’s fat budget on appetizers. It definitely makes these weeknight chicken wings guilt-free enough to make twice a month!
Frequently Asked Questions About Baked Wings
I always know there will be questions when people try this method for the first time because it feels like cheating! But here are the main things I hear all the time about getting that perfect crunch on your crispy baked chicken wings at home.
Can I use frozen chicken wings straight from the freezer?
Oh, please don’t try that if you want crunchy wings! If you put frozen or even just refrigerated, damp wings into the mix, you are guaranteeing a steamy, soggy disaster instead of those beautiful crunchy wings. You have to fully thaw the wings first. And then, following the recipe, you need to pat them absolutely bone-dry with paper towels. Taking the time for that initial drying and coating step is what separates a good wing from a truly Extra Crispy Wings Recipe!
Seriously, does the baking powder make the wings taste weird?
This is the number one question, and I totally get why you’d worry! The answer is a big, resounding NO, provided you rinse or wipe off the excess coating before baking. Remember, the baking powder is just there to change the surface chemistry to make the skin dry out faster under high heat. We use just the right amount. If you used way too much, maybe you’d notice something, but if you follow the measurements for the dry rub, all you taste is savory deliciousness! It’s our little secret for achieving incredible No Fry Chicken Wings!
What is the very best oven temperature for the ultimate crisp?
I use a two-stage approach, which I think is the key for those satisfyingly homemade crunchy wings. You start lower, at 425°F (220°C) for 25 minutes, to cook the meat through gently without burning the coating. Then, you crank it up to 450°F (230°C) for the final 20-25 minutes.
That jump to 450°F is what gives you that final blast of dry heat to make the skin look deeply golden and give you that lovely crunch you expect from the Best Baked Wing Technique. If your wings don’t seem to be getting that deep color, try bumping it up to 475°F for the last 10 minutes, but keep a watchful eye on them!
Can I make these ahead of time for my Game Day party?
Yes, absolutely! These are one of my favorite Game Day Chicken Wings because planning ahead is so easy. You can do the entire dry coating step up to 24 hours in advance. Just mix the dry rub with the wings, arrange everything on the wire rack, cover the whole thing loosely with plastic wrap, and let them hang out in the fridge. That time in the cold fridge actually helps them dry out even *more*, which will result in even crispier wings when they finally head into the oven. Just add their normal baking time—no need to adjust for the chilling!
Share Your Results
Now that you’ve experienced the magic of baking powder wings, I absolutely need to hear about it! Honestly, the best part of sharing this recipe for crispy baked chicken wings with you is seeing the results you all get. I know, I know, I sound like I’m nagging, but seriously, tell me everything!
Did they turn out just as crispy as you hoped? Were you shocked that you didn’t need a drop of frying oil? Tell me what sauce you tossed them in—did you stick to classic Buffalo, or did you try something wild like Honey Sriracha? That’s the fun part of sharing these recipes, right?
Head down to the comments section below and leave a rating. Giving this recipe five stars tells me you loved the no fry chicken wings method, and it helps other folks who are nervous about ditching the deep fryer find this foolproof technique. If you tried a variation, like swapping paprika for chipotle powder, please share those details!
Hearing from you helps me keep whipping up more genuine, tried-and-true recipes just like this one. If you have any lingering questions that I might have missed in the FAQs, drop those in the comments too! You can always reach out directly through the contact page if you need something specific. Happy crunching!
PrintThe Ultimate Crispy Baked Chicken Wings: No-Fry Crunch
Follow this method using baking powder to achieve shatteringly crispy chicken wings in the oven without deep frying.
- Prep Time: 15 min
- Cook Time: 45 min
- Total Time: 60 min
- Yield: 4 servings
- Category: Appetizer
- Method: Baking
- Cuisine: American
- Diet: Low Fat
Ingredients
- 2 lbs chicken wings, separated into flats and drumettes
- 1 tablespoon baking powder (aluminum-free preferred)
- 1 teaspoon salt
- 1/2 teaspoon black pepper
- 1/2 teaspoon garlic powder
- 1/4 teaspoon cayenne pepper (optional)
- 1 tablespoon olive oil
Instructions
- Preheat your oven to 425 degrees Fahrenheit (220 Celsius). Line a large baking sheet with aluminum foil and place a wire rack on top of the foil.
- Pat the chicken wings completely dry using paper towels. This step is critical for crispiness.
- In a large bowl, combine the baking powder, salt, pepper, garlic powder, and cayenne pepper.
- Add the dried wings to the bowl and toss thoroughly until every piece is evenly coated with the dry mixture.
- Arrange the coated wings in a single layer on the wire rack, ensuring there is space between each piece for air circulation.
- Bake for 25 minutes.
- Flip the wings over. Increase the oven temperature to 450 degrees Fahrenheit (230 Celsius).
- Bake for another 20 to 25 minutes, or until the wings are deep golden brown and very crispy.
- Remove wings from the oven. Toss immediately with your preferred sauce (like buffalo or BBQ) if desired, or serve dry with a dipping sauce.
Notes
- Do not skip drying the wings thoroughly; moisture prevents crisping.
- Use a wire rack so air circulates underneath the wings, promoting even cooking and crisping on all sides.
- If you want extra sauce adherence, toss the wings in sauce and return them to the oven under the broiler for 1-2 minutes, watching closely to prevent burning.
Nutrition
- Serving Size: 4 wings
- Calories: 250
- Sugar: 1
- Sodium: 350
- Fat: 15
- Saturated Fat: 4
- Unsaturated Fat: 11
- Trans Fat: 0
- Carbohydrates: 1
- Fiber: 0
- Protein: 26
- Cholesterol: 90