

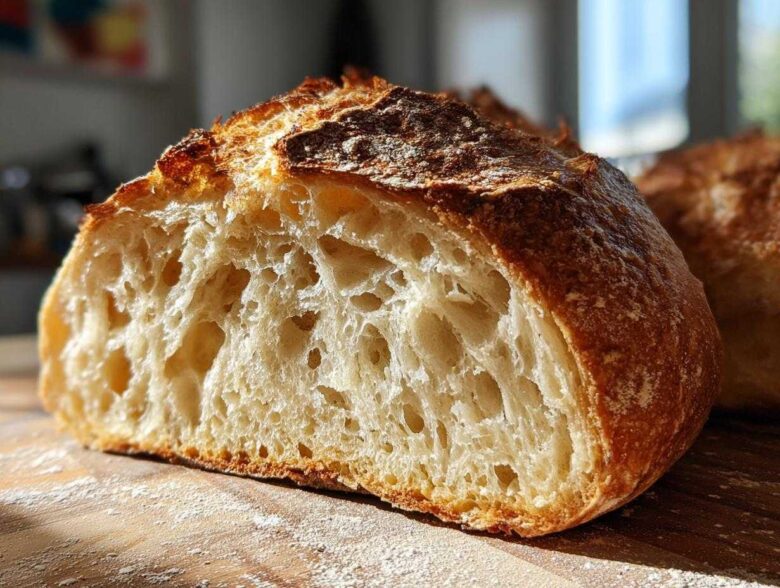
I swear, nothing beats the smell of genuine, fresh-from-the-oven french bread filling your kitchen. For years, I thought that perfect, crackly crust and that airy interior belonged only in fancy bakeries, until I figured out the trick! Honestly, my first attempt at making homemade french bread recipe resulted in something closer to a very hard frisbee. Oops. But then I discovered the magic of oven steam—it completely changes everything. This recipe blends that rustic, authentic crust you crave with steps that are so straightforward, you won’t even break a sweat. Trust me, this is the definitive loaf you’ve been searching for.
Why This Homemade French Bread Recipe Works for Everyone
I know baking bread can seem intimidating, but this recipe really breaks down the process so anyone can nail it. It genuinely is a fantastic introductory yeast bread recipe. You get that ideal result—a thick, shattering crust and an inside full of those beautiful, open air pockets. We want everyone to feel successful when they bake this!
- Perfect Balance: It’s designed to give you that wonderful crustiness most people chase, but I also show you right how to pivot for a softer loaf if that’s what your family prefers.
- Minimal Active Time: Yes, bread needs to rise, but your hands-on time is surprisingly short. Most of the wait is hands-off perfection happening in the bowl!
- Reliable Results: This ratio of water to flour is magical. It means fewer flops and more gorgeous loaves ready for the dinner table.
Achieving True Bakery Style French Bread Texture
Look, if you want something that tastes like it came straight from a small Parisian bakery, you need that textural contrast. The secret to getting that proper, crisp exterior isn’t in the mixing, it’s all about the baking environment. We use a little trick with steam in the oven that mimics a professional deck oven. This keeps the crust soft and pliable while it sets, allowing the bread to expand fully before that crust locks into place beautifully. That technique is what generates that incredible bakery style french bread sound when you tap it!
Adaptable Steps for Easy French Bread
Don’t let the two rising periods scare you off! You aren’t actively working on it for two hours. You mix it, wait, shape it, wait again, and then bake. That’s why I call this an easy french bread recipe. If you can stir ingredients together and wait patiently, you can make this loaf. Seriously, the dough does all the heavy lifting for you.
Essential Ingredients for Perfect French Bread
This whole process is a testament to how incredible bread can be when you don’t use a million complicated things. For our incredible french bread, we’re keeping it super simple! You need just the basics to make magic happen. Seeing the short list always reminds me that quality doesn’t require complexity. Here’s exactly what you need to gather before we mix anything:
- 3 cups all-purpose flour
- 1 1/2 teaspoons salt
- 1 teaspoon instant yeast
- 1 1/4 cups warm water (about 105-115°F)
- 1 tablespoon cornmeal for dusting
Ingredient Notes and Substitutions
Pay close attention to the water temperature here; this is non-negotiable for activating your yeast correctly! We use warm water between 105 and 115 degrees Fahrenheit. If it’s too cold, the yeast sleeps. If it’s too hot—say, over 125 degrees—you shock and kill your little buddies! Instant yeast is perfect because we can just dump it right in with the flour; no proofing needed, which shaves off time. While all-purpose flour is what I use for that lovely soft interior, if you want to step up the chewiness and get a true artisan bread at home texture, swap out half a cup of the AP flour for bread flour. You won’t regret trying that version next time!
How to Make Crusty French Bread: Step-by-Step Instructions
Okay, this is where the real magic happens, folks! We take those simple ingredients and turn them into actual, crackling, beautiful french bread. Stick to these instructions, especially regarding time, and you’ll have a loaf that rivals any bakery. Remember, the goal here is that wonderful shatter when you slice through the crust!
Mixing and Developing the Dough for Your French Bread
Step one is easy: grab your big mixing bowl and whisk together the flour, salt, and instant yeast. That’s right, no fussing with blooming the yeast first! Then, pour in all that warm water at once. You only need to mix this with a wooden spoon until it looks shaggy and messy—like it almost hasn’t come together yet. Don’t try to make it smooth in the bowl; that’s the first mistake people make!
Now, turn that shaggy mess out onto your counter. This is where you decide the destiny of your loaf. If you are aiming for that authentic, chewy, crusty french bread, you need to knead this dough by hand for a good five to seven minutes. You’re developing structure! However, if you decided last minute that you actually want the tender, more like a great sandwich loaf, that’s okay! Just knead it for only three minutes for a slightly softer result. See? Easy swap for a different experience!
The Crucial Rising Stages
Once you’ve kneaded to your desired texture, put that dough into a greased bowl and let it rest. Cover it up tight. This first rise is crucial for flavor development. We’re looking for it to double in size, which usually takes between an hour and an hour and a half, depending on how warm your kitchen is. Don’t rush this part; it’s where the yeast does its hard work!
Once it’s doubled, very gently punch it down—we don’t want to knock all the air out! Turn it onto a floured spot and shape it into your loaf or two baguettes. Place those beauties on some parchment paper that’s generously sprinkled with cornmeal (that helps prevent sticking and adds a nice texture underneath). Cover them loosely again and let them have their second, shorter rest, which should be about 30 minutes. While they rest, it’s time for the oven preheat.
Creating the Signature Crackly Crust on Your French Bread
This is the moment of truth for true bakery style french bread! Preheat your oven to a screaming hot 450°F (232°C). This preheating needs to start about 20 minutes before you bake, and you want to put a shallow pan, like an old metal broiler pan, on the bottom rack while it heats up. This pan is what makes the steam.
Right before the loaves go in, slash the tops three times diagonally with a razor blade or a very sharp knife. These slashes guide where the bread expands. Now, carefully—and I mean CAREFULLY—open the oven and pour about one cup of very hot water into that shallow, hot pan on the bottom rack. Close the door immediately! That steam is what keeps the surface of your dough moist so it can expand without cracking unevenly. Trust me, I’ve sputtered myself a few times adding that water; keep your face clear of the door when you pour! This environment is the key to nailing that beautiful, shattering crust for your classic french baguette recipe. Bake for 20 to 25 minutes until it’s deep golden brown, then cool it totally on a rack.
If you want more tips on how bakers achieve amazing crusts, check out this great guide on baking techniques!
Tips for Success When Baking French Bread
Even with the best recipe, sometimes things don’t go exactly as planned, right? That’s why I always keep a few easy recovery plans tucked away. These little tweaks are what take this recipe from great to absolutely foolproof, addressing any little hiccups you run into while trying to master your french bread.
How to Get a Softer French Bread Recipe Result
If you followed the steps above but took one look at that steaming oven and thought, “Nope, too crusty for my kids!”—don’t panic! You can easily pivot to a lovely, soft loaf. The traditional method relies on that boiling hot water pan in the oven to create that thick, crackly exterior. For a softer result, just skip using the steam pan entirely. Then, the very moment you pull the bread out of the oven after baking, brush the top lightly with some melted butter. That simple step traps moisture right at the surface, giving you a much more tender crust, perfect for a satisfying soft french bread recipe.
Achieving a Quick French Bread Rise
I know sometimes you just need that loaf ready faster than 90 minutes total—who hasn’t been there? If you’re looking for that quick french bread experience, you can nudge the yeast along. Use water that is actually on the warmer side of the recommended range, aiming closer to 120°F. This speeds up fermentation! Just be extremely cautious; if you get the water much hotter than 125°F, you’ll accidentally cook your yeast, and then your dough won’t rise at all. A fast rise comes from active yeast, not boiling water!
Serving Suggestions for Your Rustic Bread Recipe
So, you’ve got your beautiful, crusty loaf cooling—what now? This rustic bread recipe is so versatile because it’s humble; it tastes amazing plain, but it’s a powerhouse when paired with other things. Forget just slicing it for toast! Try dipping chunks of it into a hearty stew or chili—it soaks up all the good bits perfectly.
Honestly, my favorite thing to do is slice it thin, brush it with olive oil, garlic powder, and Italian herbs, and bake it for ten minutes until it’s crisp. Boom—instant, incredible garlic bread! It’s also the perfect flat base for a simple but elegant cheese board, offering a solid foundation for delicious toppings.
Storage and Reheating Instructions for Homemade French Bread
Listen, this incredible crust is a one-day wonder. The best flavor and texture you’ll get from this french bread is truly the day it comes out of the oven. That satisfying crackle fades quickly, so try to eat most of it immediately!
If you have leftovers, don’t put them in the fridge! The fridge turns that tender interior hard. Just wrap the loaf loosely in a paper bag or a clean kitchen towel and keep it on the counter at room temperature.
When you are ready for a slice later, revive that crust! Pop the cooled loaf right back into a 350°F oven for just five to seven minutes. That quick blast of dry heat re-crisps the exterior perfectly. Never, ever use a microwave; it just makes the bread rubbery!
Frequently Asked Questions About Making French Bread
I get so many questions after people try this french bread recipe for the first time! It’s natural, especially when you’re diving into baking from scratch. I’m happy to clear up the biggest queries I see in the comments almost every week, hopefully saving you a trip back to the mixing bowl for adjustments.
Can I make this a no knead french bread?
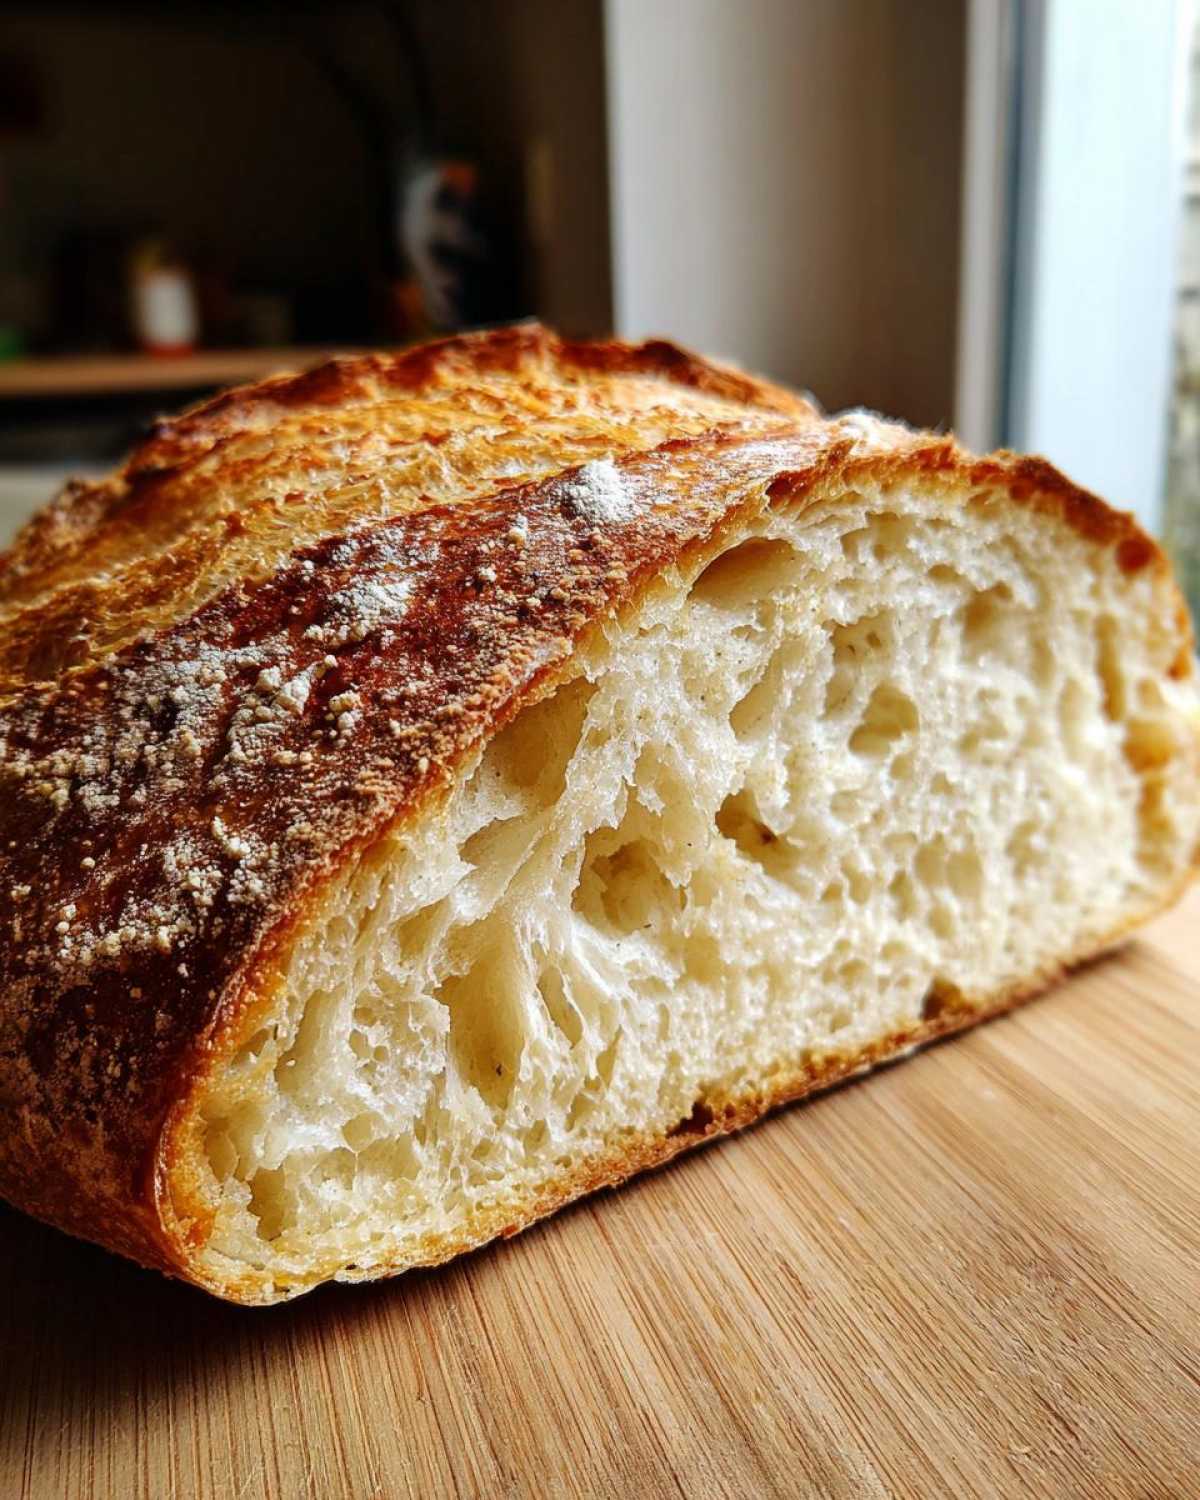
That’s a great question, because sometimes we just want to mix and walk away! For this specific texture that gives us that amazing, shatteringly crisp crust, kneading is really important. Kneading develops the gluten structure we need to hold that steam and create those huge, airy pockets you see in the picture. If you try to make this a no knead french bread, the dough won’t develop enough strength, and you’ll likely end up with a dense, gummy loaf instead of that light crumb structure. For this classic style, stick to the kneading! If you truly hate kneading, maybe try a super simple sandwich bread homemade recipe next time which is often designed to be no-knead.
What is the difference between this and a 90 minute bread recipe?
That’s hitting on the reality of bread baking—timing versus quality! A true 90 minute bread recipe usually rushes the rising process significantly. They often use way more yeast or rely on warmer temperatures to force the dough to double quickly. While it gets you bread fast, those quick rises don’t allow the flavor molecules to develop as nicely.
My approach here is focused on getting you fantastic results without taking all day. Our total time is around two hours and fifteen minutes. Yes, that’s technically longer than 90 minutes, but those extra 45 minutes are dedicated to the slow, gentle rise that builds real flavor and a superior texture. We prioritize quality over hitting that insane, rushed timeline for this homemade french bread recipe.
Can I use this dough for dinner roll bread recipe variations?
Absolutely, you can! This base dough is sturdy enough to handle shaping into smaller pieces, making it a wonderful foundation for a simple dinner roll bread recipe. The key change is in the second proofing and the baking time.
After you divide and shape the dough into rolls instead of a long loaf, they only need about 20 minutes for that final rest—they have much less volume to fill up! Because the rolls are smaller, they are going to bake much faster, too. Instead of 20 to 25 minutes, keep a close eye on them; they might be perfectly golden brown and done in as little as 15 minutes. Check out this guide on baking safety just to be sure you handle that hot oven correctly!
Estimated Nutritional Information for French Bread
I always try to include this information for everyone who tracks things, but please take this table with a huge grain of salt! Baking is an art, and the way the flour absorbs water or how thick you slice the final product completely changes the numbers.
This data is calculated based on the full recipe yield (one large loaf), divided into what I consider a standard single serving slice size. These estimates are based on standard ingredient calculations, so they will drift a tiny bit depending on what brand of flour or salt you use. If you check out the disclaimers on nutritional analysis, you’ll see why!
- Serving Size: 1 slice
- Calories: 150
- Fat: 0.5g
- Carbohydrates: 31g
- Protein: 4g
- Sugar: 0.5g
- Sodium: 300mg
Share Your Homemade French Bread Creations
Now that you have conquered the steam and pulled that perfect, crackling loaf out of your oven, I absolutely need to hear about it! Don’t leave me hanging!
Please take a moment, snap a picture of that beautiful **french bread**, and drop it in the comments below. I want to see your results—tell me if you went for that deep, rustic golden brown on the crust, or if you opted for the brushed-butter softness!
If you loved this recipe, giving it a quick star rating helps other bakers find the best way to make homemade french bread. Happy baking, everyone!
PrintClassic Crusty Homemade French Bread
Make bakery-style French bread at home. This recipe yields a loaf with a crisp, crackly crust and a soft, airy interior.
- Prep Time: 20 min
- Cook Time: 25 min
- Total Time: 2 hours 15 min
- Yield: 1 large loaf
- Category: Baking
- Method: Baking
- Cuisine: French
- Diet: Vegetarian
Ingredients
- 3 cups all-purpose flour
- 1 1/2 teaspoons salt
- 1 teaspoon instant yeast
- 1 1/4 cups warm water (about 105-115°F)
- 1 tablespoon cornmeal for dusting
Instructions
- In a large bowl, whisk together the flour, salt, and yeast.
- Pour in the warm water and mix with a wooden spoon until a shaggy dough forms. Do not overmix.
- Turn the dough out onto a lightly floured surface. Knead for 5 to 7 minutes until the dough is smooth and elastic. (For softer bread, knead for only 3 minutes.)
- Place the dough in a lightly oiled bowl, turning once to coat. Cover the bowl with plastic wrap and let it rise in a warm place for 1 to 1.5 hours, or until doubled in size.
- Gently punch down the dough. Turn it onto a lightly floured surface and shape it into a long, even loaf or two smaller baguettes.
- Place the shaped loaf(ves) on a baking sheet lined with parchment paper dusted with cornmeal. Cover loosely and let rise for 30 minutes.
- Preheat your oven to 450°F (232°C) 20 minutes before baking. Place a shallow pan on the bottom rack to create steam.
- Just before baking, use a sharp knife or razor blade to make three diagonal slashes across the top of the bread.
- Carefully pour 1 cup of hot water into the shallow pan on the bottom rack and quickly close the oven door.
- Bake for 20 to 25 minutes, or until the crust is deep golden brown.
- Remove the bread from the oven and cool completely on a wire rack before slicing.
Notes
- For a softer crust, omit the water pan in the oven and brush the top of the loaf lightly with melted butter immediately after removing it from the oven.
- If you prefer a quicker rise, use slightly warmer water (120°F) and place the dough in a slightly warmer spot.
- If you want a more rustic look, use a baking stone instead of a baking sheet.
Nutrition
- Serving Size: 1 slice
- Calories: 150
- Sugar: 0.5
- Sodium: 300
- Fat: 0.5
- Saturated Fat: 0.1
- Unsaturated Fat: 0.4
- Trans Fat: 0
- Carbohydrates: 31
- Fiber: 1
- Protein: 4
- Cholesterol: 0