

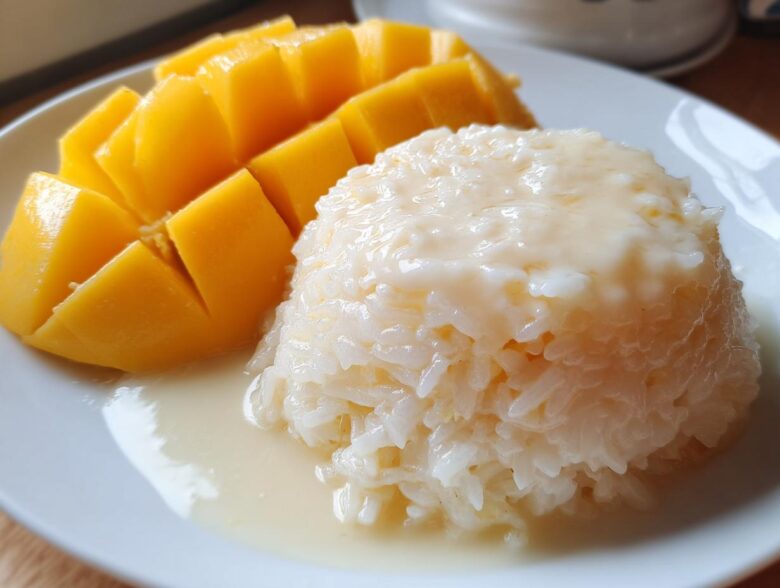
Oh my goodness, if there is one dessert that instantly transports me back to a sunny street stall in Bangkok, it’s this one. The combination of warm, sweet sticky rice soaking up that rich coconut milk and being paired with cool, perfectly ripe mango—it’s just heaven, right?
I spent years trying to replicate that street-side magic at home, and trust me, I failed gloriously a few times. The rice was either hard or mushy! But I kept testing different soaking times and steaming methods until I cracked the code. This recipe for mango sticky rice is the one. It’s genuinely authentic, super easy now that I’ve worked out the kinks, and it delivers that unmistakable, restaurant-quality flavor every single time.
Seriously, if you think making Khao Niao Mamuang is too complicated, just stick with me. You’re going to nail this beloved Thai Dessert Recipe.
Why This Is the Best Mango Sticky Rice Recipe
You might see lots of recipes out there, but I promise you, this one is different. I’ve tweaked and tested this method until it was foolproof. When you want that perfect Creamy Coconut Rice, you need simplicity and precision. Here’s why you should trust my version for your next tropical treat:
- Amazingly Fast Prep: Even with the necessary soaking time, the hands-on time is just about 20 minutes! That’s less time than it takes to run to the specialty store for dessert.
- Authentic Flavor Guaranteed: We are using the right type of rice and a perfectly balanced salty-sweet sauce. This truly tastes like the best Sweet Rice With Mango from Thailand.
- Dietary Friendly Hero: This recipe is naturally Vegan and Gluten Free Dessert friendly, making it a fantastic, show-stopping option for anyone with dietary restrictions. How great is that?
- Foolproof Sauce: My instructions for the Coconut Milk Sauce Recipe guarantee that gorgeous, slightly savory glaze every single time—no scrambling or boiling necessary.
- Crowd Pleaser: Seriously, the reaction you get when you serve this decadent tropical treat is worth every single grain of rice you soak!
Ingredients for Authentic Mango Sticky Rice (Khao Niao Mamuang)
Okay, let’s talk about what you need to grab from the store. Getting the right components makes all the difference here, especially for that gorgeous Creamy Coconut Rice. This recipe is designed to serve about four people happily, but honestly, if you love leftovers, you might want to double it!
Don’t substitute the rice! That’s my biggest plea. If it doesn’t say “glutinous” or “sweet” rice, it won’t absorb the liquid the right way, and you won’t get that signature texture for your amazing mango sticky rice.
Essential Components for Creamy Coconut Rice
This is for cooking the rice and the main soaking mixture. We need that luscious, rich liquid to flavor every single grain.
- 2 cups sweet (glutinous) sticky rice—please soak this overnight if you can!
- 1 1/2 cups thick coconut milk (only use the full-fat stuff, trust me on this!)
- 1/2 cup granulated sugar
- 1/2 teaspoon salt
Topping Sauce and Garnish Ingredients
These little bits are what take it from home-cooked to looking like a perfect Summer Dessert Recipes masterpiece at a Thai restaurant. The final drizzle is crucial!
- 1/4 cup extra coconut milk for topping—again, full-fat is best here.
- 1 tablespoon sugar for the topping sauce
- A tiny pinch of salt for the topping sauce—this is important for balancing the sweetness!
- 2 ripe mangoes—we’ll talk about picking them in a bit!
- 1 tablespoon toasted sesame seeds for garnish (optional, but they add such a nice crunch!)
Step-by-Step Instructions for Perfect Mango Sticky Rice
This process might look like a few steps, but honestly, most of the time is just waiting while the rice does its thing! If you follow this sequence, you will end up with amazing, glossy, flavorful mango sticky rice that tastes like you bought it fresh from a street vendor. Don’t rush the resting phase; that’s where the magic happens for the Sweet Sticky Rice!
Preparing the Sweet Sticky Rice Base
We start with the rice because it needs time to get soft first. You absolutely must rinse your sticky rice until the water that drains off is totally clear—no cloudy starch leftover! After that rinsing, drain it really well and soak it. I prefer to soak mine overnight, at least four hours minimum, otherwise, it just stays chewy in the middle. Once it’s plumped up, drain off all that soaking water.
Now for cooking. You can steam this for about 25 to 30 minutes, which gives a lovely texture, or you can use the cheat method in a rice cooker! If you use a cooker, just use the same ratio you would for regular white rice, maybe even a little less water, because the pre-soaking did most of the work. When it’s done, it should look soft but still hold its shape—not gloopy!
Making the Rich Coconut Milk Sauce Recipe
While the rice is steaming, get your main sauce going. In a little saucepan—keep the heat low to medium-low—put in that big batch of coconut milk, the sugar, and the salt. Here’s the key: heat it gently until the sugar and salt are totally dissolved. Do NOT let it boil! If it boils hard, the coconut milk can split, and we want smooth richness, not curdled sadness. Once dissolved, take it off the heat.
When that hot, freshly cooked sticky rice is transferred into a bowl, immediately pour about three-quarters of that warm sauce right over the top. Stir it carefully—you don’t want to mash the grains, just coat them. Cover that bowl super tightly, either with plastic wrap right onto the surface or a tight lid, and let it sit undisturbed for 30 minutes. This quiet time is when the rice absorbs all that glorious flavor!
Finishing the Topping Sauce and Assembly of Mango Sticky Rice
While your rice is soaking up the goodness, quickly make the thin finishing sauce. This sauce is just the remaining small amount of coconut milk, a tablespoon of sugar, and a pinch of salt. Heat this gently again until the sugar dissolves. Keep this separate—we drizzle this on top right before eating.
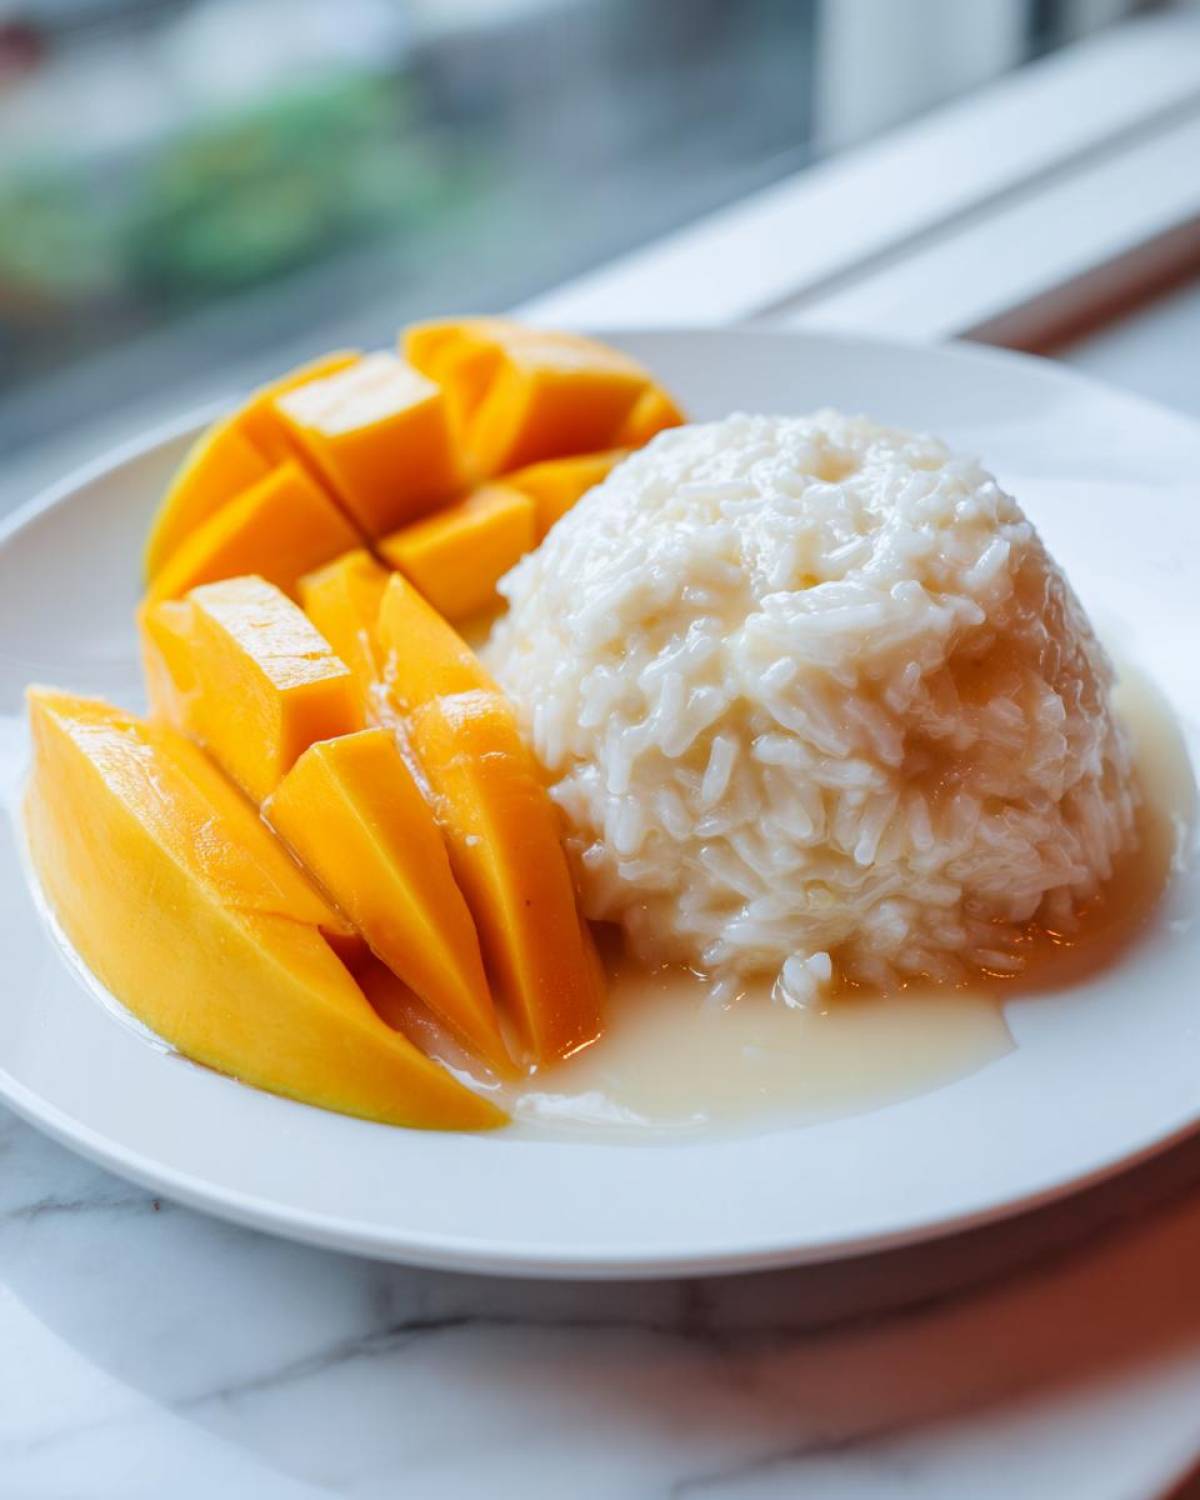
Once the rice has rested, it should look glossy and stick together perfectly. To get that Restaurant Quality Dessert plating, put a nice scoop of the sweet coconut rice on your plate. Then, artfully arrange your slices of ripe mango right next to it. Take that small topping sauce and drizzle it lightly over the rice and the mango. A sprinkle of sesame seeds, and boom! You’re done! Serve it while the rice is still warm.
Tips for Success When Making Homemade Sticky Rice
Making great mango sticky rice isn’t hard, but there are two spots where people often trip up: the rice itself and—surprise—the mango! I’ve learned that even the best coconut sauce can’t fix sub-par components. Once you master these two areas, you’re basically a Thai dessert master, I swear!
My biggest piece of advice, which I learned the hard way, is to treat the soaking process like a sacred ritual. If you skip that long soak for your glutinous rice, you end up with hard little pebbles, no matter how much coconut milk you throw at them later. If you find yourself short on time, at least give it the longest soak you possibly can manage; don’t try to fast-track that step!
Also, a little trick my local grocer taught me: when you’re draining the rice *after* the soak, make sure that water is completely gone. Soggy, un-drained rice equals gummy, sad Creamy Coconut Rice because the water you add in the cooker doesn’t know how to behave when it’s already half-full of old water!
Regarding the texture, remember that you want the rice to be sticky, yes, but not a solid block of goo. The 30-minute rest after adding the first batch of sauce is vital. It allows the liquid to gently steam and fluff the grains internally while they sit covered, rather than just boiling them on the stove, which ruins the structure of the Sweet Sticky Rice.
Selecting the Best Ripe Mango Dessert Fruit
You absolutely cannot make amazing mango sticky rice with mediocre mangoes. It’s a non-negotiable truth! Since this is a simple dessert, the quality of the fruit shines through, so we need to pick them like seasoned pros.
When I go to the market, I ignore the ones that look perfectly smooth and unblemished; those are usually rock-hard and will taste sour. Instead, I look for the fragrant ones. You should be able to catch a lovely, sweet tropical scent right near the stem end. If it smells like nothing, it will taste like nothing!
Next, gently feel the mango. You want it to give just a little bit when you press lightly with your thumb—not mushy, oh no! If it’s hard as a baseball, leave it, because it needs days on the counter. If it feels squishy, it’s past its prime and might be fibrous or brown inside. That gentle springiness means the sugars have fully developed, making it the perfect addition to your Ripe Mango Dessert.
Once you’ve got your perfect mangoes, slicing is straightforward. Just stand the mango up and slice down along the wide, flat seed in the center. You end up with two beautiful cheeks. Score the flesh in a crisscross pattern, being careful not to cut through the skin, and then you can push the skin side up to invert the flesh. Perfect little cubes are ready to go right onto your Sweet Rice With Mango!
Storage and Reheating Instructions for Mango Sticky Rice
I know, I know, this mango sticky rice is usually eaten immediately because it’s just too good to save, but sometimes we have too much, or maybe you made a batch just for meal prepping this Easy Asian Dessert! Here is what you absolutely *must* do so that your leftovers taste almost as good as fresh. The main problem is that cold sticky rice gets hard, like little pebbles, because the starch tightens up when it’s chilled.
My iron-clad rule is to always keep the sticky rice separate from the fresh mango slices and the topping sauce. The mango is going to get slimy and weird if you put it in the fridge in a container, and the topping sauce separating is just a visual nightmare.
For the leftover sweet rice, if you can avoid the fridge, do it! If you have a semi-cool pantry or space where it won’t spoil, keep it in an airtight container at room temperature for up to 24 hours. It will harden slightly, but it helps.
Restoring Texture to Refrigerated Sticky Rice
If you *must* store the rice for more than a day, or if you couldn’t keep it cool, then yes, it needs the fridge in an airtight container. When you are ready to eat it, do not try to eat it cold—it’s just not enjoyable! You need to put some moisture back in it.
The best trick here is the microwave, but you have to be careful! Place the portion of rice you want to eat in a microwave-safe bowl. Take a tiny splash of plain water or fresh coconut milk if you have some extra—maybe a teaspoon at first—and just drizzle it lightly over the rice. Cover the bowl with a damp paper towel. Microwave it in short 15-second bursts. This steam helps soften those starches right back up! It should be soft and pliable again, ready for your mango.
Storing the Coconut Milk Sauce Topping
The topping sauce is super easy because it’s mostly fat and sugar, which are great preservatives. Keep that small amount of topping sauce in a tiny jar in the fridge. Since it has less sugar than the main soaking sauce, it might firm up a bit, but don’t panic!
When you reheat it, just put the jar in a bowl of hot tap water for a few minutes to loosen it up, or give it 5–10 seconds in the microwave. You want it warm and pourable so you can drizzle it beautifully over your revived Homemade Sticky Rice.
Never pour the cold sauce over the hot rice! Always warm the topping slightly so it doesn’t re-harden the rice grain you just softened.
Frequently Asked Questions About Khao Niao Mamuang
I love hearing from you all about your adventures making this wonderful dessert! Since I’ve run this recipe so many times, I’ve gathered a few questions I hear often about making the perfect Khao Niao Mamuang. I hope these quick answers help you feel super confident about your next batch of Simple Thai Sweets!
Can I substitute the sticky rice with regular rice in this Thai Dessert Recipe?
Oh, please don’t! I know it’s tempting if you are in a pinch, but this is the one place where you really need to stick to the recipe. Regular rice, like jasmine or long-grain, just doesn’t have the right starch structure. Regular rice soaks up the liquid, sure, but it dissolves into mush or becomes watery. You need sweet glutinous rice (sometimes called sweet rice) because its high amylopectin content is what allows it to absorb all that coconut milk while staying tender, sticky, and capable of holding that beautiful shape for your final mango sticky rice presentation.
Is this recipe naturally Gluten Free Dessert friendly?
Yes, absolutely! This is one of the best things about this wonderful Tropical Fruit Recipe. Since the core ingredients are just glutinous rice, coconut milk, sugar, salt, and mango, there is zero wheat, barley, or rye involved. It’s naturally free of gluten. As long as you aren’t adding any weird ingredients to the topping (like some specialty soy sauces you might find in other Asian desserts), this is a wonderfully safe and decadent treat for anyone avoiding gluten. Enjoy that Best Mango Dessert worry-free!
- If you happen to check out our policy on ingredients, you can read more about our general approach here: our official page.
Nutritional Estimates for Mango Sticky Rice
Alright, let’s quickly talk about the numbers. I always feel like eating this spectacular mango sticky rice should be a guilt-free experience, but for those of you who follow macros or just want an idea of what you’re enjoying, I’ve put together the basic estimates.
Remember, these figures are just ballpark estimates. We’re using full-fat coconut milk, which is totally necessary for the texture, so expect the fat content to be significant, but oh, is it worth it for that perfectly Creamy Coconut Rice! We’re talking about one serving here, which is often more than enough if you manage to save some for later.
I always keep these numbers in mind, but honestly, when you create something this delicious, sometimes you just have to decide it’s part of your weekly requirement for joy! If you want to dive deeper into how we calculate these figures, you can always check out our general disclaimer page regarding nutrition specifics.
- Serving Size: 1 serving
- Calories: 450
- Sugar: 35g
- Sodium: 250mg
- Fat: 20g (Mostly the good kind from the coconut milk!)
- Saturated Fat: 18g
- Unsaturated Fat: 2g
- Trans Fat: 0g
- Carbohydrates: 65g
- Fiber: 2g
- Protein: 5g
- Cholesterol: 0mg
See? Plenty of energy in that glorious bowl of Sweet Rice With Mango to keep you going! Enjoy every bite of this tropical pleasure.
Share Your Homemade Sweet Rice With Mango Creation
Whew! We did it! We have successfully navigated the crucial steps needed to create the most authentic, stunning mango sticky rice outside of Thailand. I truly hope your kitchen smells heavenly right now with that perfect blend of sweet coconut and fresh mango.
This recipe is a labor of love, and I put all my best knowledge into these steps to ensure you get that incredible texture every time. Now that you’ve made this Decadent Tropical Treat, I absolutely want to hear all about it!
Please, please take a moment to rate this recipe with five glorious stars down below if you loved how easy and authentic it turned out. And don’t be shy in the comments section!
Tell me what happened! Did you use the Ataulfo mangoes or the Kent variety? Did you find a good brand of thick coconut milk? Hearing your little victories as you master this Simple Thai Sweets recipe truly makes my day, I can’t tell you. I read every single comment!
Snap a picture of your plated dessert—that perfect drizzle of sauce over the rice and mango looks stunning on social media! Tag me so I can see your presentation skills. I adore seeing how you all style your final Sweet Rice With Mango creations. Happy eating, friends!
PrintAuthentic Mango Sticky Rice (Khao Niao Mamuang)
Follow these steps to make creamy, sweet coconut sticky rice served with fresh, ripe mango and a rich coconut glaze.
- Prep Time: 20 min
- Cook Time: 35 min
- Total Time: 55 min
- Yield: 4 servings
- Category: Dessert
- Method: Steaming/Soaking
- Cuisine: Thai
- Diet: Vegan
Ingredients
- 2 cups sweet (glutinous) sticky rice
- 1 1/2 cups thick coconut milk (full fat)
- 1/2 cup granulated sugar
- 1/2 teaspoon salt
- 1/4 cup extra coconut milk for topping
- 1 tablespoon sugar for topping
- Pinch of salt for topping
- 2 ripe mangoes, peeled and sliced
- 1 tablespoon toasted sesame seeds for garnish (optional)
Instructions
- Rinse the sticky rice under cold water until the water runs clear. Soak the rice in water for at least 4 hours, or preferably overnight. Drain the soaked rice well.
- Steam the drained sticky rice for 25 to 30 minutes until it is tender and cooked through. Alternatively, cook the rice in a rice cooker using the minimum amount of water required for regular rice.
- While the rice cooks, prepare the sweet coconut sauce. In a small saucepan, combine 1 1/2 cups coconut milk, 1/2 cup sugar, and 1/2 teaspoon salt. Heat over medium-low heat, stirring until the sugar and salt dissolve completely. Do not boil.
- Transfer the hot, cooked sticky rice to a bowl. Pour about 3/4 of the warm coconut sauce mixture over the rice. Stir gently to combine. Cover the bowl tightly with plastic wrap or a lid and let it sit for 30 minutes to allow the rice to absorb the liquid completely.
- Prepare the topping sauce. In a separate small saucepan, combine the remaining 1/4 cup coconut milk, 1 tablespoon sugar, and a pinch of salt. Heat gently until the sugar dissolves. Set aside.
- To serve, place a portion of the sweetened sticky rice on a plate. Arrange slices of fresh, ripe mango next to the rice.
- Drizzle the reserved topping sauce over the rice and mango. Sprinkle with toasted sesame seeds, if using. Serve immediately.
Notes
- For the best texture, use sweet glutinous rice, often labeled as sticky rice. Do not substitute with regular long-grain rice.
- If you prefer a thicker sauce, you can simmer the topping sauce slightly longer until it reduces a little.
- Select mangoes that are fragrant and yield slightly to gentle pressure for optimal sweetness.
Nutrition
- Serving Size: 1 serving
- Calories: 450
- Sugar: 35
- Sodium: 250
- Fat: 20
- Saturated Fat: 18
- Unsaturated Fat: 2
- Trans Fat: 0
- Carbohydrates: 65
- Fiber: 2
- Protein: 5
- Cholesterol: 0