

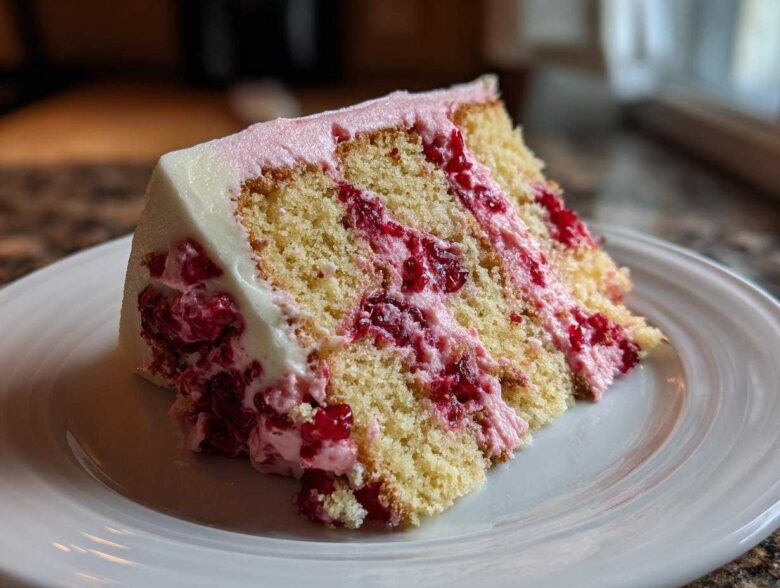
Oh, there is truly nothing like the smell of a homemade cake filling the kitchen! Forget those dry, disappointing box mixes; when you bake from scratch, you control the moisture and the bright, beautiful flavor. I spent years trying every frosting and filling imaginable until I finally nailed down what I think is the absolute best Cherry cake recipe out there. We are making my Classic Layered Cherry Cake today, and trust me, it’s moist, tender, and absolutely perfect for birthdays or just when you need a major dose of cherry goodness. It’s my go-to for celebrations!
Why This Classic Layered Cherry Cake Stands Out
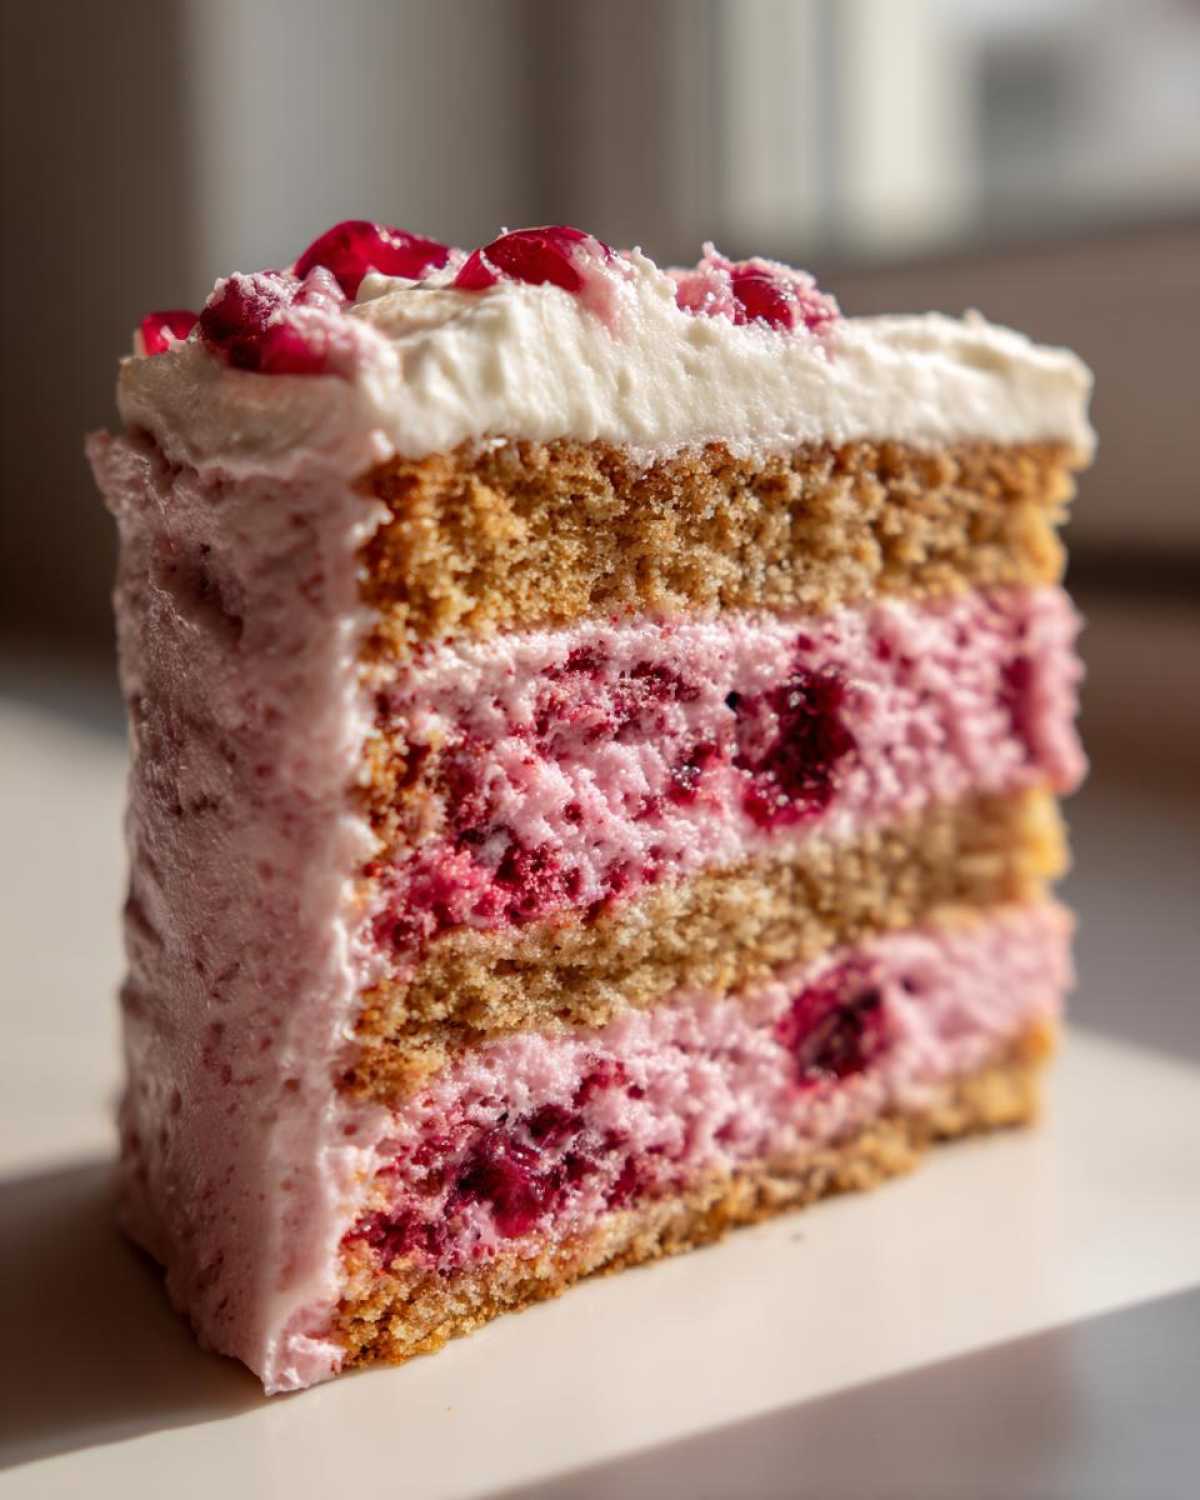
I’ve made so many cherry desserts in my life—some were stunning, and some were, well, let’s just say disappointing crumbles! This layered version is genuinely my favorite creation. It hits all the right notes, making it the Best Cherry Cake you’ll probably ever bake. It’s reliable, bright, and looks incredible stacked up high!
- Incredible, genuine cherry flavor that doesn’t taste artificial.
- The texture is soft and moist—never crumbly or dry!
- It brings that beautiful, celebratory pink hue that everyone loves.
Achieving Perfect Moisture in Your Cherry Cake
The secret to keeping this cake super moist lies right in the liquid measurements. We swap out some of that plain milk for pure cherry juice, which pumps flavor right into the crumb structure. A big tip: make sure you stop mixing the second those last streaks of flour disappear. Overmixing develops gluten, and nobody wants a tough cake when aiming for moistness!
Ingredients for the Best Cherry Cake Recipe
When it comes to baking from scratch, getting the ingredients spot on is half the battle won. Knowing exactly what you need makes this such an Easy Cherry Cake Recipe to pull off, even if you’re new to layered cakes. I always lay everything out on the counter first; it saves so much time and prevents those frantic last-minute searches! We are dividing these components up so you know exactly how much prep work to do before hitting the mixer.
Dry Ingredients for the Cherry Cake Batter
Make sure your measurement cups are leveled off for these dry goods. Accuracy here sets the whole cake structure up for success!
- 1 1/2 cups all-purpose flour
- 1 1/2 teaspoons baking powder (the good, fresh stuff!)
- 1/2 teaspoon salt
Wet Ingredients and Cherries for Your Cherry Cake
This is where all the moisture and that beautiful flavor comes from, so pay close attention to the cherries! Remember, using the liquid from canned cherries—that bright red juice—is key to getting that lovely color throughout the batter. If you use fresh or frozen cherries, make sure you chop them small so they distribute evenly instead of sinking right to the bottom of your layers.
- 1/2 cup unsalted butter, softened (room temp is crucial!)
- 1 cup granulated sugar
- 2 large eggs
- 1 teaspoon vanilla extract
- 1/2 cup milk
- 1/2 cup cherry juice (from canned cherries or fresh puree)
- 1 cup chopped fresh or frozen pitted cherries (if frozen, do not thaw)
- 1/2 cup cherry frosting or cream cheese frosting (for assembly later!)
Step-by-Step Instructions for Homemade Cherry Cake
Alright, let’s get into the mixing because this is where the magic happens! Getting your technique right for this cherry cake means the difference between a spectacular dessert and one that stresses you out. We’re following these steps precisely because they were mapped out to give you that perfect, tender crumb every single time. No lumps, no dense spots, just pure, fluffy cake!
Preparing Pans and Dry Mix for the Cherry Cake
First things first: grab those two 8-inch round pans and get them ready to go! You need to preheat your oven to 350 degrees F (175 degrees C). I know it feels early to do this, but hot ovens dry out batter if you wait! After greasing (I use butter or cooking spray), you have to dust them thoroughly with flour. Seriously, don’t skip this—nothing ruins a great cake faster than sticking to the pan. While the oven gets hot, whisk your flour, baking powder, and salt together in a bowl. It’s simple, but making sure everything is evenly distributed in the dry mix is crucial for an even rise.
Mixing the Batter and Folding in Cherries
Now for the creamy part! In your big bowl, cream that softened butter and sugar until it looks fluffy and pale yellow. Remember, this creaming step whips air into your mixture, which is the backbone of a light cake. Then, beat in your eggs one at a time—make sure the first is fully incorporated before adding the next one. Vanilla goes in here, too. Next, we alternate! You need to add the dry ingredients gradually, switching back and forth with your milk and that gorgeous cherry juice. Start and end with the dry stuff! Mix only until it’s *just* combined. I’m telling you, stop mixing right there; if you keep going, you’ll deflate all that lovely air. Finally, gently fold in those chopped cherries.
Baking and Cooling Your Layer Cake Recipes
Divide the batter carefully between your two prepared pans. Slide them into that hot oven and let them bake for about 28 to 32 minutes. You’ll know they are done when a wooden pick inserted right in the center comes out clean—no wet batter clinging to it! Once they pass the test, let them sit cool in the pans for exactly 10 minutes. Resist the urge to flip them out early! After that short cool-down, invert them onto a wire rack to finish cooling completely. This two-stage cooling process is vital for all great layer cake recipes to prevent them from cracking or sticking while they settle.
Tips for Success When Making a Cherry Cake
Honestly, baking is forgiving, but these little tricks just elevate your cake from good to absolutely unforgettable. My experience baking this cherry cake dozens of times has taught me a few non-negotiable steps that guarantee success, especially if you aren’t following a recipe to the letter.
Ingredient Notes and Substitutions for Cherry Cake
If you want that vibrant, movie-poster red in your layers, don’t be shy with a few drops of red food coloring mixed into the batter, especially if you are using lighter pink cherries! Also, if you decide to use fresh cherries instead of the canned/frozen ones, you must do the ‘dusting’ trick. Toss those chopped fresh cherries lightly in about a tablespoon of flour before folding them in. This keeps them from sinking straight to the bottom when baking. For frosting, if you are tired of the cream cheese option, a simple drizzle made from powdered sugar and a splash of lemon juice is amazing and speaks to that Simple Cake Baking philosophy.
Serving Suggestions for Your Cherry Cake
Once you have those beautiful, stacked layers frosted, you have a dessert that seriously handles a crowd! This cake is rich enough on its own, but if you’re serving it for a big gathering or maybe as a holiday centerpiece, you should definitely amp up the toppings.
My favorite pairing is always a big dollop of freshly whipped cream. Not that canned stuff—I mean the real deal, whipped until it just holds soft peaks. The lightness of the cream cuts through the richness of the cake perfectly. Also, if you’re using this as a coffee cake alternative for brunch, serve thin slices alongside really strong, hot coffee. The slight bitterness of the coffee just makes the sweet cherry flavor pop like crazy.
You could even make a simple garnish! Grab a few extra pitted cherries, slice them thinly, and arrange them artistically around the base when you put the cake on the stand. A little sprinkle of toasted, slivered almonds on top of the icing also adds a fantastic crunch and really complements the cherry notes. It’s easy, it looks fancy, and it’s ready in two seconds!
Storage and Reheating Instructions for Leftover Cherry Cake
This truly is the best Cherry cake, which means you might actually have leftovers! Don’t stress about keeping it fresh. Since this cake has a sturdy structure, you can leave it covered at room temperature for up to two days, especially if you used a stable buttercream. If you frosted it with cream cheese icing, though, you must cover it loosely and pop it into the fridge. When you want a sliver later, just let it sit on the counter for about 30 minutes before serving so it softens up a little!
If you need to reheat a slice quickly—say, you decide you want a warm dessert later—wrap that piece tightly in a paper towel and microwave it for just 10 to 15 seconds. It brings back that just-baked softness without making it tough.
Frequently Asked Questions About Cherry Cake
I always get so many questions after people try this recipe! It’s a classic for a reason, and sometimes people want to tweak it for their own needs or try out other popular cherry desserts. Here are a few things I hear most often from fellow bakers.
Can I make this a Maraschino Cherry Cake?
Oh, absolutely! If you are looking for that beautiful, slightly sticky, almost neon pink look—which is such a fun throwback—you totally can turn this into a Maraschino Cherry Cake. The most important thing you absolutely must do is drain those jars *really* well. I usually drain them, pat them dry with paper towels, and then maybe toss them in a little extra flour before folding them in, just like I mentioned for fresh cherries. You might want to cut back on the added 1/2 cup of cherry juice slightly, since the maraschinos are already soaking in liquid.
What is the easiest way to make a Cherry Dump Cake?
That’s a totally different baking adventure, isn’t it? If you’re looking for super minimal effort, a dump cake is your friend! Unlike this beautiful layered cake where we measure every single thing and cream butter, a dump cake usually just involves layering canned pie filling, sometimes some fresh fruit, and then sprinkling dry cake mix over the top before adding butter and just… letting the oven do all the work. It’s fast, it’s great for a last-minute potluck, and it’s the definition of Easy Dump Cake Recipes, but trust me, it won’t have the elegant texture we worked so hard for here!
If you’re diving into baking questions, you should always check out our site disclaimer just to understand how we approach recipe testing and sharing!
Nutritional Estimate for This Cherry Cake
Baking is about joy, not being stuck measuring every little thing, but I know some of you like to see the numbers, so here is a general breakdown for serving up a slice of this glorious cherry cake. These figures are just estimates based on standard measurements for all-purpose flour and granulated sugar, so your actual results might shift a tiny bit depending on the brand of butter or type of frosting you choose.
- Serving Size: 1 slice
- Calories: 350
- Sugar: 35g (Yes, it’s a treat, and totally worth it!)
- Sodium: 250mg
- Fat: 16g
- Saturated Fat: 9g
- Unsaturated Fat: 7g
- Trans Fat: 0g
- Carbohydrates: 48g
- Fiber: 2g
- Protein: 5g
- Cholesterol: 80mg
Just a friendly heads-up, since everyone asks: these specific numbers assume you are using a standard cream cheese or vanilla buttercream frosting, not a super dense ganache! Baking from scratch is wonderful, but remember these figures are just good benchmarks, not hard science. If you are tracking specific dietary needs, you might want to check the labels on your own ingredients.
Share Your Homemade Cherry Cake Experience
That’s it! You’ve made the absolute best cherry cake, and now it’s time to show it off! Honestly, baking this recipe is the easy part; the hardest part is waiting for it to cool down to frost it. I hope you managed to sneak a tiny piece while it was still warm—shh, I won’t tell anyone.
When you get a moment, please come back here and leave me a star rating! Did you try the food coloring? Did you use fresh cherries or the canned ones? I want to know every single detail! Your feedback helps me make sure this recipe continues to be reliable for everyone who tries it.
If you ran into any snags or have any questions about making substitutions—maybe you want to know how to turn this into a 9×13 sheet cake next time—don’t be shy! Drop a question in the comments below. I genuinely love chatting baking with you all. And if you snapped a picture of your beautiful, fluffy layers, consider sharing it on social media and tag me so I can swoon over your creation! You can also always reach out directly if you need anything else via my contact page. Happy baking, friends!
PrintClassic Layered Cherry Cake
A simple recipe for a moist, layered cake featuring bright cherry flavor, suitable for celebrations.
- Prep Time: 20 min
- Cook Time: 30 min
- Total Time: 50 min
- Yield: 8 servings
- Category: Dessert
- Method: Baking
- Cuisine: American
- Diet: Vegetarian
Ingredients
- 1 1/2 cups all-purpose flour
- 1 1/2 teaspoons baking powder
- 1/2 teaspoon salt
- 1/2 cup unsalted butter, softened
- 1 cup granulated sugar
- 2 large eggs
- 1 teaspoon vanilla extract
- 1/2 cup milk
- 1/2 cup cherry juice (from canned cherries or fresh puree)
- 1 cup chopped fresh or frozen pitted cherries (if frozen, do not thaw)
- 1/2 cup cherry frosting or cream cheese frosting
Instructions
- Preheat your oven to 350 degrees F (175 degrees C). Grease and flour two 8-inch round cake pans.
- In a medium bowl, whisk together the flour, baking powder, and salt. Set aside.
- In a large bowl, cream the softened butter and sugar together until light and fluffy. Beat in the eggs one at a time, mixing well after each addition. Stir in the vanilla extract.
- Gradually add the dry ingredients to the wet ingredients, alternating with the milk and cherry juice, beginning and ending with the dry ingredients. Mix until just combined; do not overmix.
- Gently fold in the chopped cherries.
- Divide the batter evenly between the prepared cake pans.
- Bake for 28 to 32 minutes, or until a wooden pick inserted into the center comes out clean.
- Let the cakes cool in the pans for 10 minutes before inverting them onto a wire rack to cool completely.
- Once cooled, frost the layers with your preferred cherry frosting and stack them.
Notes
- For a brighter red color, you can use a few drops of red food coloring in the batter.
- If using fresh cherries, toss them lightly in a tablespoon of flour before folding them into the batter to prevent sinking.
- This cake pairs well with a simple vanilla buttercream or a cream cheese frosting.
Nutrition
- Serving Size: 1 slice
- Calories: 350
- Sugar: 35
- Sodium: 250
- Fat: 16
- Saturated Fat: 9
- Unsaturated Fat: 7
- Trans Fat: 0
- Carbohydrates: 48
- Fiber: 2
- Protein: 5
- Cholesterol: 80