

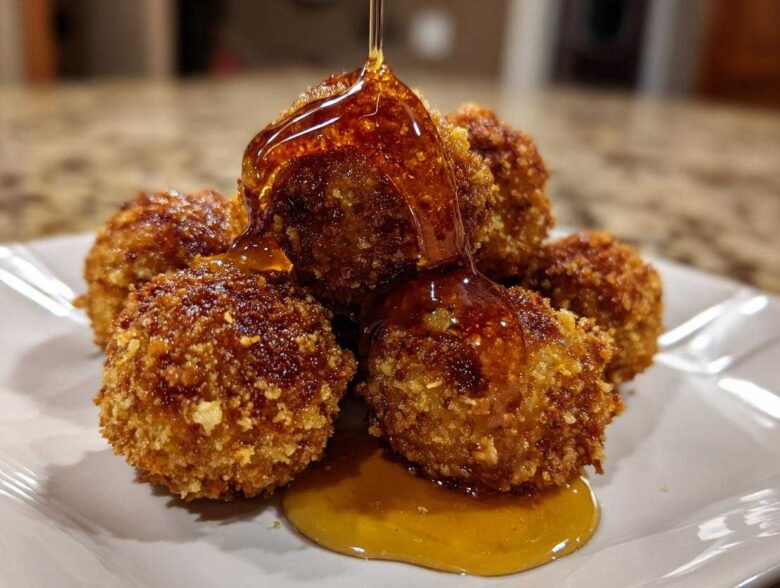
When company shows up unexpectedly, or when you just want that one show-stopping, tiny bite that disappears instantly, you need a recipe in your back pocket. Forget the fussy dips! I’m talking about the absolute best party food: wonderfully crispy on the outside, utterly creamy inside. Trust me, making these goat cheese balls has become my go-to move for entertaining.
They look incredibly gourmet, but honestly, they are embarrassingly easy to put together. If you can roll a meatball, you can master these bites. Just a quick fry, a drizzle of honey, and BAM—instant appetizer heaven.
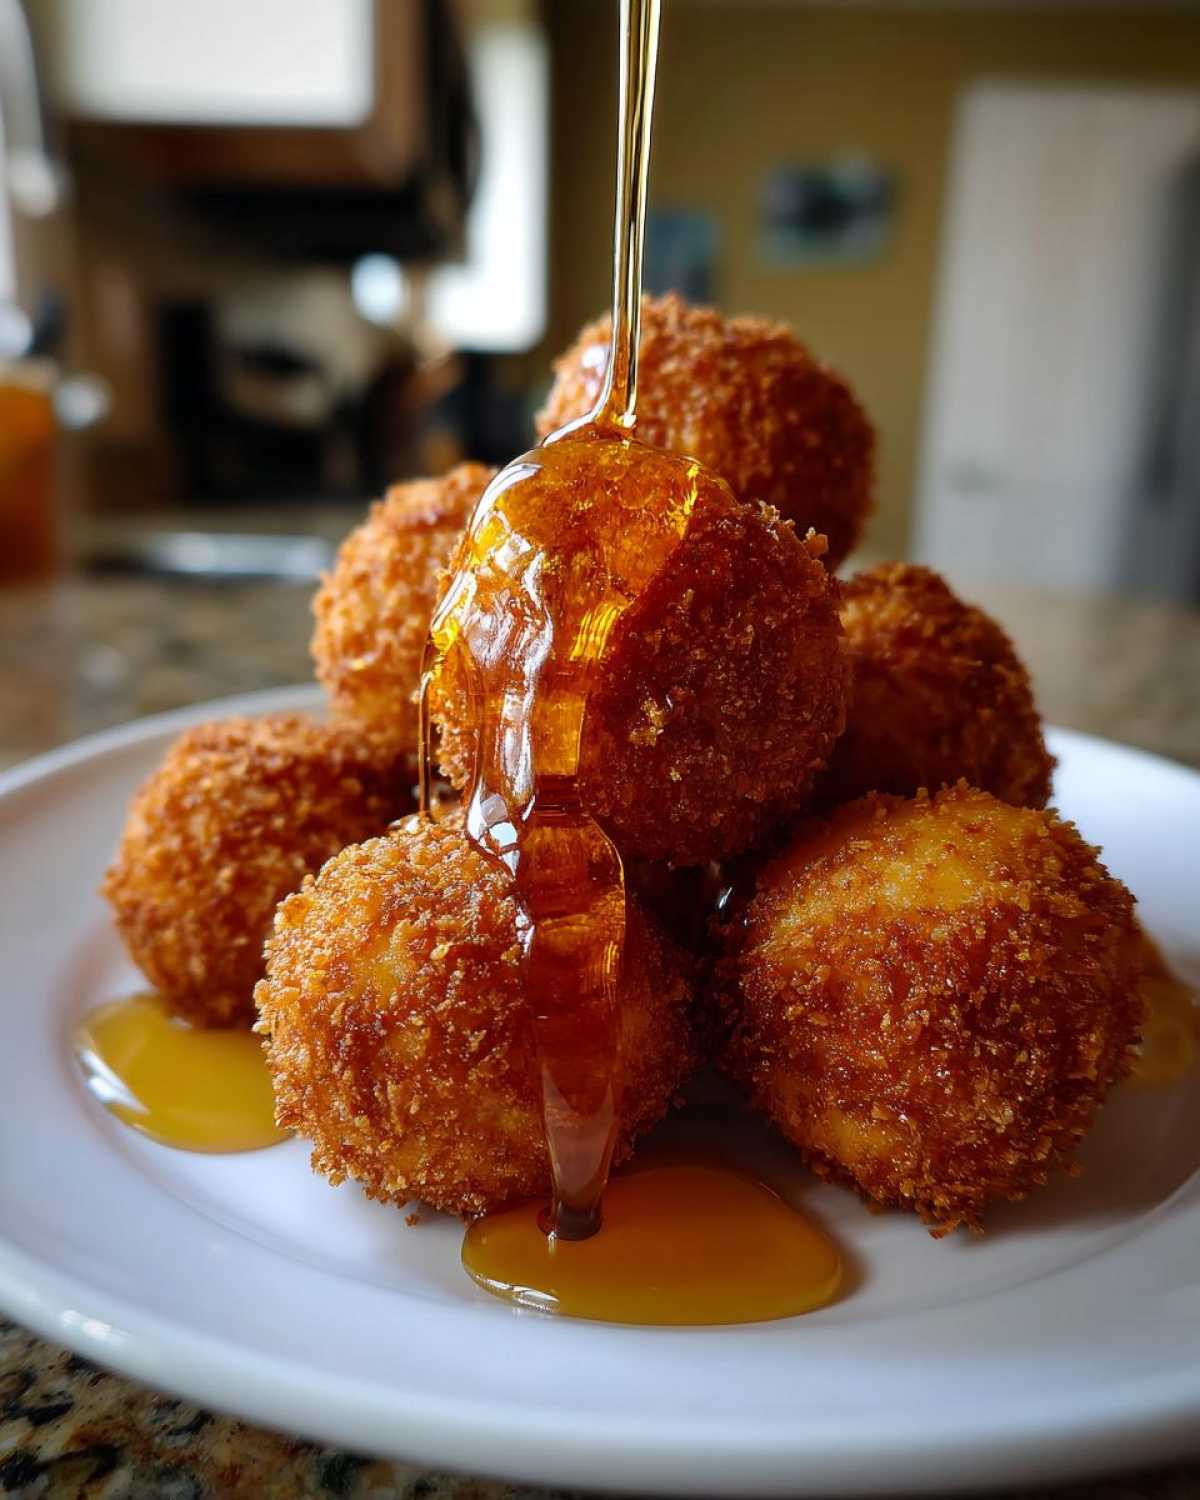
Why You Will Love These Crispy Fried Goat Cheese Balls
Honestly, why wouldn’t you love these? They tick every single box for party food perfection. If you’re looking for easy goat cheese appetizers that look like you spent hours slaving away, this is your ticket.
- They deliver an incredible dual texture: that shatteringly crisp panko crust followed by the warm, luscious, creamy center. It’s dramatic!
- These are truly some of the best entertaining snacks you’ll ever master. The shaping and coating are simple, even if you’re new to frying.
- These little golden orbs are fantastic because you can make the breaded balls ahead of time and chill them until it’s go-time.
- No fussy assembly required! Unlike a huge cheese ball that needs crackers and dips all around it, these are perfect one-bite wonders.
- The honey drizzle contrasts perfectly with the slight tang of the goat cheese. It just hits all the right notes when you bite in.
- They cook in under three minutes flat once your oil is hot, making them perfect for last-minute party prep.
Prepare to have zero leftovers when you serve these beauties up!
Essential Ingredients for Perfect Goat Cheese Balls
Okay, now we get down to brass tacks. The ingredient list for these goat cheese balls is delightfully short, which means the quality of what you use really shines through. Since there aren’t a million things masking the flavor, we need to pay attention to specifications here.
You absolutely must start with the goat cheese itself. Make sure you grab 8 oz of soft goat cheese, and I always specify (chèvre) just so people know we aren’t using some dense, aged variety. Crucially, this cheese needs to be chilled—rock solid—because trying to roll warm goat cheese balls is like trying to hug a melted stick of butter. I promise, chilly cheese is your best friend here.
For the coating, we use the classic breading trio. We need 1/2 cup of all-purpose flour, two large eggs beaten really well, and 1 cup of panko breadcrumbs. Panko—never regular breadcrumbs!—gives you that amazing crunch we are aiming for. A little salt and pepper mixed into that flour just wakes everything up. That’s it! Simple, gorgeous ingredients ready for magic.
- 8 oz soft goat cheese (chèvre), chilled
- 1/2 cup all-purpose flour
- 2 large eggs, beaten
- 1 cup panko breadcrumbs
- 1/4 teaspoon black pepper
- 1/4 teaspoon salt
- Vegetable oil, for frying
- 1/4 cup honey, for drizzling
Mastering the Coating Process for Fried Goat Cheese Balls
When you are making something this delicate—where a perfectly creamy center meets hot oil—you cannot skip the coating steps. This three-stage dredging process is what turns simple cheese rounds into beautiful, deep-golden fried cheese bites. Think of it as building tiny, protective armor for your soft cheese!
First, you want the flour. This dry layer is essential because it gives the egg something to stick to later. Shake off any excess flour; we don’t want clumps. Next, the egg wash—this acts as the glue. Dip the floured ball completely, letting it soak up the goodness. Finally, the panko! This is where we get that incredible texture. Press the breadcrumbs firmly all over the egg-coated ball. Make sure every inch is sealed before you move on to the next, very important step.
Rolling them into uniform sizes—about 1 inch—isn’t just for looks; it ensures they all cook evenly! You really don’t want half done and half burnt, do you?
The Crucial Chilling Step for Goat Cheese Balls
Listen closely, because this tip saved me from total disaster the first time I attempted these. Once all your gorgeous little goat cheese balls are breaded, you *must* put them on a tray and chill them for at least 30 minutes. Don’t try sneaking them right into the hot oil once they’re coated! The chilling time allows the breading to truly adhere to the fat, but more importantly, it firms up that chilled outer layer of cheese. If you skip this, I guarantee you will end up with little milky messes floating in your oil pot. We want crispy balls, not soup!
Step-by-Step Instructions for Frying Goat Cheese Balls
Alright, the prep work is done, and those little nuggets are nice and firm from their nap in the fridge. Now comes the exciting—and slightly scary—part: frying! Safety first, always. Make sure you use a heavy-bottomed pot or a Dutch oven for stability. You are going to heat up about two inches of vegetable oil until it hits exactly 350°F (175°C). I really, truly cannot stress this enough: get a thermometer! Trying to guess the oil temperature meant I burned batches until I finally broke down and bought a cheap instant-read one. It makes all the difference!
Once the oil is shimmering and happy at temperature, gently drop your breaded balls in. Do not crowd them! Seriously, give them space. If you put too many in at once, the oil temperature tanks, and you end up just soaking them in grease instead of frying them quickly. We are looking for a beautiful, golden-brown exterior, which usually takes just two or three minutes total. Give them a gentle nudge with a spider strainer so they turn nicely on all sides.
When they look perfect, use your slotted spoon to lift them out and set them on paper towels to catch the excess oil. The final, mandatory step is getting them onto a platter and drizzling that sweet honey right over the top while they are still piping hot. They are ready to serve immediately! If you have any questions about substitutions or need to reach out for any reason, I always check my messages here: Let me know if you need a hand.
Tips for Making Gourmet Goat Cheese Balls
Look, these goat cheese balls are fantastic on their own with just that honey drizzle, but if you want to take them up to true gourmet cheese balls status—especially for a fancier gathering—a few subtle tweaks make a huge difference. Since we are using great quality, tangy goat cheese, we don’t need to mask it, just enhance it. Think about what you love to pair with cheese!
If you are making these for a holiday event and want to use up some herbs from the garden—or just elevate the flavor profile—definitely try adding something fresh to the cheese before rolling. And hey, if you have a deep-fryer aversion or are just trying to keep things lighter, the baking option works wonders too. These are still excellent baked goat cheese appetizers!
Flavor Variations for Your Goat Cheese Balls
Want a little extra something in the mix? I always suggest finely mincing a tablespoon of fresh chives and mixing them directly into the chilled goat cheese before you start rolling. The mild onion flavor is heavenly against the tart cheese. For those who like a little kick, even a tiny pinch of cayenne pepper mixed into the flour dredge gives a surprising little warmth on the finish. It’s subtle but so tasty!
Remember that note about adding herbs to the panko? That’s another winner! Mix a teaspoon of dried thyme or even finely ground rosemary right into your breadcrumbs. It smells incredible while frying.
Storage and Reheating Instructions for Leftover Goat Cheese Balls
If you actually manage to have any goat cheese balls left over—which is rare in my house—storage is simple. Let them cool completely first, then tuck them into an airtight container. They’ll hold up nicely at room temperature for a day, but for best results, pop them in the fridge.
The microwave is strictly forbidden here; it will turn that lovely panko crust instantly soggy! If you want that wonderful crunch back, reheat them in a low oven or, even better, an air fryer for just a few minutes until they are heated through and crisp again. Don’t forget, you can also freeze them thoroughly breaded—it’s the ultimate make-ahead move for game days or unexpected guests!
Frequently Asked Questions About Simple Cheese Ball Recipes
I get so many questions about these little bites because people are always looking for the next best thing in simple cheese ball recipes. Here are a few things I hear most often when people are planning their next gathering.
Can I make these goat cheese balls without frying?
Absolutely! If you’re looking for a slightly lighter option or just don’t want to deal with the oil, you can totally make these a baked goat cheese appetizer. After you have breaded them and chilled them completely, skip the hot oil. Instead, spray those breaded beauties really well with cooking spray—don’t skimp here! Bake them on a parchment-lined sheet at 400°F (200°C) for about 10 to 12 minutes until they look nicely golden brown. They won’t be quite as shatteringly crisp as the fried ones, but they are still fantastic and fit the bill for great party food ideas with goat cheese.
What is the best way to serve these party food ideas with goat cheese?
For me, the honey drizzle is non-negotiable! Drizzling it generously over the warm balls just before serving is my favorite presentation. But if you want to spread the love around and offer another dipping option for your guests, I highly recommend pairing them with a sharp, sweet fig jam. The sweet onion flavor in a balsamic glaze also works miracles! If you’re worried about mess, just pop them onto small toothpicks, and everyone can easily grab one of these creamy cheese appetizers.
If you need to review our site policies for any reason, you can check out the details here: Our Policy Information.
Estimated Nutritional Data for Mini Cheese Balls Recipe
I always feel a little guilty when talking about fried appetizers, but I want you to have all the facts! Here is the estimated nutritional breakdown for two of these glorious little mini cheese balls recipe servings, based on the ingredients listed. Remember, as these are fried, the numbers change depending on how much oil they soak up during cooking.
These values are just estimates, of course, because every brand of goat cheese or oil behaves differently during frying. For more detailed information on how we calculate these numbers, please check out our site’s disclaimer page.
- Serving Size: 2 balls
- Calories: 180
- Fat: 14g (Saturated Fat: 8g)
- Protein: 6g
- Carbohydrates: 8g
- Sugar: 5g
See? Totally worth it for a perfect party bite!
Share Your Experience Making These Goat Cheese Balls
Now that you have everything you need to create these incredible, melt-in-your-mouth goat cheese balls, I really want to hear about it! Did you serve them for a holiday brunch, or were they the MVP snack at your last game day party?
Seriously, drop a star rating down below if you made them—five stars if they disappeared instantly, right? And if you used any of those flavor variations we talked about, like adding chives or going savory instead of sweet, let me know what you paired them with!
Were they served with that simple honey drizzle, or did you experiment with a fig jam? I love seeing how you all serve these elegant finger foods in your own kitchens. Don’t be shy; share your triumphs (or your funny little kitchen mishaps!) in the comments!
PrintClassic Crispy Fried Goat Cheese Balls with Honey Drizzle

Make these crispy fried goat cheese balls for an easy, crowd-pleasing appetizer. They are creamy inside and crunchy outside, served with a simple honey drizzle.
- Prep Time: 20 min
- Cook Time: 10 min
- Total Time: 30 min
- Yield: 14 servings
- Category: Appetizer
- Method: Frying
- Cuisine: American
- Diet: Vegetarian
Ingredients
- 8 oz soft goat cheese (chèvre), chilled
- 1/2 cup all-purpose flour
- 2 large eggs, beaten
- 1 cup panko breadcrumbs
- 1/4 teaspoon black pepper
- 1/4 teaspoon salt
- Vegetable oil, for frying
- 1/4 cup honey, for drizzling
Instructions
- Combine the flour, salt, and pepper in one shallow dish.
- Place the beaten eggs in a second shallow dish.
- Put the panko breadcrumbs in a third shallow dish.
- Scoop the chilled goat cheese into small, uniform balls, about 1 inch in diameter. You should get about 12 to 16 balls.
- Dredge each cheese ball first in the flour mixture, shaking off excess.
- Dip the floured ball completely into the egg mixture.
- Roll the egg-coated ball thoroughly in the panko breadcrumbs, pressing gently to adhere. Place the coated balls on a parchment-lined tray and chill for at least 30 minutes.
- Heat about 2 inches of vegetable oil in a deep pot or Dutch oven to 350°F (175°C).
- Carefully fry the cheese balls in batches, turning them until they are golden brown on all sides, about 2 to 3 minutes per batch. Do not overcrowd the pot.
- Remove the fried balls with a slotted spoon and place them on a paper towel-lined plate to drain excess oil.
- Arrange the warm goat cheese balls on a serving platter and drizzle generously with honey before serving immediately.
Notes
- For a make-ahead option, you can freeze the breaded cheese balls for up to one month before frying. Fry directly from frozen, adding about 1 minute to the cooking time.
- If you prefer a baked version, spray the breaded balls with cooking spray and bake at 400°F (200°C) for 10 to 12 minutes until golden.
- Add 1 teaspoon of dried herbs, like thyme or rosemary, to the panko breadcrumbs for an herbed flavor.
Nutrition
- Serving Size: 2 balls
- Calories: 180
- Sugar: 5
- Sodium: 150
- Fat: 14
- Saturated Fat: 8
- Unsaturated Fat: 6
- Trans Fat: 0
- Carbohydrates: 8
- Fiber: 0
- Protein: 6
- Cholesterol: 35