


Oh, remember those days when we used to grab a carton of cold chocolate milk from the fridge? Store-bought is fine for a pinch, but honestly, nothing beats the real thing! I spent years trying to recreate that perfect rich flavor without all the mysterious additives they sneak in there. That’s how I finally perfected this ultimate homemade chocolate milk recipe using just simple cocoa powder. Trust me when I say this is hands-down the best chocolate milk recipe you will ever taste because you get to control exactly how sweet it is. It comes together faster than boiling water. Seriously, three minutes, and you’re sipping on creamy perfection!
Why This Is the Best Chocolate Milk Recipe You Will Ever Make
Listen, the main reason this is the best chocolate milk recipe is because we skip the gloppy, grainy texture you get from just dumping cocoa powder straight into cold milk. It’s a total disaster! My secret—and this is important—is making a quick, tiny paste first. You only use one tablespoon of milk to smash the cocoa, sugar, and salt into a beautiful, smooth slurry.
When you do that step, everything dissolves perfectly. That means every sip gives you that rich creamy chocolate milk payoff without any gritty surprise at the bottom of the glass. It sounds like a tiny step, but it’s honestly the difference between a mediocre drink and total perfection.
Quick Preparation for Delicious Chocolate Milk
And the time commitment? Non-existent! We are talking about a genuine quick drink here. Because we aren’t boiling anything or waiting for flavors to marry, you can whip this up in about three minutes flat. That’s less time than it takes to find a decent store-bought carton, and it tastes infinitely better. If you need a late-night craving fixed or breakfast needs a chocolatey boost, this is ready before the ice has even fully melted!
Gathering Ingredients for Homemade Chocolate Milk
Okay, gathering these ingredients is the easiest part of this whole process! Since we are making this chocolate milk from scratch, we look for basic pantry items. You need two cups of milk—this is where you decide! Do you want it super rich creamy chocolate milk, or something lighter? Make sure you grab unsweetened cocoa powder here, as that’s what gives us that fantastic, deep chocolate flavor for our chocolate milk with cocoa powder masterpiece.
Here is what you’ll need for one generous serving:
- 2 cups Milk (specify dairy or non-dairy, chilled please!)
- 2 tablespoons Unsweetened cocoa powder
- 2 tablespoons Granulated sugar (we adjust this later!)
- 1 teaspoon Vanilla extract
- A tiny Pinch of salt (don’t skip this—it wakes up the chocolate!)
Ingredient Notes and Substitutions for Chocolate Milk
Let’s talk specifics because the ingredients really matter for the final taste. If you want that classic, decadent experience, go for whole milk. It creates the best texture, hands down. But if you’re aiming for a healthy chocolate milk version or need non-dairy, really any milk works—almond, oat, soy—it just changes the richness slightly.
For the sugar, this is your control center for making it a low sugar chocolate milk option. If you use stevia or monk fruit, start with half the amount the recipe calls for and taste first! My best tip for flavor depth? Use a good quality, dark cocoa powder. It makes the chocolate taste more ‘adult’ and less like candy, which I just love.
Step-by-Step Instructions for Perfect Chocolate Milk from Scratch
Alright, this is where the magic happens! Making this amazing chocolate milk with cocoa powder is so simple, but follow these steps exactly, and you’ll never look back. Remember that smooth paste we talked about? Start there!
- First, grab a small bowl. Mix all the dry stuff together: your cocoa powder, sugar, and that crucial pinch of salt. Get them nicely incorporated before we add anything wet.
- Now for the trick that stops clumps forever: take just ONE tablespoon of milk—only one! Pour it over your dry mix. Use a spoon or small whisk and mash it all together until it looks like thick, dark chocolate mud pie filling. No dry bits allowed!
- Once that paste is totally smooth, you can pour in the rest of the two cups of milk. Whisk that gently until you see that glorious, consistent light brown color spreading throughout. Say goodbye to grainy drinks!
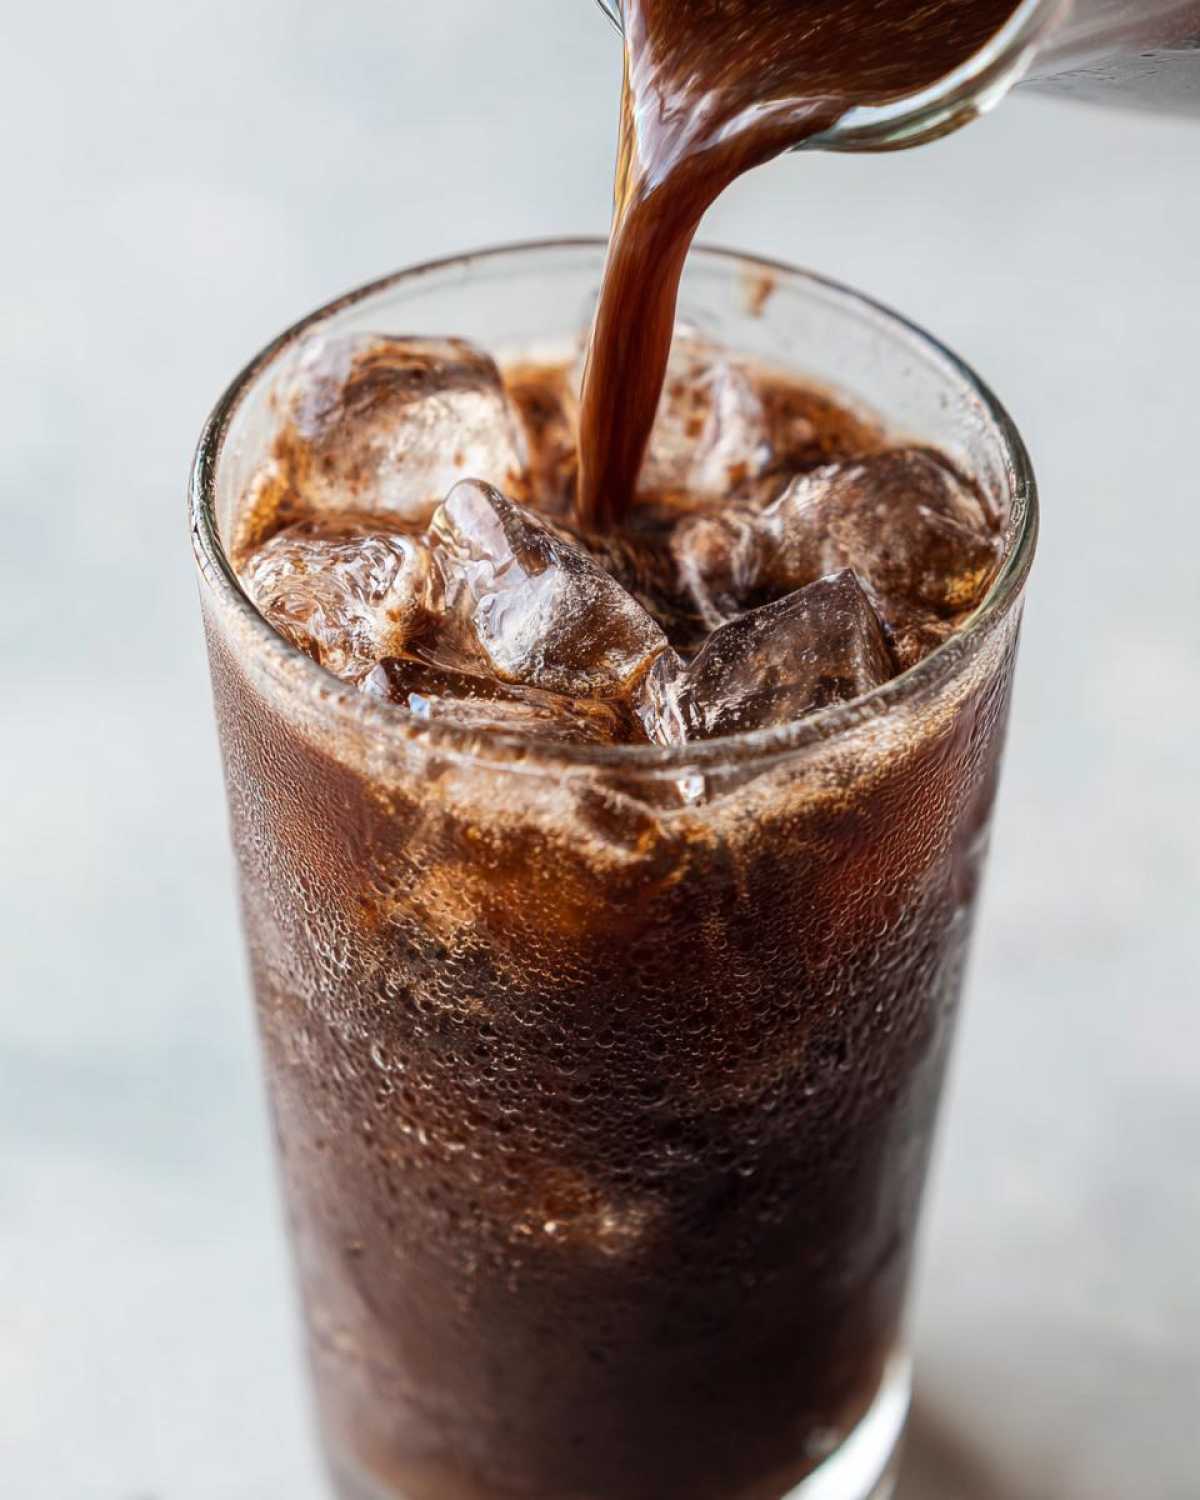
- Finally, stir in that teaspoon of vanilla extract. Taste it now! If you think it needs a little more sweetness for your perfect glass of smooth refreshment, add a tiny bit more sugar and stir until it dissolves. Serve immediately over ice!
Tips for Achieving Rich Creamy Chocolate Milk
Even though the main recipe is super quick and cold, I have one optional step that amps up the flavor, especially if you want that ultimate rich creamy chocolate milk experience. If you have an extra minute, try this:
Take about a quarter cup of your measured milk and warm it gently on the stove—not boiling, just warm to the touch. Dissolve your cocoa, sugar, and salt completely in that small warm portion first. Once it’s silky smooth, take it off the heat and stir in the rest of your cold milk and the vanilla. It blooms the cocoa flavor so much! It takes literally 30 extra seconds, but the depth of flavor is worth it. If you ever wonder why yours tastes better than anyone else’s, this tiny step is probably why!
If you have questions at any point during your first attempt, please don’t hesitate to reach out; you can check out my contact page right here. Happy mixing!
Making a Chocolate Milk Powder Recipe for Future Use
Okay, so maybe you don’t want to mix up a full glass every single time you crave that perfect chocolate fix. I totally get it! Sometimes you just need a stash ready to go. This is where we transform those simple dry ingredients—the cocoa, sugar, and salt—into a fantastic, shelf-stable chocolate milk powder recipe.
It’s so handy because you just keep the mix in a little airtight jar, and when that craving hits, you are halfway there! You avoid the messy paste step later, making for an even faster drink. You’re essentially creating your own premium drink mix that tastes miles better than any boxed stuff.
To make a batch of the dry mix, just multiply the original dry ingredients by whatever number you want. For example, if you want to make a mix that yields about 10 servings, you’d multiply everything by ten!
- Cocoa Powder: 20 tablespoons
- Sugar: 20 tablespoons
- Salt: 10 pinches (okay, maybe just half a teaspoon works better in bulk!)
When you want to use it, the ratio is super easy to remember. For every 3 tablespoons of your homemade chocolate milk powder recipe, add it to one cup of cold milk. Whisk really well—you might need a very tiny splash of cold water or milk first to get it started, because dry powder in cold milk alone can get stubbornly stubborn! Just whisk vigorously until those delightful cocoa specks disappear, stir in your vanilla (if you want it fresh), and you’ve got yourself a quick drink!
Variations on Your Homemade Chocolate Milk
Once you nail the basic, smooth version of chocolate milk from scratch, the fun really starts! This base recipe acts like a blank canvas for all sorts of wonderful chocolate drink ideas. Since you’re in complete control of what goes into your glass, you can get really creative without any guilt.
For example, if you’re feeling extra fancy, try pulsing a small amount of your finished chocolate milk in a blender with a handful of ice until it gets thick and frothy—that’s a super fast way to make a sort of non-dairy shake consistency! Or, if you saw people talking about whipped chocolate milk and wondered how to do it, just whip a tablespoon of the cocoa paste with a little bit of heavy cream until it gets stiff peaks, then use that as a topping instead of mixing it all in. Wow, right?
I also love playing with spices. A tiny pinch of cinnamon doesn’t change the flavor too much, but it warms it up beautifully. If you’re making this for adults, throw in just a whisper of cayenne pepper—it makes the dark chocolate flavor really pop!
Creating Low Sugar Chocolate Milk Options
We talked about adjusting sweetness earlier, but this is where you really commit to that healthy chocolate milk vision. If you are trying to keep this a low sugar chocolate milk, you have to commit to using alternative sweeteners like stevia or monk fruit equivalents. Just remember, they are much sweeter than regular sugar, so start small! You can always add more, but you can’t take it out once it’s in there mixed with the milk.
This is also fantastic for making simple, kid friendly drinks that don’t rely on corn syrup. My niece drinks this all the time, but instead of regular sugar, I use an equivalent amount of powdered erythritol, which dissolves really smoothly when I make that initial paste step. It keeps them happy and you know exactly what they are consuming. It’s such a great healthier alternative to the store-bought stuff!
Serving Suggestions for Your Classic Chocolate Milk
Now that you have this perfect glass of classic chocolate milk, when do you drink it? Honestly, anytime! But I have a few favorite moments. It is absolutely divine alongside a weekend fluffy pancake breakfast, cutting through the sweetness perfectly. It’s also my go-to after-school treat for the kids—way better than anything prepackaged.
Don’t forget about the serving temperature! While you can chill this for later enjoyment, I personally think it’s best served immediately. Pour it right over a glass packed full of ice cubes, or if you’re serving it to little ones, make sure your milk base was thoroughly chilled to start with. It’s just the simplest, richest way to enjoy a beverage!
Storage and Reheating Instructions for Chocolate Milk
See, one of the best things about making your own chocolate milk from scratch is that you know exactly how fresh it is! That means we don’t need a bunch of weird preservatives to keep it floating around for weeks, which is a good thing. Because we used fresh milk and no stabilizers, you really want to drink this pretty fresh.
If you made a big batch and have leftovers, just pour them straight into an airtight container. I use a couple of those cute little glass jars we use around here. You can absolutely keep it in the fridge, but I wouldn’t push it past two days, tops. By day three, the milk starts to taste a little tired, and the cocoa solids sometimes settle at the bottom more aggressively, even if you whisked well initially.
Now, for reheating—this is where people get funny about things! Do you need to reheat your homemade chocolate milk? Nope! We made this to be an ice-cold refreshment. If you are making this in the winter and you desperately want a warm mug, you absolutely can reheat it, but you have to be gentle.
Seriously, treat it like you’re warming up simple milk. Put whatever you plan to drink in a small saucepan over low heat. Stir it constantly with a wooden spoon until it’s steaming gently. Do not, I repeat, DO NOT let it boil! Boiling milk changes the texture and can sometimes make the cocoa seize up strangely. Warm and sip, that’s the rule for cozy chocolate milk!
Frequently Asked Questions About Making Chocolate Milk
I know you’ve got questions! When you start making something from scratch, especially an old favorite like this, you want to be sure you’re getting it right. I’ve gathered the biggest concerns people have when they try this easy chocolate milk recipe or when they are first trying to make a great glass of homemade chocolate milk. See if yours is down here!
Can I use Dutch-process cocoa powder in this easy chocolate milk recipe?
That’s a great question about the cocoa! Yes, you absolutely can use Dutch-process cocoa powder, and I actually prefer it sometimes for my classic chocolate milk drinks. Regular, natural cocoa powder is a bit more acidic, which means it reacts better with baking soda (not relevant here, but good to know!).
Dutch-process cocoa has been alkalized, so it results in a darker color and a smoother, mellower chocolate flavor. It doesn’t have that slight tang that natural cocoa sometimes has. Because this recipe doesn’t rely on any chemical rising agents, you won’t ruin the texture by switching. Go for it if that’s what you have; it just makes for an incredibly deep, almost dark chocolate flavor!
How do I make this recipe into a healthy chocolate milk version?
This is usually the number one question! It’s so easy to transition this into a truly healthy chocolate milk. The whole trick is managing the sweetness and the fat content, since the cocoa powder itself is great! First, for the sugar, follow my earlier advice: replace the granulated sugar with your preferred non-caloric sweetener, like monk fruit or stevia, but start small and taste!
Second clue for a healthy chocolate milk: the milk! If you use skim milk or a low-fat nut milk like unsweetened almond milk instead of whole dairy milk, you drastically cut down on the fat content without changing the flavor profile much. You just won’t get quite that same level of velvety richness, but it’s a trade-off most people are happy to make when cutting calories!
What is the secret to making the best chocolate milk recipe without clumps?
If you try to skip the paste step, you absolutely will get clumps! That’s the one non-negotiable part of making the best chocolate milk recipe. Remember that dark brown mud pie filling we made in Step 2? That’s the secret sauce!
By mixing the dry cocoa powder, sugar, and salt with just that tiny splash of cold milk first, you hydrate the cocoa particles before they ever hit the large volume of cold milk. Cold liquid makes little cocoa specks stick together like magnets, and they become impossible to break up later. So, make the paste first, whisk it until it’s smooth as silk, and then introduce the rest of the cold milk. That method ensures every single batch is lump-free and absolutely perfect!
If you run into any other trouble or want to discuss your substitutions, please review my site disclaimer here, but otherwise, I’m always happy to help fellow home cooks!
Nutritional Estimates for Homemade Chocolate Milk
Okay, so since this is homemade, you get to decide exactly what goes in, which means the nutrition can vary wildly, right? If you use ultra non-fat milk and a zero-calorie sweetener, you are looking at something totally different than if you use full-fat dairy and sugar!
But, just to give you a ballpark idea if you stick close to my standard recipe (whole milk and regular sugar), here are the estimates I cooked up. It’s helpful to know what you’re working with when you blend up this incredible homemade chocolate milk!
Based on a standard serving (that’s about one cup):
- Calories: Around 200
- Sugar: About 25 grams (But remember, you control this!)
- Protein: Roughly 8 grams
- Total Fat: Around 8 grams
- Carbohydrates: Approximately 28 grams
A Quick Word About These Numbers
Please take these numbers with a grain of salt—or maybe a very tiny pinch of cocoa powder! These are just estimates based on standard, full-fat dairy milk and granulated sugar. If you switch to almond milk or use honey instead of sugar, those numbers change immediately!
If you’re tracking things really closely, you might want to check the labels on your specific brands. For instance, the saturated fat and cholesterol depend completely on your milk choice. If you want the absolute lowest sugar, you swap that sugar out, which is the easiest way to make this a healthier option overall. You can always review my privacy policy here if you have concerns about what we track on the site.
The point is, you get all that amazing chocolate flavor without loading up on the artificial stuff they use in those cartons. Huge win!
Share Your Homemade Chocolate Milk Experience
I seriously can’t wait to hear what you think once you try this! Making homemade chocolate milk is such a satisfying little victory, especially when you realize you just made something way better than the grocery store version in three minutes flat.
Did you stick to the classic ingredients? Or did you get wild with the spices? Tell me everything! Please leave a comment down below and let me know how much sugar you ended up using—I love seeing how everyone customizes the sweetness profile.
If you made a big batch of the chocolate milk powder recipe, let me know how that turned out for you, too! And if you snapped a picture of your perfectly smooth, clump-free glass, please tag me on social media! Seeing your success is honestly my favorite part of sharing these recipes.
If you want to know more about why I share all these kitchen secrets, you can read a bit about me on my About Us page! Happy drinking!
PrintBest Homemade Chocolate Milk with Cocoa Powder
Make rich, creamy chocolate milk from scratch using cocoa powder. This recipe lets you control the sugar content for a healthier, classic drink.
- Prep Time: 3 min
- Cook Time: 0 min
- Total Time: 3 min
- Yield: 1 serving
- Category: Beverage
- Method: Mixing
- Cuisine: American
- Diet: Vegetarian
Ingredients
Scale- 2 cups Milk (dairy or non-dairy)
- 2 tablespoons Unsweetened cocoa powder
- 2 tablespoons Granulated sugar (adjust to taste)
- 1 teaspoon Vanilla extract
- Pinch of salt
Instructions
- Combine the cocoa powder, sugar, and salt in a small bowl.
- Add one tablespoon of milk to the dry ingredients and mix well until a smooth paste forms. This prevents lumps.
- Pour the remaining milk into the bowl with the chocolate paste.
- Whisk until completely smooth and the sugar is dissolved.
- Stir in the vanilla extract.
- Taste the mixture and add more sugar if you prefer it sweeter.
- Serve immediately over ice, or chill for later consumption.
Notes
- For a richer flavor, heat a small amount of milk and dissolve the cocoa and sugar in it before adding the cold milk.
- Use whole milk for the creamiest texture.
- To make a low sugar version, substitute the sugar with your preferred sweetener equivalent.
Nutrition
- Serving Size: 1 cup
- Calories: 200
- Sugar: 25
- Sodium: 100
- Fat: 8
- Saturated Fat: 5
- Unsaturated Fat: 3
- Trans Fat: 0
- Carbohydrates: 28
- Fiber: 2
- Protein: 8
- Cholesterol: 25