

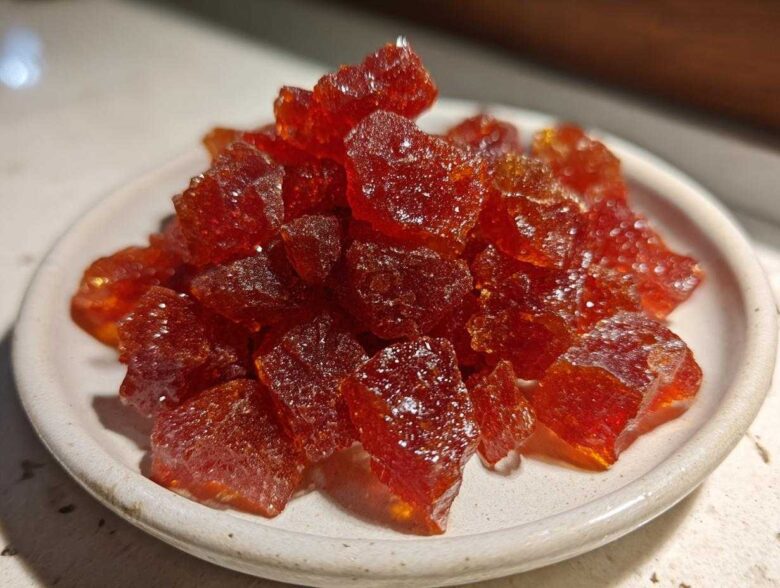
Oh, those beautiful, fiery little jewels! Remember that glorious, old-fashioned cinnamon rock candy you’d find at the fair or maybe sneak from the back of your grandma’s pantry during the holidays? It’s pure nostalgic magic, that spicy-sweet crunch. Making it at home felt impossible for the longest time, right? You stick a thermometer in, and suddenly it’s gritty or cloudy. Trust me, I’ve fought that crystallization battle more times than I care to admit! But I finally cracked the code for the most perfect, clear, and shatteringly crisp batch of homemade cinnamon rock candy. This isn’t just another recipe; this is the blueprint for making hard candy that actually turns out right, every single time. You’re going to love how easy it is once you know the secret handshake!
Why This Old Fashioned Cinnamon Rock Candy Recipe Works (E-E-A-T Focus)
I know hard candy making scares people, but the reason this old-fashioned version is so reliable is all about texture management. Candy is temperamental, and that beautiful spicy crunch we’re hunting for happens when the sugar syrup is completely cooked past the point of re-crystallization. The main reason this recipe stands up to scrutiny is the light corn syrup we include right at the start. Seriously, don’t skip it!
Corn syrup is an invert sugar, and it acts like a helpful little barrier inside the syrup. When sugar heats up, it wants to snap back into its original organized crystal structure—that’s what gives you gritty candy or sugar that turns cloudy. The syrup interrupts that process, letting us keep a smooth, glassy base for our fabulous cinnamon rock candy without any graininess popping up later. It’s pure candy chemistry, and it works wonders!
Achieving the Perfect Hard Crack Stage for Cinnamon Rock Candy
The non-negotiable target here is 300 degrees Fahrenheit. We need that hard crack stage! That extremely high temperature removes virtually all the water, leaving behind only pure, highly concentrated sugar. If you pull it off the heat too early, say at 290 degrees, you end up with sticky, chewy candy, not the crisp break we want.
Temperature control is everything for this cinnamon rock candy. Get your thermometer calibrated, secure it properly, and trust the process. Once you hit 300°F, the magic happens instantly, and you have that gorgeous, shatterable syrup base ready for flavor.
Ingredients for Your Homemade Cinnamon Candy Recipe
My grandmother always said you can’t make something spectacular out of cheap ingredients, and that goes double for candy! You only need a few pantry staples to make a big batch of this spicy delight. We are aiming for the best cinnamon hard candy flavor, so make sure your cinnamon extract is top-notch—that’s where you get the punch!
Here is exactly what you need for about a pound of shatteringly good cinnamon rock candy:
- 2 cups granulated sugar (Nothing fancy here, just plain white sugar!)
- 2/3 cup water
- 1/2 cup light corn syrup (Seriously, get the light kind!)
- 1 teaspoon cinnamon extract
- 1/4 teaspoon ground cinnamon (For that deep spice note)
- Red food coloring (Optional, but if you want that classic look, you’ll need it!)
Ingredient Notes and Substitutions for Spicy Hard Candy Tutorial
I need to drill this in: that corn syrup is the secret handshake to a smooth batch. If you are looking for how to make hard candy without corn syrup, you can try using glucose syrup, but honestly, for beginners trying this cinnamon rock candy, the corn syrup gives you incredible forgiveness against those nasty sugar crystals. Don’t try to skip it!
For the color, a tiny bit of red food coloring pushes this into the deep, nostalgic territory—it makes for a beautiful vibrant red candy recipe. Just a few drops are plenty. We mix the ground cinnamon in at the end so it floats in tiny spice clouds, giving it that beautiful crystalline look!
Step-by-Step Instructions for Making Cinnamon Rock Candy at Home
Alright, let’s put on our serious candy-making hats for this part. This is where following directions exactly pays off big time, and trust me, this becomes your go-to easy rock candy instructions manual. We’re moving fast once things start boiling, so have everything ready to go before you even turn the heat on!
First up, get your surface ready. You need a flat baking sheet lined with parchment paper, and I always give that paper a quick spray with a little bit of neutral oil or cooking spray. It helps everything release perfectly later. Next, grab a heavy-bottomed saucepan—this is essential for even heat distribution.
Combine your sugar, water, and corn syrup in that saucepan. Stir it gently over medium heat, but listen close: only stir until the sugar is completely dissolved. The moment you see even a single bubble, stop stirring! We are moving into the boil now, and stirring introduces air and rogue sugar grains, which causes problems down the line. Attach your candy thermometer right in the middle, making sure the tip isn’t touching the bottom of the pan, otherwise, you’ll get a false high reading!
Now, we wait. Let it boil undisturbed until that thermometer screams 300°F—that’s the hard crack stage you need for crisp cinnamon rock candy. Keep your eye glued to it after it hits 280°F because it jumps up fast!
Crucial Tips for Avoiding Crystallization in Your Cinnamon Rock Candy
If you want that gorgeous, clear glass look for your cinnamon rock candy, forget stirring once it’s boiling. That is the number one killer of smooth candy. But what if you see little specks forming on the sides of the pan above the liquid line? Those are potential crystals waiting to fall in and ruin everything!
My trick, which I learned the hard way, is to keep a pastry brush dipped in clean water nearby. Gently brush the inside walls of the pan every few minutes before the mixture reaches a full, rolling boil. This washes those rogue crystals back down into the syrup before they can nucleate the whole batch. It’s fussy, I know, but wiping the sides down is the ultimate defense against graininess!
Flavoring and Coloring the Classic Hard Candy Recipes
The second you pull that hot syrup off the heat after hitting 300°F, give it a second to calm down—maybe 60 seconds. Then, this is where we add the spice! Carefully stir in your teaspoon of cinnamon extract, the ground cinnamon, and any red food coloring you decided to use for your classic hard candy recipes.
Stir *just* enough to incorporate the flavorings. You want a tiny bit of swirling action, but over-mixing here will dull the shine and mess up the clarity. We are intentionally leaving that ground cinnamon in there so it looks artful, like a beautiful cinnamon crystalline sugar effect swirling through the candy sheet.
Tips for Success When Making Your Cinnamon Rock Candy
Okay, so you’ve got the temperature right and you successfully kept it from crystallizing—pat yourself on the back! But making truly magnificent cinnamon rock candy isn’t just about the boil; it’s about the environment you’re working in. If it’s already raining outside when you start stirring in the extracts, I’m warning you now, your candy will weep. Humidity is the mortal enemy of hard candy!
If you notice your candy feeling sticky halfway through cooling, it’s too late to fix it in the pan, but for next time, try to make this on the driest day possible. Also, please, use a heavy-bottomed saucepan! If you use something thin, the bottom scorches before the top even reaches 250 degrees, and scorched sugar tastes bitter, which ruins the lovely spice notes in your old fashioned cinnamon treats.
Once it’s cooling on the sheet, let it be! Don’t poke it, don’t hover, and for goodness sake, don’t try to speed up the cooling process by putting it in the fridge. Just let that hot syrup settle completely into glassy perfection.
Storage and Gifting Holiday Candy Recipes for Gifting
Once this stunning batch of cinnamon rock candy has cooled completely—and I mean completely hard, like glass—the next battle is storage. Humidity is the enemy here! If you just toss this into a regular container, by morning it will start softening and getting tacky. You’ve got to treat it like the precious jewel it is.
The absolute must-do is storing it in a truly airtight container. I like using mason jars with those tight-sealing lids. Keep that jar in the coolest, driest spot in your pantry. If your basement or closet is remotely damp, skip it and use an interior cabinet instead. This keeps your spicy sweet homemade snacks tasting just as crisp days or even weeks later.
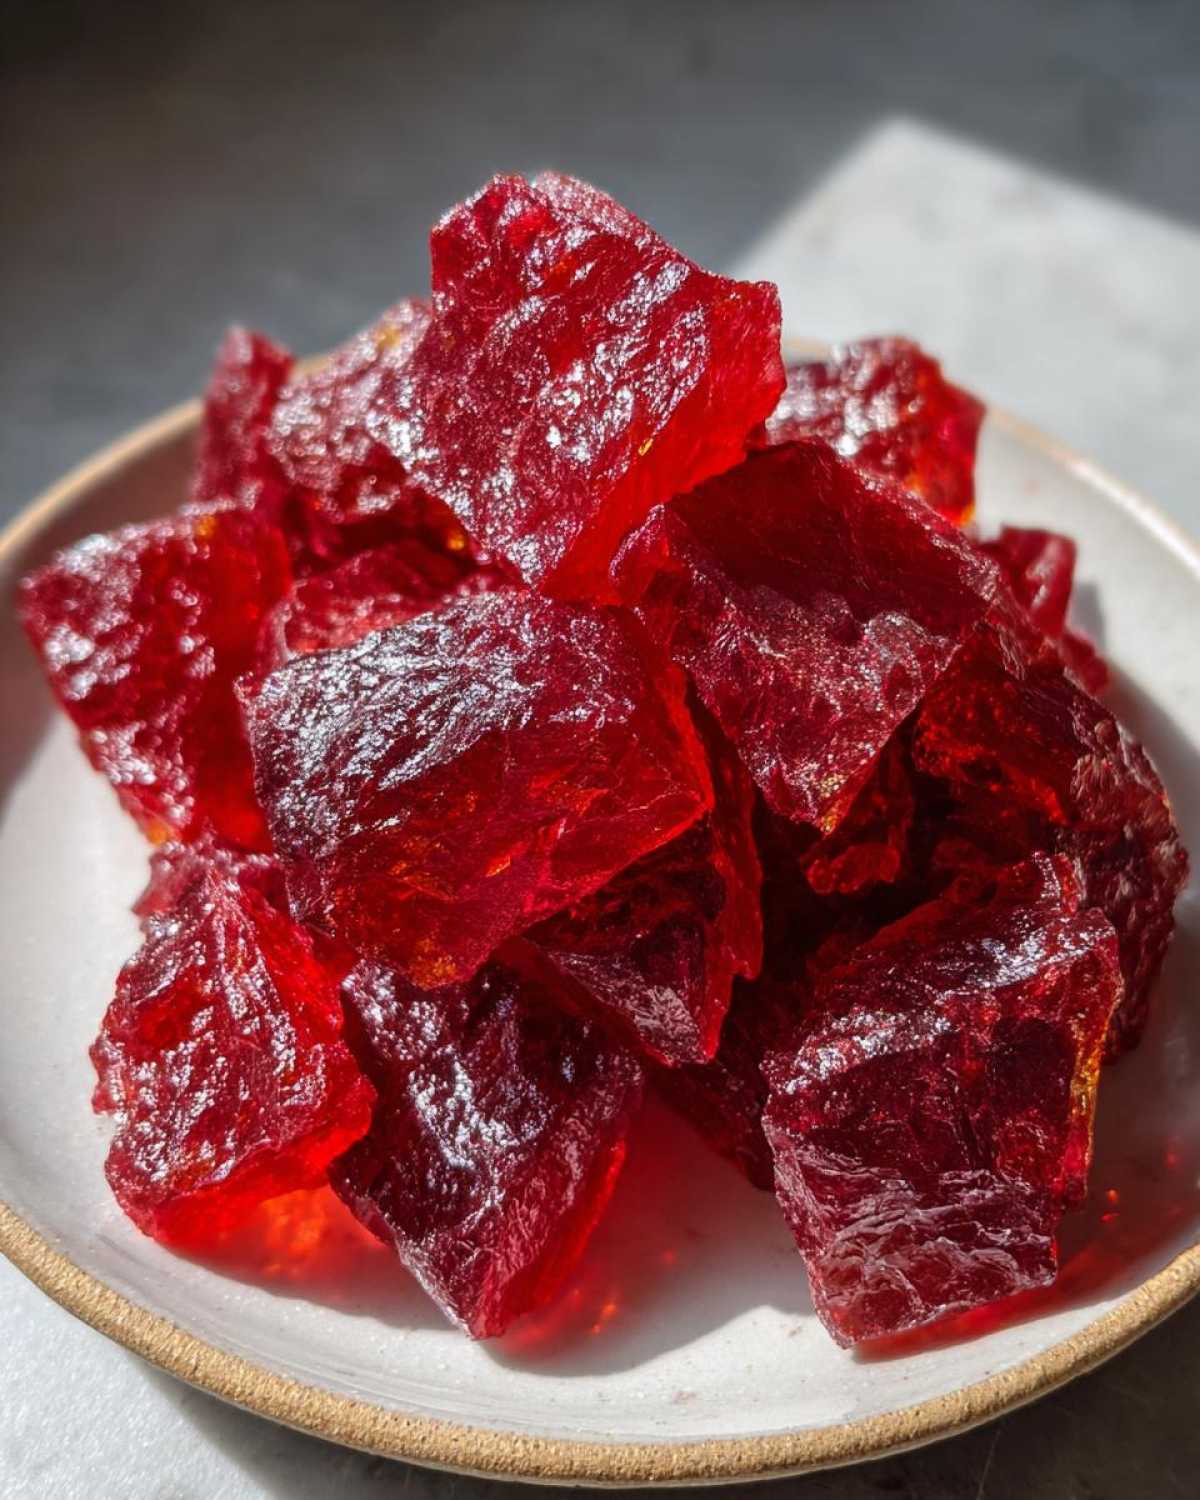
This stuff is fantastic for holiday candy recipes for gifting! I always break the large sheet into irregular, jagged pieces—that’s the rock candy look we want. Scoop the pieces into tiny cellophane bags, tie them with festive red or green ribbon, and attach a cute tag. They look incredible tucked into cookie boxes or used as spicy garnishes on top of frosted cupcakes. Everyone loves a nostalgic Christmas candy that packs such a flavor punch!
Frequently Asked Questions About This Spicy Sweet Homemade Snacks Recipe
I get so many messages asking little things about this recipe, which is proof that we all love making these spicy sweet homemade snacks! Here are the questions I get asked most often about getting this simple candy making guide perfectly right.
What is the best way to break up the finished cinnamon rock candy?
This is actually really fun, but you have to be patient! Once the candy is completely cooled and hard—like, rock hard—place the sheet into a heavy-duty zip-top bag. Make sure the bag is completely dry inside. Then, I recommend using a rolling pin or even the bottom of a clean, heavy saucepan to gently tap and smash the candy. Don’t pulverize it; you want those gorgeous, irregular shards, not fine powder. If you want bigger chunks, a quick, gentle whack is better than rolling hard for a long time.
Can I use other spices instead of cinnamon?
Absolutely! That’s the beauty of sticking to an old fashioned cinnamon treats base. You can swap out the cinnamon extract for peppermint extract for classic candy canes, or even lemon extract for a bright, lemony hard candy. Just remember that you need that base sugar syrup to hit 300°F regardless of what you flavor it with. Use extracts sparingly, though; candy flavors are very concentrated!
How long will my homemade cinnamon candy recipe last?
If you follow my storage advice—airtight container, cool, dry pantry—they honestly last for weeks, sometimes even a month or two around the holidays. But they are highly sensitive to moisture. If you live somewhere humid, you need to eat them faster! They won’t spoil, but they will get sticky and start dissolving into a messy glaze over time. Check out my storage notes again if you’re worried about humidity.
Do I have to use corn syrup for this rock candy?
I really, really advise against skipping it for this specific recipe. While it is possible to make hard candy without corn syrup by using white sugar alone or relying on an acid like cream of tartar, those methods are much trickier to keep stable at the hard-crack stage. The corn syrup is the reliable insurance policy that guarantees those beautiful, clear shards of cinnamon rock candy instead of a cloudy mess. I link to my full disclaimer for more background on why I insist on it for consistency!
Estimated Nutritional Information for Cinnamon Rock Candy
Now, let’s talk fuel! Because this is essentially pure sugar in crystalline form, we know it’s not exactly health food, but knowing the numbers is always good practice, especially when you’re packaging these up for friends and family. I worked out the estimates based on standard ingredient amounts, but remember, this is just a guide—candy making isn’t known for being super precise nutritionally!
Here is the breakdown based on a 1-ounce serving size:
- Serving Size: 1 ounce
- Calories: 110
- Sugar: 27g
- Sodium: 1mg
- Fat: 0g
- Protein: 0g
- Carbohydrates: 27g
You can see that it’s almost entirely carbohydrates from the sugar. Just remember that these figures are based on the recipe using the exact amounts listed, and they don’t account for any slight variations in measurements or ingredient brands you might use. Definitely treat these as estimates for your spicy hard candy tutorial planning!
Share Your Nostalgic Christmas Candy Creations
Well, that’s it! You’ve done it! You’ve mastered the art of making crystal-clear, perfectly spicy cinnamon rock candy right there in your own kitchen. Didn’t I tell you it wasn’t magic? It’s just good science combined with a little bit of patience.
I am SO excited for you to try these out, especially as we head into the holiday season. These truly are some of the best nostalgic Christmas candy treats you can make.
When you’re done smashing up that beautiful sheet of candy, please, please come back here and tell me how it went! Did your candy stay clear? Was the cinnamon punch just right? Leave me a comment below telling me if your batch was a total success, or maybe what you’re going to tweak next time. And if you snap a picture of those gorgeous ruby-red shards, share it on social media and tag me!
Happy candy making, and enjoy sharing those spicy, sweet homemade snacks!
PrintOld-Fashioned Cinnamon Rock Candy
A straightforward guide to making classic, spicy cinnamon rock candy at home, focusing on proper crystallization techniques.
- Prep Time: 5 min
- Cook Time: 25 min
- Total Time: 40 min
- Yield: About 1 pound
- Category: Dessert
- Method: Stovetop Boiling
- Cuisine: American
- Diet: Vegetarian
Ingredients
- 2 cups granulated sugar
- 2/3 cup water
- 1/2 cup light corn syrup
- 1 teaspoon cinnamon extract
- 1/2 teaspoon red food coloring (optional, for vibrant color)
- 1/4 teaspoon ground cinnamon
Instructions
- Prepare your surface: Line a baking sheet with parchment paper or a silicone mat. Lightly grease the paper with cooking spray or oil.
- Combine sugar, water, and corn syrup in a heavy-bottomed saucepan. Stir gently over medium heat until the sugar dissolves completely. Do not stir after the mixture begins to boil.
- Attach a candy thermometer to the side of the pan, ensuring the tip is submerged but not touching the bottom.
- Boil the mixture without stirring until it reaches 300 degrees Fahrenheit (the hard crack stage). This usually takes 15 to 25 minutes. Watch the temperature closely after 280 degrees.
- Remove the pan immediately from the heat once 300 degrees is reached. Let the bubbling subside for about one minute.
- Carefully stir in the cinnamon extract, red food coloring (if using), ground cinnamon, and any other flavorings. Stir only enough to combine the additions.
- Pour the hot mixture onto the prepared baking sheet. Do not spread or scrape the sides of the pan.
- Allow the candy to cool completely and harden, which takes about 30 minutes. Do not touch or move the candy while it cools.
- Once fully hardened, break the sheet of candy into irregular pieces. Store in an airtight container at room temperature.
Notes
- To prevent premature crystallization, ensure all sugar crystals are dissolved before the mixture boils. Wipe down the sides of the pan with a wet pastry brush if crystals form there.
- For a smoother texture, you can pour the cooled candy into a heavy-duty zip-top bag and gently tap it with a rolling pin to break it into smaller pieces.
- This candy is sensitive to humidity. Store it in a cool, dry place.
Nutrition
- Serving Size: 1 ounce
- Calories: 110
- Sugar: 27g
- Sodium: 1mg
- Fat: 0g
- Saturated Fat: 0g
- Unsaturated Fat: 0g
- Trans Fat: 0g
- Carbohydrates: 27g
- Fiber: 0g
- Protein: 0g
- Cholesterol: 0mg