

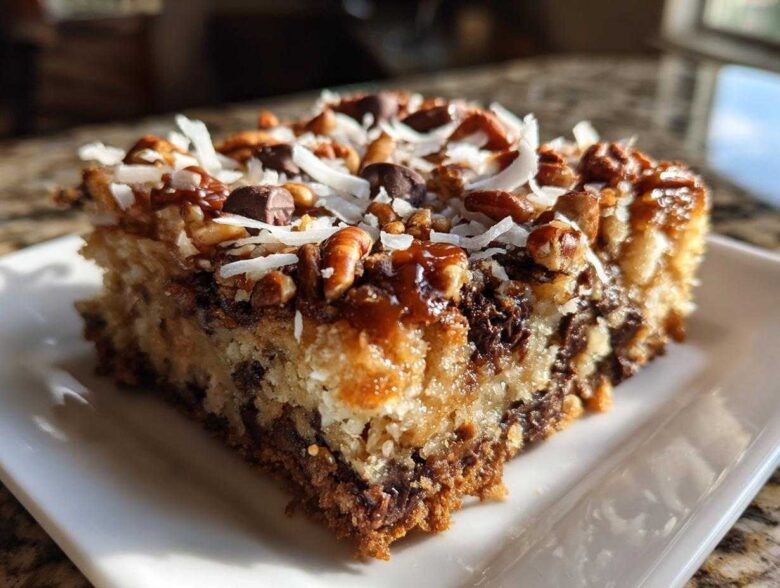
Oh my goodness, if you are looking for an impressive dessert that looks like you slaved over it for hours but honestly takes about ten minutes of actual work, you have landed in the right place! Welcome to the definitive guide for making the best **magic cookie bars** you will ever taste. These aren’t just any layered treats; they are the famous 7-layer bars, and when you get those sweet, buttery layers just right, the result is truly magical—gooey, chewy, and utterly addictive.
I bring these to every single family gathering, especially around the holidays, and they disappear first every single time. If you want to see the backbone of our amazing team and learn more about our commitment to quality recipes, check out what we stand for. Trust me, I’ve perfected the balance between the crunchy crust underneath and the soft, melted topping. If you want to bake something truly spectacular that requires zero fancy techniques, stick with my tried-and-true method!
Why This Seven Layer Bars Recipe Delivers Ultimate Flavor
What makes these the ultimate layered dessert? It’s simplicity combined with texture, my friend! These are arguably the easiest dessert bars you will ever make, yet they look so incredibly complex layered up like that. The key to that chewy, delightful messiness is the combination of chips, coconut, and the binder that holds everything together.
We aren’t just making a cookie, we are making something much better – an incredibly satisfying, dense bar that travels well and tastes amazing warm or cold. This classic American baking recipe is a showstopper, yet it’s truly a no-fuss winner.
The Role of Sweetened Condensed Milk Treats
Let’s talk about the real secret ingredient: sweetened condensed milk. You absolutely cannot substitute this with regular evaporated milk or cream; I’ve tried! This dense, sugary liquid soaks into every topping layer as it bakes, binding the chocolate chips and pecans together perfectly. It’s what creates that signature gooey cookie bars texture we all crave in our **magic cookie bars**. It’s non-negotiable!
Gathering Ingredients for Perfect Magic Cookie Bars
Okay, let’s talk about what you need for this absolute dream of a dessert. The great thing about these **magic cookie bars** is that the ingredient list is short, but the quality matters, especially since we aren’t cooking anything complex. Think of it in three parts: the base, the layers, and the binder that makes it all stick together in a beautiful, chewy mess.
When you’re gathering your supplies, make sure your butter is good quality; it really impacts the flavor of that simple crust! Remember, everything gets layered right on top of the other, so having everything measured and ready to go makes the assembly lightning fast. It’s all about prepping before the fun starts.
Buttery Graham Cracker Crust Components
First up is the foundation, and we need just two things here. You’ll require exactly one cup of graham cracker crumbs—make sure those crumbs are fine, we want it packed down smooth. Then, mix those crumbs with one-half cup of unsalted butter that you’ve melted until it’s perfectly smooth. My secret is to press this mixture super firmly into the bottom of my prepared 9×13 pan. If you press hard, you get a beautifully sturdy base that can handle all the gooey toppings to come!
Layering Components for Your Magic Cookie Bars
Now for the fun part where we build up those seven glorious layers! You need one cup of semi-sweet chocolate chips—don’t skimp here! Right on top of those, we scatter one cup of butterscotch chips. These two chips melt together into pure heaven. After the chips, you definitely need one and a half cups of shredded sweetened coconut; the texture is essential. Finally, scatter over one cup of freshly chopped pecans. If you aren’t a pecan person, walnuts work too, but pecans give the best little crunch!
Step-by-Step Instructions for Seven Layer Bars Recipe
This is where the actual magic happens, and honestly, it moves so fast! We are talking about layering, not complex stirring or folding, which is why these are a lifesaver for **quick holiday baking**. Just follow the order, and you seriously cannot mess this up.
Preparing the Base and Preheating
First things first, get that oven warmed up to 350 degrees Fahrenheit! Don’t forget to prep your 9×13 pan by lining it with parchment paper before you even touch the crumbs. Why parchment? Because pulling these out later is so much easier when you have the paper ends hanging over the side like little handles. Once lined, firm up that buttery graham cracker crust mixture we just mixed. Press it down well—I use the bottom of a measuring cup to get it perfectly smooth and flat!
Assembling the Layers for Gooey Cookie Bars
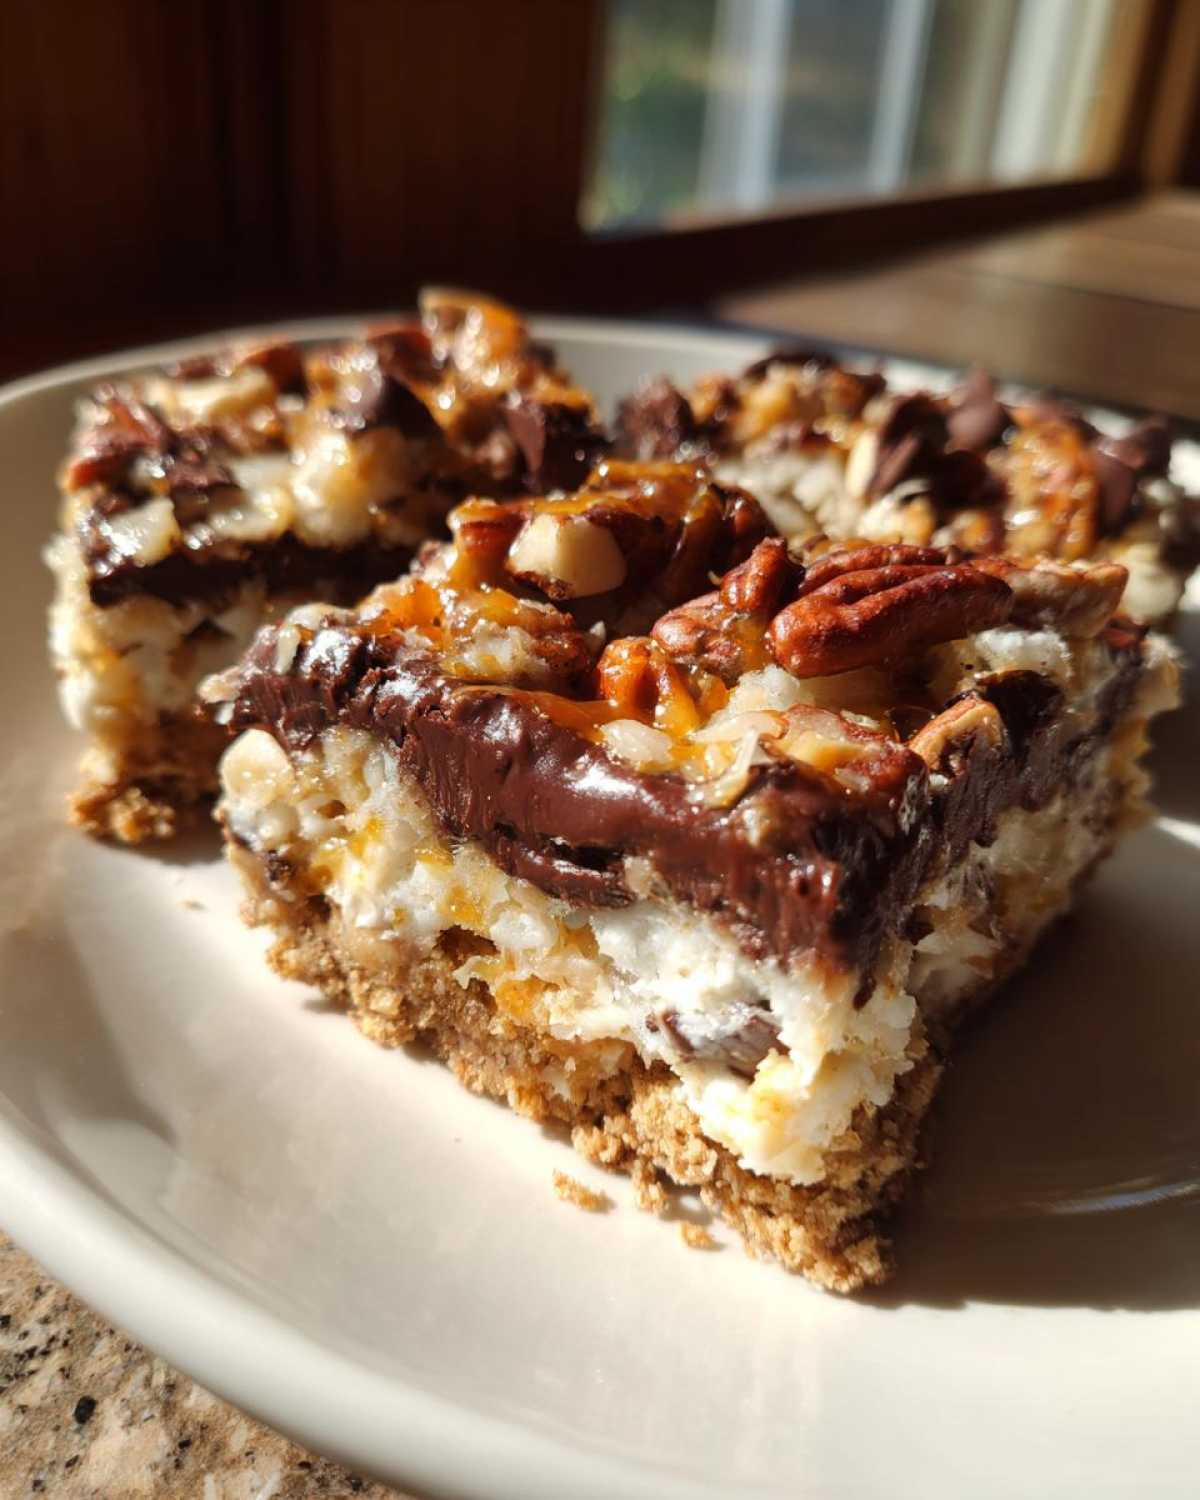
Time to stack! After your crust is set, sprinkle those chocolate chips evenly across the whole surface. Next, throw on the butterscotch chips. They bring such a lovely flavor contrast, you’ll see! Over those chips goes the shredded coconut, followed by your chopped pecans. You are building flavor upon flavor here, which is why these are the **ultimate layered dessert**! Then comes the critical step: slowly pour that entire can of sweetened condensed milk over absolutely everything. Listen close: Do NOT stir! Just let it drizzle everywhere to settle into all the nooks and crannies.
Baking and Cooling the Ultimate Layered Dessert
Into the oven they go for about 25 to 30 minutes. You are looking for edges that are beautifully golden brown and that thick layer of condensed milk looking bubbly and set—it will look slightly different than a traditional cake. Now, here is my tough love advice: You must, must, *must* let them cool almost completely. I know they are screaming to be eaten, but they need a good two hours on a wire rack to set up. If you cut them hot, they become soup! Patience here is the key to getting those perfect, sliceable bars.
Tips for Perfect Magic Cookie Bars Every Time
Even though these are designed to be **no fail bar cookies**, achieving that perfect texture—gooey but still sliceable—takes just a tiny bit of foresight. We want that beautiful chewiness without ending up with a pan full of sweet, unmanageable goo! It’s all in the cooling and a few minor swaps you can make for holidays or just fun.
Achieving Clean Slices and Better Structure
I mentioned cooling before, but I have to stress it again because it’s the number one reason people get frustrated! After those two hours on the counter, don’t grab your knife yet. Pop the whole pan into the refrigerator for at least one more hour. Chilling makes the condensed milk layer firm up just enough that when you use that parchment paper overhang to lift them out, they slice like a dream. Trust me, this step means the difference between squares and abstract art!
Variations on Classic American Baking
These bars are so versatile for **classic American baking** projects. For instance, if you’re making them for Christmas or a birthday, tossing a half cup of mini M&Ms right on top with the pecans adds such a fun splash of color for **quick holiday baking**. Similarly, you can swap out the pecans entirely for walnuts or even sunflower seeds if you have allergies to navigate. The essential structure relies on the chips and the milk, so those can stay the same while you customize the little crunchy bits!
Serving Suggestions for Potluck Dessert Ideas
Because these **magic cookie bars** travel so well and look so festive, they are my absolute go-to for any party or gathering you can imagine. Seriously, they rank right up there with sheet cakes for convenience when you need **potluck dessert ideas** that feed a crowd! Since they are so rich and sweet, I love serving them after dinner with a hot cup of coffee—the slight bitterness of the coffee cuts through that incredible gooey texture perfectly.
If it’s for the kids, a tall, ice-cold glass of milk is the only way to go. They are fantastic served slightly warm, but for big events, cutting them into small squares works best because everyone will want seconds!
Storage and Reheating Instructions for Chewy Chocolate Coconut Dessert
So, if, by some miracle, you actually have leftovers of these incredible **magic cookie bars**, storing them is super easy. You want to keep them in an airtight container, just like any good bar cookie. I always refrigerate mine because that super gooey texture sets up perfectly solid when chilled, which actually helps them stay fresh longer.
They are great straight from the fridge! If you prefer that slightly softer, room-temperature chew, pull them out about thirty minutes before you plan to eat them. They stay fantastic for almost a week this way—if they last that long, which I highly doubt!
Estimated Nutritional Data for One Serving
Now, I know most of us aren’t baking these **magic cookie bars** for health reasons, but I like to keep things transparent for you all! Since these bars are so rich with butter, sugar, and chips, they are definitely a treat. Please remember that these numbers are just estimates based on the ingredients I used, so for the most accurate details, you can always check out my full disclaimer page regarding nutrition facts.
Here is what you can generally expect in one standard square of this **ultimate layered dessert**:
- Serving Size: 1 bar
- Calories: 220
- Sugar: 20g (Yes, a bit high, but it’s worth it for that gooey factor!)
- Sodium: 75mg
- Fat: 14g
- Saturated Fat: 6g
- Carbohydrates: 23g
- Protein: 3g
We keep the ingredients simple, so you won’t see any weird additives in this **classic American baking** recipe—just pure, delicious indulgence in every bite!
Common Questions About Hello Dolly Bars Recipe
I know when you look at a recipe like this, with all those amazing layers, you end up with a million little questions running through your head! It’s totally normal. I’ve tried to answer the top things I usually hear about making these **magic cookie bars** perfectly, especially when it comes to ingredient swaps and making sure that texture stays just right.
Can I make these magic cookie bars without nuts?
Absolutely, yes! If you aren’t a fan of pecans—or if you’re packing these for a school event where nuts aren’t allowed—you can easily skip them. My preference is to just leave the space empty and let the coconut and chips take center stage. But if you want to keep that bit of crunch, try replacing the cup of pecans with another half-cup of semi-sweet chips and maybe a half-cup of sunflower seeds. It keeps them solidly in the **easy dessert bars** category!
What is the difference between Magic Cookie Bars and Hello Dolly Bars?
This is such a fun question because it feels like different regions of the country have different names for the same delicious thing! For all intents and purposes, if you run into a recipe labeled **Hello Dolly Bars Recipe**, you are looking at the same basic concept: graham cracker crust, layers of yummy stuff, and that dreamy can of sweetened condensed milk poured over the top. It’s just a different nickname for these incredible **gooey cookie bars**!
Can I use regular milk instead of sweetened condensed milk?
Oh, please don’t try it! I really need you to hear me on this one: you cannot substitute regular milk or even evaporated milk for the sweetened condensed milk when making these. It’s the magic ingredient! Regular milk will just leave you with a soupy, wet mess that won’t set up the way it should. The thickness and high sugar content of the condensed milk are chemically essential for binding all those beautiful layers into firm, chewy squares. Stick to the can for these **magic cookie bars**!
Share Your Ultimate Layered Dessert Creations
I truly cannot wait to hear what you think! Once you’ve cooled and sliced your **magic cookie bars**, please come right back here and leave a rating—let me know how gooey they turned out for you!
I’m always looking for new, fun ways people customize these **ultimate layered dessert** treats. Did you add M&Ms? Did you try using walnuts instead? Drop a comment below letting me know your spin on this classic. It helps other bakers see just how flexible this recipe is!
If you snap a picture of your beautiful, chewy squares, I would absolutely love to see them! Tag me on social media—it truly makes my day to see my family’s favorite recipe showing up in your kitchens. If you have any burning questions that I missed, hop over to my contact page and send me a message. Happy baking, everyone!
PrintGooey and Chewy 7-Layer Magic Cookie Bars
Make these simple, classic 7-layer bars using sweetened condensed milk for a rich, chewy texture perfect for any gathering.
- Prep Time: 15 min
- Cook Time: 30 min
- Total Time: 2 hours 45 min
- Yield: 24 bars
- Category: Dessert
- Method: Baking
- Cuisine: American
- Diet: Vegetarian
Ingredients
- 1 cup graham cracker crumbs
- 1/2 cup unsalted butter, melted
- 1 (14 ounce) can sweetened condensed milk
- 1 cup semi-sweet chocolate chips
- 1 cup butterscotch chips
- 1 1/2 cups shredded sweetened coconut
- 1 cup chopped pecans
Instructions
- Preheat your oven to 350 degrees Fahrenheit. Line a 9×13 inch baking pan with parchment paper, leaving an overhang on the sides for easy removal.
- Combine the graham cracker crumbs and melted butter in a medium bowl. Press this mixture firmly and evenly into the bottom of the prepared pan.
- Sprinkle the chocolate chips evenly over the crust.
- Next, sprinkle the butterscotch chips over the chocolate layer.
- Distribute the shredded coconut over the chips.
- Scatter the chopped pecans over the coconut layer.
- Slowly pour the entire can of sweetened condensed milk evenly over all the layers. Do not stir.
- Bake for 25 to 30 minutes, or until the edges are golden brown and the condensed milk is bubbly.
- Let the bars cool completely in the pan on a wire rack, about 2 hours, before lifting them out using the parchment paper overhang.
- Cut into squares before serving.
Notes
- For cleaner cuts, chill the cooled bars in the refrigerator for at least 1 hour before slicing.
- You can substitute walnuts for pecans or add 1/2 cup of mini M&Ms on top before baking for a festive look.
- Use a light spray of non-stick cooking spray on the parchment paper for extra insurance against sticking.
Nutrition
- Serving Size: 1 bar
- Calories: 220
- Sugar: 20g
- Sodium: 75mg
- Fat: 14g
- Saturated Fat: 6g
- Unsaturated Fat: 8g
- Trans Fat: 0g
- Carbohydrates: 23g
- Fiber: 1g
- Protein: 3g
- Cholesterol: 15mg