

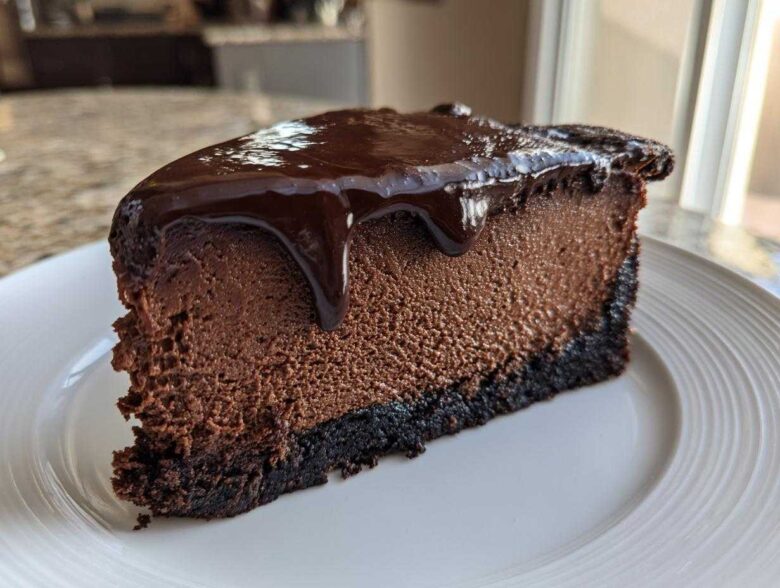
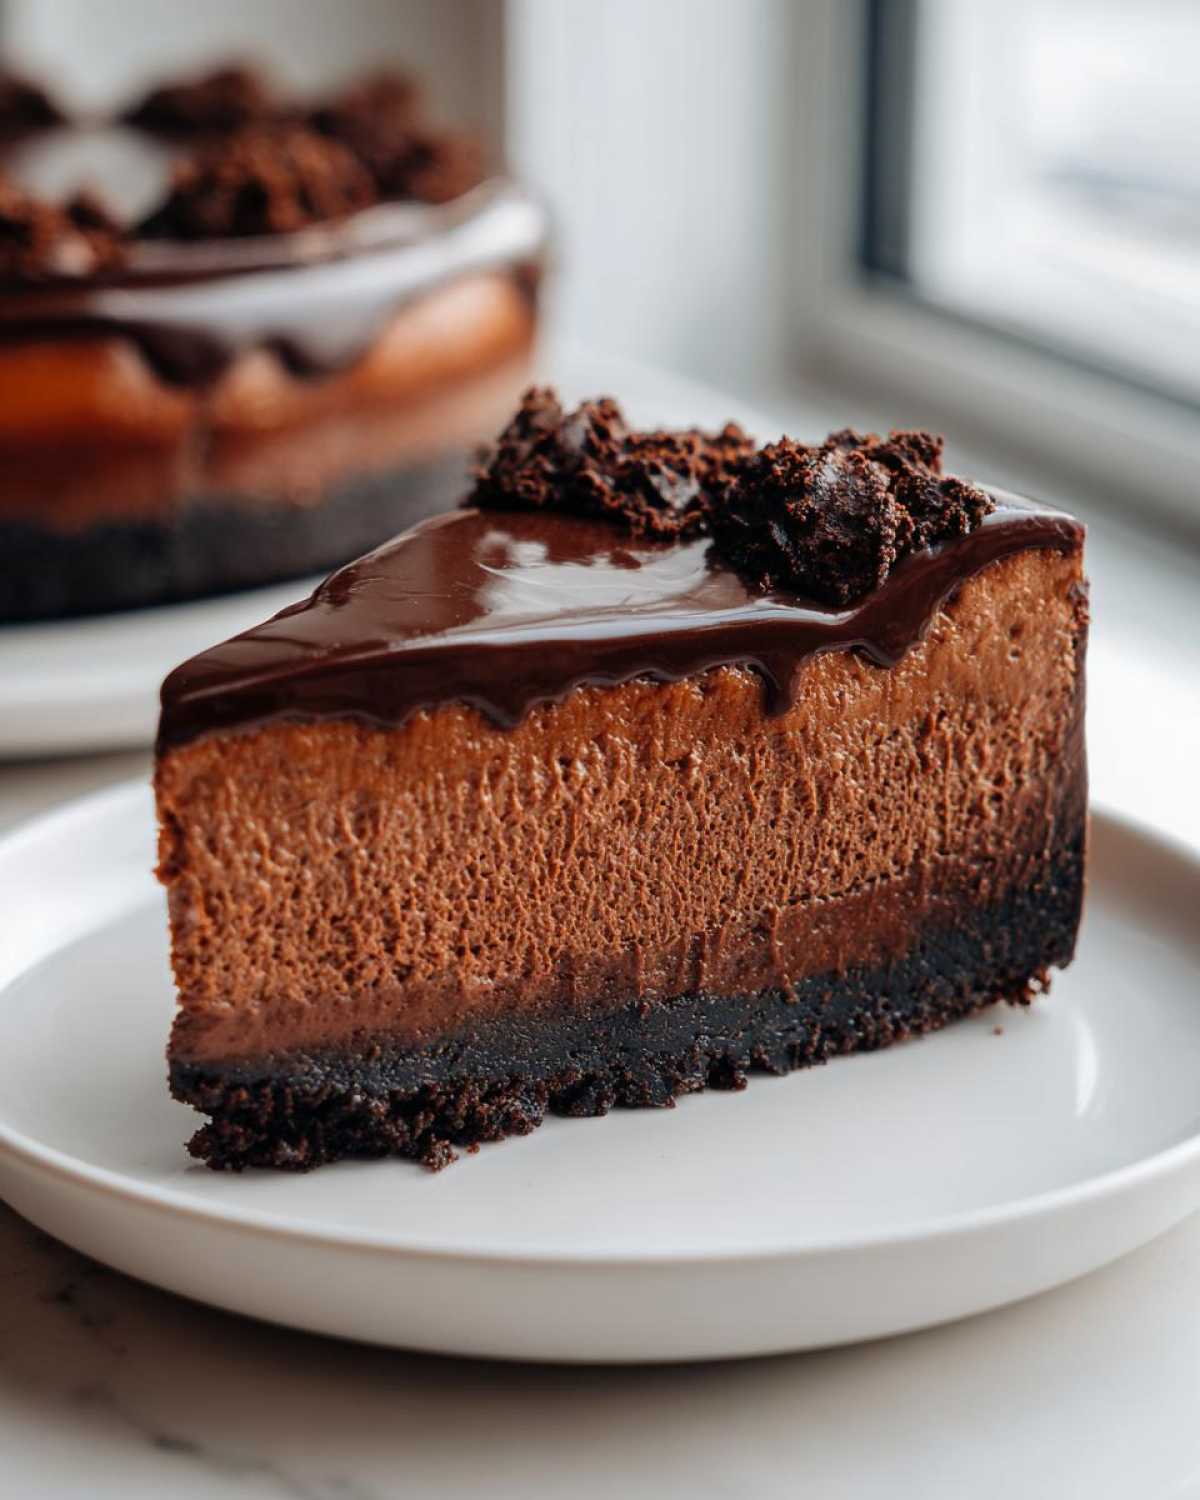
Oh, you know those nights when only something unbelievably rich and dark will do? Forget simple desserts; we’re going straight for the showstopper. This, my friend, is my absolute go-to recipe for the **ultimate creamy chocolate cheesecake** with a shiny, silky ganache topping that just screams luxury. Trust me when I say this is the dessert I pull out when I need to impress people without looking like I spent three days stressing in the kitchen. It’s all about the texture—that perfect, dense, velvety center. If you want truly show-stopping results, check out all my baking tips on the main blog page!
Why This Chocolate Cheesecake Recipe Delivers Decadence (E-E-A-T)
When I first started making this dessert, I noticed that the biggest difference between my sad, cracked attempts and the truly decadent ones came down to two things: temperature and technique. This isn’t just another recipe; it’s designed for that incredible mouthfeel you dream about. If you’re looking for results that look straight out of a gourmet bakery, these are the keys to the kingdom.
- We use higher fat content—full-fat cream cheese is non-negotiable for that rich mouthfeel.
- The high-quality bittersweet chocolate we use melts beautifully into the batter for deep flavor.
- We make sure to source the best cocoa powder because weak chocolate makes for a weak dessert!
My biggest piece of expert advice for you? Bring the cream cheese and eggs out about two hours before you start mixing. Seriously, if the cream cheese is cold, you end up with lumps, and nobody wants lumpy cheesecake. If you’ve struggled with brownies before, you might also want to check out my guide on cream cheese brownies for more baking structure tips!
Achieving the Creamy Chocolate Dessert Texture
Okay, let’s talk about the water bath, or the Bain-Marie if you want to sound fancy at your next dinner party. Listen, I know it feels like an extra hassle, but wrapping that pan tight with foil and setting it into hot water while it bakes keeps the oven environment super humid. That gentle, moist heat is what prevents the edges from setting too fast while the center is still liquid. It cooks everything evenly, guaranteeing a crack-free surface and that unbelievably smooth, almost pudding-like finish we are aiming for.
Gathering Ingredients for Your Ultimate Chocolate Cheesecake
Getting the right components ready is half the battle with any impressive dessert, and this big one is no exception! You really need to organize everything into little bowls before you even think about turning on the mixer. If you want that smooth finish, trust me, having everything prepped and measured out makes the process seamless. I always set my ingredients out while my oven preheats, just so everything is perfectly ready to go. For extra inspiration on what to bake next, take a look at my chocolate chip banana bread recipe!
Ingredients for the Oreo Crust Cheesecake Base
This crust is simple, sturdy, and so much better than a plain graham cracker crust. You need to pack this down hard against the bottom of your pan so it doesn’t crumble when you slice it later!
- 1 3/4 cups chocolate wafer cookie crumbs
- 1/4 cup granulated sugar
- 6 tablespoons unsalted butter, melted
Ingredients for the Rich Chocolate Dessert Filling
This is where the magic happens! Remember what I said about temperature? Make sure your cream cheese is floppy but not greasy, and your eggs are room temperature. This ensures everything blends into one gorgeous, unified mixture.
- 3 (8 ounce) packages cream cheese, softened
- 1 1/2 cups granulated sugar
- 1/2 cup unsweetened cocoa powder, sifted
- 1 teaspoon vanilla extract
- 1/4 teaspoon salt
- 3 large eggs
- 1/2 cup heavy cream
Ingredients for the Silky Chocolate Ganache Topping
For the topping, you really need bittersweet chocolate. It cuts through the richness of the filling perfectly. Chopping it finely helps it melt quickly and evenly when the cream hits it!
- 4 ounces bittersweet chocolate, finely chopped
- 1/2 cup heavy cream (for ganache)
- 1 tablespoon unsalted butter (for ganache)
Step-by-Step Instructions for the Baked Chocolate Cheesecake
Now that all our glorious ingredients are ready, it’s time to assemble this beauty. Follow these steps closely, especially the temperature adjustments and the cooling time. If you rush the cooling or skip the water bath, you’re just asking for a cracked top, and we absolutely don’t want that drama in our lives!
Preparing and Baking the Oreo Crust Cheesecake Base
First things first, get that oven preheated to 350 degrees F. You need to wrap your 9-inch springform pan super tight—I mean *really* tight—with heavy-duty aluminum foil. We are trying to keep water out, so use at least two layers around the outside. Mix your crust ingredients (crumbs, sugar, melted butter) and press them firmly into the bottom. Then, bake that base for just 10 minutes. Once it’s done, pull it out to cool a little bit before you start on the filling. Then, drop that oven temp down to 325 degrees F; it needs a gentler bake from here on out!
Mixing the Creamy Filling Without Overmixing
In a big bowl, beat that softened cream cheese until it looks perfect—no lumps! Then, slowly add the sugar, cocoa powder, vanilla, and salt until it’s just combined. Here is the most crucial part for that creamy texture: add your eggs one at a time, mixing on really low speed after *each* egg just long enough to incorporate it. Don’t whip this batter! Too much air is sneaking in, and that air expands, causing cracks later on. Finally, gently fold in the 1/2 cup of heavy cream. Pour that wonderful batter over your cooled crust.
The Water Bath Technique for Perfect Chocolate Cheesecake
This is where we build the humidity! Place your foil-wrapped springform pan inside a larger roasting pan. Carefully, while holding the springform pan steady, pour hot water into the roasting pan until it comes about halfway up the sides of the cheesecake pan. This is your Bain-Marie. It might seem messy, but this step ensures even baking, which is the difference between a good bake and a truly outstanding, non-cracked **chocolate cheesecake**.
Cooling and Chilling: The Secret to the Best Chocolate Cheesecake
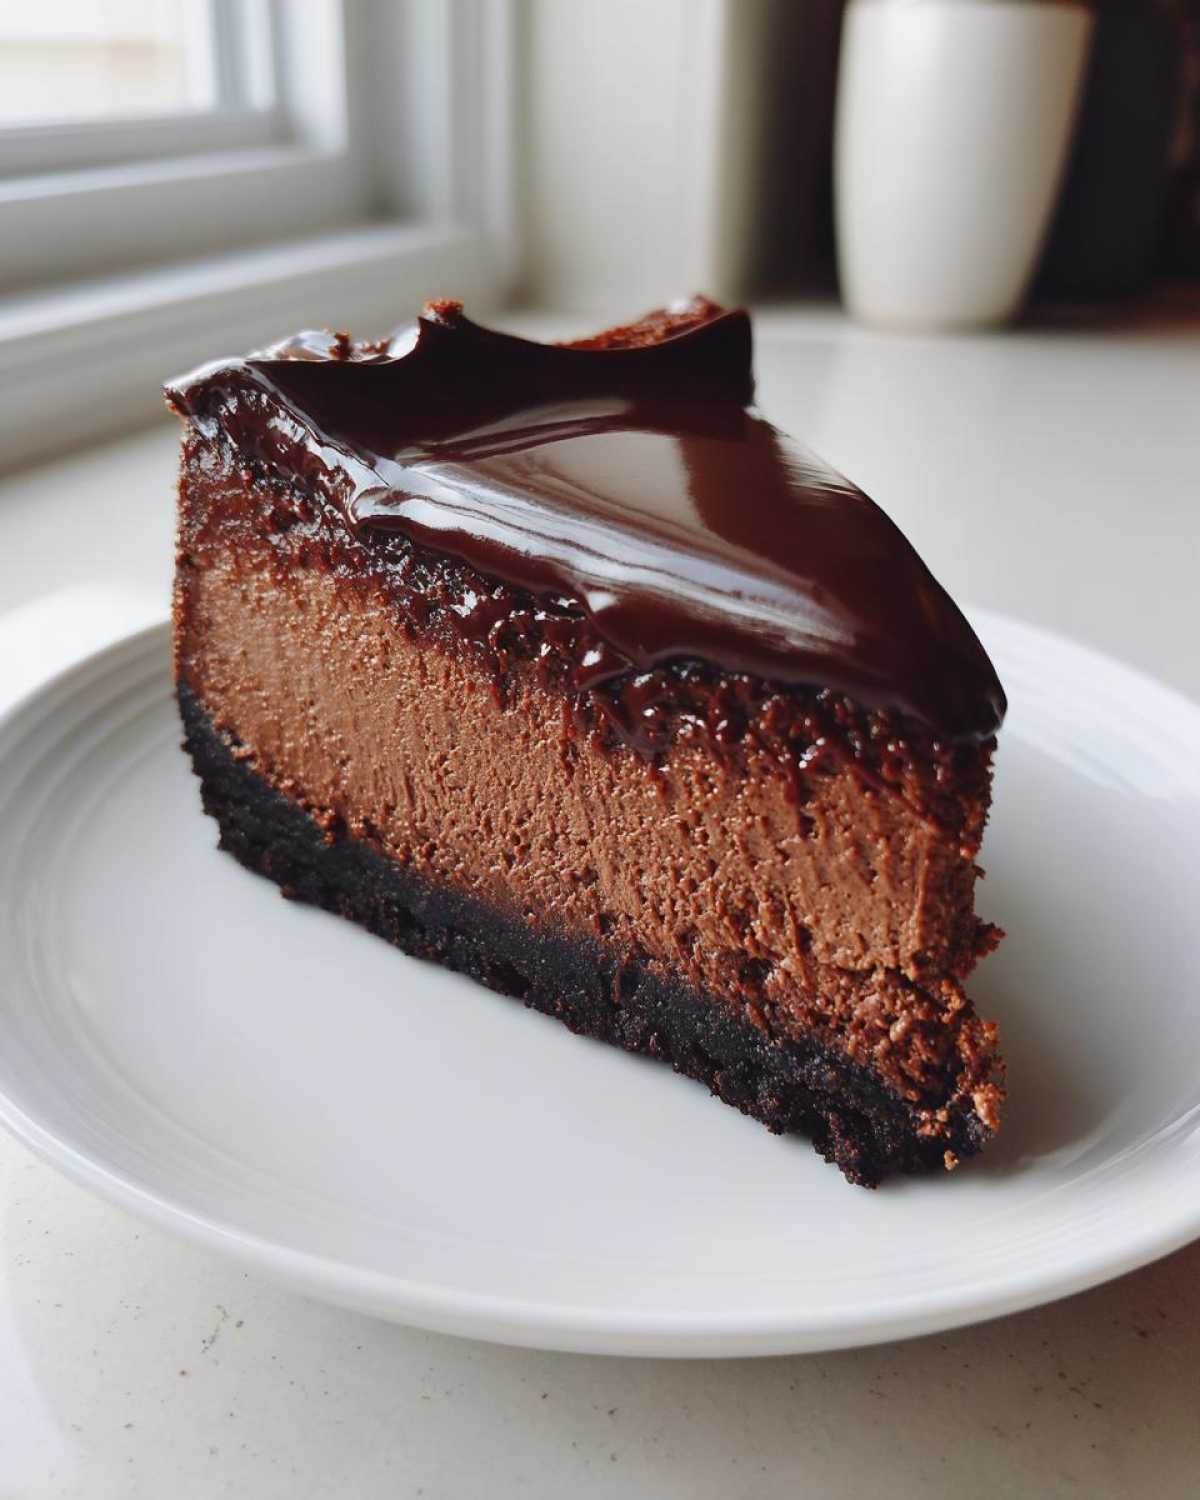
Don’t you dare pull it out right away! Once the baking time (about 55 to 65 minutes) is up, and the edges look set but the center still wobbles just a tiny bit, turn the oven OFF. Crack the door open a sliver and let your masterpiece sit in that cooling oven for a full hour. This slow transition prevents shock. After that hour, gently remove it from the water bath and let it cool completely on a wire rack. Seriously, you must chill this for at least 6 hours, but ideally, cover it and leave it overnight. Baked sides cool faster than the center, so patience is everything here!
Crafting the Glossy Chocolate Ganache Topping
By the time you get here, your cheesecake should have chilled beautifully, and now we get to the crowning glory: that super shiny topping! This simple chocolate ganache is what takes this dessert from delicious to absolutely unforgettable. It’s ridiculously easy, but you have to respect the heat of the cream, so be careful when you’re handling it!
First, grab your finely chopped bittersweet chocolate—make sure it’s in a heatproof bowl. Next, put the 1/2 cup of heavy cream and that little tablespoon of butter in a tiny saucepan. Heat it slowly until you see small bubbles just starting to form around the edges, basically simmering, but don’t let it come to a rolling boil! That hot cream mixture gets poured right over the chopped chocolate.
Now, resist the urge to stir immediately! Let that hot cream sit and do its magic for about five minutes. This gives the heat time to gently melt all those chocolate pieces without burning them. After the waiting period, grab a whisk and start stirring slowly from the center, working your way out until everything comes together. Wow! You’ll see it transform instantly into the most gorgeous, silky, glossy topping imaginable. You can peek at my tips for a great chocolate cake recipe if you want to practice your ganache skills!
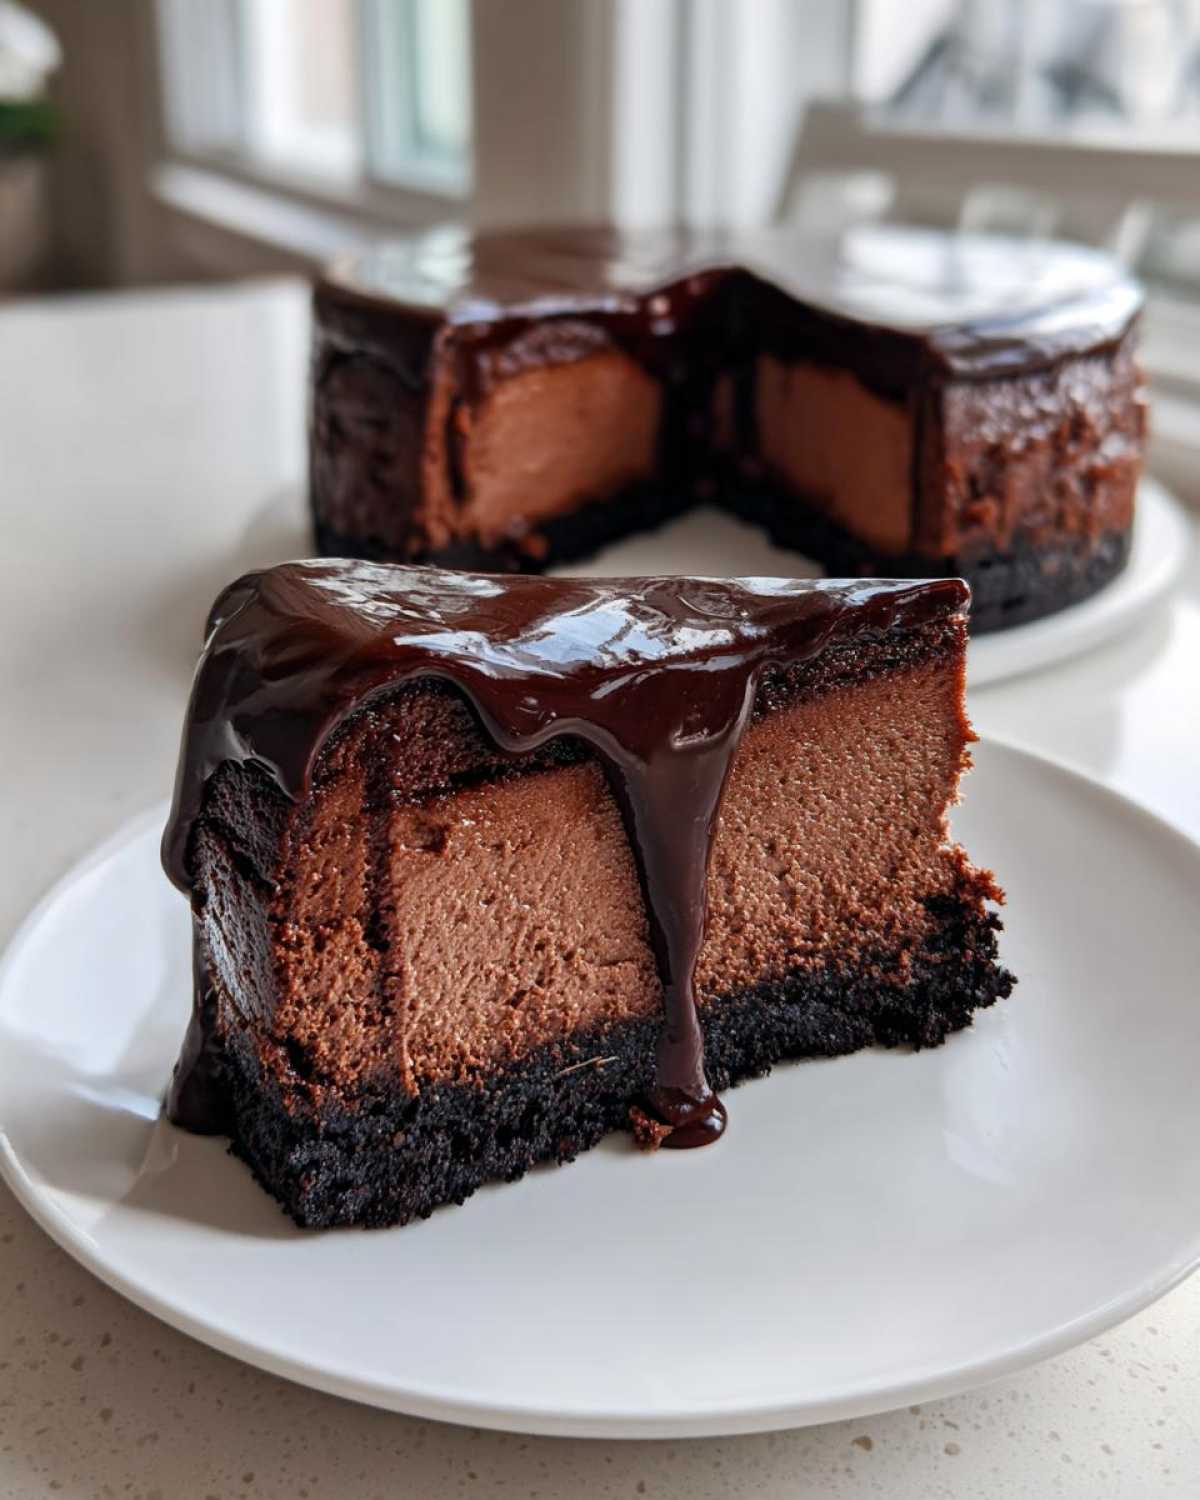
Once it’s smooth, let it cool down just a touch so it thickens slightly before pouring it over that cold cheesecake. Spread it carefully across the top, making sure you get nice, even coverage right to the edges. A quick 30 minutes back in the fridge, and that ganache sets up perfectly for slicing!
Tips for Success with Your Homemade Chocolate Cheesecake
Look, making a gorgeous cheesecake takes a bit of focus, but luckily, a few key things I learned the hard way will save you buckets of time. You absolutely must follow that temperature rule for the cream cheese and eggs; if I use batter that’s still cold, I swear it looks grainy, even after mixing! It happened once when I was rushing before work, and the result was just disappointing.
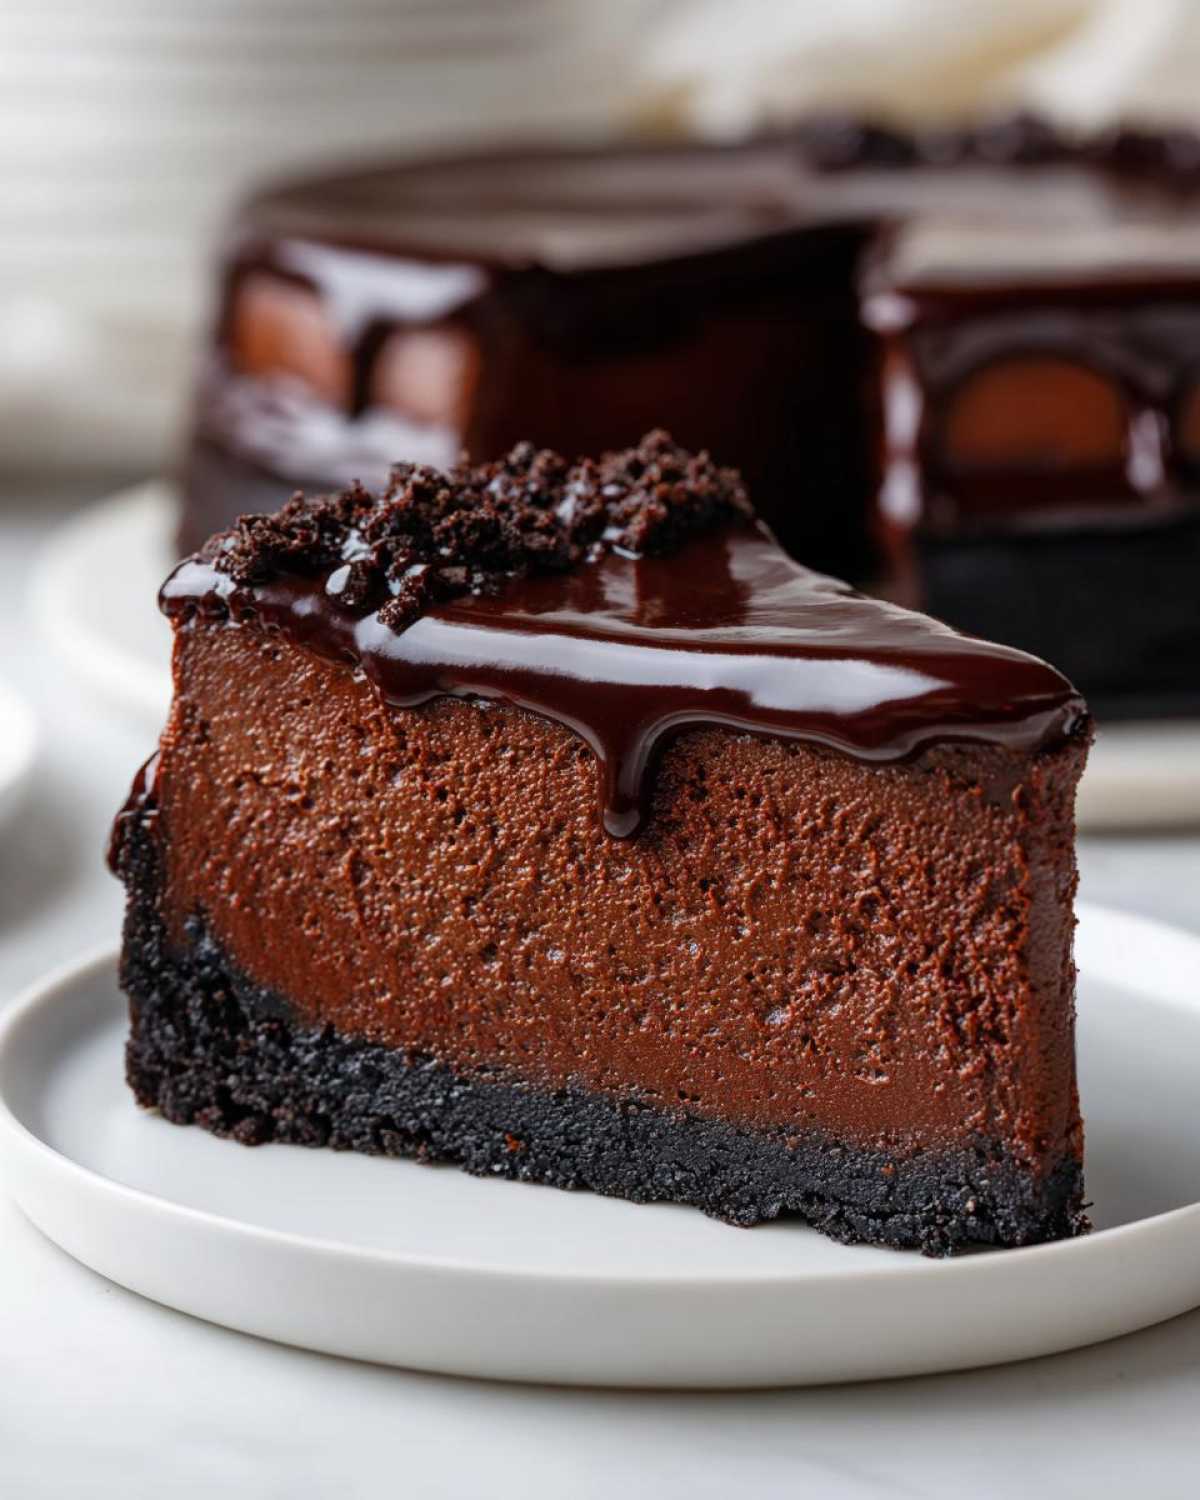
Also, invest in good cocoa powder. You only use 1/2 cup, so make it count! The difference between cheap stuff and quality, dark cocoa for this dessert is huge—it impacts the final color and the depth of flavor, turning it into a truly rich chocolate dessert. If you need more inspiration for recipes that use high-quality cocoa, definitely check out my chocolate chip banana bread recipe. It’s those little steps that elevate a good dessert to one people talk about for weeks!
Variations on the Classic Chocolate Cheesecake Recipe
Just because this recipe is my absolute favorite doesn’t mean we can’t play around with it a little bit! Because the base filling is so wonderfully rich and sturdy, it takes additions like a champ. I love playing around with different mixers when I’m making this for a big holiday gathering. You can easily transform this into something spectacular and new without reinventing the wheel.
If you’re feeling adventurous, you can definitely try adding things right into the filling before you pour it over the crust. For a real showstopper, how about dreaming up a **Triple Chocolate Cheesecake**? Fold in some milk chocolate chips right along with the heavy cream.
For a touch of tartness that cuts through all that chocolate richness, try swirling in some raspberry preserves toward the end of the mixing process. Just add a few dollops and use a knife to gently marble it through—don’t mix it completely! That contrast is divine. If you’re interested in a non-cheesecake dessert that handles fruit well, you should check out my recipe for the best moist cherry cake; the technique uses similar balancing acts!
Making a No Bake Chocolate Cheesecake Alternative
If you’ve had a long day or maybe your oven is already packed full of holiday cookies, you can absolutely turn this into a **No Bake Chocolate Cheesecake**! It’s cheating a little bit, but nobody’s judging, right? The preparation is exactly the same through the mixing of the creamy filling.
Here’s the only switch: skip the oven preheating entirely, skip the water bath step (saved you some work!), and skip the baking. You just pour that beautiful filling right over your pre-baked or no-bake crust. Then, here’s the critical part from the original notes: you must be patient. Instead of baking, you chill it. Cover the whole thing carefully and pop it into the refrigerator for a minimum of 8 hours, but overnight is always the sweet spot. It sets up firm and cold, and it’s nearly as creamy as the baked version!
Serving Suggestions for Your Decadent Cheesecake
Whew! You’ve made it through the baking, the cooling, and the chilling, and now you have this magnificent, glossy dessert sitting in front of you. It’s almost too perfect to cut into, isn’t it? While this rich chocolate dessert stands tall all on its own, I always like offering a little something extra on the side because contrast is key when you’re dealing with something this intensely wonderful.
If you’re serving this after a heavy meal, you definitely want something that cuts through that super-rich chocolate. Fresh raspberries or maybe some tart cherries are my absolute go-to. The slight acidity cleanses your palate between bites, making the next bite taste just as amazing as the first! Don’t overdo the garnish; remember, this dessert is the star of the show.
If you’re serving it for an adult gathering, I sometimes like to offer a little side shooter of something warm. My famous caramel apple martini recipe often shows up at parties, but for cheesecake, something dark and slightly bitter is amazing. A small glass of strong, black espresso is perfect. The bitterness of the coffee mirrors the bittersweet chocolate in the ganache beautifully. Or, if you want to lean into the evening, a tiny splash of raspberry liqueur served alongside the slice really makes it feel gourmet!
Storing and Reheating This Impressive Chocolate Cheesecake
Okay, we’ve reached the best part—eating it! But after you’ve served the first few slices, you need to know how to keep the rest of this masterpiece tasting perfect for later. Because this is such a rich and decadent dessert, proper storage is non-negotiable, especially with that gorgeous ganache sitting on top.
First things first: chilling time! You must keep this covered tightly in the refrigerator. I usually use plastic wrap, but make sure it’s either tented loosely over the top or placed directly on the plastic wrap to prevent condensation from making the ganache sticky or wet. It stays magnificently fresh for up to five days in the fridge. The cold actually seems to deepen the chocolate flavor overnight, which is fantastic!
When it comes to slicing, this is where a sharp knife makes all the difference. Because the cheesecake is so dense and cold after all that chilling, trying to use a dull knife is just asking for a messy wedge. I always dip my knife into a tall glass of very hot water, wipe it totally dry, and *then* make the cut. Dip, wipe, cut—repeat for every slice. It gives you those clean, sharp edges we want on a gourmet dessert. If you want to try another recipe that involves chilling, my graham cracker toffee recipe also benefits hugely from a good, long chill!
Now, can you freeze it? Yes, you absolutely can! If you know you won’t eat it within five days, wrapping it well is key. Take the fully chilled cheesecake (ganache and all) and wrap it first in plastic wrap, making sure to seal it tight against the surface, and then wrap it again in aluminum foil. This double-wrapping protects it from freezer burn. It thaws best when moved to the refrigerator overnight first. Give it a good 12 hours in the fridge to gently come back to temperature. When it’s done thawing, it should taste almost as good as fresh!
Frequently Asked Questions About Making Chocolate Cheesecake
I know, I know, sometimes you follow every step perfectly and it still feels like you have a question lingering in the back of your mind. That’s totally normal! Cheesecake recipes demand precision, but that doesn’t mean they aren’t forgiving if you know the ‘why’ behind the steps. Here are the most common things people ask me when they are attempting this **homemade cheesecake** for the first time!
What is the best way to get a smooth, creamy chocolate dessert?
This answer comes down to two non-negotiable steps, which I preach about constantly! First, you absolutely must use room-temperature cream cheese—I mean really soft. If it’s cold, your mixer creates tiny marble-sized lumps that never disappear, even when baked. Second, and this is huge, do not overmix once the eggs are in! You want to mix only until the batter is homogenous. If you beat it too vigorously, you incorporate air, and that air creates bubbles, resulting in cracks instead of that beautiful, **creamy chocolate dessert** texture we love.
Can I substitute the chocolate wafer cookies in this recipe?
You certainly can, although the chocolate wafer base really brings that deep cocoa flavor through! If you can’t find wafers, Oreos are an excellent substitute. Just make sure you scrape out that white filling first, or they add too much sugar and fat, which affects the bake. If you’re going for an **Oreo Crust Cheesecake**, just crush them with the filling included. If you’re out of chocolate cookies altogether, plain graham crackers work fine, but you’ll lose some of that chocolate punch. Try tossing a tablespoon of cocoa powder into your graham cracker crumb crust to boost the flavor back up!
If you want to explore crushing cookies without the mess, I have a fantastic tip on making easy Oreo balls that uses a food processor to perfect the crumb texture!
Another question I always get is, “How do I know when it’s actually done?” I look for visual cues before poking it. When you gently bump the counter, the very center should still jiggle like Jell-O, but the outer two inches should look completely set and firm. It’s that tiny bit of wobble in the middle that solidifies into perfection as it cools slowly in the oven. Don’t rely just on the toothpick test alone!
Nutritional Estimates for This Rich Chocolate Dessert
Okay, full transparency time—this is the kind of deeply decadent dessert you make for celebrations, not necessarily every Tuesday night! Because it’s made with real cream cheese, lots of sugar, and that glorious bittersweet chocolate, it definitely falls into the ‘treat yourself’ category. We always have to remember that these numbers are just estimates, based strictly on the amounts listed in the recipe above.
I always put a little disclaimer on my recipes because every brand of chocolate or cream cheese might vary slightly! If you want to double-check my source for making sweet potato pie, which shares some structural similarities with this bake, check out my classic creamy sweet potato pie recipe for comparison. But here is what we’re typically looking at per delicious slice:
- Serving Size: 1 slice
- Calories: 450
- Sugar: 35g
- Fat: 30g (Saturated Fat: 18g)
- Carbohydrates: 40g
- Protein: 8g
It’s definitely on the higher end for fat and sugar, which is exactly what makes it so incredible, right? If you’re counting religiously, always cross-reference with the exact products you use, but otherwise, embrace the richness! For more general information on recipes and site policies, please review our official disclaimer page.
Share Your Perfect Chocolate Cheesecake Creation
Alright, you’ve made it! You baked the rich, decadent creation, you covered it in that shiny ganache, and now you have the best **chocolate cheesecake** sitting in your kitchen. I truly hope you loved every single bite because I poured years of obsessive testing into getting this recipe just right for you.
But here’s the thing: baking is about sharing! I desperately want to see how yours turned out. Did the water bath work like a charm? Did your ganache set up perfectly glossy? Please don’t be shy!
Take a picture, snap a quick video, or just tell me how it went! Head down to the comments section below and drop a rating—five stars if it blew your mind, four if you have tiny feedback points. If you share photos on social media, tag me! Seeing your success stories is truly the best part of running this little corner of the internet.
If you need to reach out directly with a specific question about substitutions or issues you ran into, you can always find my contact details on the Contact page. Happy baking, and enjoy every single moment of serving up this showstopper!
PrintThe Ultimate Creamy Chocolate Cheesecake with Silky Ganache Topping
Make a rich, decadent chocolate cheesecake with a crisp chocolate cookie crust and a smooth, glossy ganache topping. This recipe yields a creamy texture perfect for any celebration.
- Prep Time: 25 min
- Cook Time: 65 min
- Total Time: 7 hours 30 min
- Yield: 12 servings
- Category: Dessert
- Method: Baking
- Cuisine: American
- Diet: Vegetarian
Ingredients
- 1 3/4 cups chocolate wafer cookie crumbs
- 1/4 cup granulated sugar
- 6 tablespoons unsalted butter, melted
- 3 (8 ounce) packages cream cheese, softened
- 1 1/2 cups granulated sugar
- 1/2 cup unsweetened cocoa powder, sifted
- 1 teaspoon vanilla extract
- 1/4 teaspoon salt
- 3 large eggs
- 1/2 cup heavy cream
- 4 ounces bittersweet chocolate, finely chopped (for ganache)
- 1/2 cup heavy cream (for ganache)
- 1 tablespoon unsalted butter (for ganache)
Instructions
- Preheat your oven to 350 degrees F. Wrap the outside of a 9-inch springform pan tightly with heavy-duty aluminum foil.
- Combine cookie crumbs, 1/4 cup sugar, and melted butter. Press the mixture firmly into the bottom of the prepared springform pan. Bake the crust for 10 minutes. Remove and let cool slightly.
- Reduce oven temperature to 325 degrees F.
- In a large bowl, beat the softened cream cheese with an electric mixer until smooth. Gradually add 1 1/2 cups sugar, cocoa powder, vanilla extract, and salt. Beat until just combined.
- Add eggs one at a time, mixing on low speed after each addition until incorporated. Mix in the 1/2 cup heavy cream. Do not overmix.
- Pour the batter over the cooled crust. Place the springform pan inside a larger roasting pan. Carefully pour hot water into the roasting pan until it reaches halfway up the sides of the springform pan (this creates a water bath).
- Bake for 55 to 65 minutes, or until the edges are set but the center still jiggles slightly.
- Turn off the oven, crack the door open slightly, and let the cheesecake cool in the oven for 1 hour. Remove from the water bath and cool completely on a wire rack. Chill in the refrigerator for at least 6 hours, or preferably overnight.
- To make the ganache, place the chopped bittersweet chocolate in a heatproof bowl. Heat the 1/2 cup heavy cream and 1 tablespoon butter in a small saucepan until simmering. Pour the hot cream mixture over the chocolate. Let stand for 5 minutes, then whisk until smooth and glossy.
- Pour the ganache over the chilled cheesecake. Spread evenly. Chill for another 30 minutes to allow the ganache to set before serving.
Notes
- For the creamiest texture, bring the cream cheese and eggs to room temperature before starting.
- Use high-quality cocoa powder for the best chocolate flavor.
- If you prefer a no-bake version, skip the water bath and baking steps; chill the filling for at least 8 hours.
Nutrition
- Serving Size: 1 slice
- Calories: 450
- Sugar: 35
- Sodium: 250
- Fat: 30
- Saturated Fat: 18
- Unsaturated Fat: 12
- Trans Fat: 0.5
- Carbohydrates: 40
- Fiber: 2
- Protein: 8
- Cholesterol: 95