

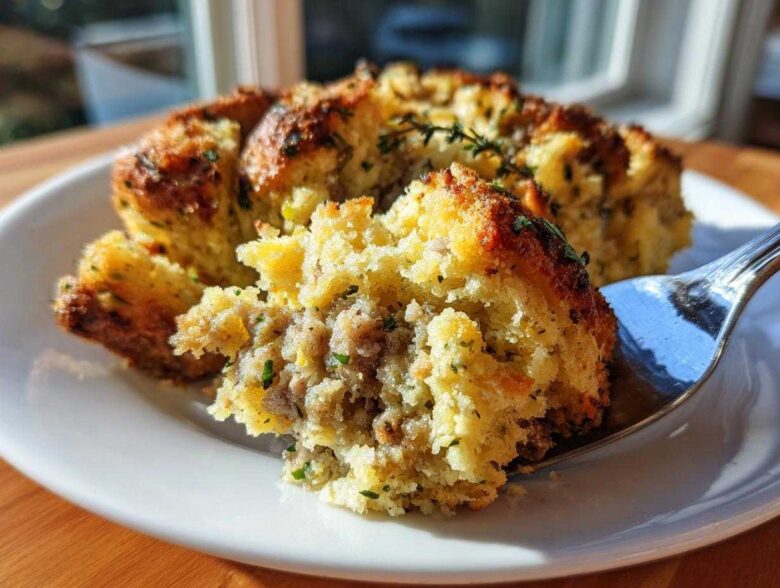
Oh, the holidays! The sheer *smell* of the house when everybody’s finally gathered around, waiting for that big bird to come out of the oven. But honestly, everyone’s secretly waiting for the side dishes, right? If there’s one thing I’ve perfected over the years, wrestling with soggy bottoms and dry edges, it’s this stuffing recipe. I must have made a dozen batches before I cracked the code. I used to think you had to choose: either beautifully golden and crispy on top, or wonderfully savory and soft all the way through.
Well, I’m here to tell you that choice is officially over! This isn’t just any recipe; this is my definitive guide to homemade stuffing that achieves that magical textural balance—moist inside, truly crispy outside. Forget those boxes from the grocery aisle; once you taste this sausage and fresh herb version, you’ll never go back. Trust me, mastering this one dish made me the undisputed queen of Thanksgiving at my family gathering.
That struggle to get it right? It ended the year my Aunt Carol almost cried because her grocery store mix clumped together. I swore right then and there I’d share the secrets I learned from trial and error. This classic approach, using good sausage and enough broth, is truly the best side dish for turkey you’ll ever make.
Why This Classic Homemade Stuffing Recipe Stands Out
When you’re cooking for the holidays, you need a side dish that’s reliable, flavorful, and genuinely memorable. What sets this recipe apart isn’t just the fantastic savory flavor from the pork sausage and fresh herbs; it’s about the texture engineering!
- It honors tradition without tasting boring or bland. That’s the power of using real butter and fresh vegetables, friends.
- The balance is near-perfect, which is why everyone always asks for seconds.
- It cooks relatively fast for a holiday side, about 40 minutes in the oven.
Achieving the Perfect Moist Stuffing Inside Crispy Outside Texture
This combination—that heavenly moist stuffing inside crispy outside—is the holy grail, right? The trick is two-fold. First, you absolutely must dry out your bread cubes slightly before mixing anything. We bake them for just a few minutes to make them porous. Second, the eggs mixed with the broth act as a perfect binding agent without making everything soggy. The exposed top layer crisps up beautifully if you take the foil off at the right time. It’s truly the best of both worlds in that 9×13 dish!
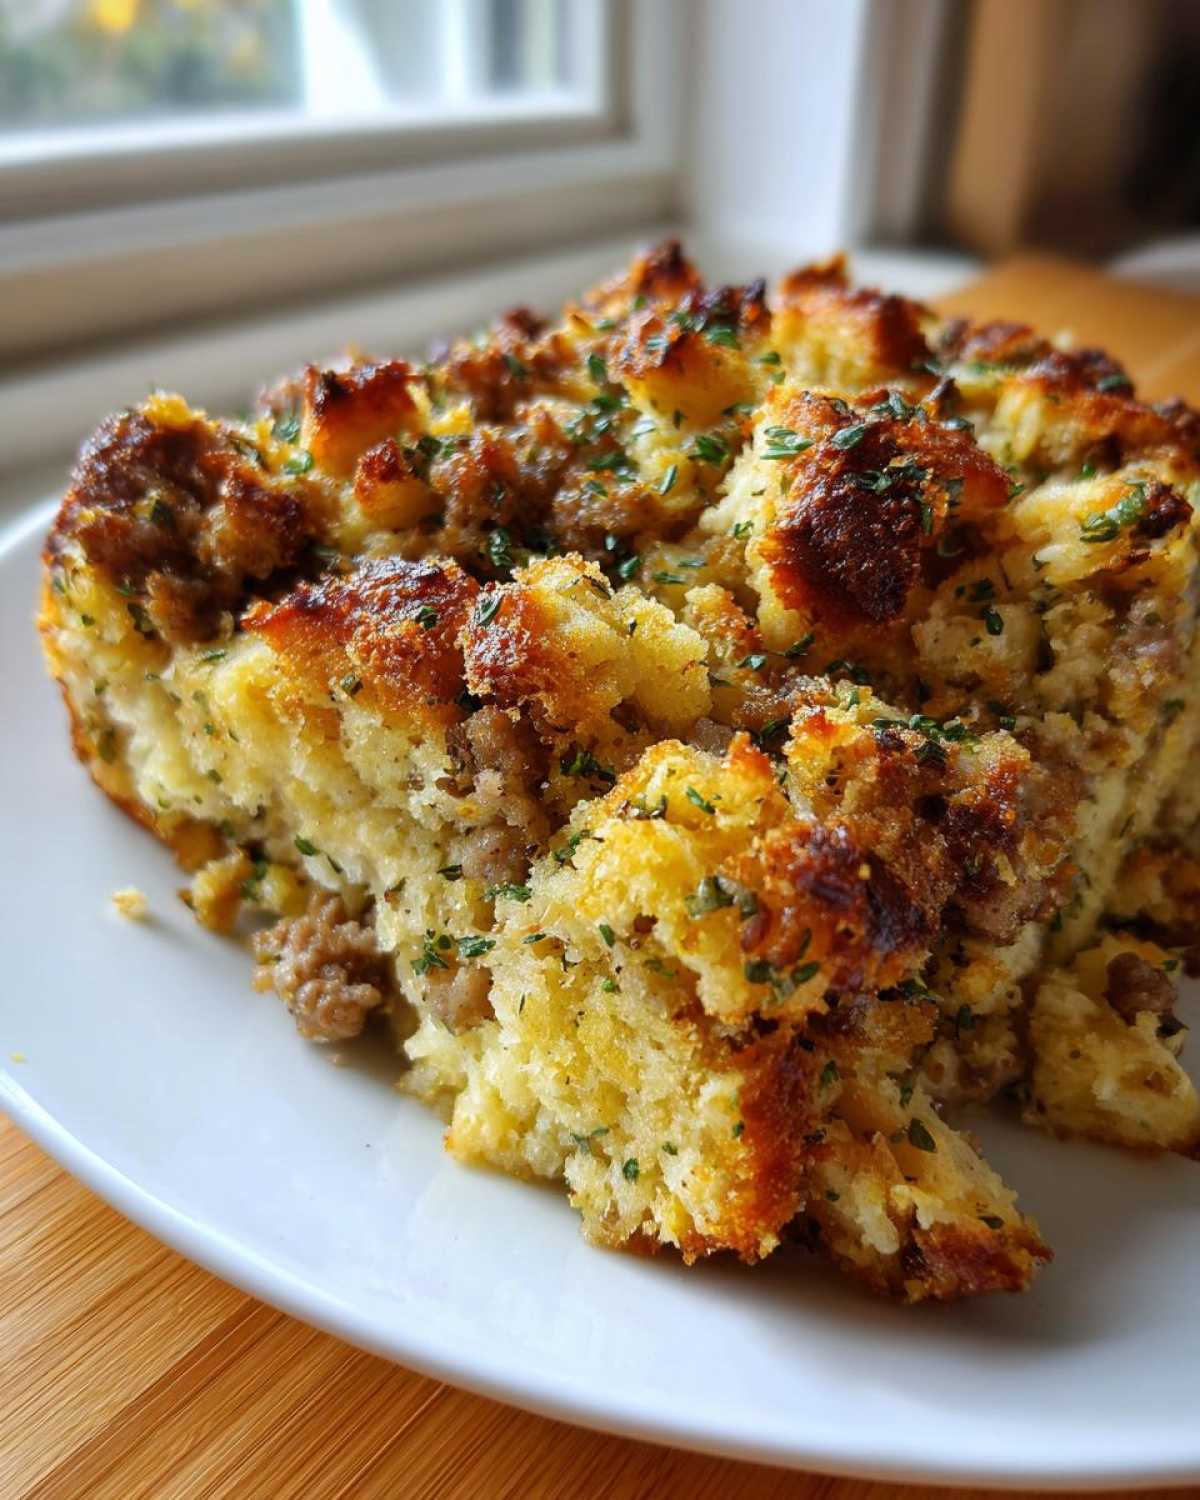
Ingredients for the Best Holiday Stuffing
Alright, let’s get down to business. If you want to make the absolute best holiday stuffing and get those compliments coming your way, ingredient quality matters! This recipe isn’t fussy, but it demands good stuff. Plan about 25 minutes for prep and 40 minutes in the oven, so we’re looking at just over an hour total time commitment for 8 generous servings. Not bad for the star side dish, huh?
The most crucial base ingredient here is the bread. You cannot, I repeat, cannot use fresh bread straight from the bag for this. We need that slightly dry, porous structure so it can soak up all that savory goodness without turning into soup. That’s why we always start by using day-old bread cubes for our stuffing.
Ingredient Clarity and Preparation Notes for Your Stuffing
Let’s talk specifics because details make the difference between good and legendary. When you measure things out, keep these little pointers in mind. It’s all about setting you up for success and avoiding that holiday baking panic!
- Bread: Make sure you have exactly 1 pound of day-old bread, cut into roughly 1-inch cubes. If your bread is more stale than day-old (like, a few days old), just skip the pre-baking step, or just bake it for 5 minutes instead of 15.
- Sausage: I specifically call for 1 pound of bulk pork sausage here. Don’t use patties that you have to crumble; the bulk stuff blends much better with the onions and celery for even flavor distribution throughout the whole dish.
- Veggies: Chop those onions and celery stalks uniformly. I aim for about a medium dice—nothing too fine that it disappears, but nothing so huge that you get a giant, unseasoned pocket of celery in your bite.
- Herbs: We rely on dried herbs here, which is fine because we cook them briefly in the butter to wake up their flavor before mixing everything in. It’s a fast way to pack a huge herbaceous punch into your bread base.
Step-by-Step Instructions for Classic Thanksgiving Stuffing
Okay, this is where the magic really comes together! I know looking at a long list of instructions can be intimidating when you’re juggling a whole holiday menu, but this process is actually very chill once you get organized. Remember, we are aiming for that perfect classic thanksgiving stuffing texture, so patience in the mixing stages is key. First thing—get your oven set to 350 degrees Fahrenheit and make sure you have a nice, greased 9×13 inch baking dish ready to go. That pan size is important because it gives us the perfect ratio of surface area for that crispy top!
Preparing the Bread Base and Sautéing Aromatics for Your Stuffing
We start by making sure our foundation is ready. Take those bread cubes and spread them out on a baking sheet, pop them in the oven for about 10 to 15 minutes until they feel dry to the touch—not rock hard, just thirsty! While that’s happening, move onto the stovetop. In your big skillet, brown that pound of sausage really well. Crumble it up as it cooks, and then, this is vital, drain off every last bit of excess grease! We want flavor, not an oil slick. Now, in that same skillet (don’t clean it, we want the sausage essence!), melt your cup of butter and add the chopped onions and celery. Let those sweat down until they’re soft, which takes about 8 minutes. Right at the end, toss in your herbs, salt, and pepper, cooking them for just one more minute until you can really smell that wonderful sage aroma.
Mixing and Baking the Perfect Stuffing
Time to combine everything! Use a really large bowl—you’ll thank me later—and gently fold together those dried bread cubes, the cooked sausage, and the buttered veggie mix. Now, whisk the chicken broth and the two large eggs together in a separate little bowl. Pour this liquid mixture evenly over the bread but stop once it looks moistened! I mean it: do not overmix. Overworking this will release starches and turn your beautiful stuffing into something closer to savory pudding. Transfer the loose mixture into your prepared baking dish. Slide it into the preheated oven for 30 to 40 minutes. You’re looking for that gorgeous golden brown crust on top, and when you poke a knife in the center, it should feel piping hot all the way through. If you need help now, feel free to check out how to get in touch with our team for quick recipe troubleshooting!
Tips for Making the Best Sausage Stuffing Recipe
Now that you have the foundation of my sausage stuffing recipe down, let’s talk about tweaking it to make it truly legendary every single time. My initial success came from paying attention to the little details the recipe card didn’t spell out perfectly.
Speaking of sausage, make sure you’re using full-flavored bulk sausage. If you use a lean turkey sausage, you’ll lose a lot of the necessary fat needed for richness and moisture cohesion. If you *must* use turkey sausage, add an extra tablespoon of butter when sautéing the veggies!
And those dried herbs? They work brilliantly, but if you want to elevate this even further, substitute the dried amounts with an equal amount of fresh herbs, chopped finely. So, that one teaspoon of dried rosemary becomes about three teaspoons of finely chopped fresh rosemary. Fresh herbs just explode with perfume when they heat up, making the entire kitchen smell like a proper holiday feast should!
Another pro tip is about the sausage fat: after you drain it, don’t toss it all! Taste a little bit of that rendered fat. If it seems incredibly salty, you might want to cut back on the added salt in the vegetable mixture. Every brand of sausage is different, you see, and knowing your ingredients is half the battle!
Make Ahead Stuffing Tips for Easy Holiday Cooking
I know that feeling—the day before Thanksgiving or Christmas, and your countertop looks like a battlefield of dirty pots and mixing bowls. If you want to save your sanity on the big day, prepping this stuffing ahead of time is totally the way to go. This recipe is fantastic because you can mix everything—the bread, the sausaged vegetables, the broth and egg mixture—up to 24 hours in advance!
Just combine it all gently, cover the whole dish tightly with plastic wrap, and tuck it into the refrigerator. The important thing to remember is that cold bread sucks up liquid differently than room-temperature bread. So, when you pull it out on cooking day, give it a quick stir and add about 1/4 cup of extra chicken broth before you put it in the oven. That little bit of extra moisture ensures you still get that wonderfully soft middle without it becoming dry.
This trick frees up your oven space for that turkey! You can start baking your stuffing while the turkey is resting; it’s a seamless transition for an organized cook.
Converting This Stuffing to Stuffing Balls Recipe
Sometimes I just don’t want to make a giant casserole, especially if I’m bringing my famous stuffing to someone else’s house. That’s when I turn this recipe into beautiful little stuffing balls! It’s incredibly simple. Once you’ve mixed everything together—making sure you haven’t added any extra broth if you’re doing balls, as the surface area is bigger—you just roll the mixture into golf-ball-sized rounds.
Place those little orbs on a rimmed baking sheet—no need to grease it heavily, as we already cooked the sausage. Then, pop them into their 350-degree oven. They don’t take nearly as long as the casserole dish because they’re smaller and exposed on all sides. I usually find 20 minutes is perfect for getting them hot through and crispy on the outside. They look so charming next to the mashed potatoes, too!
Serving Suggestions for Your Traditional Stuffing Recipe
Now that you have perfected this incredibly rich and savory stuffing, the big question becomes: what else is hitting the table? Since this recipe already packs a punch with sausage, butter, and plenty of herbs, you can afford to keep the accompaniments a little lighter. Seriously, this is the best side dish for turkey because it holds its own against the main event!
I always pair it with something tangy or bright to cut through the richness. Think simple roasted Brussels sprouts tossed with just a squeeze of lemon juice, or maybe a cranberry sauce that isn’t overly sweet. If you made this for Thanksgiving, it complements the turkey beautifully, but honestly, this savory bread pudding works just as well next to slow-cooked pork loin if you end up with leftovers!
Storage and Reheating Instructions for Leftover Stuffing
The greatest tragedy of any holiday meal is letting the glorious stuffing go to waste! But don’t panic; this recipe holds up remarkably well. Once it’s cooled slightly, transfer any leftovers into an airtight container. It stays perfectly good in the refrigerator for about three to four days. I usually try to use it up by day three, but it should last four safely.
Now, reheating requires a little finesse if you want to recapture that fresh-baked magic. If you have time, the oven is absolutely the way to go. Pop the leftover stuffing into a baking dish, add maybe a tablespoon of chicken broth right over the top to introduce some steam, cover it loosely with foil, and cook at about 325 degrees Fahrenheit until it’s heated all the way through. The foil keeps the inside soft while the heat warms things up gently.
If you’re in a hurry and only reheating a small portion, the microwave will certainly work, but be warned: it will be soft all the way through. If your microwave batch seems a little dry afterward, don’t stress! Just sprinkle a tiny bit of water or broth over the portion before zapping it for 30-second intervals. For an extra bonus, if you microwave it and it lost all its crispiness, spread that portion out on a baking sheet and pop it under the broiler for just 2 or 3 minutes. Watch it like a hawk, because that top will get just as crisp as the first time, turning day-old stuffing into a brand-new delight!
Frequently Asked Questions About Making Perfect Stuffing
I get so many lovely questions about this recipe! It’s totally normal to tweak things based on what you have in your pantry or what your family likes. Here are the questions I hear the most about making sure your stuffing turns out absolutely perfect, every single time.
Can I use regular, sliced sandwich bread instead of day-old cubes?
You certainly *can*, but you absolutely must dry it out more than you think! If you use fresh bread, it absorbs too much liquid too quickly and you end up sinking straight into mush territory. If that’s all you have, cube it up and bake it slow—maybe 20 minutes—until it’s very firm and starting to feel light. Remember, perfectly dried bread is the magic behind achieving that great moist stuffing inside crispy outside texture we want!
What if I don’t want to use sausage in my stuffing?
That’s an easy fix! You can absolutely make a stunning vegetarian or poultry-only version. If you skip the sausage, you lose a lot of essential rendered fat that keeps things moist. My number one tip here is to replace that missing fat: sauté the onions and celery in a full cup of butter (no less!), OR, use bacon fat if you have some saved up. Another popular option for a richer flavor is to substitute the pork sausage with crumbled, cooked chicken or turkey, but you’ll need to really amp up the herbs and maybe add a little extra broth.
What temperature should the internal stuffing reach before I pull it out of the oven?
This is a really important food safety question, especially when you’re cooking for a crowd! Since we are baking this in a big dish, you need to ensure the center is hot enough. I aim for an internal temperature of 165 degrees Fahrenheit. You can use an instant-read thermometer to check that center spot where the liquid pools underneath the crust. If it’s below 160°F, give it another 5 to 10 minutes, covered.
Can this sausage stuffing recipe be doubled for a very large crowd?
Yes, it scales up, but you might need a different pan! This recipe is perfect for that 9×13 inch dish we mentioned. If you double it, don’t try to cram it into the same pan; it will bake unevenly and the top won’t get crispy because the depth will be too great. Use two 9×13 dishes or perhaps a larger roasting pan that is shallower. Just remember that larger volumes sometimes need an extra 5 to 10 minutes of baking time!
If you have any other concerns about substitutions or techniques, please feel free to review our privacy policy for contact information!
Nutritional Estimates for This Comfort Food Stuffing
Now, before you dive headfirst into that heavenly bowl of savory goodness, let’s toss a quick glance at the numbers. I always get asked about the nutritional side of things, especially when we’re talking about sausage, butter, and bread all hanging out together! Remember, this delicious, rich dish is the definition of comfort food, so we aren’t aiming for low-calorie here—we’re aiming for *delicious*.
The estimates below are based on the full recipe divided into 8 generous servings, using standard ingredient brands. Your actual numbers might wiggle a tiny bit depending on the fat content of the bulk sausage you choose, but this gives you a great ballpark figure!
- Serving Size: Approximately 1 cup
- Calories: Around 450 per serving
- Total Fat: About 28 grams (with 10 grams of that being saturated fat—that’s the butter and sausage working hard!)
- Carbohydrates: Roughly 35 grams
- Protein: A solid 15 grams to keep you full through all those holiday speeches
- Sugar: Very low, just about 3 grams (mostly naturally occurring molasses from the brown sugar we didn’t even use!)
- Sodium: This one is a bit higher at 650 mg, so keep that in mind if you’re watching your salt intake.
If you’d like to see the full breakdown, including the cholesterol and fiber counts, you can always review our official nutritional disclaimer page. But honestly? On Thanksgiving Day, this stuffing is worth every single glorious bite. Go ahead, have a second scoop!
PrintClassic Homemade Herb and Sausage Stuffing

A traditional recipe for moist, savory stuffing with a crispy top, featuring fresh herbs and sausage.
- Prep Time: 25 min
- Cook Time: 40 min
- Total Time: 65 min
- Yield: 8 servings
- Category: Side Dish
- Method: Baking
- Cuisine: American
- Diet: None
Ingredients
- 1 pound day-old bread, cut into 1-inch cubes
- 1 pound bulk pork sausage
- 1 cup unsalted butter
- 2 large yellow onions, chopped
- 4 celery stalks, chopped
- 1 tablespoon dried sage
- 1 teaspoon dried thyme
- 1 teaspoon dried rosemary
- 1 teaspoon salt
- 1/2 teaspoon black pepper
- 2 cups chicken broth
- 2 large eggs, lightly beaten
Instructions
- Preheat your oven to 350 degrees Fahrenheit. Grease a 9×13 inch baking dish.
- Spread the bread cubes on a baking sheet. Bake for 10 to 15 minutes until lightly dried out. Set aside.
- In a large skillet over medium heat, cook the sausage, breaking it up with a spoon, until browned. Drain off excess grease and set the sausage aside.
- In the same skillet, melt the butter. Add the onions and celery. Cook until softened, about 8 minutes.
- Stir in the sage, thyme, rosemary, salt, and pepper. Cook for 1 minute until fragrant.
- In a very large bowl, combine the dried bread cubes, cooked sausage, and the sautéed vegetable mixture. Toss gently to combine.
- In a separate bowl, whisk together the chicken broth and eggs. Pour this mixture over the bread mixture. Toss gently until the bread is evenly moistened. Do not overmix.
- Transfer the stuffing mixture to the prepared baking dish.
- Bake for 30 to 40 minutes, or until the top is golden brown and crispy and the center is heated through.
Notes
- For extra moisture, cover the dish loosely with foil for the first 20 minutes of baking, then remove the foil.
- If you prefer stuffing balls, scoop the mixture into small balls and bake on a sheet pan for 20 minutes.
- You can prepare the mixture up to 24 hours ahead and keep it covered in the refrigerator before baking. Add 1/4 cup more broth before baking if preparing ahead.
Nutrition
- Serving Size: 1 cup
- Calories: 450
- Sugar: 3
- Sodium: 650
- Fat: 28
- Saturated Fat: 10
- Unsaturated Fat: 18
- Trans Fat: 0
- Carbohydrates: 35
- Fiber: 2
- Protein: 15
- Cholesterol: 75