

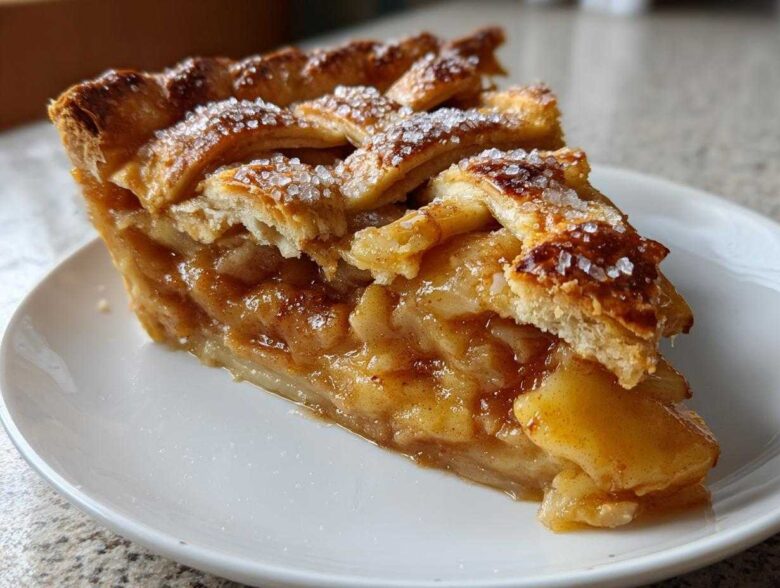
Oh my gosh, is there anything better than the smell of a rich, buttery homemade apple pie baking on a Sunday afternoon? Seriously, that scent alone fixes everything. I spent years chasing that perfect slice—you know, the one with the crust that shatters when you poke it and a filling that’s sweet but still screams ‘apple!’ I finally nailed it by combining a few old-school secrets. This truly is the ultimate easy homemade apple pie recipe because I’ve taken out all the tricky parts while keeping that flaky crust and perfectly spiced, sweet and tart filling intact. Trust me, if you follow these steps, you’re getting the best homemade pie on the block!
Why This Homemade Apple Pie Recipe Stands Out
I know you’ve tried other recipes, and maybe you ended up with a tough crust or a watery filling. Not here! This particular homemade apple pie is different because it guarantees amazing results for weekend baking projects.
- You get that legendary flaky crust every single time.
- Assembly is surprisingly quick—you won’t spend all day in the kitchen!
- The filling is perfectly balanced: sweet and tart without being syrupy.
The Secret to a Buttery Crust Pie
This is where most people go wrong! For a successful buttery crust pie, everything needs to be cold. I mean ice cold. When the butter hits that hot oven, those tiny, cold pockets of fat create steam, and that steam is what separates the layers of dough, giving you that beautiful flaky pie crust recipe texture. Don’t cheat this step!
Perfectly Spiced Cinnamon Apple Dessert Filling
We aren’t just relying on sugar here; flavor is huge! This sweet and tart apple pie gets its warmth—perfect for fall baking recipes—from a specific blend of cinnamon, nutmeg, and just a whisper of allspice. It makes this cinnamon apple dessert taste exactly like an old fashioned apple pie should.
Gathering Ingredients for Your Homemade Apple Pie
Okay, ready to gather your supplies? Making a stunning homemade apple pie really starts with quality ingredients. I never skimp here because, frankly, the filling and the crust are everything! We’re going for that classic taste that makes people ask for the recipe.
For the Flaky Pie Crust Recipe
Remember, this is where we build that gorgeous flaky pie crust recipe. Keep that butter rock hard! Here’s what you need for the dough:
- 2 1/2 cups all-purpose flour
- 1 teaspoon salt
- 1 cup (2 sticks) unsalted butter, cut into small cubes and kept freezing cold
- 1/2 cup ice water, plus a splash more if your dough looks too dry
For the Made From Scratch Pie Filling
This mixture packs the sweet and tart punch we need. I always use Granny Smith apples because they hold their shape perfectly and don’t turn to applesauce. Slice them about 1/4 inch thick—not too thin!
- 6 large Granny Smith apples, peeled, cored, and sliced 1/4 inch thick
- 1 cup granulated sugar
- 1/4 cup packed light brown sugar
- 1 teaspoon ground cinnamon (don’t skimp!)
- 1/4 teaspoon ground nutmeg
- 1/8 teaspoon ground allspice
- 2 tablespoons all-purpose flour (this is key for thickening!)
- 1 tablespoon lemon juice
- 1 large egg, beaten (for that shiny egg wash before baking)
- 1 tablespoon coarse sugar (for sprinkling on top)
Simple Apple Pie Tutorial: Making the Flaky Crust
Alright, let’s tackle the crust first because this is the heart of any great homemade apple pie. If you get this right, the rest is easy street! We’re making that buttery crust pie mixture. Whisk your flour and salt together, then get your cold butter cubes in there. I don’t mess around with fancy tools; my fingers work just fine, but work fast so the butter doesn’t melt in your warm hands. You need to squish that butter into the flour until you have mostly pebbles—some the size of peas, some the size of small beans. Those pea-sized bits are your insurance policy for flakiness!
Next, toss in the ice water, tablespoon by tablespoon. You absolutely must stop mixing the second the dough starts clinging together. If you stir too long, poof! Goodbye, flaky pie crust recipe! Divide that shaggy mess into two even stacks, wrap them tight in plastic wrap, and honestly, you must chill them for at least an hour. If you skip that chilling time, I promise you, your dough will fight you when you try to roll it out next.
Tips for Keeping Your Crust Cold
Here’s how I guarantee an extra-flaky result for this buttery crust pie. First, work near an open window if your kitchen runs hot, or even better, chill your mixing bowl in the freezer for ten minutes before you start. Second, when you add the ice water, make sure the water itself is borderline slushy. I even keep my glass of water right next to the ice bucket!
When you’re using your pastry blender or even your fingertips, try to handle the dough as little as possible. The warmth transfers fast. If you see the dough starting to look slick instead of shaggy, stop immediately, wrap it up, and pop it back in the fridge for 15 minutes. This minimal handling is the real trick to tender, flaky layers!
Assembling the Classic Apple Pie Recipe Filling
Now that our dough is chilling—thank goodness—we get to the best part: the filling! This process takes zero time, but you have to be kind to those apples. You want slices, not mush, remember? Grab a huge bowl, the biggest one you have, because we need room to move.
Toss those perfectly sliced Granny Smiths with both sugars—the granulated and that rich, dark brown sugar. Then, add all those lovely warm spices we talked about: the cinnamon, nutmeg, and allspice. Gently, gently fold everything together. I mean it—use a rubber spatula and lift from the bottom. Bruised apples are sad apples, and sad apples leak too much water! The 2 tablespoons of flour is crucial here; it acts like a little sponge to soak up the juices released while baking, so we don’t end up with a soupy homemade apple pie. A little squeeze of lemon juice keeps the apples bright, too. Set it aside while you roll out your first crust!
Step-by-Step Instructions for Your Homemade Apple Pie
Now for the exciting part where everything comes together! This is how you transform that chilled dough and spiced filling into the homemade apple pie of your dreams. Make sure your oven is preheated to 425 degrees Fahrenheit before you even think about pulling that dough out of the fridge!
First, roll out one disk of that beautiful, cold dough until it’s about 12 inches across. Carefully lay it into your 9-inch pie plate. Trim it but leave about an inch hanging over the edge—we need that overhang for crimping later! Now, gently spoon in all those amazing apples. Try to mound them slightly in the center; they will settle down as they bake.
Roll out the second disk for the top crust. Lay it right over the apples. Trim the edges again and then seal them up tight by crimping them together with your thumb and forefinger. Don’t forget to cut a few vent slits in the top crust, or steam builds up and you get a messy blowout! Give the top a lovely brush with that beaten egg wash and sprinkle generously with coarse sugar for that professional sparkle.
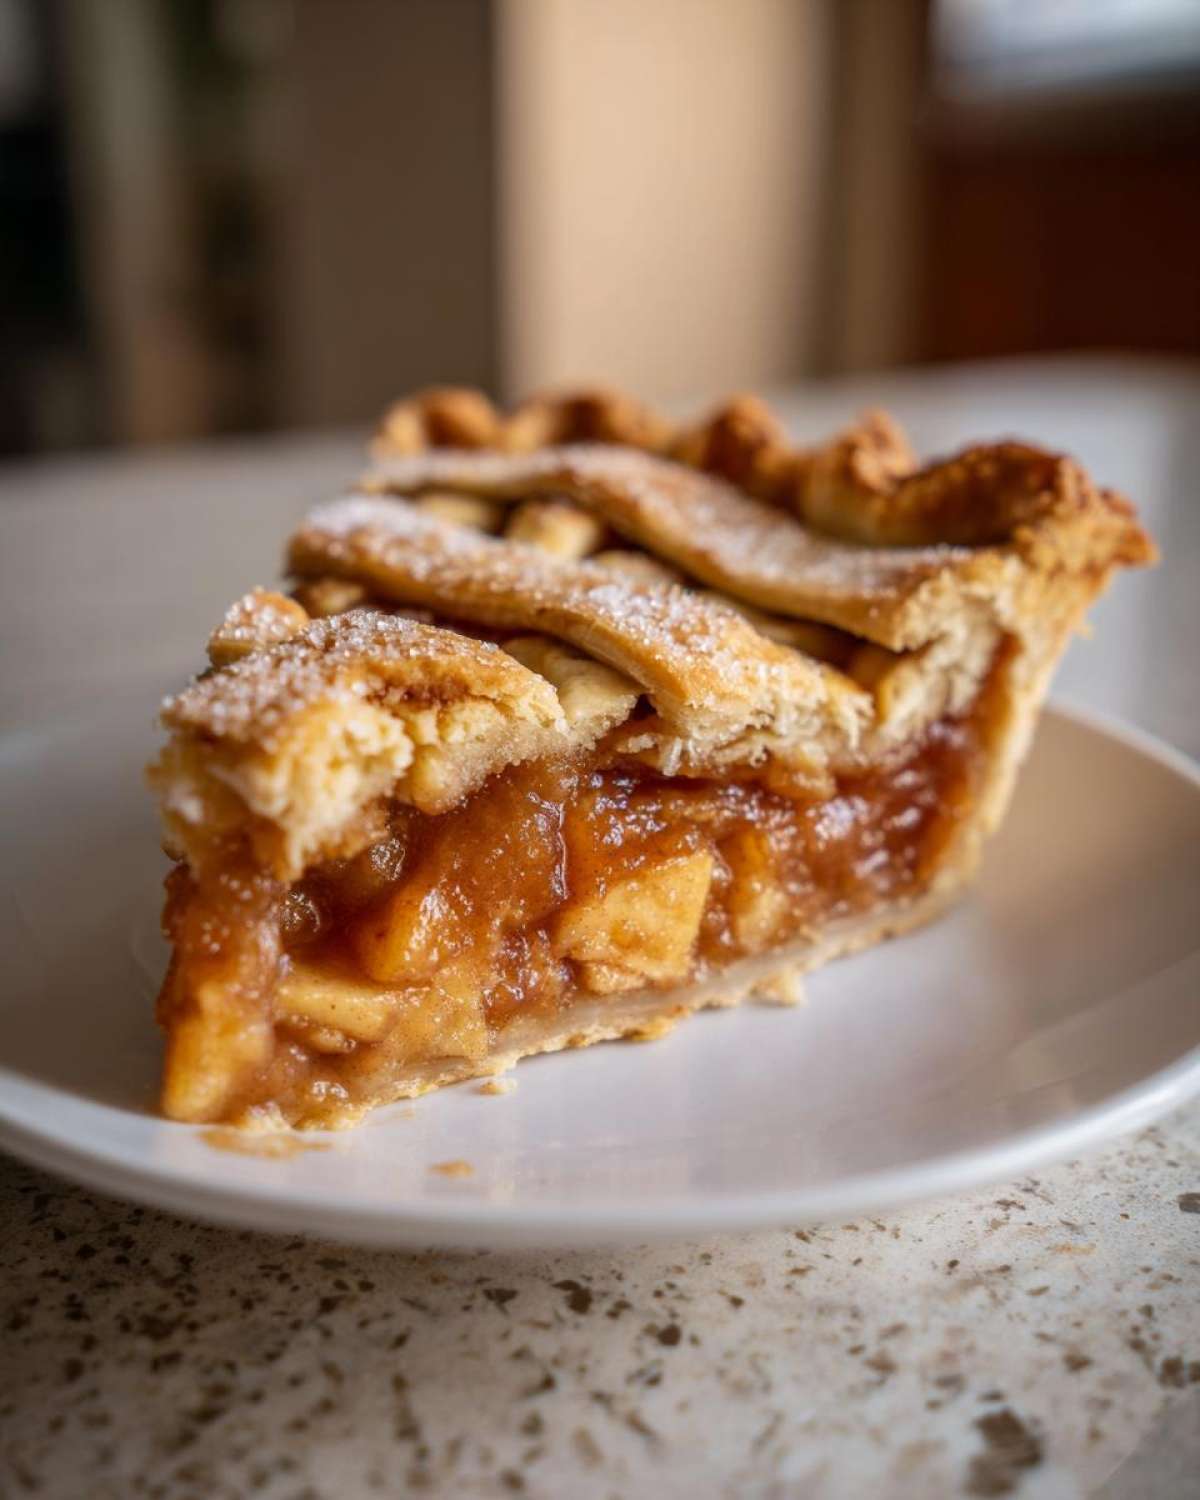
- Bake at 425°F for exactly 15 minutes. This initial blast of heat sets the crust structure quickly.
- After 15 minutes, you must drop the oven temperature down to 375°F (190°C). This prevents the crust from burning while the filling cooks through.
- Continue baking for another 40 to 50 minutes. Keep an eye on the edges!
Crucial Baking Times and Temperature Adjustments
That 15 minutes at 425°F is non-negotiable for that flaky crust we worked so hard on! It shocks the butter. Once that crust structure is set, we immediately back off the heat to 375°F. If you notice your beautiful crimped edges are getting too dark—and they often do, especially with high sugar fillings—just tear off a small strip of aluminum foil and loosely wrap it around the pie edge. This protects the crust without blocking the steam vents in the center. It’s that easy!
You’ll know the pie is done when the crust is a deep, rich golden brown and you can see the filling bubbling thick and slow through those steam vents. Remember patience for the cooling stage, otherwise, your perfect homemade apple pie will just slide right out!
Cooling and Serving Your Apple Dessert for Holidays
You just pulled a masterpiece out of the oven, and I know you want to slice into it right now. Hold. The. Line! This is maybe the hardest part of making any homemade apple pie: waiting. The filling is molten lava hot, and if you cut it early, it just turns into a lovely, warm mess. You absolutely must let this cool on a wire rack for at least three full hours. I know, it’s torturous, but this time lets the flour and juices solidify so you get those perfect, clean wedges.
Once it’s set, this sweet and tart apple pie is perfect served warm or room temperature. It’s one of my favorite comfort food desserts for fall baking recipes. A tiny dollop of vanilla bean ice cream is mandatory, or maybe a sharp cheddar cheese slice if you’re feeling truly traditional for your apple dessert for holidays!
Tips for Success with This Easy Apple Pie From Scratch
Even though this is an easy apple pie from scratch, there are always those little details that separate a good pie from the absolute best homemade pie. You want that gorgeous, golden slice every time, right? So, let’s talk about troubleshooting your homemade apple pie before it even hits the rack.
When checking the filling, I rarely trust the toothpick test alone for the apples. Instead, look through the vents: if you see the juices rolling thick and slow, that means the flour has done its job. If it’s just liquid splashing around, give it five or ten more minutes. To beat the dreaded soggy bottom, I always bake my pies on the lowest rack possible for the first 30 minutes. That direct heat helps crisp up the bottom crust before the butter melts completely.
Ingredient Substitutions and Variations
I’m a staunch defender of Granny Smith for structure and tartness, but if you want a little more sweetness, definitely mix in half Honeycrisp or Fuji apples! They have a wonderful snap, too. If you aren’t feeling the double crust, this recipe is just as fantastic as a Dutch apple pie. Just skip the top crust entirely and use a simple crumb topping. You just mix 1 cup of flour, 1/2 cup of brown sugar, and 1/2 cup of cold butter until crumbly, then nestle that right on top of the apples before baking. It turns this homemade apple pie into a delightful crumbly-topped dream!
Frequently Asked Questions About Making Homemade Apple Pie
I keep getting asked the same few things about this recipe because people want their homemade apple pie to be perfect! It’s wonderful that so many of you are trying this classic apple pie recipe. Here are the answers to the most common questions I get about perfecting this sweet and tart apple pie.
What apples are the very best for this pie?
I highly recommend sticking to Granny Smith apples for the most reliable texture and that perfect tartness that cuts through the sweetness. But for an even richer flavor profile in your homemade apple pie, try a 50/50 mix of Granny Smith and something sweeter, like Honeycrisp or Braeburn. Avoid Red Delicious; they turn mushy way too fast.
How do I stop the filling from being runny when I slice it?
That’s usually a result of not letting the pie cool down enough, honestly! You must wait the full three hours. However, the 2 tablespoons of flour mixed into the filling helps tremendously. If you live somewhere really humid, you can try adding just a tiny bit more flour—maybe 3 tablespoons total—to your made from scratch pie filling for extra thickening insurance.
Can I freeze this easy dessert idea?
Yes, you absolutely can! If you are making this for the apple dessert for holidays, you can freeze it unbaked. Just assemble the whole thing, crimp the edges, but skip the egg wash. Wrap it tightly in several layers of plastic wrap and foil. When you’re ready to bake, let it thaw for about an hour on the counter, add the egg wash, and bake from frozen, adding about 15 minutes to the total cook time.
Is this the best homemade pie if I want a crumb topping?
While my heart belongs to the double crust, this recipe is a fantastic base for a Dutch apple pie! You just omit the top crust from the instructions. Instead, you make a quick topping with flour, brown sugar, and cold butter, and spread that right over your spiced apples. It makes for a super satisfying, textured comfort food dessert.
Storage and Reheating Instructions for Leftover Pie
Once you’ve waited the agonizing three hours for your homemade apple pie to set, storage is easy. Honestly, if you have leftovers (which I doubt!), you can keep this classic apple pie recipe covered tightly on the counter for a whole day, as the sugar content really protects it. After that, definitely move it to the fridge.
To bring back that glorious, flaky crust texture, never microwave it! That spells doom for buttery pastry. Instead, reheat individual slices right on a baking sheet in a 350-degree oven for about 10 minutes. That little refresh brings back the crispness immediately. Enjoy!
Estimated Nutritional Data for This Comfort Food Dessert
Since we all want to know what deliciousness we’re diving into, here’s a rough idea of what’s in one slice of this incredible homemade apple pie. Remember, this is just an estimate for one serving, but it gives you a good idea of why this comfort food dessert is so satisfying!
- Serving Size: 1 slice
- Calories: 410
- Sugar: 35g
- Sodium: 250mg
- Fat: 22g
- Saturated Fat: 14g
- Unsaturated Fat: 8g
- Trans Fat: 0g
- Carbohydrates: 52g
- Fiber: 3g
- Protein: 4g
- Cholesterol: 55mg
Share Your Weekend Baking Projects
Whew! We made it through the ultimate easy homemade apple pie tutorial. I am so excited for you to try this recipe. Seriously, pull out your rolling pin this weekend and give this a whirl. Every single time I make this homemade apple pie, I feel like I’ve accomplished something major!
Once you’ve let it cool (don’t forget that cooling time!), I really want to hear what you think. Drop a rating down below—five stars if you loved that flaky crust! Tell me about your experience in the comments. Did you use two crusts or try the crumb topping? Did you catch all the spice notes in that sweet and tart apple pie filling?
And if you took pictures of your gorgeous, golden results, tag me on social media! Nothing makes my day more than seeing your beautiful baking successes. Happy baking, friends!
PrintThe Ultimate Easy Homemade Apple Pie with Perfectly Flaky Crust
Follow these simple steps to make a classic, from-scratch apple pie featuring a buttery, flaky crust and a perfectly spiced, sweet and tart filling.
- Prep Time: 45 min
- Cook Time: 60 min
- Total Time: 105 min
- Yield: 8 servings
- Category: Dessert
- Method: Baking
- Cuisine: American
- Diet: Vegetarian
Ingredients
- 2 1/2 cups all-purpose flour
- 1 teaspoon salt
- 1 cup (2 sticks) cold unsalted butter, cut into small cubes
- 1/2 cup ice water, plus more if needed
- 6 large Granny Smith apples, peeled, cored, and sliced 1/4 inch thick
- 1 cup granulated sugar
- 1/4 cup packed light brown sugar
- 1 teaspoon ground cinnamon
- 1/4 teaspoon ground nutmeg
- 1/8 teaspoon ground allspice
- 2 tablespoons all-purpose flour
- 1 tablespoon lemon juice
- 1 large egg, beaten (for egg wash)
- 1 tablespoon coarse sugar (for sprinkling)
Instructions
- Prepare the crust: In a large bowl, whisk together the 2 1/2 cups flour and salt. Cut in the cold butter using a pastry blender or your fingers until the mixture resembles coarse crumbs with some pea-sized pieces of butter remaining.
- Gradually add the ice water, one tablespoon at a time, mixing until the dough just comes together. Do not overmix. Divide the dough in half, flatten each half into a disk, wrap in plastic, and chill for at least 1 hour.
- Prepare the filling: In a separate large bowl, gently toss the sliced apples with the granulated sugar, brown sugar, cinnamon, nutmeg, allspice, 2 tablespoons flour, and lemon juice until the apples are evenly coated. Set aside.
- Preheat your oven to 425 degrees Fahrenheit (220 degrees Celsius).
- Roll out one dough disk on a lightly floured surface into a 12-inch circle. Carefully transfer the dough to a 9-inch pie plate. Trim the edges, leaving a 1-inch overhang.
- Pour the apple filling into the crust. Dot the top of the apples with a few small pieces of leftover butter if desired for extra richness.
- Roll out the second dough disk. Place it over the filling. Trim the top crust, leaving a 1-inch overhang. Crimp the edges of the top and bottom crusts together to seal. Cut several slits in the top crust to allow steam to escape.
- Brush the top crust lightly with the beaten egg wash and sprinkle with coarse sugar.
- Bake for 15 minutes at 425 degrees Fahrenheit. Then, reduce the oven temperature to 375 degrees Fahrenheit (190 degrees Celsius) and continue baking for 40 to 50 minutes, or until the crust is golden brown and the filling is bubbly. If the edges brown too quickly, cover them loosely with foil.
- Cool the pie on a wire rack for at least 3 hours before slicing to allow the filling to set properly.
Notes
- For the flakiest crust, keep all ingredients, especially the butter and water, very cold.
- If you prefer a Dutch apple pie, omit the top crust and sprinkle the filling with a crumb topping made from 1 cup flour, 1/2 cup brown sugar, 1/2 cup cold butter, and 1/2 teaspoon cinnamon.
- Use a mix of apples like Granny Smith for tartness and Honeycrisp for sweetness for the best flavor balance.
Nutrition
- Serving Size: 1 slice
- Calories: 410
- Sugar: 35g
- Sodium: 250mg
- Fat: 22g
- Saturated Fat: 14g
- Unsaturated Fat: 8g
- Trans Fat: 0g
- Carbohydrates: 52g
- Fiber: 3g
- Protein: 4g
- Cholesterol: 55mg