

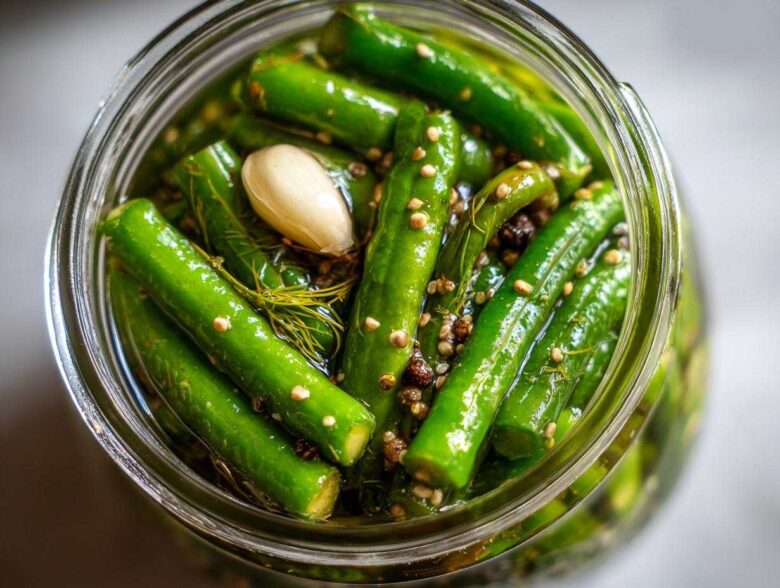
Oh my goodness, if you have a summer garden overflowing with green beans right now, you are in luck! There is truly nothing better than a crisp, tangy snap straight out of the jar, and I figured out the absolute best way to get there. We are making dilly beans today, but here’s the big secret: I’m going to show you my tried-and-true method for both traditional water bath canning and the super-fast refrigerator pickle method. Trust me, whether you want shelf-stable snacks or need a tangy treat for dinner tonight, these dilly beans will have the crunch factor everyone raves about. Stick with me; you won’t be disappointed!
Why You Will Make the Best dilly beans Every Time
Look, there are tons of ways to pickle green beans, but I promise this recipe hits every single mark. I’ve tested these methods during the busiest harvest weeks and also when I just needed a quick snack fix. You need something reliable, and this guide delivers pure crunch!
- You get total flexibility! Choose between proper water bath canning for those long-term pantry stashes, or jump straight to the refrigerator method if you need crunchy dilly beans by the weekend.
- We focus intensely on texture. I’ve included tips in the steps below that guarantee you won’t end up with floppy, sad beans—only satisfying, audible crunches!
- The flavor profile is spot-on: that perfect, bright balance of garlic and fresh dill that makes people ask for the recipe immediately.
- It handles garden overload! This recipe is scaled nicely to produce six full pints, which is perfect for saving that big summer haul.
Essential Ingredients for Perfect dilly beans
When you’re making preserves, the quality of what goes in directly dictates what you get out. Don’t skimp here! Having all these components ready before you start boiling water is half the battle. I’ve listed everything you need for six perfect jars of what I consider the best dilly beans out there. Remember, we are using canning measurements, so be accurate!
- 3 lbs fresh green beans, trimmed (Make sure these are good quality! No floppy ones allowed.)
- 6 cloves garlic, peeled and halved (Fresh is best, obviously.)
- 1 tablespoon whole black peppercorns
- 1 tablespoon mustard seeds
- 1 teaspoon dill seed (or 3 fresh dill heads if you have a great dill patch!)
- 1/2 teaspoon red pepper flakes (This is totally optional, but if you like a little zing, throw them in.)
- 3 cups white vinegar (It must be 5% acidity—this is non-negotiable for safe pickling!)
- 3 cups water
- 3 tablespoons pickling salt (Seriously, do not use standard iodized table salt! It makes the brine cloudy. We want crystal clear jars.)
- Optional: 6 small grape leaves (These are my little secret weapon for crunch!)
Ingredient Notes and Substitutions for dilly beans
Let’s talk specifics, because these little decisions make a big difference in your final jar of dilly beans. First off, the beans themselves. They should be young, crisp, and green. If they feel soft when you squeeze them before the brine goes in, they won’t get crunchy later, no matter what tricks I teach you!
If you use fresh dill heads instead of dill seed, you get that beautiful, floral aroma that dried seed just can’t match. If you use fresh heads, make sure they are fully intact and tuck one right into each jar. And the grape leaves? They contain tannins. Tannins are your best friend when pickling crunchy vegetables because they help inhibit the enzymes that cause softening. Don’t skip them if you are worried about texture!
One last major point—that salt! I listed 3 tablespoons of pickling salt—why? Because it’s pure sodium chloride. Table salt has additives, most notably iodine and anti-caking agents, which mess with the clear brine and can even add a metallic off-flavor to your dilly beans over time. Be a purist here; it’s worth taking the extra trip to get the *right* salt.
Equipment Needed for Your dilly beans Recipe
You don’t need a giant factory setup to make amazing dilly beans, but you do need a few essentials, especially if you plan on canning them for later enjoyment. Seriously, gathering your tools first makes the whole process smoother and cuts down on rushing around once the brine is hot!
For either method, you’ll need your jars and pot, but the canning method requires a little more specialized gear. Make sure all your equipment is clean and ready to go before you start trimming those beans!
- Pint-sized canning jars with new lids and rings (You need 6 of these total).
- A large, non-reactive saucepan (Stainless steel is perfect) for boiling your brine—no aluminum here!
- Tongs or a jar lifter—you need these to safely handle those hot jars!
- A funnel designed for canning (This saves you messy overflow when pouring the hot liquid).
- A non-metallic utensil, like a chopstick or plastic knife, for gently removing air bubbles.
- If canning: A sturdy water bath canner large enough to fully submerge your filled jars by at least one inch of water. Don’t forget the rack that sits inside it!
How to Prepare Crunchy Homemade dilly beans
Okay, this is where the magic—and maybe a little bit of controlled chaos—happens! We are moving fast here because we want to lock in that amazing crispness, especially if you are planning on canning these beauties to enjoy all winter long. Total active work time is only about 45 minutes, which isn’t bad for making shelf-stable snacks! Remember how I mentioned blanching? That quick dip in boiling water followed by an immediate ice bath is the secret to firm beans, so please don’t skip that step if you’re canning.
Once everything is prepped—jars hot, brine simmering, and beans chilled—we move fast to pack them tight. Then, you just need to choose your path: sealing them up safely in the canner or popping them straight into the fridge. It’s so simple, I promise you.
Step-by-Step: Water Bath Canning Method for dilly beans
If you want these dilly beans to last until next spring, we need to follow proper canning procedure to keep things safe. Get your water bath canner boiling before you even start packing the jars!
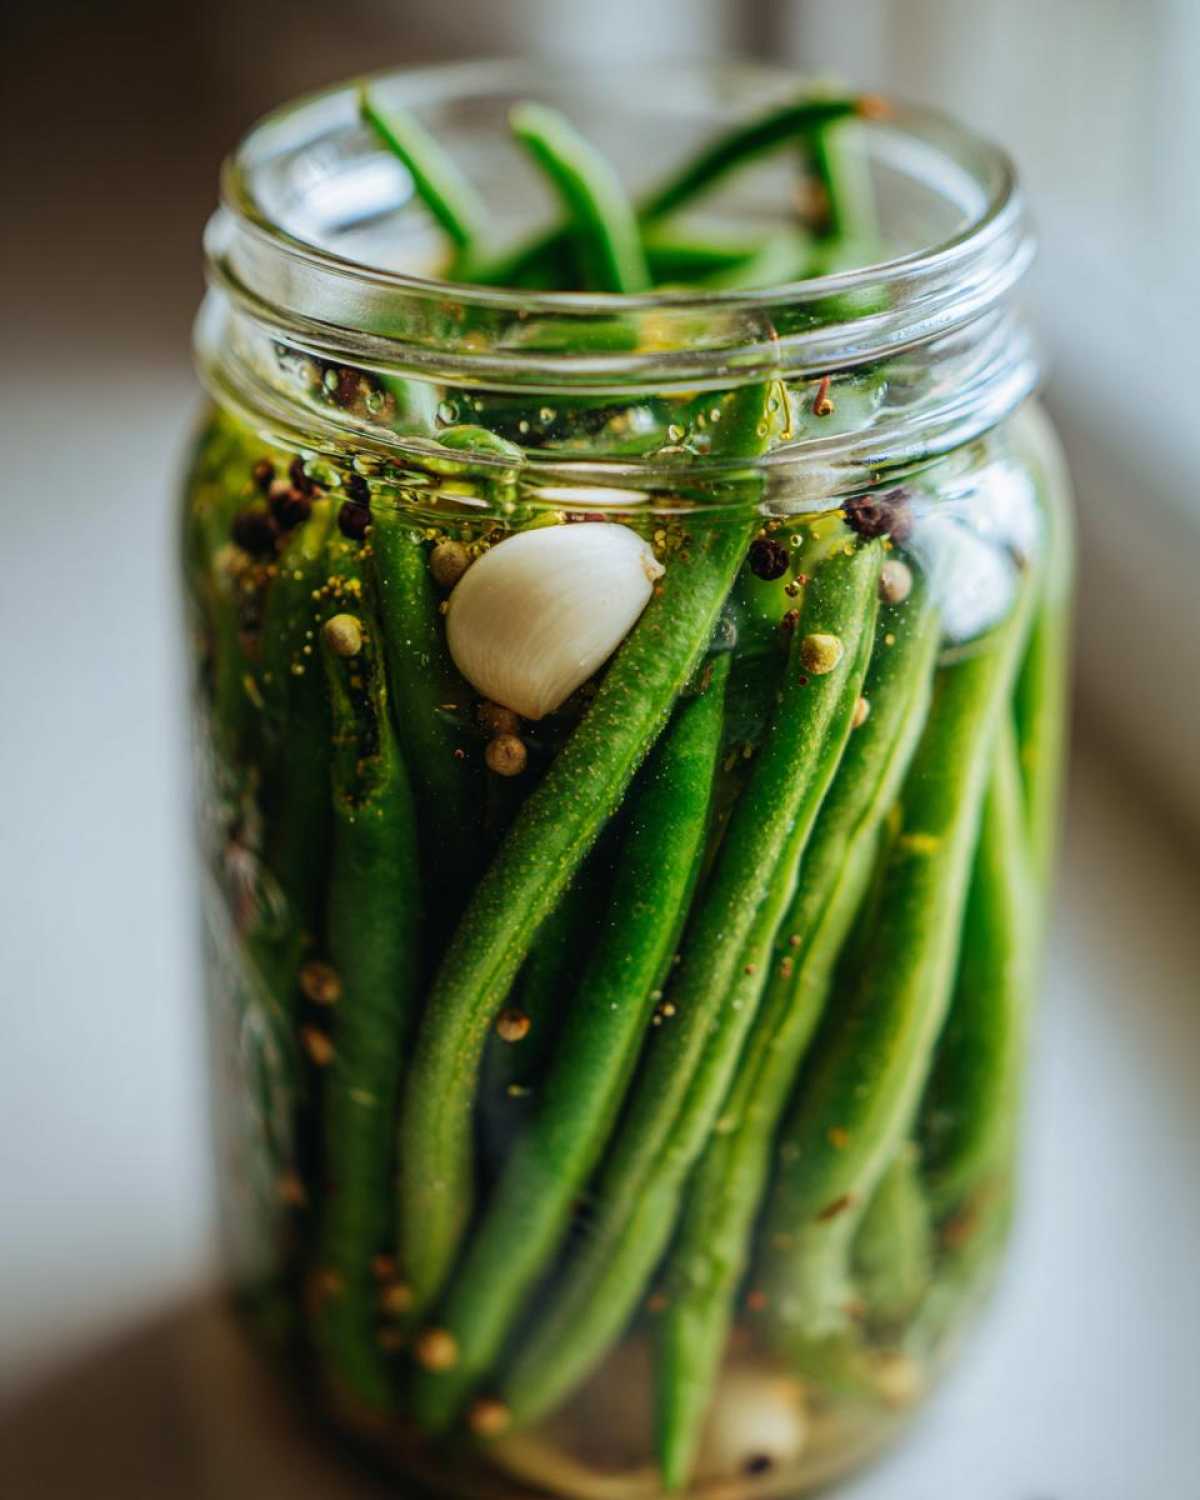
- Once your jars are hot and packed tightly with your aromatics, garlic, and those blanched, chilled beans, you carefully pour in that rolling hot brine. Make sure you leave exactly 1/2 inch of headspace at the top. Headspace is crucial!
- Take your non-metallic tool—I usually use a plastic chopstick—and run it around the inside of the jar to knock out any tiny air pockets clinging to the beans.
- Now, dip a clean cloth in a little vinegar and give those rims a really good wipe down. This removes any stray salt or oil that could prevent a proper seal. Place your lids on fingertip tight.
- Lower the filled jars into your actively boiling water bath. Process them for exactly 10 minutes. If you’re high up in the mountains, you need to adjust that time—look up your local altitude processing time!
- When the time is up, carefully lift the jars out, leaving them undisturbed on a towel or wooden board for a full 24 hours so they can seal up tight. I love listening for that wonderful *ping* sound a few minutes later!
If you’re curious about the basic science of safe home canning, I read a great overview from the experts over at About Us that really clarified why these steps matter so much!
Step-by-Step: Refrigerator Pickles Green Beans Method
Want a zesty, spicy, or plain dilly bean tomorrow? This method is your answer. It’s the fastest way to get those garlic dill pickle flavors into your garden green beans!
- Pack your clean, *unblanched* beans tightly into jars along with the garlic, spices, mustard seed, and your optional red pepper flakes or grape leaf.
- Bring your brine (vinegar, water, salt) to a rolling boil, just like the canning method. Pour that hot liquid directly over the packed beans until you have that necessary 1/2 inch of headspace.
- Seal the jars with regular lids—no need for the water bath! Let them cool completely on the counter to room temperature.
- Once cool, tuck them into the coldest part of your refrigerator. Now comes the hard part: patience! You must let these rest for at least 48 hours before you dare open one. The flavor and crunch need time to develop!
Tips for Achieving Crispy Pickles Tips for dilly beans
I cannot stress this enough: floppy pickles are a tragedy! You put all that effort into growing or buying beautiful green beans, and then they turn mushy? No, thank you! Achieving that legendary snap in your dilly beans isn’t luck; it’s chemistry! We have a few tricks up our sleeve that ensure you get the crunchiest pickled vegetables possible, whether they are canned or just hanging out in the fridge.
My absolute favorite trick, which I mentioned briefly in the ingredients, involves those little grape leaves. Tannins are compounds that help inhibit the softening enzymes in vegetables during the heating process, and grape leaves are packed with them. If you can find them—maybe from a local farmer or even by using a clean leaf from your own grapevine—tuck one into the bottom of your jar before you pack the beans in. It seriously works wonders for keeping those dilly beans firm!
If you can’t find grape leaves, the ice bath soak is your next best defense. This is different from the quick blanching step used to prepare the beans for traditional canning. For guaranteed crunch, you want to let your trimmed green beans sit completely submerged in an ice water bath for a minimum of two hours, or even four if you have the space in your fridge. This forces the cells in the bean walls to firm up rapidly. When you pack the jars, they will still be cold and rigid before the hot brine hits them.
Finally, temperature control on your brine is surprisingly important. While the brine must be boiling hot when you pour it over the spices and beans (this is what starts the pickling process instantly), ensure you don’t let that brine sit around simmering forever. The longer it cooks, the less vibrant your final flavor will be. Get that salt dissolved quickly, keep it actively boiling, and pour it immediately over your packed jars of dilly beans. Quick action equals maximum crispness!
Variations: Making Spicy Dilly Beans
So you love the classic garlic and dill flavor of standard dilly beans, but maybe you want the snack to bite back a little? I totally get it! Sometimes a pickle just needs some serious heat, and fortunately, it’s ridiculously easy to customize this recipe into a fantastic batch of Spicy Dilly Beans.
The easiest way, as you saw in the ingredient list, is simply using red pepper flakes. If you’re making a standard batch of six pint jars, I suggest adding about 1/2 teaspoon of standard dried red pepper flakes spread evenly among the jars. That gives you a nice, warming heat that builds a little as you eat them.
But why stop there? If you like things truly fiery, you can get much more creative with your heat sources rather than just relying on flakes. For my go-to spicy batch, I often swap out the standard black peppercorns, or at least supplement them, with something that brings real fire.
- Whole Dried Chilies: Instead of flakes, toss one or two small, dried Arbol or small Thai bird’s eye chilies right into each jar. They look beautiful sitting next to the green beans, and they release a fantastic, slow-building heat. Just remember to warn your guests about biting into them!
- Jalapeño Slices: For a fresher, vegetal heat, take about a quarter of a fresh jalapeño (seeds in!) and slice it thinly. Tuck two or three of those slices into each jar along with the garlic. This gives you a bright, immediate spice that pairs wonderfully with the vinegar brine.
- Mustard Seed Boost: If you like heat that focuses more on your sinuses than your tongue, try boosting the mustard seed! Bump that amount up to 1.5 or even 2 full teaspoons for a batch of dilly beans. It adds an earthy, sharp sensation that feels traditional but packs a punch.
Remember, the great thing about pickling is that you are in control. You can test a small jar first with extra heat, see how you like the flavor development after a week, and then run the rest of your batch with your favorite variation. Spicy dilly beans are just as easy to can as the mild ones, so go ahead and experiment!
Storage and Shelf Life for Preserving Garden Green Beans
So, you’ve successfully processed a gorgeous batch of dilly beans. Congrats! Now comes the hard part: waiting to eat them, or maybe just figuring out where to put them all! The storage method you chose—canning versus refrigerator pickling—makes a huge difference in how long these tangy snacks will last in your kitchen.
If you went the water bath canning route, you’ve already earned yourself some serious pantry space. Because we processed those jars in boiling water and achieved a proper vacuum seal, those dilly beans are good to go for at least a whole year, maybe even longer! Just make sure you store them in a cool, dark place, like a basement or pantry cupboard. Always inspect the seal before opening; if the lid is sucked down tight and doesn’t flex when you press the center, you are good to go. These are traditionally served cold, straight from the jar, as a perfect side dish or snack.
Now, if you made the super-speedy refrigerator pickles green beans, you need to treat those jars much more like leftovers. Since they never went through the high heat of a canner, they aren’t shelf-stable. These wonderful, crunchy treats must stay chilled in the fridge the whole time. They are usually best eaten within about two months. Honestly, though, my jars of dilly beans never last that long! They are such a fantastic summer vegetable preservation method that I always end up making a second small batch right before the first one runs out.
You don’t need to reheat either version, of course. These are meant to be enjoyed cold and crisp. The flavor on the canned ones actually deepens over the first month, so if you can resist opening them right away, you’ll be rewarded with an even better garlic dill flavor!
Frequently Asked Questions About dilly beans
I know when I started making preserves, my head was spinning with all the little rules! It’s totally normal to have questions, especially when you’re trying to nail that perfect texture. Let’s tackle the most common things folks ask me about achieving the best dilly beans, whether you’re using my full canning process or just making quick refrigerator pickles green beans.
How long do I need to wait before eating my Homemade Dilly Beans?
Ah, timing is everything when you’re craving a tangy snack! This answer depends entirely on which method you chose. If you went the super-fast Refrigerator Pickles Green Beans route, you need patience for exactly 48 hours minimum. Seriously, don’t cheat! The brine needs that time to fully penetrate the beans and start developing that fantastic flavor. Two days is the absolute minimum for good results.
If you went through the water bath canning process, you technically *can* eat them once they’ve cooled and the seal is set (usually 24 hours), but I rarely recommend it. The flavor of those beautifully canned dilly beans really deepens and mellows over two to four weeks. Trust me, waiting gives you a much better garlic dill pickle experience!
Can I use regular table salt instead of pickling salt in this Pickled Green Bean Recipe?
Oh, please don’t! I know table salt is what you have sitting right next to your stove 99% of the time, but when it comes to preserving, we must use pickling or canning salt. This is one of the non-negotiable rules for making clear, beautiful dilly beans.
Standard table salt has these anti-caking agents added so it pours freely out of the container, especially in humid weather. Those mineral additives do not dissolve nicely in the brine and end up making your beautiful vinegar-water solution cloudy, murky, and maybe even a little gritty looking. We want that brine crystal clear so we can admire those perfect green beans! Also, some table salts contain iodine, which can sometimes turn your brine slightly yellow. Just skip the trouble and grab that larger, cheaper container of pure pickling salt—it’s worth it for the look of your final product. You can review our guidelines on kitchen safety and ingredients over on our Privacy Policy page, as maintaining quality standards is important to us!
For those who skipped the canning and just made a small batch of crunchy pickled vegetables, you might be tempted to cheat here, but I still recommend the dedicated pickling salt even for your smallest jars!
Estimated Nutritional Data for Your Tangy Snack Recipes
It’s always nice to know just what you’re munching on, right? Since fresh green beans are the absolute star here, these dilly beans are wonderfully light. These figures are just estimates, since they change slightly depending on how much brine you consume with the beans, but it gives you a great baseline for this amazing garlic dill pickles flavor profile!
- Serving Size: 5 beans
- Calories: 10
- Sugar: 1g
- Sodium: 250mg (This is the highest part, due to the salt for preserving, so be mindful if you eat a whole jar!)
- Fat: 0g
- Cholesterol: 0mg
- Carbohydrates: 2g
- Fiber: 1g
- Protein: 0g
Since we aren’t adding any oils or high-sugar ingredients beyond the necessary vinegar and salt solution, these remain a fantastic, low-calorie way to snack! If you are concerned about sodium, remember that the refrigerator pickles absorb a little less brine than the canned ones, but for proper food safety in canning, you can’t really cut back on the salt needed for preservation. For full transparency regarding data usage and how we present information on this site, please review our Disclaimer page.
Share Your Best Green Bean Pickling Method Success
I have shared everything I know, from the ice bath secrets to the proper 10-minute processing time for safe canning. Now it’s your turn! When you try this ultimate guide for making dilly beans, I want to hear about it.
Did you go spicy? Did the grape leaves really work their magic to give you that incredible crunch? Please leave a rating below—it helps other cooks know this recipe is reliable. And if you share pictures of your jars of homemade dilly beans on Instagram or Facebook, tag me! I absolutely love seeing everyone preserving their garden harvests!
Estimated Nutritional Data for Your Tangy Snack Recipes
It’s always nice to know just what you’re munching on, right? Since fresh green beans are the absolute star here, these dilly beans are wonderfully light. These figures are just estimates, since they change slightly depending on how much brine you consume with the beans, but it gives you a great baseline for this amazing garlic dill pickles flavor profile!
- Serving Size: 5 beans
- Calories: 10
- Sugar: 1g
- Sodium: 250mg (This is the highest part, due to the salt for preserving, so be mindful if you eat a whole jar!)
- Fat: 0g
- Cholesterol: 0mg
- Carbohydrates: 2g
- Fiber: 1g
- Protein: 0g
Since we aren’t adding any oils or high-sugar ingredients beyond the necessary vinegar and salt solution, these remain a fantastic, low-calorie way to snack! If you are concerned about sodium, remember that the refrigerator pickles absorb a little less brine than the canned ones, but for proper food safety in canning, you can’t really cut back on the salt needed for preservation. For full transparency regarding data usage and how we present information on this site, please review our Disclaimer page.
Share Your Best Green Bean Pickling Method Success
I have shared everything I know, from the ice bath secrets to the proper 10-minute processing time for safe canning. Now it’s your turn! When you try this ultimate guide for making dilly beans, I want to hear about it.
Did you go spicy? Did the grape leaves really work their magic to give you that incredible crunch? Please leave a rating below—it helps other cooks know this recipe is reliable. And if you share pictures of your jars of homemade dilly beans on social media, tag me! I absolutely love seeing everyone preserving their garden harvests!
PrintUltimate Dilly Beans: Canning and Refrigerator Pickling Guide
Follow this guide to make crisp dilly beans using either a traditional water bath canning method for long-term storage or a quick refrigerator pickle method for immediate enjoyment. Includes a spicy variation.
- Prep Time: 30 min
- Cook Time: 15 min
- Total Time: 45 min
- Yield: 6 pints
- Category: Preserves
- Method: Water Bath Canning / Refrigerator Pickling
- Cuisine: American
- Diet: Vegetarian
Ingredients
- 3 lbs fresh green beans, trimmed
- 6 cloves garlic, peeled and halved
- 1 tablespoon whole black peppercorns
- 1 tablespoon mustard seeds
- 1 teaspoon dill seed (or 3 fresh dill heads)
- 1/2 teaspoon red pepper flakes (optional, for spicy version)
- 3 cups white vinegar (5% acidity)
- 3 cups water
- 3 tablespoons pickling salt
- Optional: 6 small grape leaves (for crispness)
Instructions
- Prepare the jars: Wash pint-sized canning jars and lids. Keep jars hot until ready to fill.
- Prepare the beans: Wash the green beans thoroughly. Trim the ends. For canning, blanch beans by submerging them in boiling water for 2 minutes, then immediately transfer them to an ice bath. Drain well.
- Pack the jars: Place 1 garlic half, 1/4 teaspoon peppercorns, 1/4 teaspoon mustard seeds, 1/4 teaspoon dill seed, and a pinch of red pepper flakes (if using) into the bottom of each hot jar. Add one grape leaf if you are using it for crispness. Pack the trimmed green beans tightly into the jars vertically.
- Make the brine: In a non-reactive saucepan, combine the vinegar, water, and pickling salt. Bring the mixture to a rolling boil, stirring until the salt dissolves completely.
- Fill the jars (Canning Method): Carefully pour the hot brine over the beans in each jar, leaving 1/2 inch headspace. Remove air bubbles with a non-metallic utensil. Wipe the rims clean and center the lids. Process in a boiling water bath for 10 minutes (adjust time for altitude). Remove jars and let cool undisturbed for 24 hours before checking seals.
- Fill the jars (Refrigerator Method): Pack the beans and spices into clean, non-canning jars. Pour the hot brine over the beans, leaving 1/2 inch headspace. Seal the jars and let them cool to room temperature. Refrigerate for at least 48 hours before eating.
Notes
- For maximum crunch, soak the trimmed green beans in an ice water bath for 2 to 4 hours before packing them into the jars.
- If you do not have fresh dill heads, use dried dill seed, but increase the quantity slightly for a stronger flavor.
- Always use canning salt (pickling salt) for pickling; table salt contains anti-caking agents that can cloud the brine.
- Refrigerator pickles must be kept cold and will last about 2 months in the refrigerator.
Nutrition
- Serving Size: 5 beans
- Calories: 10
- Sugar: 1
- Sodium: 250
- Fat: 0
- Saturated Fat: 0
- Unsaturated Fat: 0
- Trans Fat: 0
- Carbohydrates: 2
- Fiber: 1
- Protein: 0
- Cholesterol: 0