

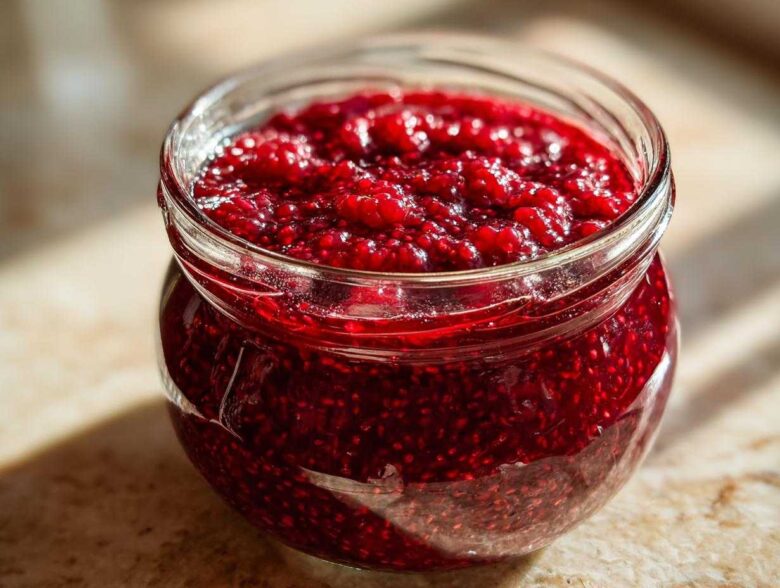
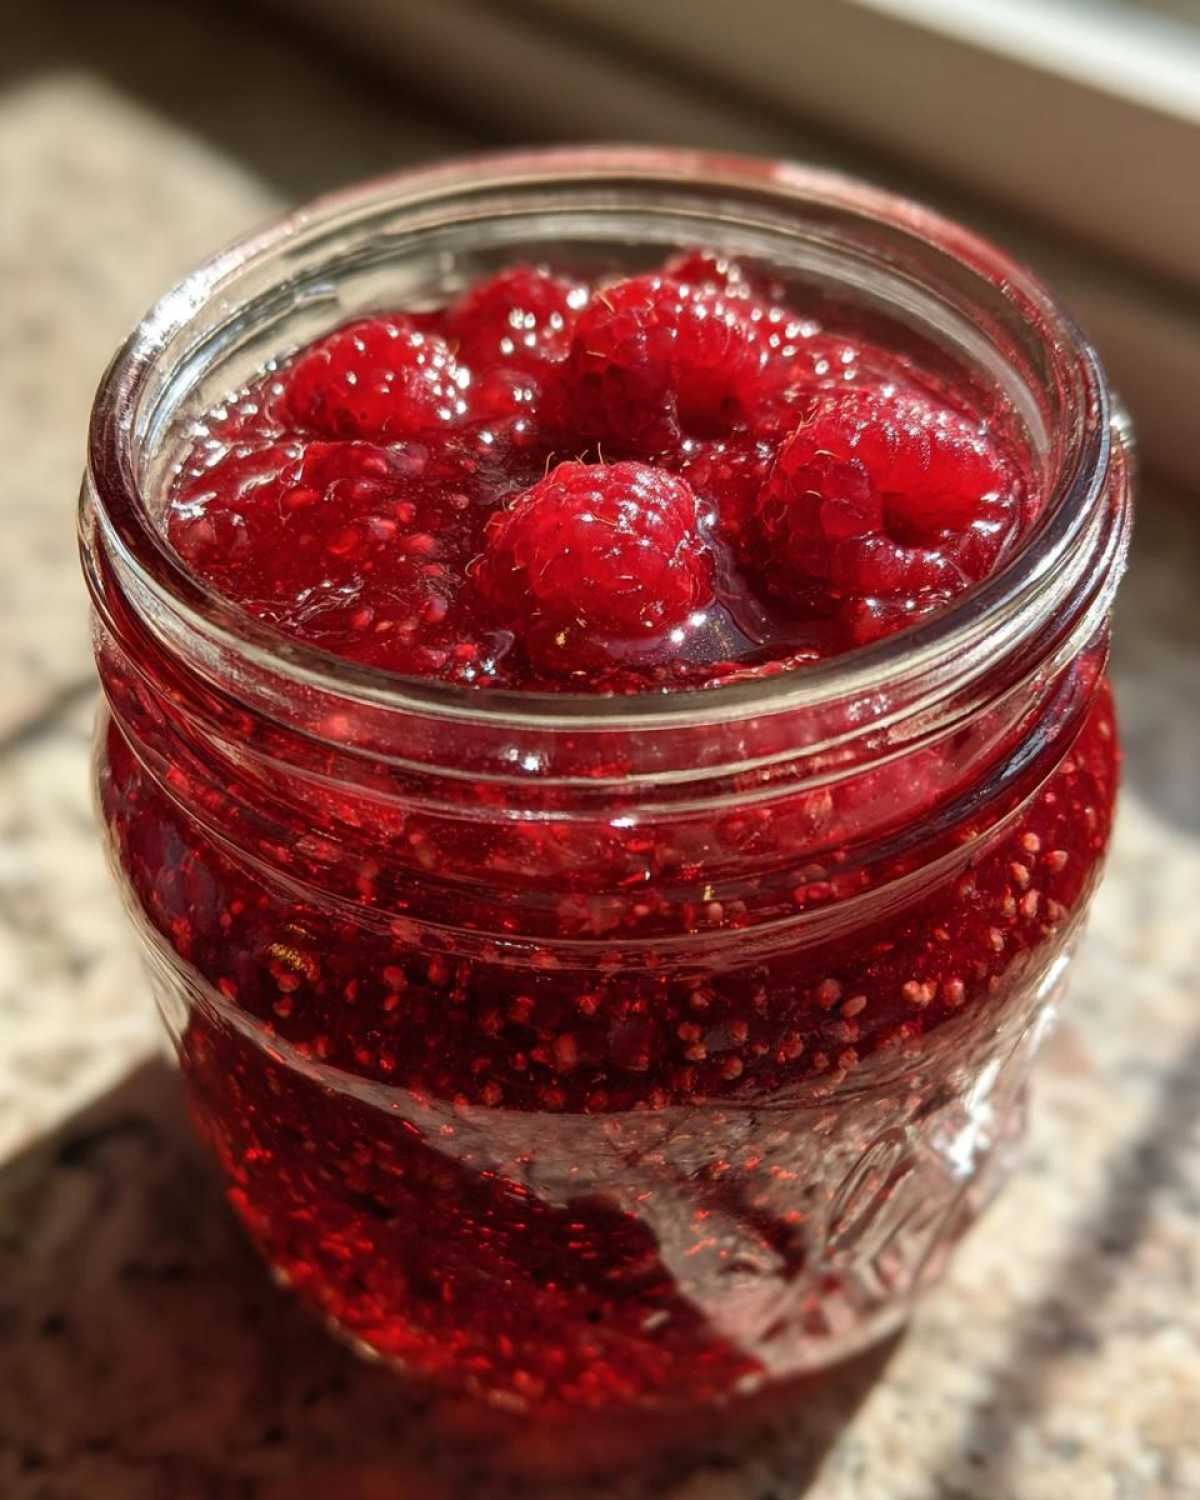
Oh, the smell of a summer kitchen when the berries arrive! There is nothing quite like that burst of flavor when you get perfect, sun-ripened raspberries. For years, I thought making gorgeous, thick raspberry jam meant wrestling with jars, boiling water baths for hours, and always, always buying that confusing box of pectin powder. Forget that! After ruining batches by using too much or too little pectin over the years, I finally went back to basics. Trust me, after testing this ratio dozens of times, I figured out how to make beautiful, bright, thick homemade raspberry jam relying only on the fruit’s natural magic and a little lemon juice. It’s the easiest, most flavorful jam you’ll ever pull off the stovetop.
You can check out more about my kitchen philosophy and why simplicity matters over on our About Us page!
Why This Is the Best Raspberry Jam Recipe Without Pectin
When I tell people this is the best raspberry jam they should ever try, I’m not exaggerating! The secret is leaving out the pectin. It keeps the flavor so unbelievably bright and stops the texture from getting gluey. Honestly, this recipe is foolproof once you know the trick of using lemon juice to help things along.
- Only three ingredients stand between you and the perfect breakfast spread!
- No pectin required—we rely on natural fruit power.
- It’s flexible: Canning or simple freezing both work perfectly.
- You get that true, vibrant taste of summer berries in every spoonful.
Quick Raspberry Jam: Prep and Cook Times
I know you want this jam right now, so the setup is lightning fast. Prep time is only about 10 minutes because we aren’t messing around with chopping anything fancy. Total time, including the boil, is usually under an hour, but remember that’s just the active cooking time!
Prep Time: 10 min
Cook Time: 35 min
Total Time: 45 min (Active time only, not including cooling/canning)
Essential Ingredients for Homemade Raspberry Jam
When you’re making a simple, quick raspberry jam like this, the quality of your few ingredients really shines through. We are keeping this ultra-focused to let the raspberries do the heavy lifting. Unlike other recipes, you won’t find a long shopping list here. We only need three things to get that beautiful, thick set for our raspberry jam.
Here is exactly what you need for this small batch recipe, which yields about four half-pint jars:
- 4 cups fresh or frozen raspberries—yes, you can absolutely use frozen if your fresh patch hasn’t produced yet!
- 3 cups granulated sugar
- 1/4 cup fresh lemon juice
Ingredient Notes and Substitutions
That lemon juice is doing more work than you think! It’s not just for a little tang; the acid activates the natural pectin that is already hiding in the raspberries, which is why we can skip that boxed stuff. Please, please use fresh lemon juice; the bottled stuff changes the game chemically and not for the better!
Now, sugar. You might wonder if you can cut down on the 3 cups, but I strongly advise against it when you aren’t using pectin. Sugar holds the structure just as much as the acid does. If you’re looking to create a very mild natural fruit preserves, you could try stevia or monk fruit, but you will absolutely need pectin then. For this specific no-pectin method, just stick to the sugar amount listed. It’s what gives you that perfect set for spreading on toast later!
How to Make Raspberry Jam Without Pectin: Step-by-Step Instructions
Okay, here we go! This is where the real magic happens in making your raspberry jam. Don’t panic about the heat; just be very attentive. The first thing you absolutely must do is get those jars ready if you’re planning on canning them long-term. If you’re just making freezer jam, you can skip the boiling part, but clean containers are still a must. Sterilize those jars in boiling water for ten minutes—safety first!
Next up, combine those beautiful raspberries and your lemon juice in your biggest, heaviest pot. We cook this over medium heat, stirring gently until the fruit completely breaks down and is just starting to bubble—that takes maybe 5 to 10 minutes. Once it’s warm and mushy, stir in all that sugar until you see absolutely nothing grainy left. Once the sugar is dissolved, stop stirring much! Seriously, just stir enough to stop it from scorching on the bottom once it hits that hard boil.
Now we boil! You need a full, rolling boil that just won’t go away when you stir it. This is the crucial part for setting our no-pectin homemade raspberry jam. Keep it going for about 15 to 25 minutes, keeping an eye on the clock and the temperature.
Achieving the Perfect Set for Your Raspberry Jam
How do you know when it’s done without a thermometer? While 220 degrees Fahrenheit is the target if you are using one, my favorite older method is the cold plate test. Before you even start cooking, put a small saucer in the freezer. When you think the jam is getting close—say, after boiling for 15 minutes—drop one tiny spoonful onto that chilled plate. Pop the plate back in the freezer for just one minute. When you pull it out, push the jam with your finger. If it wrinkles up nicely? Bingo! It’s set beautifully. If it’s still runny, cook for a few more minutes and test again. This wrinkling tells you the natural pectin and sugar have formed the perfect preserve structure.
Canning Homemade Jam vs. Freezer Jam Tutorial
Once it passes the wrinkle test, pull the whole glorious pot off the heat immediately! Skim off any foamy bits using a regular spoon; they taste fine, but they look messy on top of the finished product. Now, decide your fate!
For canning, ladle the super hot jam into your sterilized jars, leaving a quarter-inch of empty space at the top—that’s called headspace. Wipe those rims perfectly clean, pop on the lids and rings, and process them in a boiling water bath for 10 minutes. Let them cool completely on the counter, and you’ll hear that wonderful “pop!” confirming the seal. If you are making this a quick raspberry jam for the freezer, just ladle it into freezer-safe containers, leave a bit more headspace (about half an inch, because liquids expand!), let it cool uncovered on the counter, then seal and freeze!
If you ever have trouble and need to reach out or contact us for recipe questions, you can always send a message through our contact page!
Tips for Success with This Easy Jam Recipe
Listen, even with this easy jam recipe, sometimes things go slightly sideways—that’s home cooking! My biggest rookie mistake years ago was stirring furiously once the sugar was in. Once that mixture hits a full boil, stir only when necessary to keep it from scorching! Too much stirring releases steam, and steam means you lose the concentration needed for the set. If your jam looks runny after the cold plate test, don’t waste it! Just return it to a hard boil for another 5 minutes and test again.
My first batch of raspberry jam without pectin was a total liquid mess. I panicked! But what saved it was realizing I hadn’t boiled out enough water. I put it back on high heat and boiled it aggressively for another seven minutes, then tested again. Perfection! It’s all about that concentration and relying on the sugar and acid doing their job.
Making Seedless Raspberry Jam Variation
Sometimes you just don’t want those little seeds popping up while you’re enjoying your homemade raspberry jam on sourdough, right? That’s totally fine! If you prefer a seedless raspberry jam, you need to cook the fruit down *before* you add the sugar.
Follow Step 2 (cooking the fruit and lemon juice). Then, instead of adding the sugar, carefully pour that hot fruit mixture through a fine-mesh sieve set over a clean bowl. You might need a gentle nudge with a rubber spatula to get all the pulp through—don’t force the seeds! Once you’ve strained it, return the seedless pulp to the pot, add your sugar (Step 3), and continue following the instructions as written. It’s an extra quick step that makes a big difference if you have texture sensitivities!
Serving Suggestions for Your Bright Raspberry Flavor
Wow, you have finished your raspberry jam! Congratulations! Now comes the best part: eating it all! Because this jam has such a beautiful, bright raspberry flavor, it’s incredible on nearly everything. Forget just toast—although it is divine smeared thick on warm sourdough or a fresh bagel, I think. This jam is fantastic used as a swirl in vanilla bean ice cream! Seriously, just soften your store-bought ice cream a little, swirl in a thick ribbon of this jam, freeze until firm, and you have a gourmet dessert.
It also makes the most thoughtful gift. Portion it into cute jars, tie a piece of gingham ribbon around the lid, and you have easy, homemade gifts for neighbors or teachers. If you’re baking, try spooning it over the center of thumbprint cookies before you bake them, or use it as a layer in a simple shortcake. It’s just the perfect summer berry preserve to brighten up any meal, any day!
Storage and Reheating Instructions
So, you’ve made this amazing, bright raspberry jam. What now? How long it lasts totally depends on what you did at the end of the process, but I can tell you a few tricks I’ve learned about keeping it perfect, whether it’s fresh, sealed, or frozen solid.
If you went the traditional route and did the water bath canning—fantastic! You’ve got shelf-stable goodness. As long as the jar seals correctly (you should hear that satisfying ‘pop’ when they cool), these jars are good to go in a cool, dark pantry. They’ll keep perfectly for up to a year. Once you open one, though, treat it like any other jam: pop it in the fridge. Once refrigerated, use your canned jam within three weeks.
The freezer option is my favorite for truly maximizing that fresh flavor. If you made a batch of freezer jam tutorial style, just make sure those containers have a little headspace. They will stay vibrant and delicious for up to nine months in the freezer. When you want to use some, just pull a jar out the night before and let it thaw in the fridge overnight. Give it a quick stir, and it’s ready to go. Easy peasy!
And what if you just made a small batch and didn’t bother with canning or freezing? Say you just needed a small batch jam recipe for your brunch on Sunday. That’s okay! If it’s just sitting in a clean jar in the main compartment of the fridge—not canned, just chilled—I trust it for about three weeks before the flavor starts to dull down a bit. I’ve pushed it to four weeks, but honestly, this jam is too good to risk!
Frequently Asked Questions About Raspberry Jam
Okay, I know you might have a few lingering questions about getting this raspberry jam just right, especially since we skipped the pectin! These are the things I used to ask myself constantly when I first started making my own fruit preserves.
Why did my homemade raspberry jam turn out runny?
This is the number one fear when making jam without pectin! Usually, it just means you didn’t boil it long enough to concentrate the natural pectin and evaporate enough water. If you didn’t use a thermometer, the cold plate test is key—if it didn’t wrinkle, it needed more time cooking until it reached that hard boil stage. Sometimes, if the berries weren’t quite ripe, the natural pectin just isn’t dominant enough, and you’ll need that extra cooking time.
Can I really use frozen berries for this easy jam recipe?
Yes, absolutely! I mentioned it in the ingredients, but it bears repeating. Frozen berries work beautifully for this easy jam recipe. You don’t need to thaw them first, either! Just toss them straight into the pot with the lemon juice. They might take an extra minute or two to break down, but the final texture of your natural fruit preserves will be identical.
What is the yield, and is this a good small batch jam recipe?
This recipe is perfect for a small batch jam recipe! We start with four cups of fruit, and it yields about four half-pint jars, or eight small jelly jars. This is great because it means you can try making a batch without committing to six huge jars all at once. It’s definitely the best way to start canning homemade jam!
Do I have to use all that sugar in this quick raspberry jam?
For this specific no-pectin method, yes, the sugar is crucial for setting the jam, not just for sweetness! It works with the lemon juice acid to trap the fruit’s natural pectins, giving you that wonderful spreadable texture. Cutting back too much means you likely end up with a tasty, runny sauce rather than a solid preserve.
Legal and Policy Information
Now that you have the best method for making your bright and flavorful raspberry jam, I need to close things out properly. You know I like to keep things simple and direct, and that extends to our little corner of the internet as well!
Before you run off to sterilize those jars, I just want to make sure you know where to find all the formal details about how this site operates, our commitment to privacy, and what you need to know about using recipes shared here. We take transparency seriously, even when we are just chatting about preserves!
For all the official rundown—things like our terms and conditions and how we handle user data—please take a moment to review the details located on our official disclaimer page. It’s all good stuff, I promise, but it’s important you know where to find it as you explore more of these homemade raspberry jam wonders!
PrintEasy Homemade Raspberry Jam Without Pectin
Make bright, flavorful raspberry jam using only three ingredients. This recipe works for both traditional water bath canning or simple freezer storage.
- Prep Time: 10 min
- Cook Time: 35 min
- Total Time: 45 min
- Yield: About 4 half-pint jars
- Category: Preserves
- Method: Stovetop Cooking
- Cuisine: American
- Diet: Vegetarian
Ingredients
- 4 cups fresh or frozen raspberries
- 3 cups granulated sugar
- 1/4 cup fresh lemon juice
Instructions
- Prepare your canning jars and lids if you plan to can the jam. Sterilize jars by boiling them for 10 minutes.
- Combine the raspberries and lemon juice in a large, heavy-bottomed pot.
- Cook over medium heat, stirring often, until the fruit breaks down and begins to simmer, about 5 to 10 minutes.
- Stir in the sugar until it is completely dissolved. Do not stir after this point unless necessary to prevent scorching.
- Bring the mixture to a rolling boil that cannot be stirred down.
- Continue boiling, stirring occasionally to prevent sticking, until the jam reaches 220 degrees Fahrenheit on a candy thermometer, or until it passes the cold plate test (a small spoonful dropped onto a chilled plate wrinkles when pushed). This usually takes 15 to 25 minutes after reaching a full boil.
- Remove the pot from the heat. Skim off any foam that forms on the surface using a spoon.
- For canning: Ladle the hot jam into the hot, sterilized jars, leaving 1/4 inch headspace. Wipe rims clean, apply lids and bands, and process in a boiling water bath for 10 minutes. Let cool completely.
- For freezer jam: Ladle the jam into clean, freezer-safe containers, leaving 1/2 inch headspace. Let cool to room temperature, then seal and freeze.
Notes
- To test for set without a thermometer, place a small plate in the freezer before starting. Drop a teaspoon of jam onto the cold plate; return it to the freezer for one minute. If the jam wrinkles when you push it with your finger, it is set.
- If you prefer seedless jam, press the cooked fruit mixture through a fine-mesh sieve before adding the sugar.
- This jam keeps well in the refrigerator for up to 3 weeks if not canned or frozen.
Nutrition
- Serving Size: 2 tablespoons
- Calories: 100
- Sugar: 25g
- Sodium: 1mg
- Fat: 0g
- Saturated Fat: 0g
- Unsaturated Fat: 0g
- Trans Fat: 0g
- Carbohydrates: 26g
- Fiber: 1g
- Protein: 0g
- Cholesterol: 0mg