

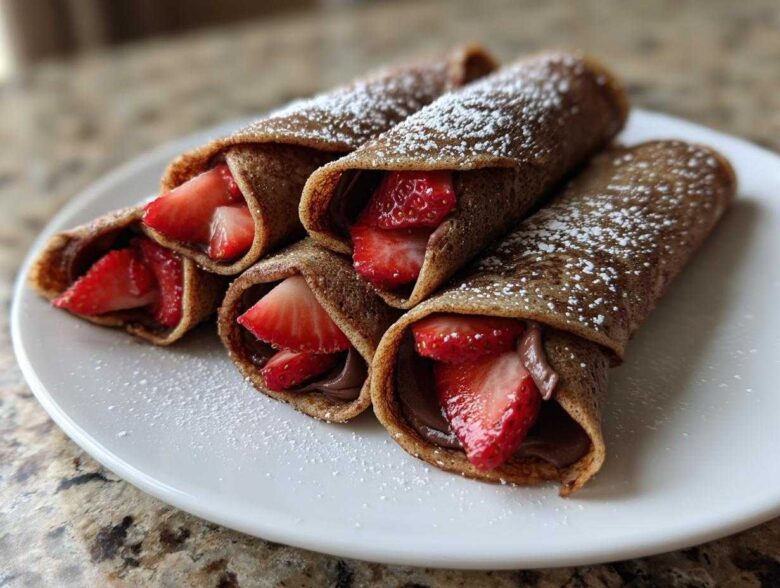
Oh my gosh, you know those times when you need a dessert—a *real* treat—but you just don’t have hours to fuss? That’s when I whip these up! Forget fussy layers of cake; we’re talking about pure, warm, rolled-up heaven. These Nutella Strawberry Crepe Rollups are my go-to indulgence, whether it’s an impromptu Friday night treat or a slightly fancy brunch surprise. When I first tried making crepes, I made tiny, thick pancakes, which was a disaster! But I spent years perfecting the technique for those perfectly thin French pancakes, and trust me, once you nail the batter consistency, everything else just falls into place. If you’ve ever loved a super rich dessert like classic chocolate cake but wanted something lighter, this is it. These are so much better than using store-bought wraps, I promise!
Why You Will Love These Nutella Strawberry Crepe Rollups
Okay, just hearing “Nutella” and “strawberry” together should tell you everything you need to know, but let me quickly sell you on why these Nutella Strawberry Crepe Rollups deserve a spot on your weekend menu. They hit every single happy button!
- They are lightning fast! Seriously, once the batter rests, you can have these assembled and ready to eat in under 20 minutes. Talk about a quick dessert rollups solution.
- That flavor combination is just unbeatable. The richness of the chocolate hazelnut spread against the bright, fresh tang of the strawberries? It’s absolute perfection. It’s like taking the best parts of strawberry and Nutella desserts and making them easy.
- Assembly is a total breeze once you master the flip. It’s less about precise decoration and more about hugging that gooey filling inside the thin French pancake.
- These are fantastic for kids (and my husband loves them, too!). They look elegant, but they are secretly one of the simplest things you can make for sweet breakfast crepes.
- You don’t need any complicated baking skills, just a good non-stick pan and a steady hand for swirling the batter.
Essential Ingredients for Perfect Nutella Strawberry Crepe Rollups
Listen, the biggest secret to making these Nutella Strawberry Crepe Rollups look and taste professional is starting with perfect components. You can’t rush ingredients, and I never skimp here because the filling is so simple—it relies totally on the quality of those few things!
When you shop for these, think fresh and simple. We need to make sure the crepes themselves are flexible enough to handle the thick filling without tearing. Having everything measured out before you even heat the pan is my cardinal rule for success in the kitchen. If you want a truly easy crepe recipe, do your prep work!
For the Thin French Pancake Recipe
For the batter, you just need kitchen staples, but the flour matters! Never use self-rising; we want that lovely, delicate structure that only comes from standard all-purpose flour that hasn’t been tampered with yet. This will give us the perfect base for our easy crepe recipe.
- 1 cup all-purpose flour (Make sure it’s fresh!)
- 2 large eggs
- 1/2 cup milk
- 1/2 cup water (This is the secret to thinness!)
- 1/4 teaspoon salt
- 2 tablespoons melted butter, plus more melted butter specifically for brushing the pan while cooking
For the Strawberry and Nutella Desserts Filling
This is where the magic happens, and frankly, the simpler the filling, the better the presentation. We are focusing on that phenomenal pairing of chocolate hazelnut fruit wraps, so please, pick the reddest, juiciest strawberries you can find. Overripe ones get mushy too fast!
- 1 cup Nutella (or your favorite chocolate hazelnut spread)
- 1 cup fresh strawberries, sliced
- Powdered sugar for dusting (optional, but highly recommended for that beautiful finish!)
The Best Crepe Batter: Making the Base for Your Nutella Strawberry Crepe Rollups
Alright, let’s talk about the batter. This is where most people mess up their best crepe batter attempts because they blend it too fast! We need smooth, not overworked. Start by whisking your dry stuff—the flour and salt—together really well in a big bowl. That salt is important; it balances all that sweetness later on!
Then, in another bowl, lightly beat those two eggs with the milk and the water. The water is key here; it really helps thin out the batter so you get those beautifully delicate wraps instead of thick little pancakes. Slowly pour the wet mixture into your dry bowl while you whisk constantly. Don’t just dump it all in, slow and steady is the name of the game! Once it looks combined, pour in that melted butter last and mix until everything looks uniform and lovely. You want it runny—almost like heavy cream.
Now for my secret tip, and this is essential for those paper-thin results: you absolutely must let this batter rest. I know, I know, we’re hungry! But you need to stick it in the fridge for at least 30 minutes, or honestly, an hour if you can manage it. Resting allows the gluten (that stuff that makes bread chewy) to relax. If you skip this, your crepes will be tough and tear when you try to roll them up. Trust me, waiting for that perfect relaxation stage is what separates acceptable crepes from the gorgeous, pliable base needed for your Nutella Strawberry Crepe Rollups.
Cooking Thin Crepes: A Rolled Crepe Tutorial
Okay, the resting period is over, it’s time to put that beautiful, relaxed batter to work! This is the part where we turn batter into magic thin gold—the perfect wrappers for our Nutella Strawberry Crepe Rollups. Remember, we are aiming for a very thin French pancake recipe result, so don’t be shy with the heat!
First things first: Get your 8-inch non-stick skillet good and hot over medium heat. If it’s not hot enough, the batter just sits there and soaks in the butter instead of immediately setting up. Once it’s hot, brush it lightly with some melted butter. You only need a sheen, not a pool—wipe any excess off with a paper towel if you need to. That initial coating is what keeps the first crepe from sticking, which is always the sacrificial one anyway, right?
Now for the swirling technique! This is what makes or breaks the thinness needed for a successful rolled crepe tutorial. Pour about a quarter cup of batter right into the center of that sizzling pan. IMMEDIATELY lift the pan off the heat and tilt and rotate it swiftly. You want that batter to splash out and coat the bottom completely in one even, thin layer. If you see bald spots, pour the extra back into the bowl or pour a tiny bit more batter in right away to fill the gaps. Get it thin!
Once you’ve swirled it, set the pan back on the heat. You’ll cook it for just a minute or two—maybe less, depending on your stove. How do you know when to flip? Watch the edges first; they’ll start turning dry and looking slightly crispy, maybe lifting up a bit on their own. The center should look set, not wet. When it looks good, use a very thin spatula to gently slide underneath and flip it over. The second side only needs about 30 seconds of cooking time. We don’t want these to get brown and crispy like a taco shell; we want them pale gold and super pliable for our sweet breakfast crepes.
Slide that finished crepe onto a plate. Make sure you stack them up, but if you are making a huge batch, placing a square of wax paper between each one prevents them from sticking together as they cool. Repeat the process—a quick butter brush on the pan, swirl the thin batter, cook, flip, and stack! Before you know it, you’ll have a lovely pile ready for filling.

Assembling Your Nutella Strawberry Crepe Rollups
Okay, the crepes are cooling (or maybe they aren’t—I often eat one straight off the stack, don’t judge!), and now it’s time for the fun part: turning those delicate circles into amazing Nutella Strawberry Crepe Rollups! Since we’re keeping this classic and focused, we are skipping the nuts and the bananas; this filling is all about that gorgeous chocolate hazelnut fruit wrap combination.
Lay one of your perfectly thin crepes flat on your clean work surface. It should be cool enough that the Nutella doesn’t instantly melt and run everywhere, but still warm enough to be wonderfully soft. Take about one tablespoon—maybe a generous one—of the Nutella and spread it across the surface. Be sure you leave about a half-inch border around the edges. If you spread it right to the very edge, when you roll it up, the filling is going to ooze out the ends, making a huge sticky mess. We want neat, beautiful homemade Nutella wraps!
Next, grab those sliced strawberries. Arrange a few slices neatly over the layer of Nutella. Don’t overload it! This is the most important part of the homemade Nutella wraps visual appeal. If you put too much filling in, they won’t roll into that classic tight shape we’re aiming for.
Now for the rolling technique, which is crucial for tidy rollups. You want to fold the left and right sides in first, just slightly—maybe about an inch or so—over the filling. This acts like little flaps to keep the strawberries tucked safely inside. Think of it like preparing a tiny burrito!
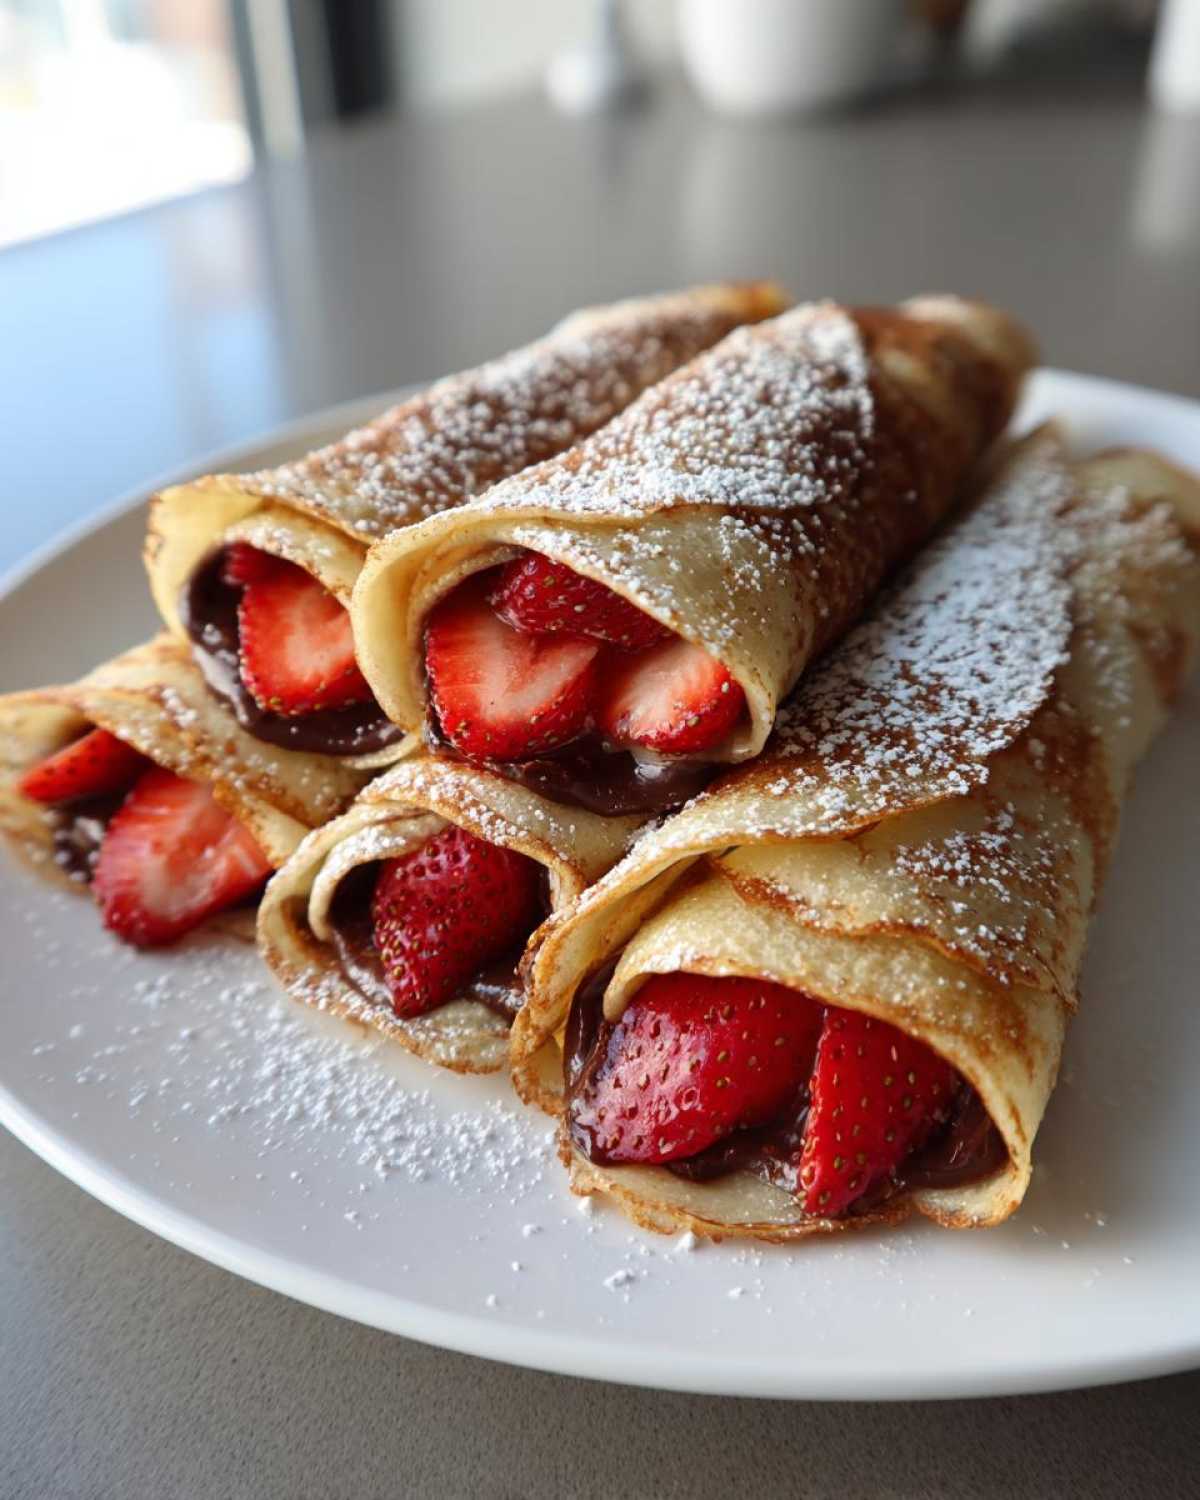
Once those sides are folded in, start rolling tightly from the bottom edge up toward the top. The key here is ensuring those initial folds stay tucked in while you roll. Roll it all the way until you have a neat cylinder. If you want those picture-perfect halves, just take a sharp knife and slice the finished rollup right down the middle on a slight diagonal. Dust them with powdered sugar, and voilà! Instant elegance for your Nutella Strawberry Crepe Rollups.
Tips for Success Making Nutella Strawberry Crepe Rollups
Even though these Nutella Strawberry Crepe Rollups sound easy—and they are!—a couple of tiny problems can sneak up on you. I’ve learned a few tricks over the years, mostly through trial and error when I was rushing through breakfast ideas for the kids. We definitely want to avoid tears and sticking!
First, let’s talk about the batter consistency, because that’s your foundation for everything. If, after resting, your batter is still a little too thick—maybe it’s coating the back of a spoon heavily rather than just lightly dusting it—don’t panic! You can totally save it. Just stir in a tablespoon of water or milk at a time until it loosens up again. Remember, thin crepes need thin batter. If you use this recipe for brunch crepe ideas, the resting period is non-negotiable for tender results.
My biggest tip to prevent tearing during the rolling phase comes from experience making these sweet breakfast crepes when the filling is cold. If you make the crepes ahead of time (which, good for you!), let them sit out at room temperature for about 15 minutes before you try to roll them. Cold crepes are stiff crepes, and a stiff crepe will crack when you bend it around that luscious Nutella. You want them pliable and warm!
Also, remember the note about less filling! It seems counterintuitive when you want maximum flavor, but overstuffing is the number one reason the rollups burst when you try to slice them. Stick to that 1 tablespoon of Nutella and just a few strawberry slices. You can always serve the extra filling on the side for dipping, I promise nobody will complain about having extra chocolate hazelnut goodness!
Lastly, if you are planning on storing these as make ahead dessert crepes, make sure you get them fully rolled before chilling. They hold their shape much better than if you just store the flat crepes and try to fill them later. When you reheat them, a quick 10-second zap in the microwave is usually enough to soften everything up perfectly without making the crepe rubbery.
Storage and Make Ahead Dessert Crepes
One of the best things about these Nutella Strawberry Crepe Rollups is how fantastic they are for planning ahead! Seriously, these qualify as some of the best make ahead dessert crepes you can find because they hold up so well. Baking takes time, and knowing you can have the work done early is such a relief, especially if you’re having people over for brunch or need a quick dessert ready when you get home from work.
If you just made the flat crepes and haven’t filled them yet—maybe you ran out of time or just got tired of flipping—that’s perfectly fine! You can store those plain crepes easily. Just stack them up, but you absolutely must put a little square of wax or parchment paper between each one. If you don’t, the starches will cement them together, and trying to pull them apart later is going to end in disaster, trust me. Store the stack in an airtight container or a heavy-duty zip-top bag in the refrigerator. They stay lovely for up to two full days this way. When you’re ready to eat them, let them sit on the counter for about 15 minutes to warm up a tiny bit so they don’t crack when you fill and roll them.
Now, for fully assembled Nutella Strawberry Crepe Rollups: these are also great to prep ahead! I usually assemble them completely—spread, sprinkle, fold, and roll—and then slice them right away, just like we talked about. I lay them cut-side up on a parchment-lined baking sheet. Once they look perfect, I cover the whole tray loosely with plastic wrap and pop them back into the fridge. They are wonderful eaten cold the next day, though sometimes the strawberries weep just a teensie bit. If you want them to taste totally fresh, eat them within 12 hours.
If you are planning way ahead, you can even freeze them! Don’t try to freeze assembled ones that are already dusted with powdered sugar, that’s a definite no-go. For freezing, assemble them, don’t slice them yet, and place them on a parchment-lined plate or tray. Freeze until they are solid—this takes about an hour—then transfer the frozen rolls into a heavy freezer bag, making sure to squeeze out as much air as possible. They’ll keep quality wonderfully for about a month. When you want to serve them, just transfer them to the fridge overnight to thaw, and then slice and enjoy! You get the benefit of having zero work to do right before dessert time!
Serving Suggestions for Chocolate Hazelnut Fruit Wraps
You’ve gone through all the effort to make these stunning Nutella Strawberry Crepe Rollups, so let’s make sure the presentation matches that delicious, gooey interior! Dusting them with powdered sugar is classic, absolutely, but sometimes you need that extra little something, especially if these are part of a bigger spread of chocolate hazelnut fruit wraps.
Here are a few ways I like to dress these up for company or just when I’m feeling extra cheerful:
Go the Ice Cream Route: There is zero shame in serving these warm with a scoop of good vanilla bean ice cream. The temperature contrast alone is incredible—warm, soft crepe against icy cold cream. The vanilla is the perfect neutral flavor to let the chocolate and strawberry shine.
The Cocoa Dusting Trick: If you want that elegant look without the major sweetness hit of powdered sugar, try using unsweetened cocoa powder. Dust it lightly through a fine-mesh sieve right before serving. It gives a sophisticated, slightly bitter edge that balances the Nutella beautifully.
Drizzle It! Don’t let any of that luxurious filling go to waste. If you have a little extra Nutella or even some melted dark chocolate chips (**no banana crepe fillings** needed for this addition!), warm it up slightly so it’s perfectly runny. Drizzle it back over those sliced rollup halves. It adds extra shine and texture.

Fresh Crunch on Top: If you didn’t want to put nuts *inside* these homemade Nutella wraps, grab a few chopped hazelnuts or pecans and sprinkle them right over the top of the powdered sugar or cocoa dust. Just a tiny bit of crunch goes a long way when everything else is soft!
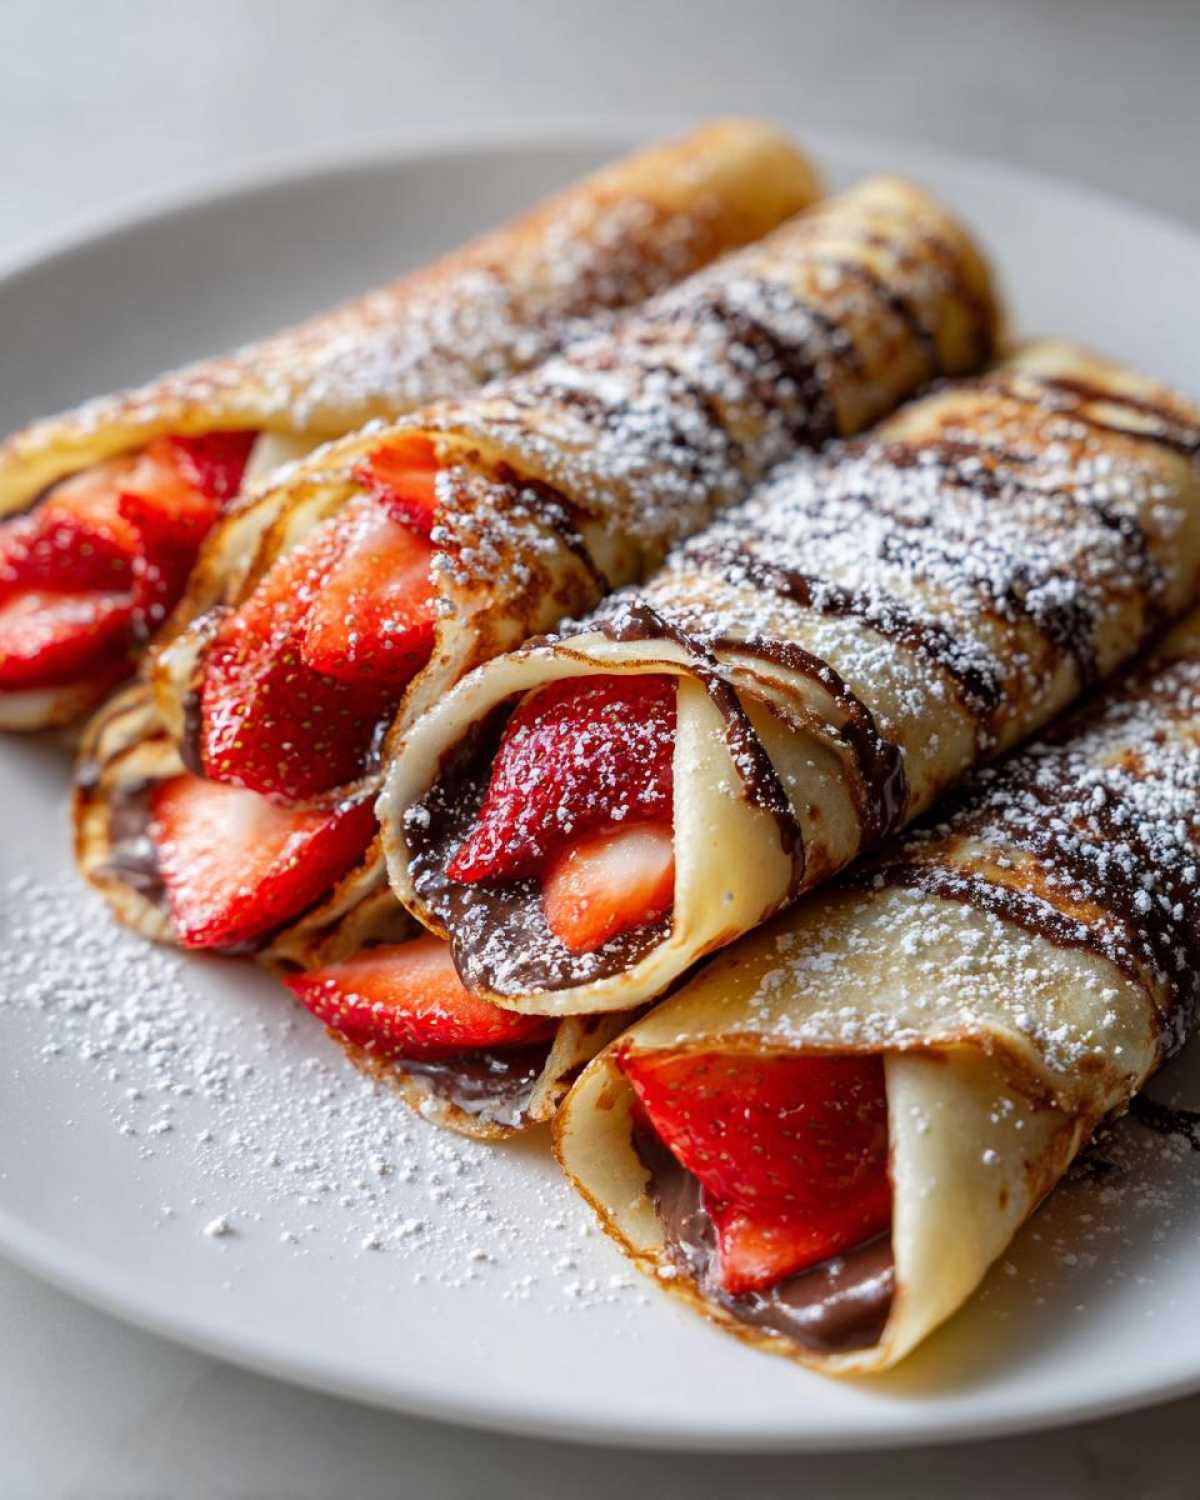
Seriously, once you slice those Nutella Strawberry Crepe Rollups on the diagonal, they pretty much serve themselves. They look way fancier than they are, which is the best kind of kitchen magic!
Common Questions About Nutella Strawberry Crepe Rollups
Even with the perfect recipe in hand, I always end up with a few lingering questions when I’m tackling a new favorite like these Nutella Strawberry Crepe Rollups. I’ve gathered the most common things people ask me when they try to make these delicious stuffed french pancakes so you can get right to the eating part!
Are my crepes supposed to be really, really thin?
They absolutely are! If you’re aiming for the classic French style that rolls up neatly without getting doughy, they need to be thin enough that you can almost see your hand through them when you hold them up to the light. Remember when we discussed the water in the batter? That’s what keeps them delicate. If yours end up looking like thick pancakes, it usually means one of two things: either you didn’t let the batter rest, or your pan wasn’t hot enough when you poured the batter in. Thin is always in for these rollups!
Can I skip the Nutella and use another spread for these sweet breakfast crepes?
Of course! While the combination of chocolate hazelnut and strawberry is what makes this recipe shine, feel free to swap it out if you’re in a pinch. If you’re avoiding hazelnut, you can use melted peanut butter, a simple homemade lemon curd, or even a rich chocolate ganache. The key, though, is that whatever you use must be fairly thick. Things that are too liquidy—like a thin jam—will run out when you try to form those neat homemade Nutella wraps.
I made extra crepes. What’s the best way to use the leftover batter?
That’s a great problem to have! If you have leftover batter after making your required dose of Nutella Strawberry Crepe Rollups, don’t throw it out! You can use the exact same batter for savory items. Just skip the salt in the batter next time, and fill the next batch with shredded cheese, ham, or sautéed mushrooms and spinach! They are perfect for making light lunch wraps instead of just kid friendly dessert rolls.
My rollups keep unrolling! What am I doing wrong?
This almost always comes down to filling volume or technique. First, make sure you are folding in those sides before you roll from the bottom up—those side flaps are essential scaffolding! Second, check how much Nutella you’re using. If you stack too much filling, gravity wins, and the whole thing unravels. Limit yourself to that 1 tablespoon of filling and go for a tighter roll. It’s just a little snugger than you might think!
Can I use freeze-dried strawberries instead of fresh ones?
I wouldn’t recommend it for this specific recipe. Fresh, ripe strawberries provide that perfect burst of juicy moisture that cuts through the richness of the Nutella. Freeze-dried berries are often too brittle and would just turn into powder when you tried to roll or slice them, creating a mess instead of a clean wrap. Save the freeze-dried ones for dusting the top of a *chocolate cake* or stirring into yogurt!
PrintNutella Strawberry Crepe Rollups

Make simple, thin crepes and fill them with Nutella and fresh strawberries for a quick dessert or sweet breakfast.
- Prep Time: 15 min
- Cook Time: 20 min
- Total Time: 35 min
- Yield: About 10 crepes
- Category: Dessert
- Method: Pan Frying
- Cuisine: French
- Diet: Vegetarian
Ingredients
- 1 cup all-purpose flour
- 2 large eggs
- 1/2 cup milk
- 1/2 cup water
- 1/4 teaspoon salt
- 2 tablespoons melted butter, plus more for the pan
- 1 cup Nutella
- 1 cup fresh strawberries, sliced
- Powdered sugar for dusting (optional)
Instructions
- Prepare the crepe batter: In a bowl, whisk together the flour and salt. In a separate bowl, whisk the eggs, milk, and water. Gradually add the wet ingredients to the dry ingredients, whisking until smooth. Whisk in the melted butter.
- Let the batter rest for at least 30 minutes for best results.
- Heat an 8-inch non-stick skillet over medium heat. Lightly brush the pan with melted butter.
- Pour about 1/4 cup of batter into the center of the hot pan, immediately tilting and rotating the pan so the batter coats the bottom evenly in a thin layer.
- Cook for 1 to 2 minutes until the edges look dry and the bottom is lightly golden. Flip the crepe and cook the other side for about 30 seconds.
- Slide the finished crepe onto a plate. Repeat with the remaining batter, stacking the crepes.
- To assemble the rollups: Lay one crepe flat. Spread about 1 tablespoon of Nutella over the surface, leaving a small border. Arrange a few slices of strawberry over the Nutella.
- Fold in the sides of the crepe slightly, then roll the crepe tightly from one end to the other to form a rollup.
- Slice the rollups in half if desired, and dust with powdered sugar before serving.
Notes
- For easier rolling, use slightly less filling per crepe.
- You can make the crepes ahead of time and store them layered between parchment paper in the refrigerator for up to two days.
- If the batter is too thick, add a tablespoon of water or milk until it coats the back of a spoon thinly.
Nutrition
- Serving Size: 2 rollups
- Calories: 280
- Sugar: 22
- Sodium: 110
- Fat: 16
- Saturated Fat: 5
- Unsaturated Fat: 11
- Trans Fat: 0
- Carbohydrates: 28
- Fiber: 2
- Protein: 7
- Cholesterol: 45