

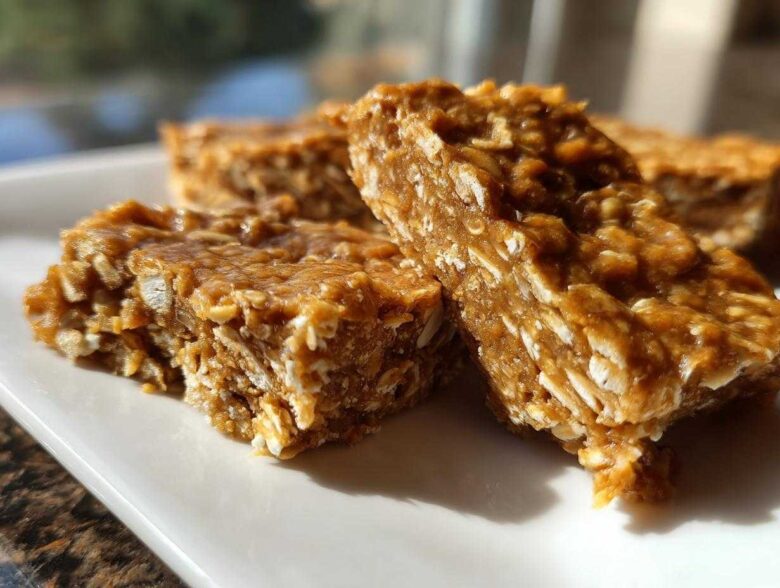
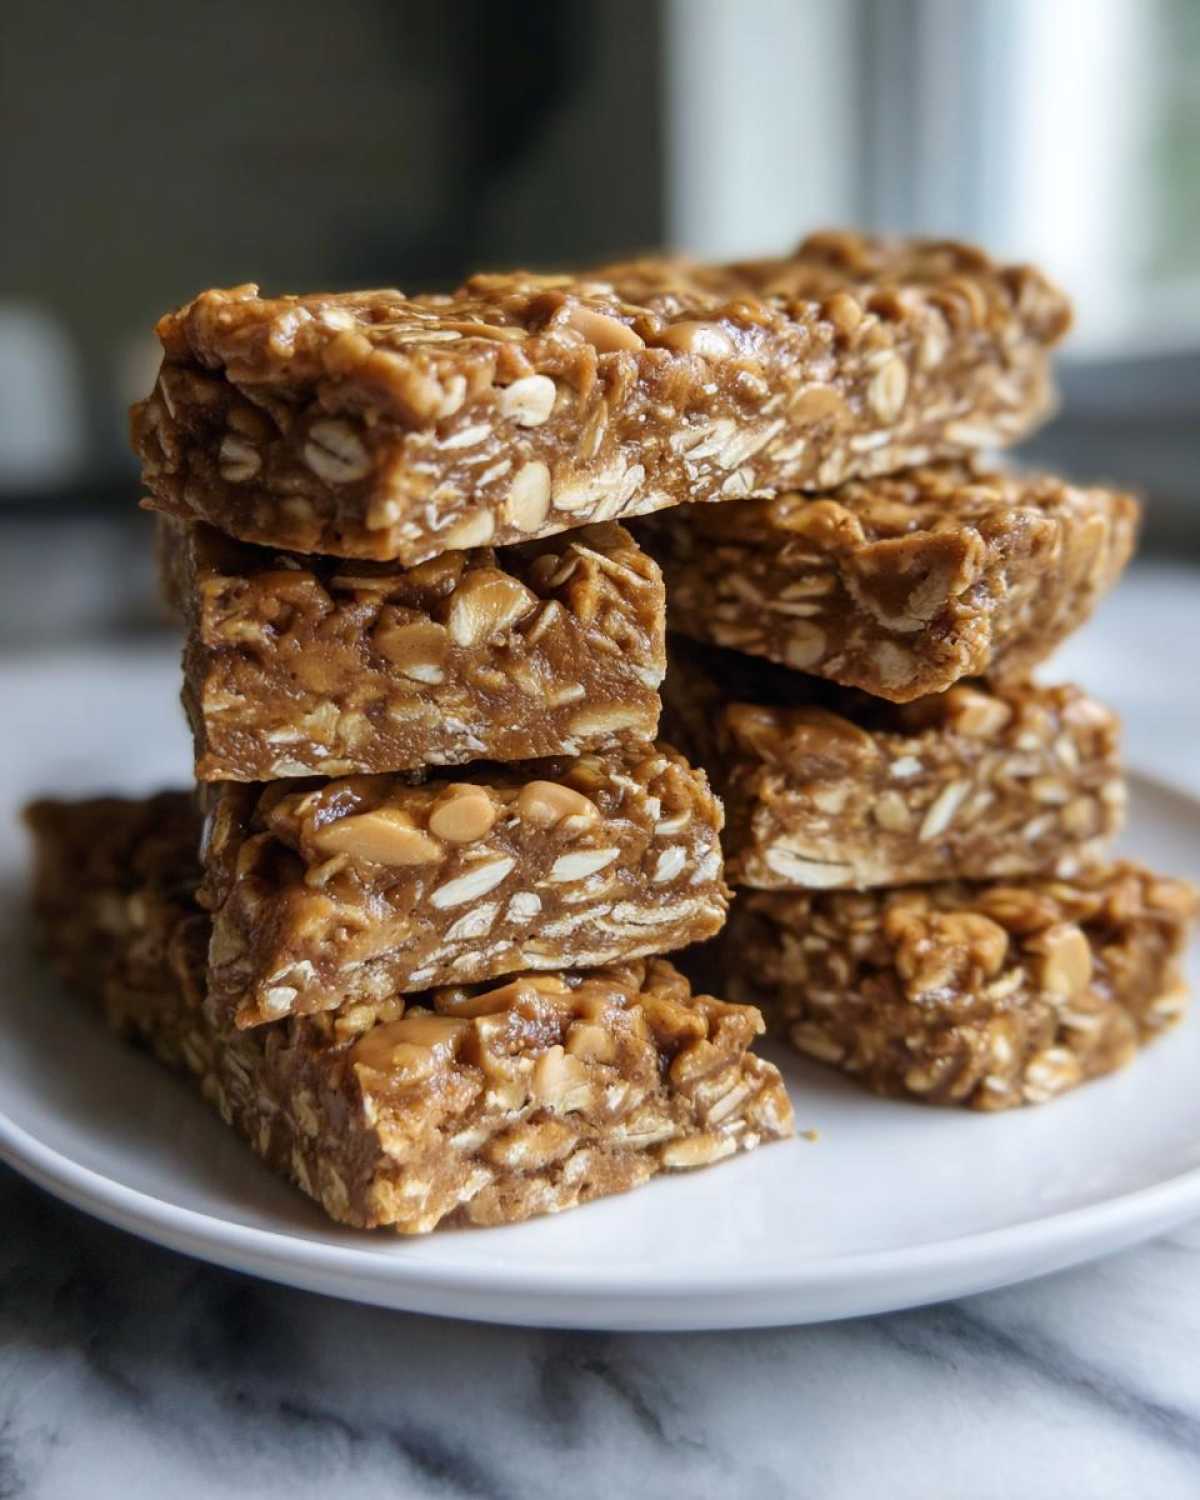
Oh my gosh, do you ever look at the price tag for those fancy store-bought **protein bars** and just have a minor heart attack? I totally do! Honestly, that’s exactly why I finally perfected this recipe. I got so tired of gritty textures and ingredients lists a mile long that I put my foot down and figured out the absolute easiest, best-tasting, no-bake recipe for **protein bars** you will ever need. Trust me, making your own **protein bars** at home is a total game-changer, especially when you see how simple these **peanutt butter protein bars** are to whip up. I love knowing exactly what’s going into my post-workout fuel, and these taste like an actual treat!
If you want to learn more about why I share these tried-and-true home cooking techniques, you can check out our little corner of the internet. But for now, let’s get mixing!
Why This Easy Protein Bar Recipe Beats Store-Bought Options
Listen, store-bought just doesn’t cut it when you want real flavor and texture. These **protein bars** I’m sharing? They are superior. They save me a ton of money, and I get total control over the sugar and filler content. The texture ends up perfectly chewy, too—none of that weird boxed crunch!
- Cheaper than anything you find at the checkout counter.
- You control every single ingredient.
- Amazing, satisfyingly chewy texture every time.
- Minimal cleanup!
Quick Protein Snacks for Busy Schedules
Seriously, you can’t beat the speed here. It only takes me about 10 minutes of actual hands-on time to mix up a whole batch of these **protein bars**. That means if I wait until laundry is folding or the water is boiling for my coffee, I can have **quick protein snacks** ready to chill before I even leave for the gym. They are the ultimate grab-and-go solution!
Gathering Ingredients for Your No Bake Protein Bars
The best part about these **homemade protein bars** is that they require so few things—we aren’t dealing with a massive shopping list here! That low ingredient count is exactly why they are one of the best **low ingredient protein bars** out there. You probably have most of this stuff in your pantry already. We are keeping this super simple with just five main components.
Here is what you need to pull together for this recipe:
- One cup of good old-fashioned rolled oats. Not the instant stuff, the regular kind!
- Half a cup of creamy peanut butter—this is our binder!
- Half a cup of your preferred protein powder. I use vanilla, but unflavored works if you want to get creative later.
- A quarter cup of either sticky honey or maple syrup for that perfect sweetness.
- Two tablespoons of water or milk, but only if you need it to bring the dough together.
Ingredient Notes and Substitutions for Protein Bars
Since these are **no bake protein bars**, the quality of the binder makes a huge difference in the final texture. If you are using a really thick, dry protein powder, you might need slightly more liquid than I mention, so always add it slowly! We want these **protein bars** to be chewy, not crumbly.
If you’re skipping honey to keep things plant-based, maple syrup is a 1:1 swap, no sweat. And listen, if you hate peanut butter—which, who are you?—feel free to use almond butter or sunflower seed butter. Just remember that nut butters vary in thickness, so that might influence how much extra water you need to get the dough just right.
Step-by-Step Guide: Making Chewy Protein Bars
Okay, this is where the magic happens, and I promise it’s fast. Forget turning on the oven; these **protein bars** set up in the fridge! First, grab a medium bowl and just toss in your rolled oats, your protein powder, and that glorious peanut butter we talked about. Make sure everything is in there before you move on.
Next, drizzle in your sweetener—that’s the honey or maple syrup. Now, you mix! You’re going to stir it with a sturdy spoon or even your hands at first until it starts looking like a thick, uniform dough. This is the starting point for those **chewy protein bars** we love.
Once it’s mostly combined, you’re going to press that dough firmly into an 8×8 inch pan. I always line mine with parchment paper first, letting the edges hang over the side like little handles—this is a lifesaver later! Pressing firmly is key here to make sure the bars are compact. Once pressed in, you absolutely need to chill them in the refrigerator for at least a full hour. Don’t rush this cooling time! If you skip it, they’ll fall apart.
Protein Bar Kitchen Hacks for Perfect Texture
If your dough seems desert dry when you mix it, don’t panic! This is one of the best **protein bar kitchen hacks**: just add water or milk, a teaspoon at a time, until it holds together when you squeeze a chunk. Too much liquid, though, and you end up with a sticky mess that won’t cut properly.
Also, when you press the dough into the pan, use the back of a measuring cup or even a second piece of parchment paper on top. Really pack it down! If you press hard enough, you’ll avoid that crumbly texture you sometimes get when you try to slice these **homemade protein bars** later. Once they are firm from chilling, use those parchment handles to lift the whole slab out, and cut them into about ten neat little squares.
Customizing Your Homemade Protein Bars
Everyone likes their snacks a little differently, and that’s the beauty of making your own **protein bars**! You can absolutely **customize protein bars** to make them totally yours. Since the base recipe is so straightforward, it’s begging for some extra flavor or texture thrown in.
My favorite thing to sneak in is a little bit of flavor complexity. You could add about a half teaspoon of cinnamon and a tiny pinch of nutmeg right in with the dry ingredients—it makes them smell amazing, almost like a spiced cookie! Or, if you want something crunchy, toss in a quarter cup of chopped walnuts or sunflower seeds when you mix everything up. If you choose seeds, they add a nice little energy boost, too, turning them into great **energy boosting bars**.
And of course, who can resist chocolate? I often fold in about a quarter cup of mini chocolate chips right before I press the dough into the pan. It gives you that sweet surprise when you bite into an otherwise savory bar.
Making Vegan Protein Bars Recipe Variations
A big question I always get is about making sure these **protein bars** fit dairy-free or vegan requirements. Good news! This **easy protein bar recipe** is shockingly adaptable. If you use maple syrup instead of honey, you’ve immediately made the bars vegan friendly. That’s the main swap you need to worry about there.
The other piece is the protein powder itself. You just need to make sure you are using a plant-based protein powder—pea, soy, or even brown rice protein works perfectly well here. Because we aren’t baking, the texture might differ slightly depending on the powder, but the peanut butter and syrup still hold everything together beautifully. These work perfectly as **vegan protein bars recipe** solutions for anytime snacking!
Storing and Preparing Protein Bars for Meal Prep
Okay, you’ve made your giant batch of delicious **protein bars**, and now you need to keep them fresh so you don’t demolish them all in two days! Since these are **no bake protein bars**, they definitely prefer the cold. This is crucial for making them successful **protein bars for meal prep**.
You absolutely have to store these in an airtight container. If you leave them out on the counter uncovered, they get a little sad and crusty fast. I use a glass container with a tight lid and line the bottom with a piece of parchment paper just to prevent sticking.
They need to stay in the refrigerator. When they are chilled, they stay perfectly firm and chewy—that’s the goal! I’ve kept them this way for up to a week, sometimes ten days, and they are still fantastic. They are perfect straight out of the fridge for a quick grab-and-go breakfast or when you need **high protein snacks** later in the afternoon.
Because they contain nut butter, they aren’t really designed for long-term room temperature storage like baked goods. If you want to make a huge batch last longer than a week, you can wrap individual bars tightly in plastic wrap or parchment paper and freeze them. When you want one, just pull it out while you’re getting ready in the morning, and it should be thawed and ready to eat by the time you need that **post workout fuel bar**!
Using Protein Bars as Post Workout Fuel
I swear, my favorite time to grab one of these **protein bars** is right after I finish a tough workout. They are such fantastic **healthy protein bars** because they hit that sweet spot for refueling without making you feel heavy or sluggish. We’re looking for quick-digesting protein and some carbs to restore energy, right?
Since we used protein powder, you get that immediate hit of amino acids your muscles are craving after a heavy session. That’s why I call them great **post workout fuel bars**!
Instead of reaching for some sugary sports drink, just having one of these chilled bars is perfect. If you added chocolate chips, even better—that little bit of sugar helps drive the nutrients into your system faster. They turn what used to be a complicated post-gym routine into one easy, delicious snack. If you’re looking for more ways to connect with me about your fitness goals or just need to send a quick note, feel free to reach out via my contact page anytime!
Frequently Asked Questions About Making Protein Bars
Can I use whey protein powder instead of whatever you used?
Oh, absolutely! Whey is super common, and it works great in these **protein bars**. Just be aware that whey can sometimes be a little drier than plant-based powders. If you notice the mixture is too stiff before you start pressing it, just drip in a tiny bit more water or milk until it’s totally pliable. The goal is always to get the right consistency so you end up with the **best homemade protein bars**, not a brick!
Why are my no bake protein bars crumbling when I cut them?
Nine times out of ten, this means one of two things happened, both related back to texture. First, you might not have pressed the mixture down hard enough into the pan. Remember, you need to compact it firmly so the peanut butter and syrup have maximum surface area to stick everything together! Second, you might not have chilled them long enough. That hour in the fridge is non-negotiable! If you pull them out warm, they are going to just smoosh when you try to slice them into neat squares.
Do I absolutely need oats for this easy protein bar recipe?
You know, I love oats because they give these **healthy protein bars** that classic chewiness and add some filling fiber. However, if you are avoiding oats for some reason, you can substitute them with finely chopped nuts or puffed rice cereal. You might need to adjust the liquid just a bit because they absorb moisture differently than oats do, but yes, something needs to provide the bulk besides the powder!
What’s the best way to stop them from sticking to the container when I meal prep?
This is such a common issue, especially when stacking them up! Always line your container with parchment paper—that overhang is your best friend. If you stack them directly on top of each other, they will fuse into one giant protein brick! I actually like to cut little squares of parchment paper to place between each individual bar before I stack them. It’s a tiny extra step, but it makes grabbing those **quick protein snacks** so much easier later on.
Estimated Nutritional Information for These Protein Bars
Okay, I know you’re curious about the hard numbers for these **protein bars**! Based on how I usually make them, here’s a rough estimate for one bar (cut into 10 servings). Remember, because ingredient brands differ so much—especially protein powder—these numbers are just a guide. For the most accurate counts, always check the labels on your specific oats and peanut butter!
- Calories: About 200
- Protein: A solid 15 grams!
- Fat: Around 10 grams
- Carbs: About 18 grams
- Sugar: Roughly 8 grams
We pack a lot of goodness into such a small, **energy boosting bar**. For the official details and legalities regarding nutrition on homemade recipes, please check out our detailed disclaimer page. Happy eating!
Share Your Thoughts on This Easy Protein Bar Recipe
Alright, that’s it! You now have the blueprint for making the absolute best **homemade protein bars** without ever sweating over an oven. I’m so excited for you to try these! But I really, really want to know what you think.
Did you try customizing them? Which flavor additions did you go with? Did you manage to get that perfect, dense, chewy texture on your first try? Let me know in the comments below! I’d love for you to rate this recipe—give it a solid 1 to 5 stars!
Tell me honestly: Are these **easy protein bar recipe** secrets the best way you’ve found to make quick, **high protein snacks**? Drop your feedback down below so we can all learn from each other’s kitchen experiments!
PrintEasy No-Bake Peanut Butter Protein Bars
Make simple, chewy protein bars at home without baking. These bars use few ingredients and are great for quick snacks or post-workout fuel.
- Prep Time: 10 min
- Cook Time: 0 min
- Total Time: 1 hour 10 min
- Yield: 10 servings
- Category: Snack
- Method: No-Bake
- Cuisine: American
- Diet: Vegetarian
Ingredients
- 1 cup rolled oats
- 1/2 cup peanut butter
- 1/2 cup protein powder (vanilla or unflavored)
- 1/4 cup honey or maple syrup
- 2 tablespoons water or milk (as needed)
Instructions
- Combine the rolled oats, protein powder, and peanut butter in a medium bowl.
- Add the honey or maple syrup to the mixture.
- Mix all ingredients thoroughly until a thick, uniform dough forms. If the mixture is too dry, add water or milk one teaspoon at a time until it holds together when pressed.
- Press the dough evenly into an 8×8 inch pan lined with parchment paper. Press firmly to compact the mixture.
- Place the pan in the refrigerator for at least 1 hour to set.
- Remove the mixture from the pan using the parchment paper overhang. Cut into 10 to 12 bars.
- Store the bars in an airtight container in the refrigerator.
Notes
- For a vegan option, use maple syrup instead of honey.
- You can substitute peanut butter with almond butter or sunflower seed butter.
- For extra flavor, add 1/4 cup of mini chocolate chips before pressing the mixture into the pan.
Nutrition
- Serving Size: 1 bar
- Calories: 200
- Sugar: 8
- Sodium: 100
- Fat: 10
- Saturated Fat: 2
- Unsaturated Fat: 8
- Trans Fat: 0
- Carbohydrates: 18
- Fiber: 2
- Protein: 15
- Cholesterol: 0