

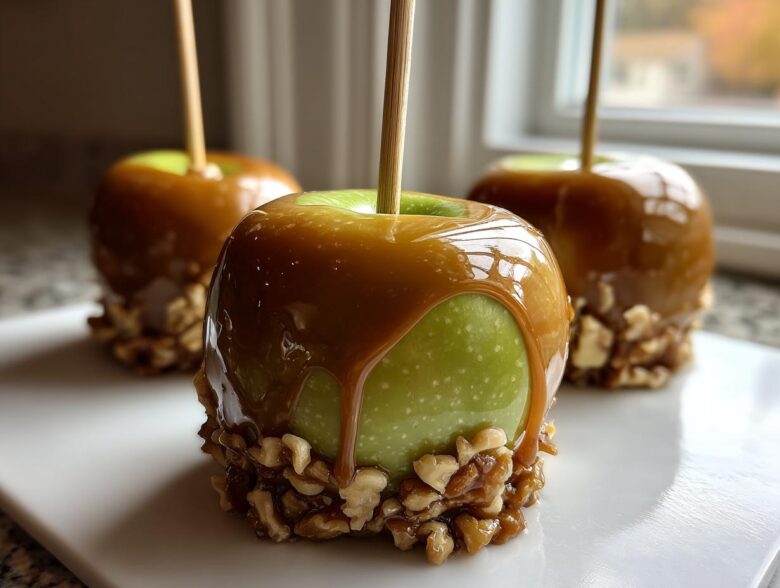
Oh my goodness, nothing screams cozy autumn perfection like biting into a truly fantastic caramel apple. You know the ones I mean, right? The ones where the caramel is chewy, sweet, and actually *sticks* to the apple instead of sliding right off into a gooey puddle on the plate? I spent years wrestling with runny caramel; it was frustrating! But trust me now, I’ve cracked the code. This foolproof recipe ensures you get that signature chewy caramel every single time. It all comes down to knowing your temperature—that tiny little number on the thermometer is everything!
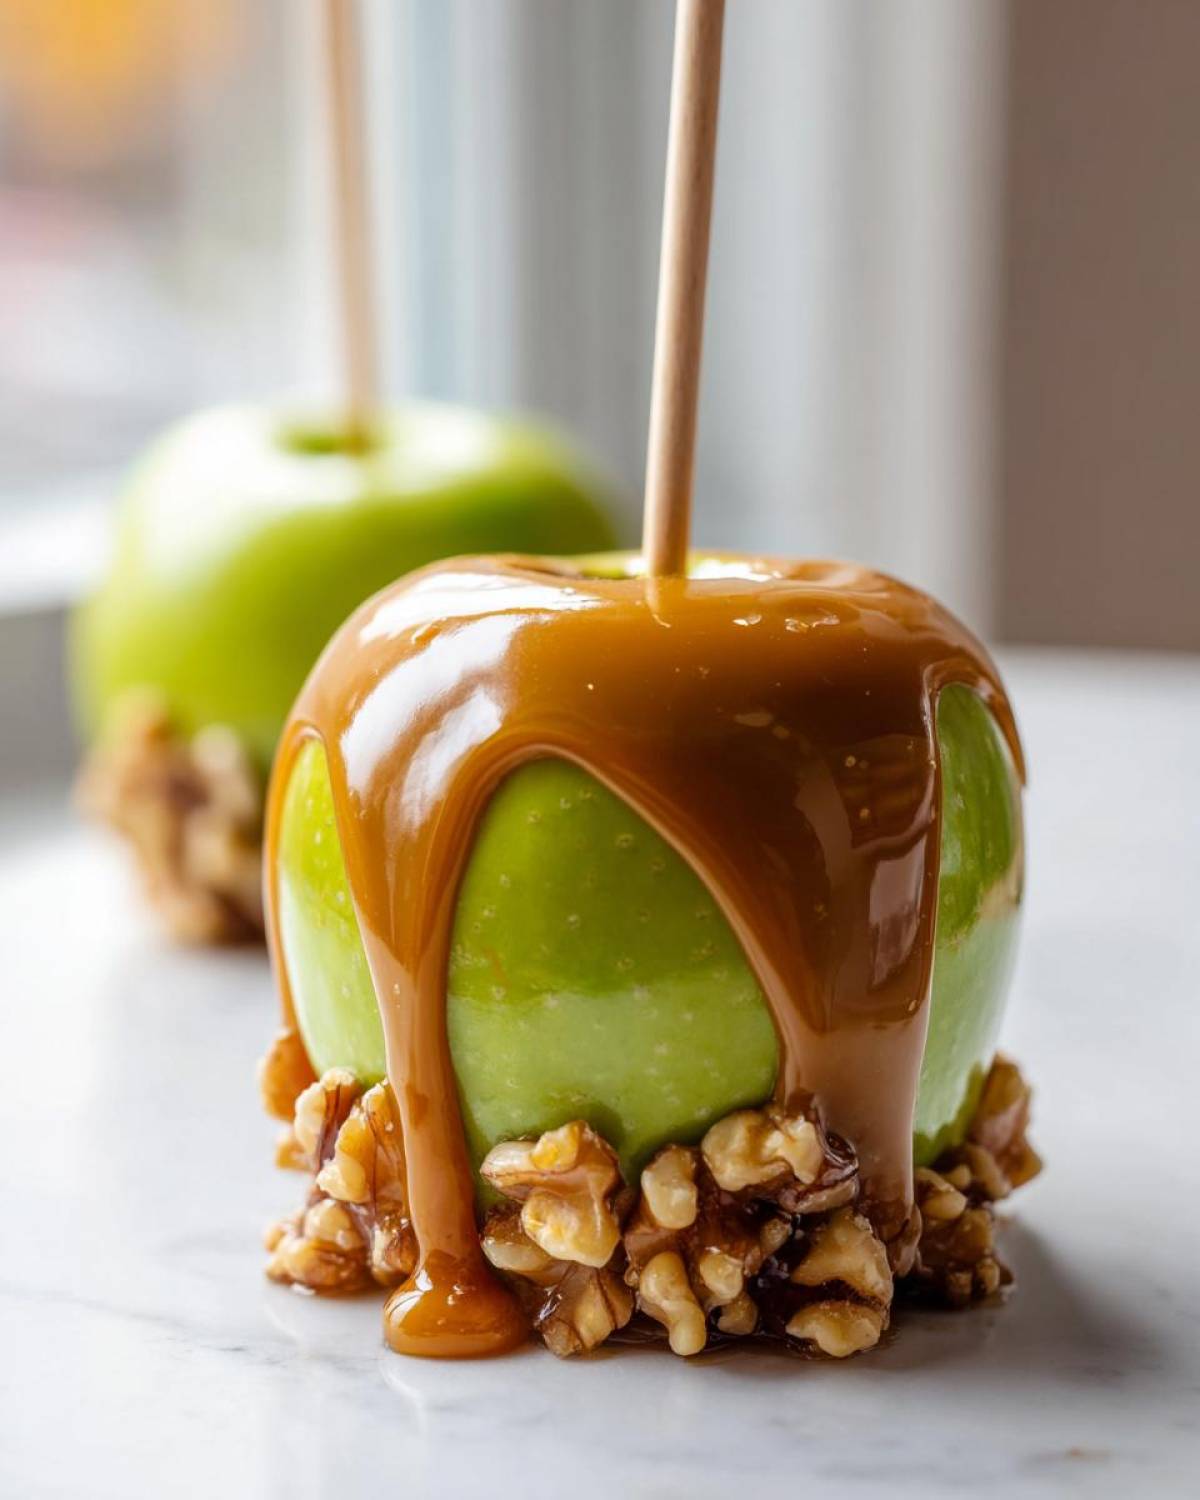
Why This is the Best Foolproof Homemade Caramel Apples Recipe
I know there are a million recipes out there claiming to be the one, but seriously, this is the one that finally banished my runny caramel woes for good. This guide is designed to give you those no fail caramel apples that stay perfectly coated, even after sitting out for a bit. My secret weapon? Treating the thermometer like gospel! People often skip the simple drying step for the apples, and that’s where disaster strikes.
Here’s why you can trust this method for a batch of rich gooey caramel every time:
- We nail the temperature: Hitting exactly 245°F means chewy, not hard candy.
- We respect the apple: Thorough cleaning and drying prevents peeling!
- We use the right base ingredients: Sweetened condensed milk provides that signature creaminess.
I promise, once you master the temperature, you’ll never buy those sad, sticky ones from the fair again.
Essential Ingredients for Perfect Caramel Apples
The ingredient list is short, which is fantastic, but every component plays a huge role. You need stuff that can stand up to high heat and give you that perfect consistency. Don’t try to substitute the corn syrup; it’s what keeps the caramel from crystallizing into sugar dust!
For six beautiful caramel apples, grab these right now:
- 6 medium firm apples (I always grab Granny Smith—that tartness is necessary!)
- 6 wooden skewers or lollipop sticks
- 1 cup (that’s two full sticks) of good unsalted butter
- 2 cups packed light brown sugar
- 1 cup light corn syrup (don’t skip this one!)
- 1 (14 ounce) can sweetened condensed milk
- 1 teaspoon vanilla extract
- 1/2 teaspoon salt
- Optional: 1 cup chopped nuts for rolling them in later
Prepping Your Apples for Optimal Caramel Adhesion
Okay, listen up, because this is genuinely the most critical stage, even more important than the caramel itself! If you skip this, your beautiful caramel apple dipping technique is going to result in caramel puddles. Most store-bought apples—even the ones that look perfectly clean—are coated with a light layer of wax or oil. That wax is designed to keep them fresh, but it’s basically nature’s non-stick spray for your caramel!
You have to banish that wax completely. First, wash them really well under warm water. Then, dry them until you think they’re dry, and then dry them some more! Seriously, every speck of moisture is enemy number one.
Here’s my hot tip, the one that guarantees your caramel sticks like glue: grab a small pot of boiling water. Carefully dip each apple into that boiling water for just five seconds—no longer! Pull it right out, let it steam dry for a second, and then pat it down thoroughly with paper towels. That quick blast loosens the wax right up. Insert your skewer while the apple is still warm, and then let them cool completely to room temperature before you even think about dipping them. This is how the pros manage a perfect, non-slipping coating.
Making the Rich Gooey Caramel Sauce for Your Caramel Apples
Now for the fun part—making that glorious, luscious caramel! You want that chewy caramel sauce, and achieving it is 90% patience and 10% stirring. Get yourself a heavy-bottomed saucepan. Trust me on this; thinner pans scorch easily, and scorched caramel tastes bitter, which ruins the whole experience.
Toss in your butter, brown sugar, corn syrup, and that can of condensed milk. Stir this gently over medium heat until the sugar dissolves completely. Once it starts simmering and you attach your candy thermometer, you have to stop stirring! This seems scary, but if you stir boiled sugar, it starts forming tiny sugar crystals, and that means graininess instead of smooth caramel. We are aiming for pure silk here.
You need to let it boil undisturbed until that thermometer hits exactly 245 degrees Fahrenheit. That is your magic number for the perfect bite. Once you hit it, pull the pan off the heat instantly. Stir in the vanilla and salt—that little hit of salt really brings out the sweetness. You can check out more tips on why we love using condensed milk over on our about page—it just makes everything creamier.
Crucial Temperature Checks for Chewy Caramel Apples
I cannot stress this enough: 245°F is the golden standard for a perfect, chewy caramel apple. If you pull it off the heat too soon, say at 235°F, it’ll be too soft and drip right off the apple once it warms up. If you accidentally cook it past 250°F, you’re going to end up with a rock-hard candy shell, and nobody wants to chip a tooth!
A little personal confession: when I first tried this, I used a really wide, shallow pan. The caramel reached 245°F way too fast, and it was almost too hard. Now, I stick to a slightly narrower saucepan. It gives the caramel more time to develop that lovely chewiness instead of rushing straight into candy territory. Just watch that thermometer like a hawk!
The Art of Dipping and Coating Your Caramel Apples
Okay, your caramel has cooled just enough—it should look slightly thicker, almost like liquid taffy. This is the moment of truth for your caramel apple dipping technique! Grab your prepped, room-temperature apple on its skewer. You want to tilt your saucepan slightly so the caramel pools a little bit on one side. This makes coating much easier than trying to dip straight down!
Dip the apple in, tilting the pan so the caramel comes up past the equator of the apple. Slowly lift it out, keeping the apple submerged for just a second. Now, the important part: gently rotate the apple as you lift it out, letting all that beautiful excess caramel drip right back into the pot. Don’t scrape it on the edge; just let gravity do the work!
Place the coated apple immediately onto that parchment-lined baking sheet. If you’re adding toppings, roll the base of the apple in them right away while the caramel is still tacky. You must let them set completely, which usually takes at least an hour at room temperature. Resist the urge to poke them!
Classic and Gourmet Caramel Apple Toppings Ideas
Once the caramel is set just right, it’s time to make your beautiful caramel apples truly special! Nuts are the absolute classic—think pecans or chopped peanuts—and they give such a satisfying crunch against that chewy caramel. But honestly, you can get really playful here and create some incredible gourmet caramel apples.
I love doing a simple drizzle of good quality white chocolate over the top once the caramel has set for about twenty minutes. Crushed pretzels are my unexpected favorite; the salty crunch is just heaven with the sweetness. You can even sprinkle on some flaky sea salt right after dipping for a more sophisticated flavor profile.
Serving Suggestions for Autumn Treats
These stunning autumn treats are great on their own, packed up for a classroom party, or served as a simple end to a big holiday meal. They are fantastic alongside a mug of hot apple cider or even a strong cup of coffee!
If you happen to have leftover caramel (which rarely happens!), don’t toss it! Pour it into a small bowl. Suddenly, you have an amazing caramel apple dip ready for slices of fresh apples or graham crackers. Or, try spreading that leftover caramel over a plate of sliced apples, adding a sprinkle of sweet toppings, and calling it caramel apple nachos—easier than making the whole apple!
Storage and Handling for Your Homemade Caramel Apples
Figuring out where to keep these beauties is important so they don’t end up sticky or weeping caramel all over your counter. The good news is they set up beautifully at room temperature! If you are serving them the same day or the next, just leave them on that baking sheet, loosely covered, away from any heat sources. They need about an hour to fully firm up.
If you are storing them for longer, the fridge is your friend, but use caution! Wrapping them too tightly while they are cold can encourage condensation, making the caramel look sad and watery. I like to place them in a single layer inside an airtight container—maybe with a little bit of parchment paper separating them—and keep them cool. They are always best eaten within three or four days. Try not to let them sit out too long before serving, especially if your kitchen is warm!
Frequently Asked Questions About Making Caramel Apples
You know how it is, you follow the steps, but questions always pop up right when you need an answer fast! Here are the most common things folks ask me about making these easy caramel apples:
Why did my caramel turn grainy or sugary instead of smooth?
That’s almost always because you stirred the mixture once it started boiling! Once those bubbles appear, that sugar needs to cook undisturbed until it hits the target temperature. If you stir, you disturb the sugar molecules, forcing them to re-crystallize, and hello, graininess! It’s frustrating, but now you know for next time!
My caramel is runny—did I mess up the temperature?
More than likely, yes. If your finished bite is more like a sauce than a solid coating, you definitely pulled it off the heat too soon. You must hit that 245 degrees Fahrenheit mark for a proper firm-ball stage caramel. If it’s too cool, it just won’t set up right. Just remember, you can always put it back on very low heat to nudge it up a few more degrees!
Can I use any type of apple for homemade caramel apples?
You can, but I strongly advise against using super soft apples like Red Delicious. They just don’t have the structure, and they’ll start to weep or fall apart under the heavy caramel. I stick to Granny Smith for that perfect sweet-and-tart contrast, or Honeycrisp, which is firm and crisp. The apple needs to hold its own against that thick coating!
For more general cooking advice and policies related to our site tips, you can always check out our disclaimer page.
Sharing Your Perfect Caramel Apple Creation
Whew! We did it. You’ve got six gorgeous, perfectly coated, chewy caramel apples cooling on the counter. I’m so incredibly proud of you for tackling homemade caramel—it takes a little courage! Now the real fun begins: showing them off!
When you take that first big, satisfying bite, I desperately want to hear about it. Did you go classic with the nuts, or did you get wild with that spicy-sweet topping idea we talked about?
Please, please leave a comment right below this section. Let me know what apples you used, how your caramel setting went, and which topping combination was your absolute favorite! If you happen to snap a quick picture, tag me on social media—it genuinely lights up my day to see your successes in the kitchen!
If you have any last-minute questions about storage or maybe want to know about my favorite classic fall recipes that pair well with these, head over to the contact page and let me know. Happy autumn snacking!
PrintFoolproof Homemade Caramel Apples with Chewy Caramel

Make classic homemade caramel apples with a chewy caramel that sticks every time. This recipe covers the dipping technique and topping suggestions.
- Prep Time: 15 min
- Cook Time: 20 min
- Total Time: 1 hour 35 min
- Yield: 6 servings
- Category: Dessert
- Method: Stovetop Cooking
- Cuisine: American
- Diet: Vegetarian
Ingredients
- 6 medium firm apples (like Granny Smith or Honeycrisp)
- 6 wooden skewers or lollipop sticks
- 1 cup (2 sticks) unsalted butter
- 2 cups packed light brown sugar
- 1 cup light corn syrup
- 1 (14 ounce) can sweetened condensed milk
- 1 teaspoon vanilla extract
- 1/2 teaspoon salt
- 1 cup chopped nuts or other desired toppings (optional)
Instructions
- Wash and thoroughly dry the apples. Remove the stems and insert a wooden skewer firmly into the top of each apple.
- Line a baking sheet with parchment paper or a silicone mat. Set aside.
- In a heavy-bottomed saucepan, combine the butter, brown sugar, corn syrup, and condensed milk.
- Cook over medium heat, stirring constantly until the sugar dissolves.
- Attach a candy thermometer to the side of the pan, ensuring the tip does not touch the bottom.
- Bring the mixture to a boil without stirring. Once boiling, stop stirring.
- Cook until the mixture reaches 245 degrees Fahrenheit (firm ball stage). This usually takes 10 to 15 minutes.
- Remove the pan from the heat immediately. Stir in the vanilla extract and salt. Let the caramel cool for 5 to 10 minutes until it thickens slightly.
- Dip each apple into the caramel, tilting the pan slightly to cover the apple. Lift the apple and slowly rotate it to allow excess caramel to drip off.
- If using toppings, immediately roll the bottom half of the caramel-coated apple in your chosen toppings, like chopped nuts.
- Place the finished apples on the prepared baking sheet.
- Let the caramel apples set completely at room temperature for at least 1 hour, or chill briefly until the caramel is firm.
Notes
- For the caramel to stick, the apples must be completely dry and free of wax. You can briefly dip the apples in boiling water for 5 seconds and dry them thoroughly to remove the wax coating.
- If the caramel seems too thin after cooling slightly, return it to low heat and cook until it reaches 245 degrees Fahrenheit again.
- For a gourmet touch, add 1/4 teaspoon of cinnamon or a pinch of sea salt to the caramel mixture before removing it from the heat.
- If you prefer a dip, simply pour the finished caramel into a serving bowl and serve with apple slices.
Nutrition
- Serving Size: 1 apple
- Calories: 650
- Sugar: 95
- Sodium: 250
- Fat: 30
- Saturated Fat: 18
- Unsaturated Fat: 12
- Trans Fat: 0
- Carbohydrates: 98
- Fiber: 1
- Protein: 3
- Cholesterol: 75