

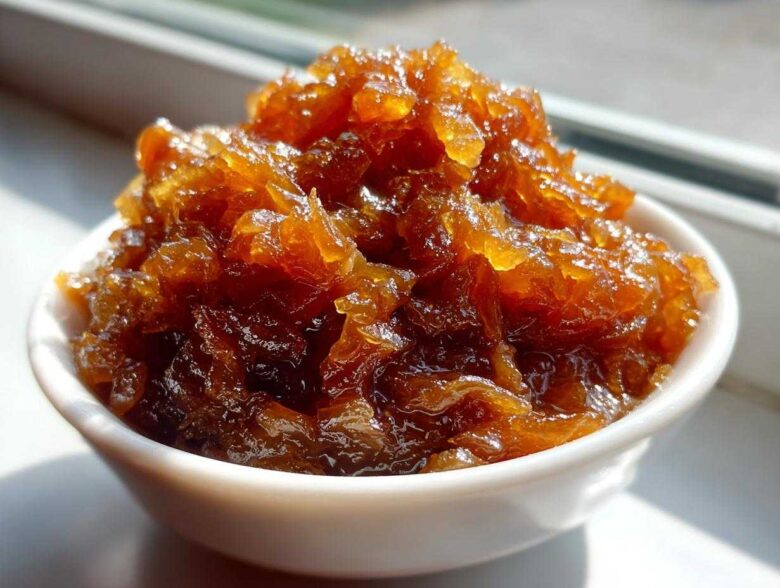
Oh my goodness, if you think onions are just for crying over while chopping, you are missing out on pure magic. We’re talking about the transformation from sharp bite to deep, complex, almost wine-like sweetness. Mastering the art of caramelized onions completely revolutionized how I think about side dishes and toppings. Seriously, once you nail this, you’ll whisper to your soup broth how crucial this step is! This guide is my absolute best onion cooking method for getting those jammy, perfect results every single time, and yes, I even show you how to cheat the clock if you’re in a hurry.
Why You Will Love This Caramelized Onions Recipe
Forget everything you thought you knew about cooking onions. These aren’t just ‘soft’ onions; they are gloriously sweet, almost like a savory candy. You absolutely need this caramelized onions recipe in your rotation because:
- You get that perfect jammy onions texture without needing fancy equipment.
- The deep, complex flavor provides incredible savory depth to simple meals.
- They are endlessly versatile—perfect for decadent burger toppings or mixed straight into a caramelized onion dip!
Gathering Ingredients for Perfect Caramelized Onions
Alright, let’s talk supplies. Making amazing caramelized onions isn’t hard, but you do need a few specific players on your team. You’ll need three large yellow onions, sliced paper-thin—seriously, uniformity matters here for even cooking! We start with two tablespoons of butter and one tablespoon of olive oil because fat equals flavor, right? Don’t forget a teaspoon of salt, and I always throw in half a teaspoon of plain sugar. That sugar isn’t meant to make them sweet like cake; it just helps kickstart the browning process, especially if you’re rushing.
Ingredient Notes and Substitution Tips
If you want the absolute best flavor, go for a classic sweet onions recipe type, like Vidalia or Walla Walla. They have lower water content and more natural sugars, making them ideal. If you are looking for that ultimate flavor boosting onions trick, try adding a tiny splash of sherry or balsamic vinegar during the last five minutes of cooking. That little bit of acidity cuts through the richness just beautifully!
The Slow Cooked Onions Technique: How to Caramelize Onions Perfectly
This is where the magic happens, folks. Forget throwing these into a hot pan and stirring for five minutes. To truly get those gorgeous, sweet, jammy onions that you dream about, you have to take your time. I always reach for my heaviest, thickest cast iron skillet or a trusty Dutch oven. Why? Because heat distribution is everything! If you have hot spots, you end up burning some onions while others stay pale, and nobody wants that mess.
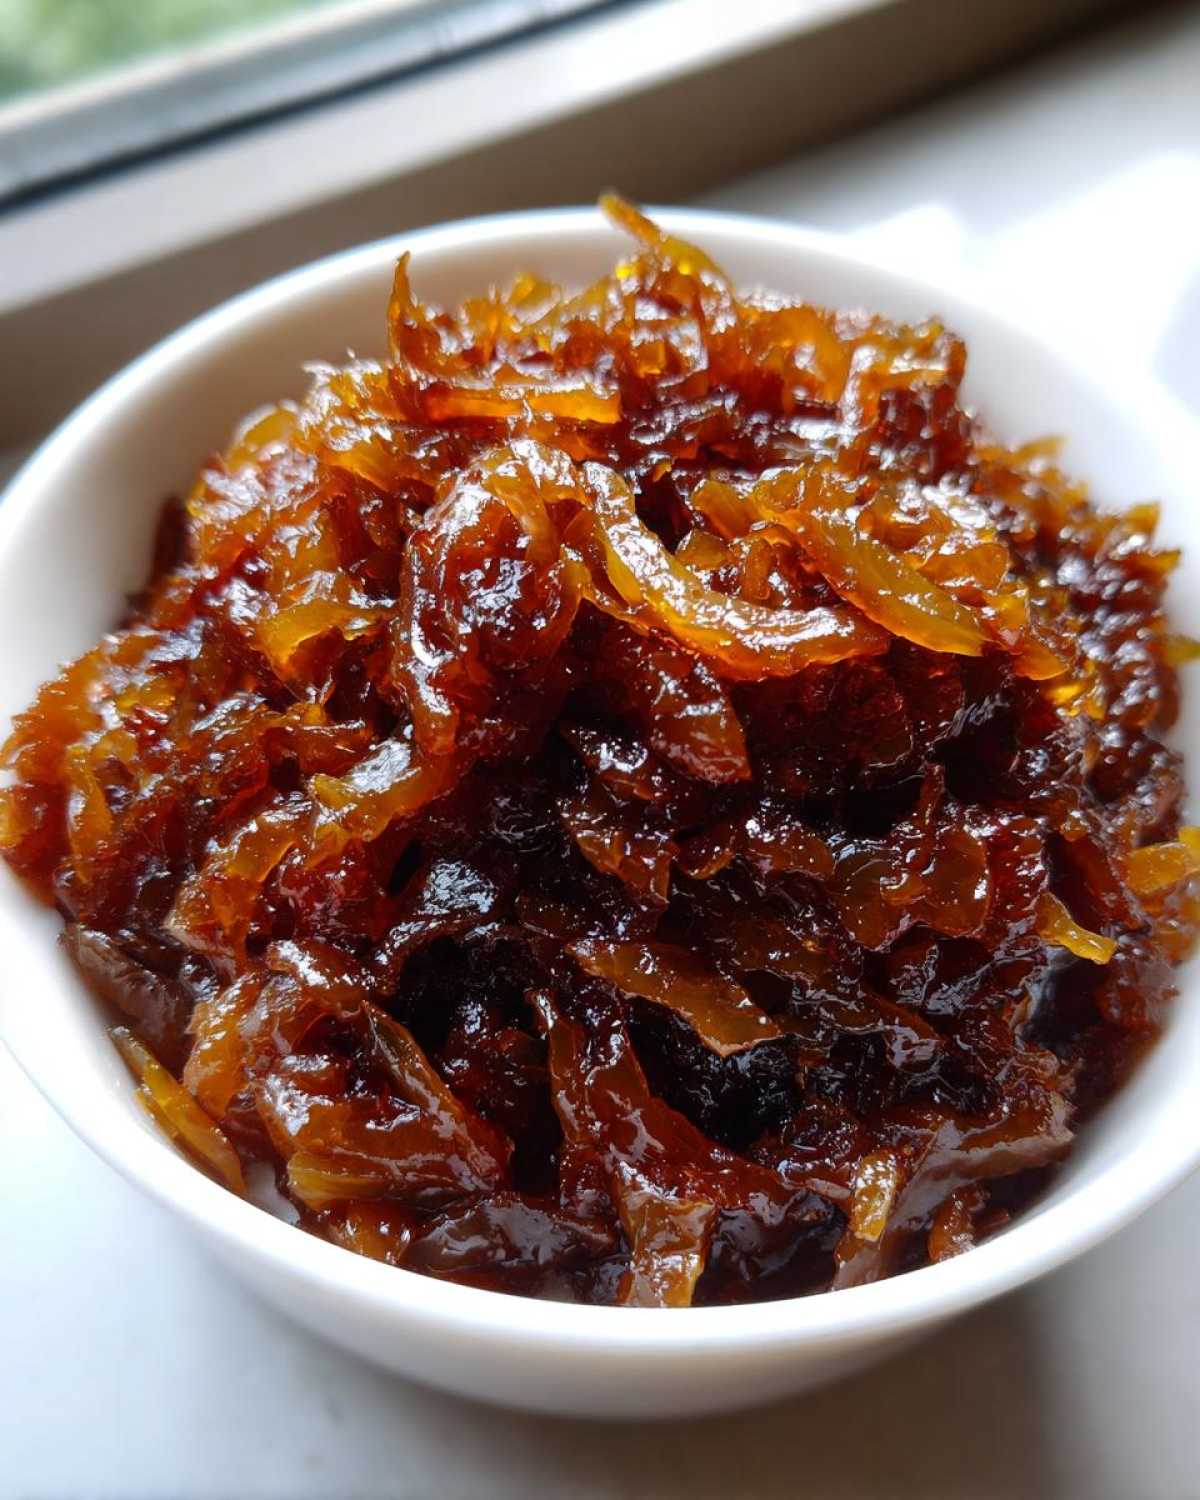
We are talking medium-low heat, sunshine. The goal isn’t frying; it’s slowly evaporating the moisture and coaxing those natural sugars out. This standard method for caramelized onions takes about 40 to 60 minutes. You have to stir them gently every 5 to 10 minutes, just enough to keep them from settling in one spot for too long. Trust me on this, the aroma that drifts up around the 30-minute mark is intoxicating. If you need a little help scraping up those tasty brown bits from the bottom—what we call fond—just splash in a tablespoon of water or some broth. That’s our little secret weapon to deepen the flavor, just like we discussed over about us. This gradual process guarantees incredible results for any savory onion recipe!
Achieving Quick Caramelized Onions (The Time-Saving Method)
Now, I know life gets busy. Sometimes 60 minutes just isn’t happening. If you need quick caramelized onions, I have a slightly less soulful, but still effective, workaround! You can bump the heat up to medium and be much more aggressive with stirring—about every 3 to 4 minutes. The trick here is adding just a tiny splash (maybe a tablespoon) of water or broth every 10 minutes. This keeps the pan temperature managed so they don’t scorch while speeding up the moisture release. You can shave this process down to about 30 minutes total. It won’t have the same profound depth as the slow-cooked ones, but hey, it’s better than tearing up opening a jar!
Step-by-Step Instructions for Your Caramelized Onions Recipe
Okay, time to put on the apron and get cooking! I want this process to feel so clear that you feel like I’m standing right next to you stirring the pot. We’re following the classic, flavor-building method here to get our caramelized onions just right. Remember, the key player here is low, slow heat!
First things first, get your fat combination—the butter and olive oil—into a big, heavy-bottomed skillet. We’re going to set that heat to medium-low. You want the fat melted and shimmering slightly, but definitely not smoking. Now, dump in all those perfectly thin onion slices and sprinkle on that teaspoon of salt. Give everything a good toss until every single slippery slice is coated in the fat. That salt helps draw out the water we need to evaporate!
For the next 20 minutes, just let them relax. You need to stir them occasionally—maybe every 5 to 10 minutes—to check the progress. They’ll wilt down a lot and start looking soft and translucent once that initial volume is gone. If things seem to be sticking fiercely to the bottom of the pan before the color shows up, that’s when you grab a tiny splash (maybe a tablespoon!) of water or broth. Scrape up those browned bits stuck at the bottom when you stir—that’s pure flavor gold, honey! This little deglazing trick is vital.
After that initial 20 minutes, you shift gears. Now you stir more frequently, maybe every 4 or 5 minutes, because the browning process is speeding up. Keep watching that color change! If you decided to use the optional sugar, throw it in now during these last 15 minutes. When they look deeply golden brown, sticky, and smell unbelievably sweet, pull the pan right off the heat. That’s it! You’ve made truly incredible caramelized onions!
Using Your Flavor Boosting Onions: Serving Suggestions
So now you have this gorgeous jar full of sweet, sticky piles of flavor. What do you do with them? Don’t just stop there! These are meant to be added to everything. I always make a huge batch because they are fantastic layered on top of steak or pork chops. They make a fantastic caramelized onion topping for burgers that will put any restaurant to shame.
My absolute favorite lately is turning them into a sauce. If you whip up a batch of creamy caramelized onion pasta—just melt some cream cheese and milk into a skillet with your onions—you’ve got an instant gourmet dinner. Seriously, these are flavor builders, and you’ll be reaching for them constantly now that you know how to make them!
Making a Simple Caramelized Onion Dip
If you want a party appetizer that disappears instantly, you have to try mixing these guys into a dip. Making a caramelized onion dip is ridiculously easy. Just take about a cup of your finished onions and mix them into a package of room-temperature cream cheese or a blend of sour cream and mayo. Seriously, that’s almost it!
If you want to get fancy, throw in a teaspoon of Worcestershire sauce and some fresh chives. Chill it for an hour so those flavors can marry up. That dip will be gone before the chips even get set out, I promise you!
Storage and Reheating Instructions for Caramelized Onions
You made a big batch, which is the *only* smart way to make these! I look at these beautiful, brown beauties and think of them as my secret weapon—truly an onion kitchen staple I keep on hand at all times. Store your finished caramelized onions in a completely airtight container in the fridge. They stay wonderfully fresh for about a full week, maybe even longer. Honestly, mine never last that long!
Reheating is simple. If you’re folding them into pasta sauce or a dip, just warm them gently on the stovetop with a tiny splash of water or broth to loosen them up a bit. Do not zap them in the microwave for too long, or they can get a little tough. Gentle heat brings back that soft, wonderful texture perfectly!
Frequently Asked Questions About Caramelized Onions
Why are my onions burning instead of browning properly?
Oh, that frustrating moment! If your onions are scorching or turning black before they get that beautiful golden color, it almost always means your heat is too high. Remember, an oven mitt is not a substitute for low heat regulation! You need extremely low, slow cooking for true caramelization. If you’re finding they still stick badly, don’t panic. Just add that tiny splash of water or broth mentioned in the instructions and scrape up the bottom until they loosen. This stops scorching and gets you closer to those amazing jammy onions without the burnt taste!
Can I use white onions instead of yellow ones for this recipe?
You absolutely can, but you might need to adjust your expectations slightly. Yellow onions are my go-to because they have a higher sugar content, which makes the process more predictable for achieving that deep sweetness. White onions are better, but they can sometimes release more water and might take a touch longer to reach that perfect level of deep color if you are looking for classic slow cooked onions. They still work great, especially if you are whipping up a quick caramelized onion topping!
How long do I really need to cook them for the best flavor?
For the absolute best, deepest flavor profile where the onions achieve that sticky, complex sweetness—the kind that makes any sandwich or dip legendary—stick to the 45 to 60-minute mark! When you cook them that long, you are developing maximum flavor. If you’re making a simple side dish and absolutely short on time, my 30-minute quick method is a decent substitute, but the long cook time produces truly glorious results for savory onion recipes.
Are these caramelized onions healthy to eat regularly?
For a rich side dish, they are quite reasonable. We are mainly using butter/oil and onions, which cooks down to a small volume (about 1.5 cups yield). If you’re watching your intake, remember the fat content comes from whatever you use to sauté them. If you are worried about it, make sure you check out the nutritional information below. They are fantastic flavor builders, so a little goes a long way!
Estimated Nutritional Data for This Onion Side Dish
I always feel like sharing the numbers is important, even though when I’m cooking with caramelized onions, I’m usually just thinking about how delicious they are. Since these onions are concentrated flavor, you don’t need a huge serving size to get that big taste. That means you can often budget them into your meal plan pretty easily!
Here is a quick rundown of the estimated nutrition based on a standard recipe using the butter and oil listed, calculated per a 1/4 cup serving. Please keep in mind that exact totals will shift depending on whether you used extra butter or a splash of sherry for that extra flavor boosting onions kick!
- Serving Size: 1/4 cup
- Calories: 75
- Fat: 4g (with only 2g saturated fat)
- Carbohydrates: 9g
- Sugar: 8g
- Protein: 1g
- Sodium: 290mg
See? Not terrible for something that tastes this indulgent! It just shows you that sometimes the best onion cooking method relies on a little bit of fat to really bring out that natural sweetness. Enjoy them guilt-free!
Share Your Success with This Caramelized Onions Recipe
Seriously, now that you know the secrets to achieving perfect, sweet, caramelized onions, I absolutely need to know what delicious things you created!
Did you finally make that incredible caramelized onion dip I was raving about? Or maybe you heaped your fresh batch onto burgers—did they make the perfect caramelized onion topping?
Please, head down to the comments section and tell me how long you cooked yours and what dish you ended up using them in. A number rating helps other cooks decide if they should start chopping right now! If you snapped a photo of your savory masterpiece, I’d love to see it!
If you have any last-minute questions about technique or storage, don’t hesitate to ask; you can always reach out to us via the contact page. Happy cooking, and thank you for trusting my family’s favorite technique for making these jammy onions perfection!
PrintHow to Perfectly Caramelize Onions
Learn the simple technique to slowly cook onions until they are deeply sweet, brown, and jammy. This method works for any recipe calling for caramelized onions.
- Prep Time: 10 min
- Cook Time: 50 min
- Total Time: 60 min
- Yield: About 1.5 cups
- Category: Side Dish
- Method: Stovetop Cooking
- Cuisine: General
- Diet: Vegetarian
Ingredients
- 3 large yellow onions, thinly sliced
- 2 tablespoons unsalted butter
- 1 tablespoon olive oil
- 1 teaspoon salt
- 1/2 teaspoon sugar (optional, for faster browning)
- 1/4 cup water or beef/vegetable broth (for deglazing)
Instructions
- Slice the onions thinly and uniformly. Uniformity helps them cook evenly.
- Combine the butter and olive oil in a large, heavy-bottomed skillet or Dutch oven over medium-low heat.
- Add the sliced onions and salt to the skillet. Stir to coat them completely with the fat.
- Cook the onions slowly, stirring every 5 to 10 minutes. Keep the heat low to prevent burning. The goal is slow moisture evaporation and sugar development.
- After 20 minutes, the onions will be soft and translucent. If they start sticking too much, add a tablespoon of water or broth and scrape the bottom of the pan (deglazing).
- Continue cooking, stirring more frequently as they begin to brown, usually between 40 and 60 minutes total. If using, add the sugar during the last 15 minutes of cooking.
- When the onions are deep golden brown, sticky, and sweet, remove them from the heat.
Notes
- For a quicker method, use medium heat and add 1 tablespoon of water every 10 minutes to prevent scorching while encouraging faster color development. Total time will be closer to 30 minutes.
- Use sweet onions like Vidalia or Walla Walla for the best natural sweetness.
- These onions store well in an airtight container in the refrigerator for up to one week.
- Add a splash of sherry or balsamic vinegar during the last 5 minutes of cooking for added depth of flavor.
Nutrition
- Serving Size: 1/4 cup
- Calories: 75
- Sugar: 8
- Sodium: 290
- Fat: 4
- Saturated Fat: 2
- Unsaturated Fat: 2
- Trans Fat: 0
- Carbohydrates: 9
- Fiber: 1
- Protein: 1
- Cholesterol: 8