

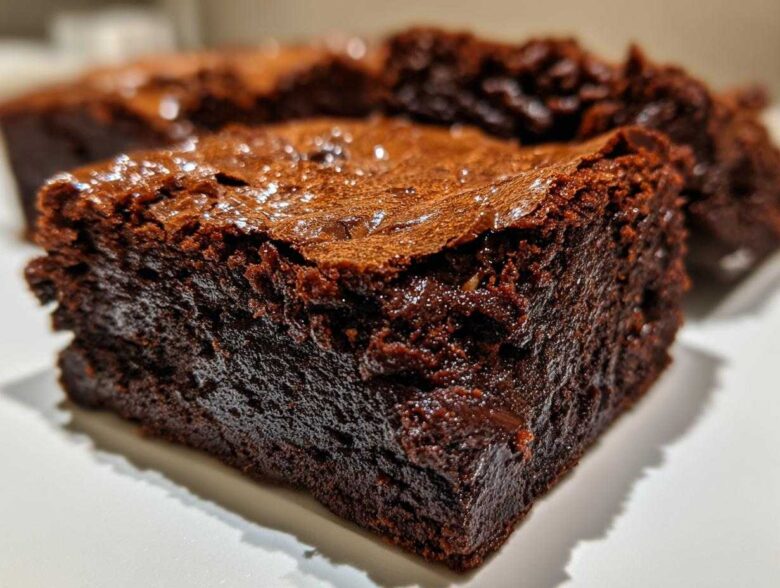
If you’re tired of settling for dry, cakey squares masquerading as chocolate treats, then honey, pull up a chair! I spent what feels like years chasing the perfect texture, that sweet spot where you bite in and it’s purely gooey, rich, and utterly decadent. I’ve finally cracked the code, and I’m sharing every single secret. Forget everything you thought you knew about making brownies; these are different.
This recipe delivers the absolute best fudgy brownies recipe you will ever bake, guaranteed. The secret weapon? We brown the butter first to add this incredible nutty depth, and I show you exactly how to get that coveted, paper-thin, crackly top. Trust me when I say this recipe—the ultimate fudgy chocolate bars—is going straight into your permanent rotation. Head over to my About Page if you want to know more about how I test recipes until they’re perfect!
Why These Are the Ultimate Fudgy Brownies Recipe (Best Homemade Brownies)
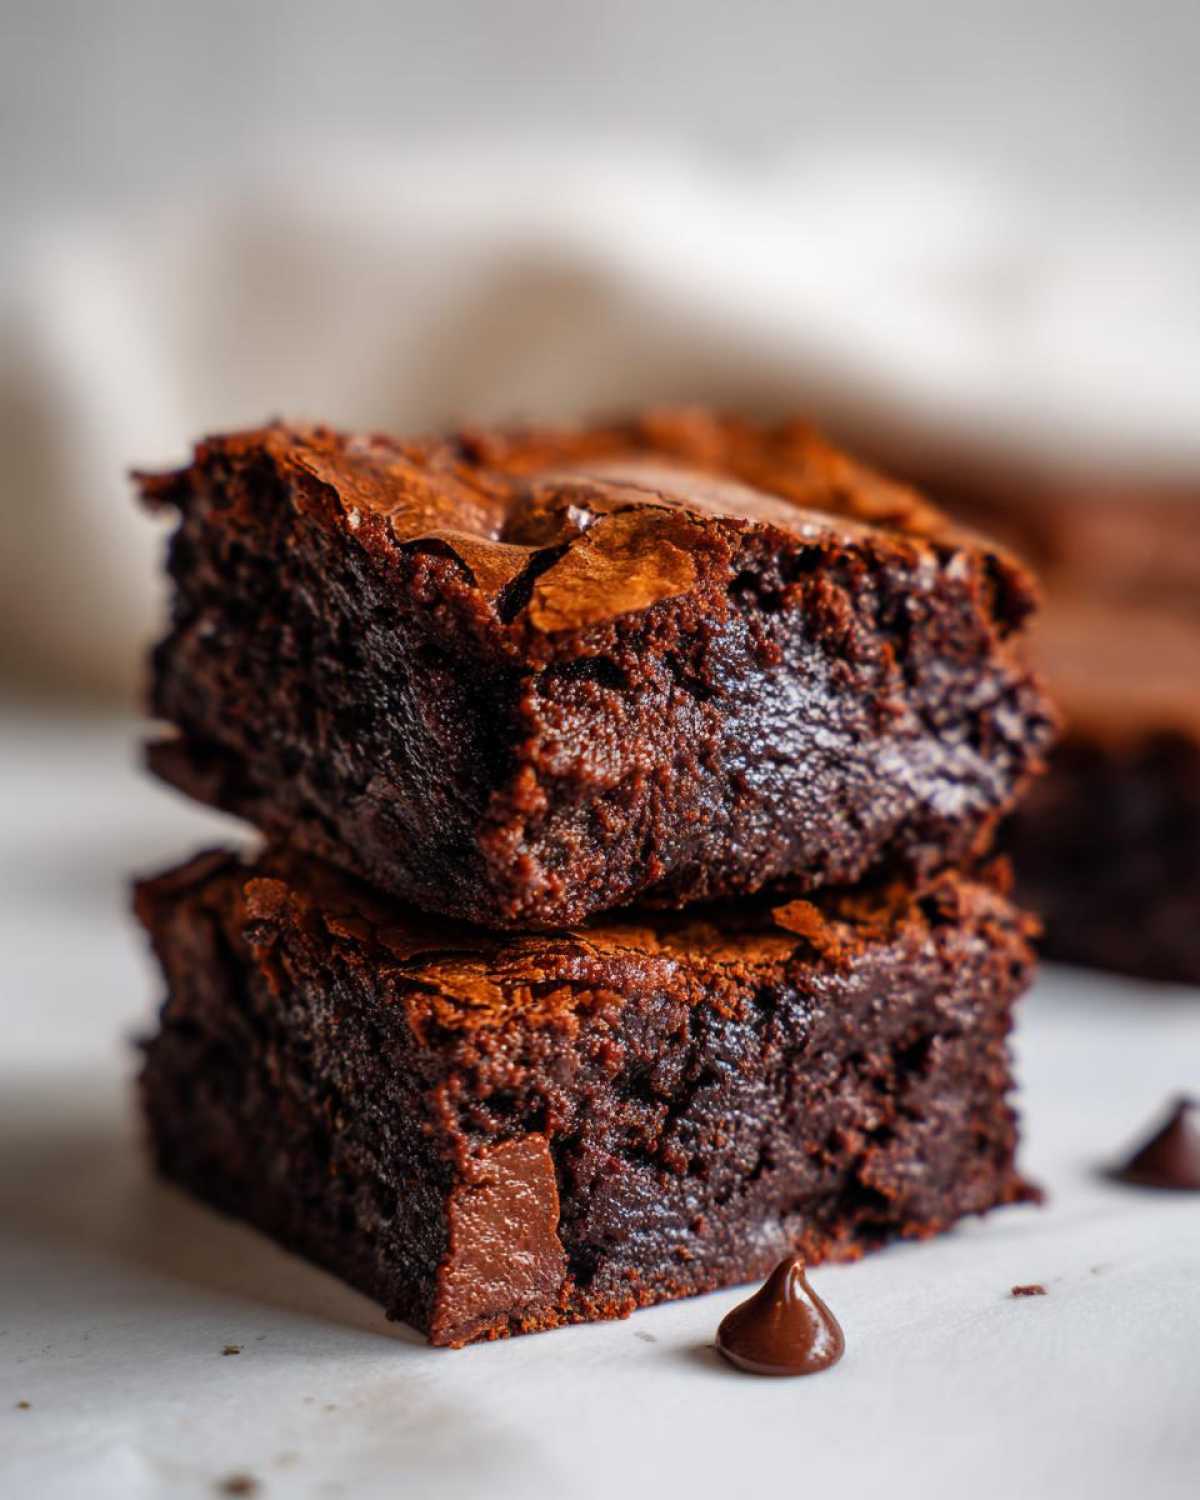
What makes these the truly best homemade brownies? It all comes down to that texture! We aren’t fooling around with dry, crumbly messes here; we are aiming for that rich, dense interior everyone craves. This fudgy brownies recipe nails the contrast between the ultra-gooey center and the brittle, shiny crust.
The real game-changer, though, is the brown butter. When you brown the butter, you unlock these fantastic, nutty, toasted caramel notes that you just can’t get from melted butter alone. It elevates these simple chocolate squares onto a gourmet level immediately, giving them that deep flavor profile that screams *decadent chocolate treats*.
Ingredients for Ultimate Fudgy Brownies with Brown Butter
You don’t need a million things for these brownies, but the few things you do need need to be spot on. When you’re dealing with pure, unadulterated chocolate flavor, quality matters! Using a rich cocoa powder makes all the difference here—Dutch-process gives a super dark color, but natural works wonderfully too, just know the color will be slightly lighter.
- 1 cup (2 sticks) unsalted butter
- 1 1/4 cups granulated sugar
- 1 cup packed light brown sugar
- 4 large eggs, room temperature
- 1 tablespoon vanilla extract
- 3/4 cup unsweetened cocoa powder, natural or Dutch-process
- 1/2 cup all-purpose flour
- 1 teaspoon salt
- 1 cup semi-sweet chocolate chips, divided
See? Simple stuff! But when that butter browns, magic happens, transforming these ingredients into true gourmet brownies.
How to Prepare Brown Butter Brownies: Step-by-Step Instructions
Alright, time to roll up our sleeves! Making these rich chocolate dessert bars is a process, but I promise every single step is worth the effort, especially when you hear that little sizzle and smell that nutty aroma.
Creating the Brown Butter Base for Rich Chocolate Dessert
First things first: you gotta get your oven hot—350°F (175°C). Then, line that 9×9 inch metal pan with parchment paper. Make sure to leave an overhang on two sides; that’s your handle for lifting the whole pan out later! Trust me, wrestling brownies out of a hot pan is no fun.
Now for the star of the show! Melt your butter in a nice light-colored saucepan over medium heat. You need to watch this like a hawk because it goes fast! You’ll see it foam up, then the foam calms down, and brown specks start appearing at the bottom. When you catch that deep, nutty perfume—that’s perfection! Immediately yank it off the heat and pour that beautiful brown butter into a large, heat-safe bowl.
Achieving the Shiny Top on Your Brownies
This is where the magic for that beautiful shiny top happens, so pay attention! While the brown butter is still warm, whisk in both your granulated sugar and that packed light brown sugar until they are totally mixed in. It’s going to look wet—that’s good!
Next, the eggs. Add them one large egg at a time, and here’s the key—you need to whisk hard for about 30 seconds after each egg goes in. We aren’t just mixing; we are emulsifying! Whisk in your vanilla extract after the last egg. That vigorous whisking action is what builds up those microscopic bubbles that guarantee your brownies with shiny top!
Folding Dry Ingredients and Baking Gooey Dessert Squares
In a separate little bowl, quickly whisk your dry stuff together: the cocoa powder, flour, and salt. Now, listen up: gently fold the dry mix into those sugary, eggy liquids using a rubber spatula. You fold until it’s *just* combined. If you overmix, you’ll develop too much gluten, and you end up with a cakey square, not the gooey dessert squares we want!
Fold in most of your chocolate chips, pour the batter into your prepared pan, and sprinkle the remaining chips right on top for those pockets of melted goodness. Bake for 30 to 35 minutes. You’re looking for the edges to be set and a toothpick to come out with moist, fudgy crumbs—not wet batter! Don’t even think about cutting them until they’ve cooled completely. Seriously, cooling is non-negotiable for the best fudgy texture!
Tips for Perfect Fudgy Brownies with Shiny Top
If you follow the instructions exactly, you’re halfway there, but these few little tweaks I learned along the way are what separate a great brownie from the absolute legend. Remember, we are aiming for fudgy, and fudgy equals slightly underbaked!
First, take my advice about the eggs: they absolutely must be room temperature. Cold eggs shock the warm butter mixture and stop that crucial emulsification process that leads to the shiny top. Don’t skip that step; take them out a half-hour before you start!
Also, when you are whisking the sugar and eggs into that warm brown butter? Time it! You need that full 30 seconds per egg. It feels like a long time when you’re whisking furiously, but that friction is what sets this whole thing up beautifully.
And please, please do not be a hero about the baking time. When that toothpick comes out with moist crumbs? Pull them! If it comes out totally clean, you’ve drifted into cakey territory, and we can’t have that. Let them set up as they cool down in the pan; that’s where the final fudgy magic happens.
Ingredient Notes and Substitutions for Brownies
I want you to feel confident walking away from this recipe knowing exactly *why* we chose what we chose. With something as pure as these decadent chocolate treats, the ingredients shine through, so knowing how to swap or what to look for is key for your future baking adventures.
Let’s talk cocoa powder for a second. In the recipe, I mentioned both natural and Dutch-process cocoa powder. Both work great for these brownies, but they behave differently. Natural cocoa is slightly more acidic, while Dutch-process cocoa is alkalized, giving a darker color and a smoother, less harsh chocolate flavor. Since we aren’t relying heavily on baking soda or powder for lift (we want fudge!), either one will give you fantastic results, but I lean toward Dutch-process for that ultra-rich chocolate dessert vibe.
Now, about that little optional kick I mentioned in the notes? If you want to take these from great to “Whoa, what is that amazing flavor?” you need to try the espresso trick. It doesn’t make the brownies taste like coffee, I promise! Instead, the tiny bit of instant espresso powder deepens the *chocolate* flavor, making it taste even richer and more intense.
- Espresso Trick: Just swap 1 teaspoon of your cocoa powder for 1 teaspoon of instant espresso powder. It’s a baker’s secret weapon for pushing chocolate flavor without adding noticeable coffee taste.
Remember, substituting ingredients can change the final texture, especially when dealing with something as precise as achieving that perfect fudge. But don’t be scared to experiment once you’ve nailed the base recipe—that’s how all the best homemade brownies start!
Storage & Reheating Instructions for Homemade Chocolate Desserts
This is often the hardest part, isn’t it? Trying to resist eating all of these amazing, gooey dessert squares in one sitting! The good news is that these rich chocolate dessert bars actually improve over time, provided you store them correctly. They firm up just enough to slice cleaner but stay supremely fudgy inside.
For best results, you have to let those brownies cool completely—I mean *completely*—before you even think about cutting them, let alone storing them. If you cut them warm, they turn into a sticky, messy puddle, and you lose that gorgeous internal structure we worked so hard to build!
Once they are totally cool, you want to store them in an airtight container. Plastic containers work great, or even a good quality zip-top bag, provided you press out most of the air. Keep them on the counter at cool room temperature, not in the fridge!
Keeping Your Brownies Fudgy at Room Temperature
The refrigerator is the enemy of fudgy texture, I’m telling you! Cold makes butter solidify quickly, which turns your gorgeous, gooey center into something closer to chocolate brick. Keep your airtight container out of direct sunlight—a cool pantry or cupboard works perfectly. Stored this way, these homemade chocolate desserts stay fantastic for about three to four days. Honestly, mine never last that long!
The Very Best Way to Reheat Brownies (If You Must)
Now, if you’ve been *really* good and stored them properly, but you want that just-out-of-the-oven experience, don’t microwave the whole thing! Microwaving tends to warm them unevenly and can ruin that shiny top crust we worked so hard for. If you want one perfect square warm, try this:
- Wrap one brownie square tightly in a small piece of aluminum foil.
- Place that foil packet into a slightly warm (maybe 200°F) oven for about 5 minutes, or until it thaws and softens gently.
- Alternatively, a quick 10 seconds in the microwave can work in a pinch, but use tongs to handle it immediately after, as it gets super soft!
What If I Need to Keep Them Longer?
If you’re making a huge batch for a party and need them to last past four days, you can freeze them! But you have to take extra care with the wrapping to prevent freezer burn, which dries out even the fuddiest brownies. Cut the brownies first, then wrap each square individually in plastic wrap, making sure you seal every corner tightly. Pop those wrapped squares into a freezer-safe bag or container. They hold up perfectly for up to three months! When you want one, let it thaw on the counter for an hour or two for the best texture.
Variations: From Espresso Brownies Recipe to Cream Cheese Brownies
Once you master the base—the glorious, fudgy, brown-butter dream—the fun really starts! These brownies are just begging you to dress them up. You’ve already got the secret for the espresso brownies recipe built right into the notes, but trust me, there are so many amazing ways to customize these decadent chocolate treats.
If you’re looking for that gourmet dessert experience, think about adding a swirl. Who doesn’t love a little rich cream cheese swirled through their chocolate? We can definitely adapt this recipe for cream cheese brownies, and it’s shockingly easy. You just need to whip up a small batch of softened cream cheese with a tiny bit of sugar and vanilla, swirl it gently into the batter right before it hits the oven, and boom—instant sophistication!
Adding Espresso for a Deeper Chocolate Flavor
I touched on this already, but I can’t stress enough how this little tweak transforms the chocolate. Using that instant espresso powder instead of a small bit of cocoa powder is like giving your brownies a secret superpower. It doesn’t taste overtly like coffee; instead, it just makes the chocolate taste more… well, *chocolatey*! It brings out those deep, almost bitter notes that balance the sweetness of all that sugar we added.
You only need about one level teaspoon to make a huge difference in a 9×9 batch. It dissolves right into the wet ingredients, so you don’t have to worry about chunks or texture. This is the easiest way to make your brownies taste like they came from a high-end bakery!
Swirling in Cream Cheese or Marshmallows
For a bit of cream cheese tang that cuts through the richness, try this: soften about four ounces of cream cheese, beat it with one egg yolk and two tablespoons of sugar until it’s smooth. Then, pour your brownie batter into the pan, dollop the cream cheese mixture on top, and use a knife or skewer to gently swirl it through the batter. Don’t over-swirl, or you lose the beautiful contrast!
If you’re feeling extra wild, you can try making turtle brownies with caramel by layering in some chopped pecans and a drizzle of caramel sauce just before the last ten minutes of baking. Or, if you’re a S’mores fan, fold in some mini marshmallows right at the end; they’ll puff up beautifully!
Make Brookies: The Best of Both Worlds
For the true chocolate lover who can never pick just one treat, you absolutely must try making a brookies recipe! This is where we combine the best of my perfect brownie batter with a simple cookie dough layer. You press the cookie dough layer into the bottom of your prepared pan first, then pour this fudgy brownie batter right on top. When they bake, you get that perfect crispy cookie bottom and the ultimate gooey brownie top. It’s a little more work, but honestly? It’s worth every extra minute when you see that cross-section!
Frequently Asked Questions About Fudgy Brownies
I get so many questions about these fudgy brownies recipe because getting that perfect texture seems like a mystical art! But I promise you, once you understand the *why* behind the steps, these secrets become simple baking science. Here are the top things folks ask me about making the ultimate fudgy chocolate bars.
Why are my brownies cakey instead of fudgy?
Oh, the dreaded cakey brownie! This happens for two main reasons, and they both relate back to baking structure. First, you might have overmixed the flour. Remember how I drilled that in? Overmixing develops gluten, and gluten is what makes bread chewy and cakes light—but it makes brownies tough and cake-like. Stop mixing as soon as you don’t see streaks of flour!
The second culprit is almost always overbaking. If you wait until a toothpick comes out totally clean, you’ve baked off all the delicious moisture that makes them gooey! For these decadent chocolate treats, you want that toothpick to come out sporting moist, sticky crumbs stuck to it. That slight under-baking is what keeps them perfectly fudgy.
How do I guarantee the shiny, crackly top on my brownies?
This is my favorite question! That beautiful brittle top isn’t luck; it’s physics. To guarantee those brownies with shiny top, you *must* follow the egg whisking technique in Step 4 exactly. You need to whisk the eggs vigorously into that warm sugar/brown butter mixture for a solid 30 seconds after each addition.
When you whisk that hard, you are dissolving the sugar and getting tiny air bubbles incorporated into the mixture. As the brownies bake, this layer rises to the top. When the heat hits it, that sugar mixture sets into that thin, crackly layer we all love. Make sure your eggs aren’t cold, or they won’t emulsify properly!
Can I make these easy one bowl brownies without brown butter?
I totally get the desire for easy one bowl brownies sometimes! If you’re in a huge rush, you can certainly substitute regular melted butter for the brown butter. Just melt the butter until it’s liquid and skip the stovetop browning step entirely. Pour it into your bowl and proceed with whisking the sugars in.
However, I have to tell you honestly, it’s a major flavor downgrade! You lose that distinctive, deep, nutty complexity that makes this specific recipe my number one recommendation. You’ll still get great chewy chocolate squares, but they won’t have that gourmet depth. If you have an extra eight minutes, please brown that butter—it’s worth asking me about on my Contact Page if you have any last-minute questions!
Nutritional Estimates for These Decadent Chocolate Treats
Now, I know what you might be thinking when you look at how rich and fudgy these brownies are—*surely* these are pushing me way over my daily allowance of happiness, right? While these are definitely intended for indulgence (these are decadent chocolate treats, after all!), I wanted to give you a rough idea of what you’re estimating per square based on my standard recipe yield of 16 squares.
Please know that these numbers are just estimates, darling. They change based on the exact brand of cocoa or chocolate chips you use. Think of this as a fun guide rather than a strict science lesson!
- Serving Size: 1 square
- Calories: 280
- Sugar: 30g
- Total Fat: 16g
- Saturated Fat: 10g
- Carbohydrates: 34g
- Protein: 4g
- Cholesterol: 75mg
If you are looking for a more detailed breakdown of how I calculate these figures and the general guidelines I follow for sharing nutritional information on my recipes, you absolutely must check out my official disclaimer page. It covers everything about ingredient sourcing and calculation methodology, which is important for building trust in any recipe you follow!
Share Your Ultimate Fudgy Chocolate Bars Experience
Well, you made it to the end! You’ve smelled that brown butter perfume, you’ve whisked those eggs until your arm ached a little, and now you have these absolutely perfect, gooey dessert squares cooling on the counter. I hope they are everything you dreamed of!
Now comes the really fun part: telling me all about it! I absolutely live for hearing about your baking adventures. Did this recipe give you the ultimate shiny top you were hunting for? Did your family fight over the edges versus the super-gooey middle pieces?
Don’t be shy! Head down to the comments section right now and tell me how your batch of ultimate fudgy chocolate bars turned out. A simple five-star rating helps other bakers feel confident trying this recipe, and I genuinely read every single comment.
Rate This Fudgy Brownies Recipe
If this recipe earned a spot in your dessert rotation, will you give it a rating? Just click those little stars at the top of the page when you’re done reading, or leave a quick note below saying, “Five stars, stayed fudgy for three days!” That kind of feedback is gold to me.
Show Me Your Shiny Top Beauties!
Do you have a picture of that perfect crackly crust? I would love, love, love to see it! If you posted a photo of your rich chocolate dessert on Instagram or Facebook, tag me so I can check it out. Seeing those gorgeous homemade chocolate desserts coming out of your ovens truly makes all the testing and perfecting worth it.
What’s Next On Your Baking List?
Now that you’ve mastered the fudgy brownie, what flavor are you thinking about tackling next? Are you going for the peanut butter swirl, or maybe trying an espresso variation next time? Let me know your future baking plans in the comments below. Happy baking, and enjoy every single decadent bite!
PrintUltimate Fudgy Brownies with Brown Butter and Shiny Top
Make rich, fudgy brownies featuring the deep flavor of brown butter and a desirable shiny, crackly top.
- Prep Time: 15 min
- Cook Time: 35 min
- Total Time: 50 min
- Yield: 16 squares
- Category: Dessert
- Method: Baking
- Cuisine: American
- Diet: Vegetarian
Ingredients
- 1 cup (2 sticks) unsalted butter
- 1 1/4 cups granulated sugar
- 1 cup packed light brown sugar
- 4 large eggs, room temperature
- 1 tablespoon vanilla extract
- 3/4 cup unsweetened cocoa powder, natural or Dutch-process
- 1/2 cup all-purpose flour
- 1 teaspoon salt
- 1 cup semi-sweet chocolate chips, divided
Instructions
- Preheat your oven to 350°F (175°C). Line a 9×9 inch metal baking pan with parchment paper, leaving an overhang on two sides for easy removal. Lightly grease the exposed sides of the pan.
- Melt the butter in a light-colored saucepan over medium heat. Continue cooking, stirring occasionally, until the butter foams, then subsides, and brown bits form at the bottom, giving off a nutty aroma. This takes about 5 to 8 minutes. Immediately pour the brown butter into a large, heat-safe bowl.
- Whisk the granulated sugar and brown sugar into the warm brown butter until fully combined. The mixture will look wet.
- Add the eggs one at a time, whisking vigorously for about 30 seconds after each addition. This step helps create the shiny top. Whisk in the vanilla extract.
- In a separate small bowl, whisk together the cocoa powder, flour, and salt.
- Gently fold the dry ingredients into the wet ingredients using a rubber spatula until just combined. Do not overmix.
- Fold in 3/4 cup of the chocolate chips.
- Pour the batter into the prepared pan and spread evenly. Sprinkle the remaining 1/4 cup of chocolate chips over the top.
- Bake for 30 to 35 minutes. The edges should look set, and a toothpick inserted near the center should come out with moist, fudgy crumbs attached, not wet batter.
- Let the brownies cool completely in the pan on a wire rack before lifting them out using the parchment overhang and cutting into squares. Cooling fully is essential for fudgy texture.
Notes
- For the shiniest top, ensure your eggs are room temperature and whisk the sugar into the warm brown butter and eggs vigorously for the full time specified.
- Do not overbake; slightly underbaking results in a gooier center.
- If you prefer a stronger coffee flavor, substitute 1 teaspoon of instant espresso powder for 1 teaspoon of the cocoa powder.
Nutrition
- Serving Size: 1 square
- Calories: 280
- Sugar: 30
- Sodium: 120
- Fat: 16
- Saturated Fat: 10
- Unsaturated Fat: 6
- Trans Fat: 0.5
- Carbohydrates: 34
- Fiber: 2
- Protein: 4
- Cholesterol: 75