

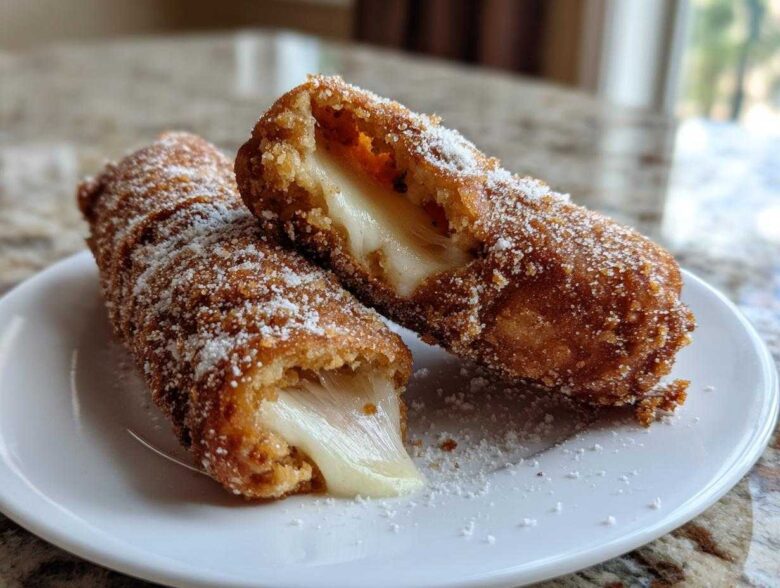
Oh my gosh, are you ready for this? I swear, every single time I scrolled past a picture of a perfectly golden, ridiculously stretchy **Korean corn dog** online, I got major cravings. They look simple, right? A sausage or cheese stick dipped in batter and fried? Wrong! The texture is everything, and most recipes just don’t get that satisfying, loud *crunch* you need. Well, friends, I finally cracked the code. We are mastering the viral street food sensation right here in our own kitchens. I spent way too much time testing yeast amounts and flour ratios, but trust me, the payoff is huge. Get ready for the absolute best cheese pull of your life!
Why This Is The Ultimate Crispy Korean Corn Dog Recipe
You’ve seen the videos, right? That perfect shatter when you bite in or that impossibly long cheese stretch? That’s what we’re after here. These aren’t just any deep-fried snacks; these are the **Best Korean Corn Dogs**, and they rely on two things: a slightly sweet, airy batter and the perfect coating combination. I promise this method gives you that authentic, **Viral Korean Hot Dog** experience without needing a plane ticket!
- The yeast makes the batter rise beautifully, giving you that signature chewy interior.
- We use a specific two-stage coating system (batter, then Panko/potato) for maximum shatter.
- Don’t skip the quick freeze before frying—that’s crucial for coating integrity!
Achieving the Perfect Cheesy Interior for Your Korean Corn Dog
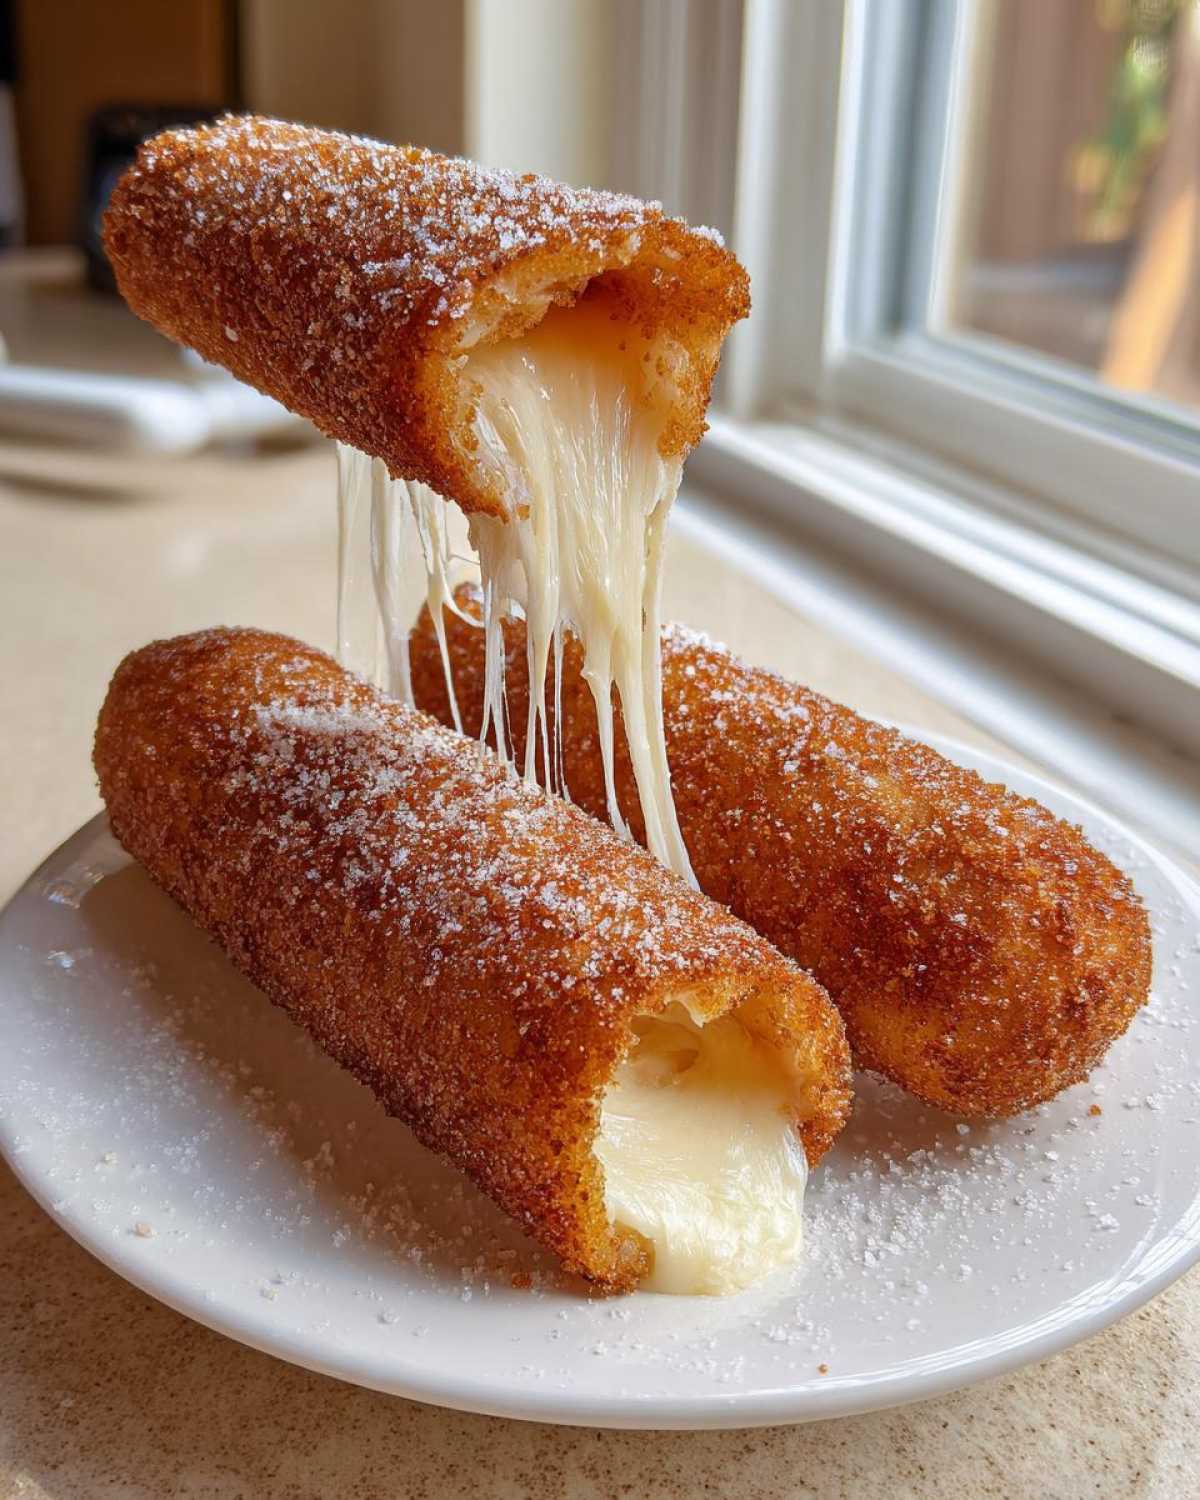
Listen, if you want that Instagram-worthy pull, you need to use the right cheese. Forget the fresh stuff; it gets too watery. We are sticking firmly to low-moisture, full-fat mozzarella sticks. They hold their shape just long enough in the hot oil to steam perfectly inside the batter. When you pull the skewered **Korean corn dog** apart, that gooey blanket of melted cheese is the ultimate prize. It’s worth the little bit of extra effort, I promise!
Essential Ingredients for Homemade Korean Corn Dogs
Okay, stop right there! Before you dive into the steps, we need to talk ingredients. This isn’t the place to wing it, especially with the batter, because that yeasty structure we talked about is key to a great **Korean corn dog**. Measurements need to be respected for that perfect crunch! Seriously, the difference between a great hot dog and an absolutely life-changing one is in these components.
For the Airy Korean Corn Dog Batter
This is where the magic starts, mostly thanks to the yeast and the special flour. I know, sweet rice flour sounds fancy, but it’s what gives these that amazing chewiness underneath the crisp shell. If you can’t find it, just add a little extra all-purpose flour, but the texture won’t be quite as spot-on authentic.
- 1 cup all-purpose flour
- 1/4 cup sweet rice flour (This is our secret weapon for chewiness!)
- 1 tablespoon sugar
- 1/2 teaspoon salt
- 1 teaspoon baking powder
- 1 large egg
- 3/4 cup milk
- 1/2 cup warm water (Make sure it’s warm, not hot, or you’ll kill our active dry yeast!)
- 1 packet active dry yeast (Remember, we let this foam up first!)
Coatings and Fillings for Your Korean Corn Dog
Here’s where you decide if you’re going simple, pure cheese, or going full street vendor mode with the potato coating. For the **Homemade Korean Corn Dogs**, you need high-quality mozzarella—low moisture is essential! If you choose the famous **Gamja Hotdog** style, you’ll use frozen french fries, but they need to be small and diced before coating.
- 12 mozzarella cheese sticks (full fat, please—we need that melt!)
- 6 hot dogs (optional, cut your dogs in half if you like a half-cheese, half-dog combo)
- 1 cup panko breadcrumbs OR 1 cup small diced frozen french fries (Ready them first!)
- Hot oil for frying
- Granulated sugar (Don’t forget this final dusting!)
Step-by-Step Guide: How to Make Korean Corn Dogs
This is the moment of truth! Making these **Korean corn dogs** isn’t hard once you respect the process. We have three main phases: getting the batter ready (which takes time!), assembling and sticking the coating on, and finally, the fast and furious frying part. Don’t rush the first step, or the whole thing suffers, I learned that the hard way!
Preparing the Crispy Corn Dog Batter
First things first, we wake up our yeast. Mix that yeast packet into your warm water and let it sit for about five minutes until it looks foamy and happy—that means it’s active! While that’s happening, grab your biggest bowl and whisk all your dry ingredients: the flour, the sweet rice flour, sugar, salt, and baking powder. We want everything evenly distributed.
Now, add the wet stuff—the egg, the milk, and, finally, that bubbly yeast mixture—into the dry ingredients. Whisk it *just* until it comes together. Seriously, stop stirring when you still see a few lumps. If you overmix, you develop the gluten and lose that airy texture we want! Cover that bowl with a clean kitchen towel and tuck it away somewhere warm. It needs a good 1 to 1.5 hours to double in size. Patience is mandatory here!
Assembling and Coating the Korean Corn Dog
Once the batter is fluffy and bubbly, it’s assembly time. Take your skewers and load them up. Are you going all cheese today? Or maybe dividing your mozzarella sticks and hot dogs in half for a mixed treat? Perfect! Now, dip your skewered item completely into that beautiful, thick batter. Make sure every millimeter is covered.
Immediately roll that wet dog into your prepared panko breadcrumbs or your diced frozen fries. You need to press gently to make sure the coating sticks tight. If the coating feels loose, go back to the batter for a second light dip, then coat again! This double-dip helps create that sturdy exterior. Pop the coated dogs on a tray lined with parchment paper and stick them in the freezer for about 15 minutes. This chilling step is what locks the coating in place so it doesn’t fall apart when it hits the oil.
Deep Frying for the Ultimate Korean Corn Dog Texture
Time to get out the oil! You need about 2 or 3 inches of cooking oil heated up in a deep pot or Dutch oven. We’re aiming for a steady 350°F (175°C). If your oil is too cold, your **Korean corn dog** will soak up grease and turn soggy—no thank you! If it’s way too hot, the outside burns before the cheese inside melts. You shouldn’t fry more than two or three at a time; overcrowding cools the oil down too fast.
Carefully lower the chilled dogs in and keep them moving gently. They need about 3 to 4 minutes per side until they are that gorgeous, deep golden brown color. Once they look perfect, pull them out using tongs and place them on a wire rack over paper towels to drain that extra oil. Remember, a wire rack keeps the bottom from steaming and getting soft!
Coating Variations: Panko vs. Potato Coated Corn Dogs
Okay, this is where you get to customize your **Korean corn dog** because there isn’t just one right way to coat them! The two stars of the show are the classic Panko coating and the super trendy potato coating, or what they call the *Gamja Hotdog* style. Honestly, picking one over the other is like picking a favorite child, but they offer wonderfully different experiences.
If you love extreme crunch—the kind that sounds almost like shattering glass when you bite into it—you absolutely must go with Panko breadcrumbs. They are flakier and absorb less oil than regular breadcrumbs, giving you that light, loud crackle.
Now, for the **Potato Coated Corn Dogs**. This one is my absolute favorite for texture contrast! You’re using small, diced cubes of frozen French fries pressed right into the batter. When these fry up, you get this amazing combination: a chewy, slightly softer exterior giving way to the crunch of the potato pieces. It adds body and a cool, savory element right onto your sweet batter. It makes the final **Korean corn dog** look totally rustic and professional all at once. Either way, make sure you press the coating on firmly after that initial dip in the batter!
Expert Tips for Success with Your Homemade Korean Corn Dogs
We’ve covered the rising, the coating, and the frying, but honestly, serving these **Korean corn dogs** is almost as important as cooking them! A few little finishing touches make the difference between a good homemade snack and something that tastes exactly like you bought it from a stand in Seoul. Trust me, you don’t want to skip the dusting step—it’s the hallmark of authentic street food!
Essential Korean Corn Dog Toppings and Sauces
The moment these hot dogs come out of the oil, you need to work fast! While they are still piping hot, that’s when you want to roll them around in a shallow plate of plain granulated sugar. They are still quite greasy right out of the fryer, and that mild stickiness helps the sugar cling perfectly. That sweet, slightly crunchy shell against the savory interior? That’s what makes the sweet and savory snack combination so addictive!
Once sugared, put them on the cooling rack for just a minute to settle, and then it’s sauce time. You can go classic, which means just plain yellow mustard and ketchup dumped over the top, but I usually turn up the spice level a little bit, because, why not? Mix some mayonnaise with Sriracha or, if you’re feeling really authentic, a dab of Gochujang paste. That spicy mayo slathered on the side of your **Korean corn dog** cuts through the richness beautifully. Keep the condiments on the side so everyone can customize their own favorite dipping sauce!
Storage and Reheating Instructions
So, what if you actually managed to have leftovers of these incredible homemade **Korean corn dogs**? Don’t panic about soggy texture! First, let them cool completely, then tuck them into an airtight container. They should last fine in the fridge for maybe two days, but honestly, they’re best the day you make them.
When reheating, absolutely DO NOT microwave them—that’s instant rubber city! The best way to bring back that satisfying crunch is by using an air fryer set to 375°F for about 5 to 7 minutes. If you don’t have an air fryer, a regular oven at 400°F on a wire rack works almost as well. Pop over to my contact page if you have any questions about getting that crisp back!
Frequently Asked Questions About Korean Corn Dogs
I know you might have a few questions still lingering about how to get these **Korean corn dogs** perfect—I certainly did when I started! Don’t worry, we’ve gathered the most common queries to make sure your adventure in **Korean Street Food at Home** is a total success. Whether you’re worried about the frying or the batter texture, we covered the bases!
Can I bake or air fry the Korean Corn Dog instead of deep frying?
I totally get it; deep frying isn’t everyone’s favorite activity! Yes, you *can* bake or pop these into an air fryer, but here is my honest truth: they won’t capture that signature texture of an authentic **Korean corn dog**. The heavy coating and the need for rapid cooking to melt the cheese before the batter burns requires the hot oil environment. Baking tends to make the coating dense rather than light and shattering. If you must use an air fryer, make sure you spritz the outside generously with oil first, but the results will be closer to a reheated dog than a fresh-from-the-stand treat.
What makes this batter different from regular corn dog batter?
This is the best part of learning **How to Make Korean Corn Dogs**! A standard American corn dog batter is just flour, cornmeal, and leavening. Our batter is special because we rely on two key items: yeast and sweet rice flour. The yeast is what gives the inside that wonderful, airy, slightly bread-like chewiness—it’s not just dense dough!
Then there’s the sweet rice flour. It’s crucial because it adds that desirable elasticity and chew. It’s what keeps the batter from being too cakey or too hard after frying. When you combine that yeasty rise with the rice flour’s springiness, you get the perfect pillow for the cheese or hot dog to hide inside. It’s the difference between a good fried snack and a top-tier **Cheesy Corn Dog**!
Nutritional Estimate for This Korean Corn Dog Recipe
So, look, I love delicious food, and I’m not going to lie—these are deep-fried, cheese-stuffed marvels! That means they aren’t exactly diet food, but since you asked, I always like to include a general idea of what’s in one of these show-stopping **Korean corn dogs**. This estimation is based on one serving using half mozzarella and half hot dog, plus the coating and the dusting of sugar.
Please remember this is just a general guideline! Things change based on the exact brand of cheese you use or how much oil they soak up during frying. If you want the full legal scoop, you can always take a peek at my general recipe disclaimer, but for bragging rights, here are the rough numbers:
- Serving Size: 1 corn dog (half cheese/half dog)
- Calories: About 350 (Give or take a few depending on the oil!)
- Total Fat: Around 20g
- Carbohydrates: Roughly 35g (That’s from the flour and the sugar dusting!)
- Protein: About 15g (Mostly from the cheese and hot dog!)
- Sugar: Close to 12g (Mostly from the batter ingredients and that glorious coating of sugar.)
It’s a complete, satisfying, sweet-and-savory snack, that’s for sure! Enjoy them, maybe share one or two—but definitely don’t count every crumb!
Share Your Homemade Korean Street Food Creations
Whew! You did it! You conquered the yeast, you mastered the coating, and you successfully deep-fried some masterpieces. Now, the best part of sharing a recipe is seeing what you all created in your own kitchens. Seriously, when you make these **Korean corn dogs**, you *have* to tell me how it went.
Did you get that mythical, mile-long cheese pull? Did you choose the Panko crunch or go all-in on the potato crust? Don’t be shy! Come back here and leave me a five-star rating if these hit the spot, or drop a comment below telling me the secrets to your perfect sauce pairing. I love hearing about your successes!
And if you’re sharing photos of your beautiful, golden **Korean street food** creations on social media, please tag me! Seeing your perfectly dusted, dripping-with-sauce hot dogs honestly makes my whole week. Happy cooking, and enjoy every satisfying, crunchy bite!
PrintUltimate Crispy Mozzarella Korean Corn Dog Recipe
Make viral, street-style Korean corn dogs at home featuring a chewy, airy batter, a mozzarella cheese pull, and a super crispy coating, finished with a dusting of sugar.
- Prep Time: 25 min
- Cook Time: 15 min
- Total Time: 1 hour 55 min
- Yield: 6 servings
- Category: Snack
- Method: Deep Frying
- Cuisine: Korean
- Diet: Vegetarian
Ingredients
- 1 cup all-purpose flour
- 1/4 cup sweet rice flour (or substitute with more all-purpose flour)
- 1 tablespoon sugar
- 1/2 teaspoon salt
- 1 teaspoon baking powder
- 1 large egg
- 3/4 cup milk
- 1/2 cup warm water
- 1 packet active dry yeast
- 12 mozzarella cheese sticks (low moisture, full fat)
- 6 hot dogs (optional, cut in half)
- 1 cup panko breadcrumbs OR 1 cup small diced frozen french fries (for Gamja style)
- Cooking oil for deep frying
- 2 tablespoons granulated sugar for dusting
Instructions
- Activate the yeast: In a small bowl, combine the warm water and yeast. Let stand for 5 minutes until foamy.
- Prepare the batter: In a large bowl, whisk together the all-purpose flour, sweet rice flour, sugar, salt, and baking powder.
- Combine wet and dry ingredients: Add the egg, milk, and the activated yeast mixture to the dry ingredients. Whisk until just combined. The batter should be thick. Cover the bowl and let the batter rest in a warm place for 1 to 1.5 hours until it has doubled in size.
- Prepare coatings: Place the panko breadcrumbs or diced frozen fries onto separate shallow plates.
- Assemble the corn dogs: Skewer the mozzarella sticks or the hot dogs (or half-and-half combinations) onto wooden skewers.
- Dip and coat: Dip the skewered item fully into the risen batter, ensuring it is completely covered. Immediately roll the battered item in the panko or diced fries, pressing gently so the coating adheres well.
- Chill: Place the coated corn dogs on a parchment-lined tray and freeze for 15 minutes. This helps the coating set before frying.
- Fry: Heat 2 to 3 inches of cooking oil in a deep pot or Dutch oven to 350°F (175°C). Carefully lower the corn dogs into the hot oil, frying 2 or 3 at a time to avoid overcrowding.
- Cook until golden brown and crispy, about 3 to 4 minutes per side. The internal cheese should be melted.
- Drain: Remove the corn dogs and place them on a wire rack set over a paper towel-lined baking sheet to drain excess oil.
- Finish: While still warm, roll the corn dogs in granulated sugar. Serve immediately with your choice of dipping sauce.
Notes
- For the best cheese pull, use low-moisture, full-fat mozzarella sticks.
- If using the French fry coating (Gamja style), ensure the fries are small and frozen solid before coating the batter.
- For a thinner batter, add a tablespoon of milk at a time until it reaches a thick pancake consistency.
- Classic dipping sauces include ketchup, yellow mustard, and a spicy mayo made from mayonnaise mixed with Sriracha or Gochujang paste.
Nutrition
- Serving Size: 1 corn dog
- Calories: 350
- Sugar: 12
- Sodium: 450
- Fat: 20
- Saturated Fat: 8
- Unsaturated Fat: 10
- Trans Fat: 0.5
- Carbohydrates: 35
- Fiber: 1
- Protein: 15
- Cholesterol: 30