

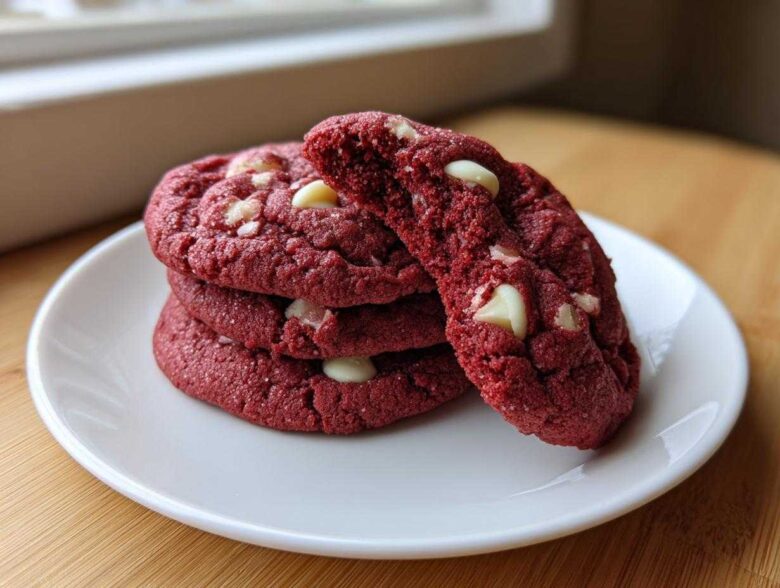
If you’ve ever taken a bite of a perfect red velvet cookie—the kind that’s deeply chocolatey, faintly tart, unbelievably soft, and yet satisfyingly chewy on the edges—you know the struggle. Most recipes out there either flatten into crispy wafers or end up tasting more like plain chocolate sugar. Not ours! I spent ages tweaking my recipe because I wanted something that felt like eating a tiny slice of the best red velvet cake, only portable and perfect for dunking in milk. Trust me, this recipe is the holy grail. It’s the one I rely on for everything from Valentine’s Day celebrations to simple Tuesday night cravings, and it always steals the show. I’m sharing all my little secrets here in the hope you love them as much as my family does.
We use a specific technique to lock in moisture and get that signature deep color without sacrificing texture. Since this is one of our most requested holiday bakes, I wanted to make sure this version truly stands out. Head over to our About Us page to learn more about how we test our favorite dessert recipes!
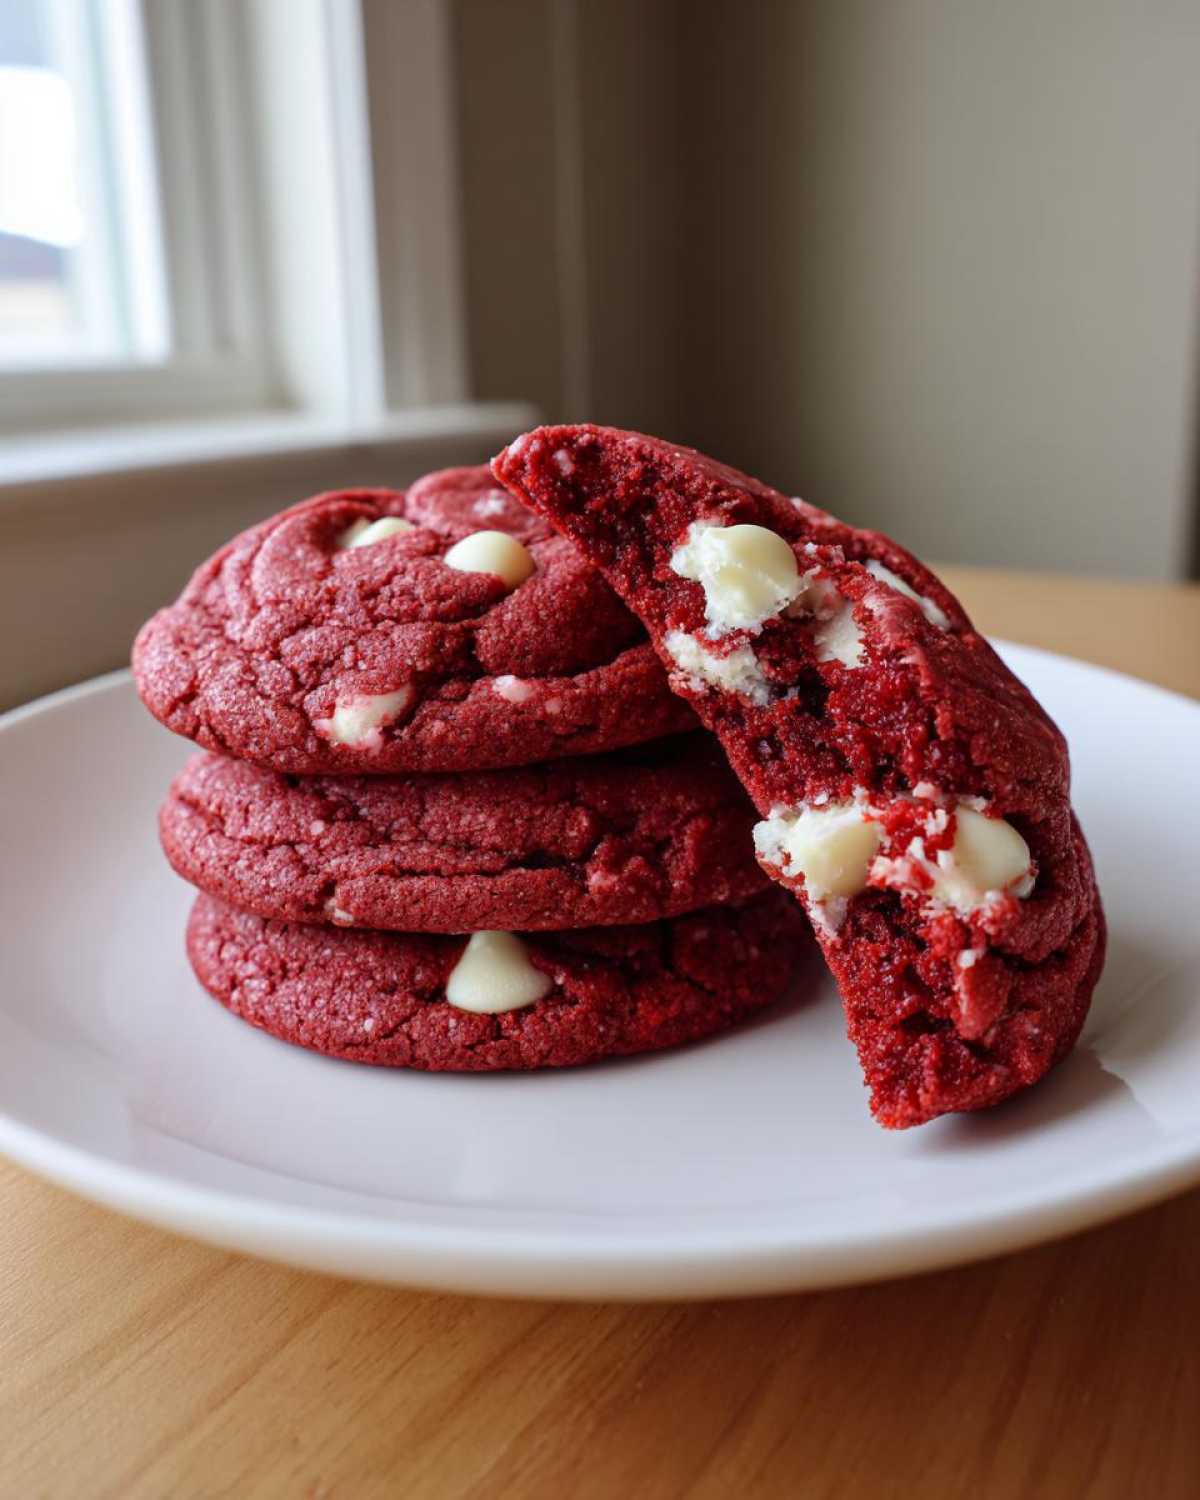
Why This Soft and Chewy Red Velvet Cookies Recipe Works
What separates these Soft Red Velvet Cookies from the flat, dry disks you sometimes end up with? It all comes down to temperature and mixing restraint. We want luxurious, Chewy Red Velvet Cookies, not brittle ones, and that starts before the oven even turns on.
The combination of just the right amount of cocoa powder, along with vivid gel coloring, ensures you get that deep, complex flavor profile we all crave. It tastes authentically red velvet, not just like dyed chocolate. My big trick that I learned the hard way? Make sure your butter is perfectly softened—not melty, but soft enough that you can quickly press your finger into it. That temperature control is huge for air incorporation!
Achieving the Perfect Red Velvet Cookie Texture
The secret sauce for that amazing chew is definitely in the creaming step. When you beat the softened butter and sugar until they’re fluffy, you’re whipping air into the dough. Those tiny air pockets are what give the structure to the cookie once it bakes. Don’t rush it!
However, once you add the flour—stop! Overmixing develops gluten, and gluten equals tough cookies. For the best red velvet cookies, you mix the dry ingredients in until you see just a few streaks of flour remaining. Seriously, stop the mixer then. That last little bit of mixing happens when you gently fold in those beautiful white chocolate chips. That’s how we guarantee soft centers every single time.
Gathering Your Ingredients for Homemade Red Velvet Treats
Okay, now for the fun part—gathering everything you need to make these incredible red velvet cookies! Remember, baking is science, so paying attention to a few key details here makes a huge difference in the final look and taste. We aren’t just throwing stuff together; we’re building flavor and structure!
You’ll definitely want to grab your good quality, unsweetened cocoa powder. This is what gives the signature red velvet flavor—it needs that hint of chocolate balance against the vanilla. And please, if you want that true, vibrant color, skip the liquid food coloring drops. Gel coloring is where it’s at, because you get intense red color without watering down your beautiful dough. A little goes a long way!
Also, you might look at the recipe and wonder about the white vinegar and baking soda? That little bit of acid is crucial! It reacts right away with the baking soda to give us just the right amount of lift and tenderness in our cookie. Don’t skip it; it’s our little flavor and texture booster.
Ingredient Notes and Substitutions for Red Velvet Cookies
Let’s talk about the mix-ins and the coloring in a bit more detail to build your trust in this process. When it comes to the chocolate, I specified white chocolate chips because they melt beautifully without spreading too much, keeping the cookie thick. If you prefer chips that stay a bit chunkier, go ahead and use white chocolate chunks—they bake up a little differently, but are delicious!
If you absolutely cannot find gel food coloring, you can use liquid drops, but you may need a couple more drops than you think. Just add until you hit that rich, deep cranberry-red color you see in bakery versions. Also, just a heads-up: while you certainly could swap out the white chocolate for semisweet, it shifts the profile away from classic red velvet, which relies on that creamy, milky contrast. Stick to what’s listed for the best red velvet cookies!
Step-by-Step Guide to Making Bakery Style Red Velvet Cookies
Alright, let’s get these gorgeous red dough balls into the oven! Since these are meant to be classic, Bakery Style Red Velvet Cookies, we need that perfect thickness, and timing is everything. First things first: make sure your oven is humming along nicely at 350 degrees F (175 degrees C). I always line my baking sheets with parchment paper because it saves cleanup and ensures the bottoms don’t brown too fast. If you don’t have parchment, don’t panic, but you might need to watch them closely!
We’re aiming for about 24 delicious cookies from this batch, so get your dough scoops ready. We want them spaced about two inches apart on the sheet so they have room to spread just a little bit while baking.
Mixing the Wet and Dry Components for Red Velvet Cookie Dough
This starts where we left off—with that perfectly creamed butter and sugar. Now, we bring in the eggs, one at a time. Make sure each egg is totally incorporated before you even think about adding the next one. Trust me, rushing here leads to uneven dough!
Next comes the color magic—add your vanilla, your *red food coloring*, and that little bit of white vinegar all at once. Mix until the color is deep and uniform. Wow, it looks stunning when it’s this vibrant!
Time for the structure builders. In a separate bowl, whisk your flour, cocoa powder, baking soda, and salt together. Whisking dry goods briefly before adding them helps distribute everything evenly, which is key for consistent red velvet cookies. Now, add the dry mix to the wet mix on low speed, just until it comes together. I mean it—stop mixing the second you don’t see streaks of flour anymore! Overmixing here is the fastest way to hard, sad cookies. Finally, gently fold in those beautiful white chocolate chips by hand with a spatula.
Baking and Cooling Your Red Velvet Cookie Recipe
Spoon out your dough balls—I like using a standard tablespoon measure for consistency—and get them into that preheated oven. Most recipes call for 10 to 12 minutes, and that’s a great guideline for these Homemade Red Velvet Treats. But here’s the visual cue you need: the edges should look set and maybe just starting to firm up, but that center patch should still look slightly soft and glossy. If they look fully dry in the oven, they are already overdone!
This next part is non-negotiable for that chewy middle! Leave them right there on the hot baking sheet for a full five minutes after you pull them out. The residual heat finishes baking the center gently without turning the edges tough. After five minutes, very carefully move them over to a wire rack to cool completely. If you try to move them sooner, they might just fall apart, so have patience!
Variations on Classic Red Velvet Cookies
Once you master these basic red velvet cookies, you’ll realize how fun they are to customize! If you’re looking for that incredible, snowy crackled look—perfect for the holidays—you have to try making Red Velvet Crinkle Cookies. Just chill your dough balls really well, like for at least an hour, and then roll them generously in powdered sugar before they hit the oven. They look fancy, but they are so simple!
Another huge crowd-pleaser is adding cream cheese elements. You can definitely fold in some softened cream cheese to the dough itself for a tangier experience, but I think the best way to get that authentic flavor is wrapping the cookie dough around a small cube of cream cheese before baking. Oops, sometimes those little cheese pockets melt out, so you have to be quick with them!
Making Frosted Red Velvet Cookies
For the ultimate indulgence—especially if you’re making Valentine’s Day Cookies rather than just simple drop cookies—you need frosting! Once these have cooled completely, you can whip up a quick glaze. Just beat one block of softened cream cheese until it’s totally smooth, then gradually add about one cup of powdered sugar and a splash of vanilla until it’s spreadable. You want it thick enough not to run right off the cookie, but definitely creamy. Spread a generous dollop on top of each cooled cookie. That tang from the cream cheese frosting is just the perfect counterpoint to the slightly bitter cocoa in the cookies!
Tips for Success with Festive Holiday Cookies
Now that you know the base recipe, let’s talk about making these showstoppers for your next gathering. Whether you’re prepping for Christmas or just need amazing Festive Holiday Cookies, these three quick tips will make your red velvet cookies look unbelievably professional.
First, if you find your cookies spreading too thin—which can happen if your kitchen is warm—don’t hesitate to chill the dough. I chill mine for just 30 minutes before scooping. This keeps them thicker and ensures that glorious mound shape we love in bakery style cookies.
Second, about that color! If you want that deep, almost black-cherry red, don’t be afraid to use high-quality red gel coloring. Measure what the recipe says, mix it well, and then just add one or two *tiny* extra drops if the color looks too pale before baking. It really makes them pop on the holiday platter.
Finally, packaging is everything! When you store these red velvet cookies, make sure they are completely cooled before stacking them. If you’re gifting them, place a small square of parchment paper between each cookie. This keeps the chocolate chips from sticking and prevents any accidental frosting smudges if you decided to frost them!
Storing and Reheating Your Red Velvet Treats
The best part about these red velvet cookies is that they actually taste *better* the next day once those spices have really settled in and married! Seriously, they get perfectly gooey overnight. If you’re lucky enough to have any leftovers, storage is super simple.
You want to keep them in an airtight container right on the counter, at room temperature. They should stay wonderfully soft for a good five days. Don’t bother with the fridge unless your kitchen is ridiculously hot and humid—cold air can sometimes make cookies unnecessarily firm, and we are striving for ultimate softness, remember?
If you made a giant batch for the holidays and need them to last longer, you can absolutely freeze them! Just make sure they are completely cooled first. Stack them with parchment paper layers between them inside a freezer-safe bag or container. They keep great for about three months this way.
Now, for the reheating tip! Say you froze them or they’ve been sitting out for a few days and you want that fresh-out-of-the-oven feel again. Don’t microwave them for too long, or they’ll turn rubbery. Pop just one or two cookies on a microwave-safe plate and heat for just 8 to 10 seconds on 50% power. It warms the white chocolate chips just enough and restores that melt-in-your-mouth softness to your red velvet cookies. It’s honestly magical!
Frequently Asked Questions About Red Velvet Cookie Recipe
I know you might still have a few lingering questions now that you’ve got the full recipe memorized! That’s totally normal when dealing with rich desserts like these. I always get asked the same things about getting the color right and whether they can skip certain ingredients. Let’s clear a few things up so your batch of red velvet cookies turns out absolutely perfect!
If you have other questions after you try them out, please don’t hesitate to reach out over on my Contact page—I love hearing what you think!
Can I make these Easy Red Velvet Cookies without White Chocolate?
Yes, absolutely! While the white chocolate provides that signature sweet, creamy contrast against the cocoa, you certainly don’t have to use it if it’s not your favorite. If you want to keep these as Easy Red Velvet Cookies, you can simply omit the chips altogether, and you’ll still have a wonderfully soft, plain red velvet cookie base. They are great plain, too!
If you want a little something extra, try milk chocolate chips—they mingle nicely with the cocoa flavor. Or, for a richer, slightly less sweet treat, use dark chocolate chips. Just remember that the melted dark chocolate will slightly mute the red color in the crinkle when you bake them, but the flavor is fantastic!
How do I get the deep red color in my red velvet cookies?
This is the number one question I get, especially for Christmas Cookie Recipes or Valentine’s Day! The key here is using gel food coloring, not the liquid drops found in the baking aisle of the grocery store. Liquid coloring is mostly water, so you have to add so much of it that it changes the dough consistency, which ruins the final texture.
Gel coloring is super concentrated. You only need a few drops, and it gives you that vibrant, deep ruby red without affecting those important wet ingredients. Also, remember that using the specified amount of cocoa powder is necessary! If you use too much cocoa powder trying to deepen the chocolate flavor, it actually starts to counteract the red dye, making the cookie look dull brown instead of bright red. Keep the cocoa balanced, and use the gel!
Nutritional Estimates for Homemade Red Velvet Treats
I get asked all the time about the nutrition facts for my recipes, and while I’m not a nutritionist—I’m just a baker trying to make delicious things—I always try to give a general idea of what you’re looking at per cookie. Because we’re using real butter and white chocolate, these are definitely a treat, not an everyday snack, but wow, are they worth it!
These estimates are based on making 24 cookies, using the ingredients listed, and they are just averages. Please remember that if you use full-fat vs. reduced-fat cream cheese in a swap, or if you use store-brand chocolate chips, the real numbers will change. For precise dietary tracking, you’ll want to plug the exact ingredients you use into your favorite tracking app.
For my full breakdown on how I approach recipe nutrition and sourcing these estimates, you can take a look at our site’s official disclaimer here. It’s important to me that you know where these numbers come from!
Here’s a quick snapshot of the estimated data for one of these incredible red velvet cookies:
- Serving Size: 1 cookie
- Calories: 210
- Fat: 12g (7g Saturated Fat)
- Carbohydrates: 25g
- Protein: 2g
- Sugar: 18g
See? A perfect little indulgence! Enjoy them guilt-free!
Share Your Soft Red Velvet Cookies Creations
Whew! We did it! You’ve got the secrets now to making the absolute best, fluffiest, most divine red velvet cookies that everyone will swear came straight from a fancy bakery. I always feel a little thrill when I pull that first sheet out of the oven—that color is just unmatched!
Now, the most important thing you can do is bake them! And then, tell me all about it! I absolutely live for reading your feedback. Did the white chocolate melt perfectly for you? Did you end up trying the crinkle version? Please drop a star rating right below this section, and definitely leave a comment telling me how they turned out.
If you took a gorgeous photo of your stack of red velvet cookies—maybe next to a cold glass of milk or tucked onto a holiday platter—please share it! Tag me on social media so I can see your beautiful work. It means the world to me to see my family’s favorite recipe inspiring your kitchen creations. Head over to my Bookmarks section to save this recipe, and happy baking!
PrintSoft and Chewy Red Velvet Cookies with White Chocolate

Make soft, chewy red velvet cookies featuring a rich cocoa flavor and studded with white chocolate chips. This recipe yields classic, bakery-style treats perfect for holidays.
- Prep Time: 20 min
- Cook Time: 12 min
- Total Time: 32 min
- Yield: 24 cookies
- Category: Dessert
- Method: Baking
- Cuisine: American
- Diet: Vegetarian
Ingredients
- 1 cup unsalted butter, softened
- 1 1/2 cups granulated sugar
- 2 large eggs
- 1 teaspoon vanilla extract
- 1 tablespoon red food coloring (gel preferred)
- 1 teaspoon white vinegar
- 1 teaspoon baking soda
- 2 1/2 cups all-purpose flour
- 1/2 cup unsweetened cocoa powder
- 1/2 teaspoon salt
- 1 cup white chocolate chips
Instructions
- Preheat your oven to 350 degrees F (175 degrees C). Line baking sheets with parchment paper.
- In a large bowl, cream together the softened butter and granulated sugar until light and fluffy.
- Beat in the eggs one at a time, mixing well after each addition.
- Stir in the vanilla extract, red food coloring, and white vinegar until the color is uniform.
- In a separate bowl, whisk together the flour, cocoa powder, baking soda, and salt.
- Gradually add the dry ingredients to the wet ingredients, mixing on low speed until just combined. Do not overmix.
- Fold in the white chocolate chips.
- Drop rounded tablespoons of dough onto the prepared baking sheets, spacing them about 2 inches apart.
- Bake for 10 to 12 minutes, or until the edges are set but the centers still look slightly soft.
- Let the cookies cool on the baking sheets for 5 minutes before transferring them to a wire rack to cool completely.
Notes
- For a crinkle effect, roll the chilled dough balls in powdered sugar before baking.
- Use gel food coloring for the most intense red color without adding too much liquid.
- If you prefer a tangier flavor, substitute 1/4 cup of the butter with cream cheese.
Nutrition
- Serving Size: 1 cookie
- Calories: 210
- Sugar: 18g
- Sodium: 110mg
- Fat: 12g
- Saturated Fat: 7g
- Unsaturated Fat: 5g
- Trans Fat: 0.2g
- Carbohydrates: 25g
- Fiber: 1g
- Protein: 2g
- Cholesterol: 35mg