

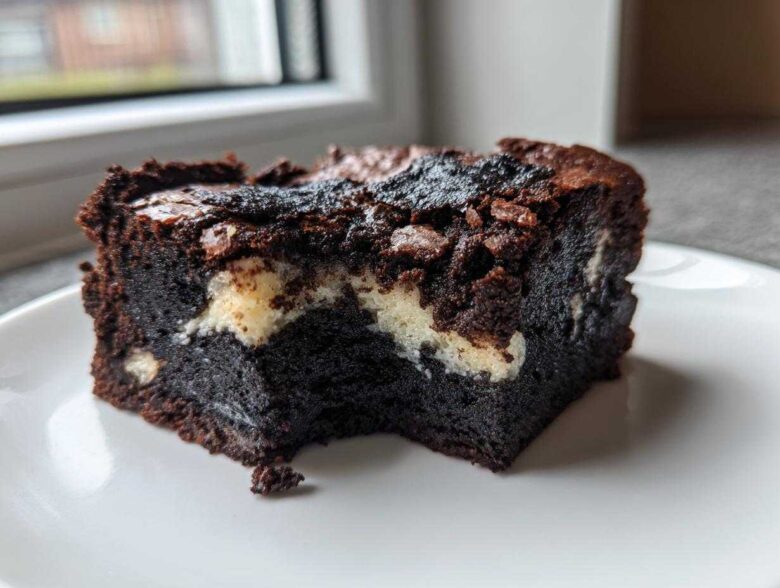
If there’s one thing I absolutely obsess over in baking, it’s texture! Seriously, a dessert that’s just one note—plain fudgy, plain soft—leaves me wanting more. That’s why when I first tried layering things, I knew I had hit the jackpot. I wanted the deep, incredibly nutty, almost savory flavor of black sesame, paired with that satisfying chew you only get from mochi. It took me three tries to get the ratio of glutinous rice flour just right, but wow, when it finally worked, the result was pure magic!
These **Black Sesame Mochi Brownies** are just that magical marriage: a rich, dark, fudgy chocolate base that melts in your mouth, hugging a bouncy, delightfully chewy layer infused with toasted sesame goodness. If you love Asian Fusion Baking, these are your new absolute favorite. You can check out more of my baking adventures over at my main blog page while you wait for these to bake!
Why You Will Love These Black Sesame Mochi Brownies
Honestly, these aren’t just brownies; they are an experience! I live for desserts that confuse and delight your taste buds, and these hit every mark. Here’s why you need to clear your counter space for these **Black Sesame Mochi Brownies**:
- The Amazing Texture Combo: Seriously, the best part! You get that deeply fudgy, slightly gooey chocolate brownie bottom, and then BAM! A super chewy, bouncy layer thanks to the sweet rice flour. It really is the secret to incredible unique brownie variations.
- Deep, Complex Flavor: Forget weak sesame flavor! The black sesame paste gives everything this earthy, rich, almost umami note that cuts through the sweetness perfectly. It’s surprisingly addictive.
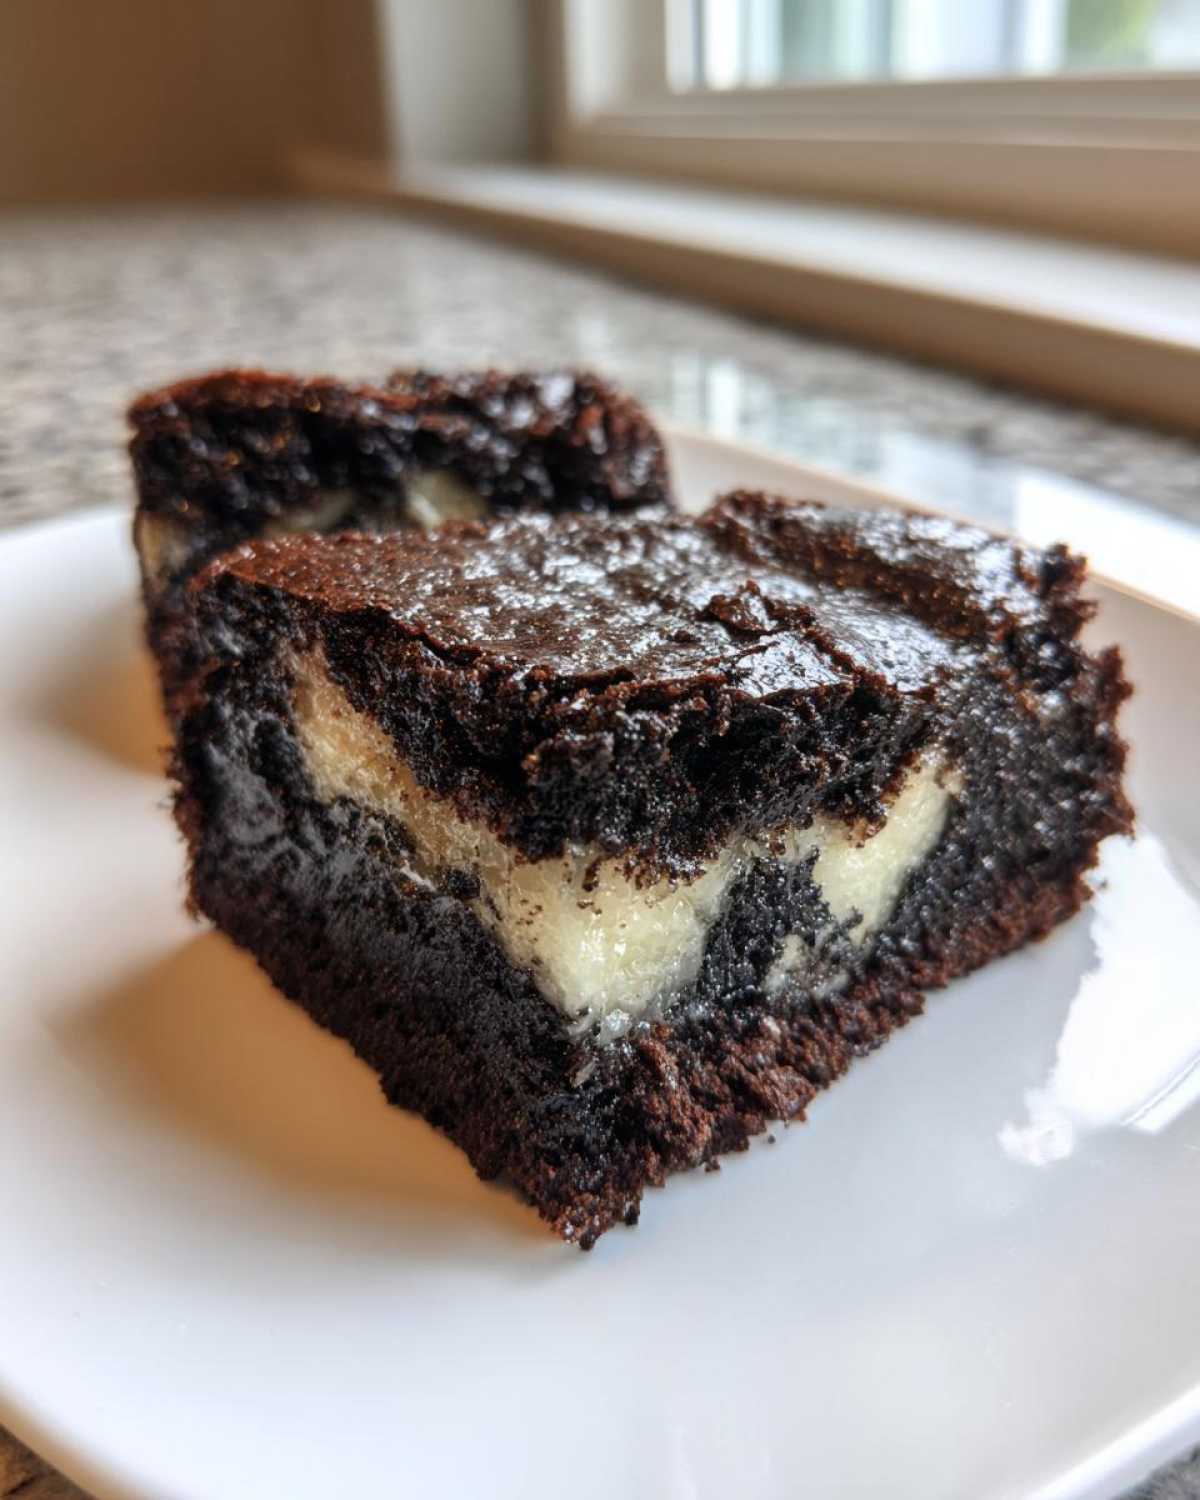
- Gorgeous Presentation: Since we marble the dark batters together, you get these stunning, deep grey swirls against the dark chocolate. They look sophisticated even though they are ridiculously easy to whip up!
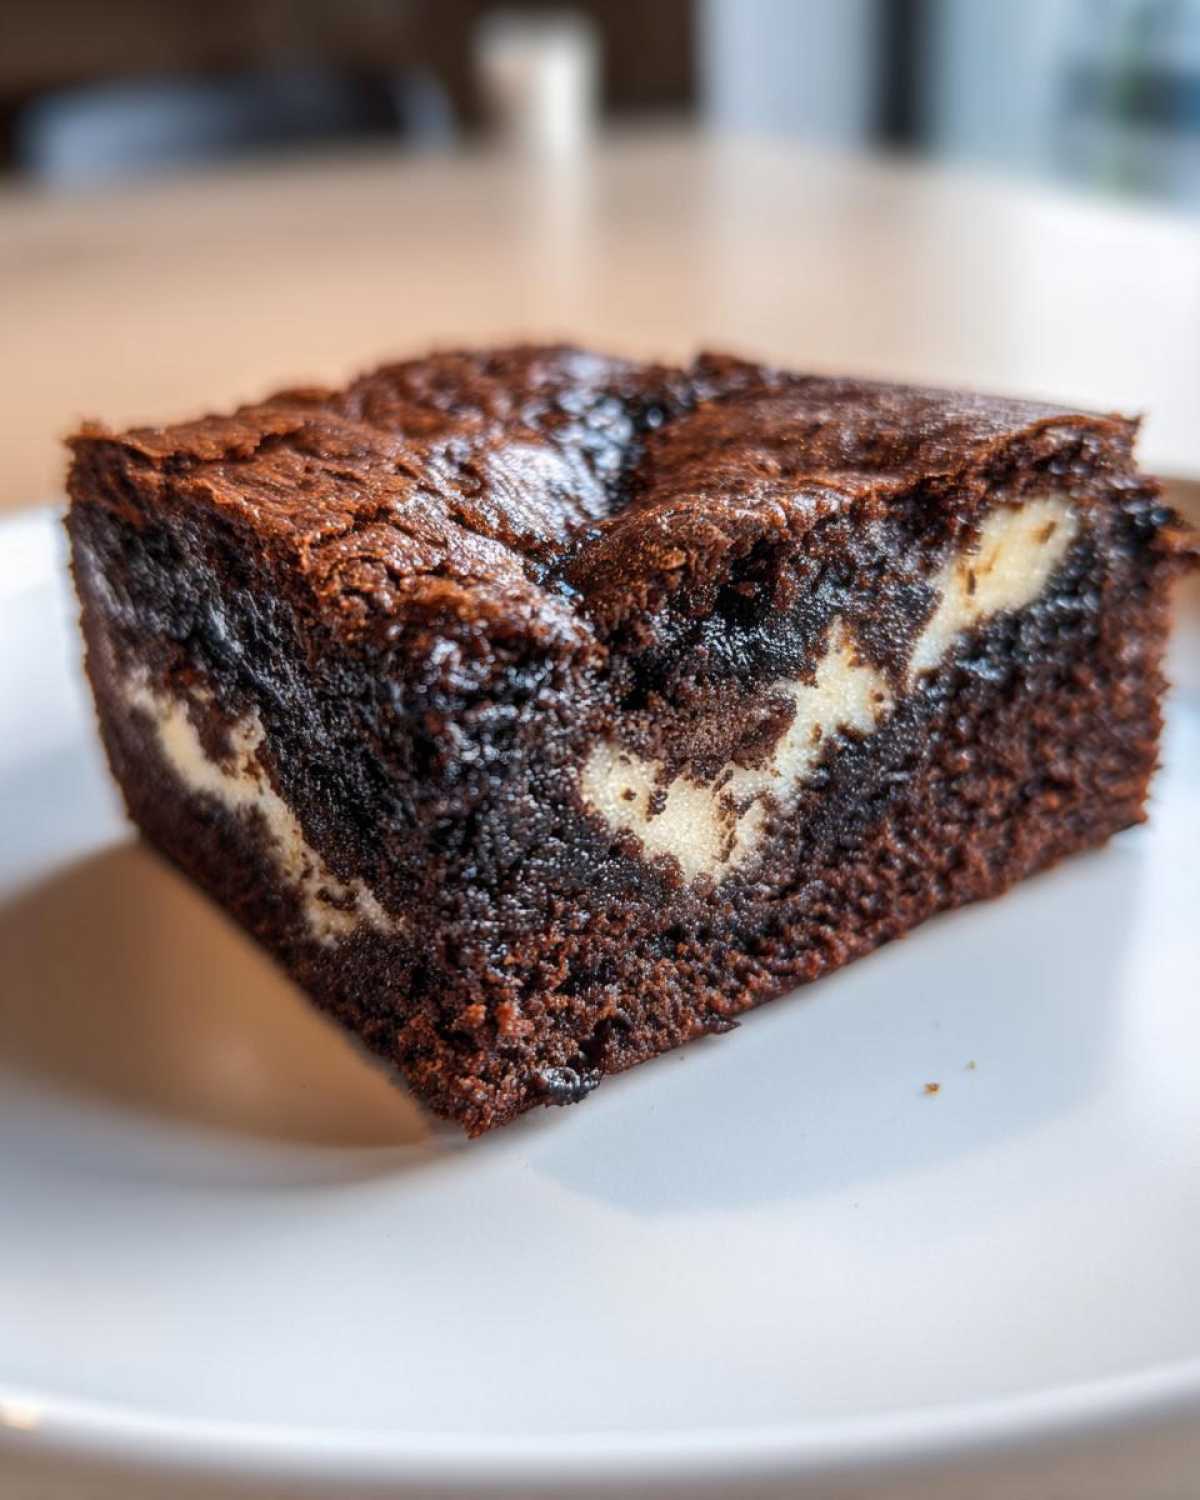
Essential Ingredients for Perfect Black Sesame Mochi Brownies
To get that incredible texture combination, you can’t just toss things together—you need specific ingredients for each half of the equation. Don’t worry, I’ve broken down exactly what you need below! Trust me; getting the right kind of flour for the chew is non-negotiable. If you want to read more about working with this amazing spice, I wrote a whole piece on baking with black sesame paste!
For the Fudgy Brownie Batter
- 1 cup (226g) unsalted butter, melted
- 1 1/4 cups (250g) granulated sugar
- 3/4 cup (150g) packed light brown sugar
- 4 large eggs
- 1 tablespoon vanilla extract
- 3/4 cup (75g) unsweetened cocoa powder
- 1/2 cup (60g) all-purpose flour
- 1/2 teaspoon salt
- 1/2 cup (120g) black sesame paste (or tahini mixed with 2 tablespoons black sesame powder)
- 1/2 cup (85g) bittersweet chocolate chips (if you want extra gooeyness!)
For the Chewy Mochi Layer
- 1 cup (120g) glutinous rice flour (this is the key!)
- 1/2 cup (100g) granulated sugar (the second measurement for this part)
- 1/2 cup (120ml) whole milk or non-dairy milk
- 1/4 cup (60ml) neutral oil (like canola or vegetable)
- 1/2 teaspoon baking powder
Equipment Needed for Your Homemade Mochi Brownie
You don’t need a million fancy gadgets for these **Black Sesame Mochi Brownies**, thank goodness! Most of this stuff is probably already hiding in your cabinet. Being organized before you start is half the battle, especially when you’re dealing with two different batters that need drizzling.
Here’s what I always grab before I start mixing:
- A sturdy 9×9 inch baking pan. This is the size that works best for the batter ratios we established.
- Parchment paper is your best friend! You need enough to line the pan with an overhang on two sides. This lets you just lift the whole glorious mess out when it’s cool.
- Large mixing bowls—one for the brownie batter fuss and one for the smooth mochi batter. I usually use two medium-sized bowls for the wet and dry sections of the brownie mix, too.
- A reliable whisk. You need something strong for getting that sugar incorporated into the melted butter without straining your wrist!
- A spatula for folding and gently spreading the layers. Remember, we’re not trying to make a uniform batter; we’re layering!
Step-by-Step Guide to Making Black Sesame Mochi Brownies
Okay, baking these **Black Sesame Mochi Brownies** is like a little science experiment, but honestly, it’s so worth the effort when you see those two distinct layers come together. The key here is speed when mixing the brownie part so we don’t deflate all that beautiful air we worked into the butter and sugar, and patience when it comes to cooling!
Preparing the Pan and Brownie Batter
First things first, let’s get organized! Crank that oven up to 350°F (175°C) right now. You absolutely must line your 9×9 pan with parchment paper, making sure you leave a couple of inches hanging over the sides—that overhang is your handle later! Give the paper a little grease too, just in case. Once the oven’s hot, grab your big bowl. Whisk that melted butter and both sugars until they look glossy and everything is dissolved. Then, beat in your eggs, one by one, until it’s super smooth. Stir in the vanilla and that gorgeous black sesame paste until the color is perfectly dreamy. Now, switch to a spatula! Gently fold in your cocoa, flour, and salt. Mix only until you see no more dry streaks. *Do not overmix the brownie batter*, or it won’t be fudgy!
Mixing the Glutinous Rice Flour Mochi Batter
While the brownie batter is resting for a minute, we tackle the chew! In a separate bowl, grab your glutinous rice flour and the second portion of sugar, plus the baking powder. Now, add the milk and the oil. You’ll notice this mixture is way thicker than regular pancake batter—that’s good! Whisk it until it’s one smooth, thick batter. Because we are using that sweet rice flour, it will feel dense, but trust me, that’s exactly what gives us that gorgeous mochi texture.
Layering and Swirling the Black Sesame Mochi Brownies
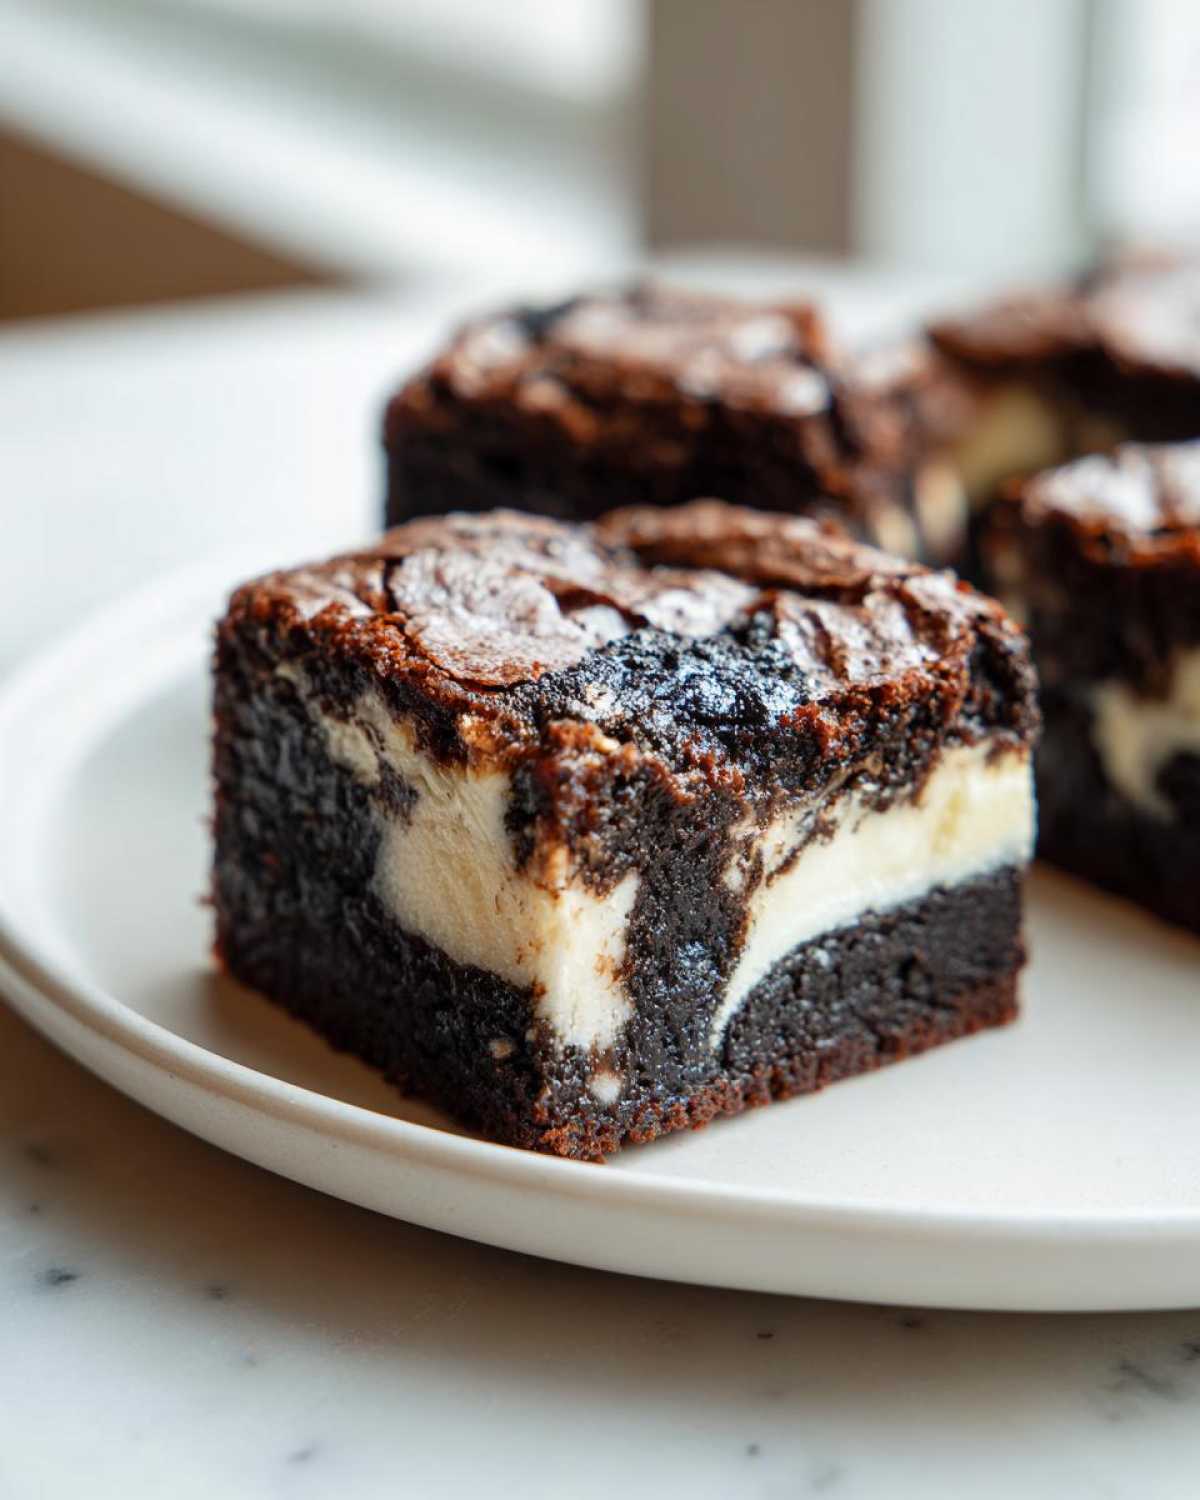
Now for the fun part that makes these **Gooey Sesame Brownies** unique! Pour exactly half of that fudgy brownie batter into your prepared pan and spread it out evenly across the bottom. Next, very carefully pour the thick mochi batter right on top of that. It might look clumsy, but that’s okay! Take the remaining brownie batter and gently drizzle, dollop, or spoon it over the mochi layer. If you want that marbled look, take a knife and just gently push it through the two layers in a figure-eight pattern a few times. Stop after about three goes! We aren’t trying to completely combine them; we want distinct layers.
Baking and Setting the Chewy Sesame Dessert
Slide that pan into your hot oven and bake it for about 35 to 45 minutes. You are looking for the edges to look firm and set. When you check it with a toothpick, you want to see moist crumbs sticking to it—not wet, goopy batter, but certainly not dry, crunchy crumbs either! This is crucial for a **Chewy Sesame Dessert**! Once you pull them out, this is the hardest step: you have to let them cool *completely* in that pan on a rack. If you try to cut them warm, that mochi layer will just melt out everywhere. Give them at least two hours, or pop them in the fridge to set up properly. Once fully cooled, grab those parchment overhangs and lift them out to slice your perfect squares!
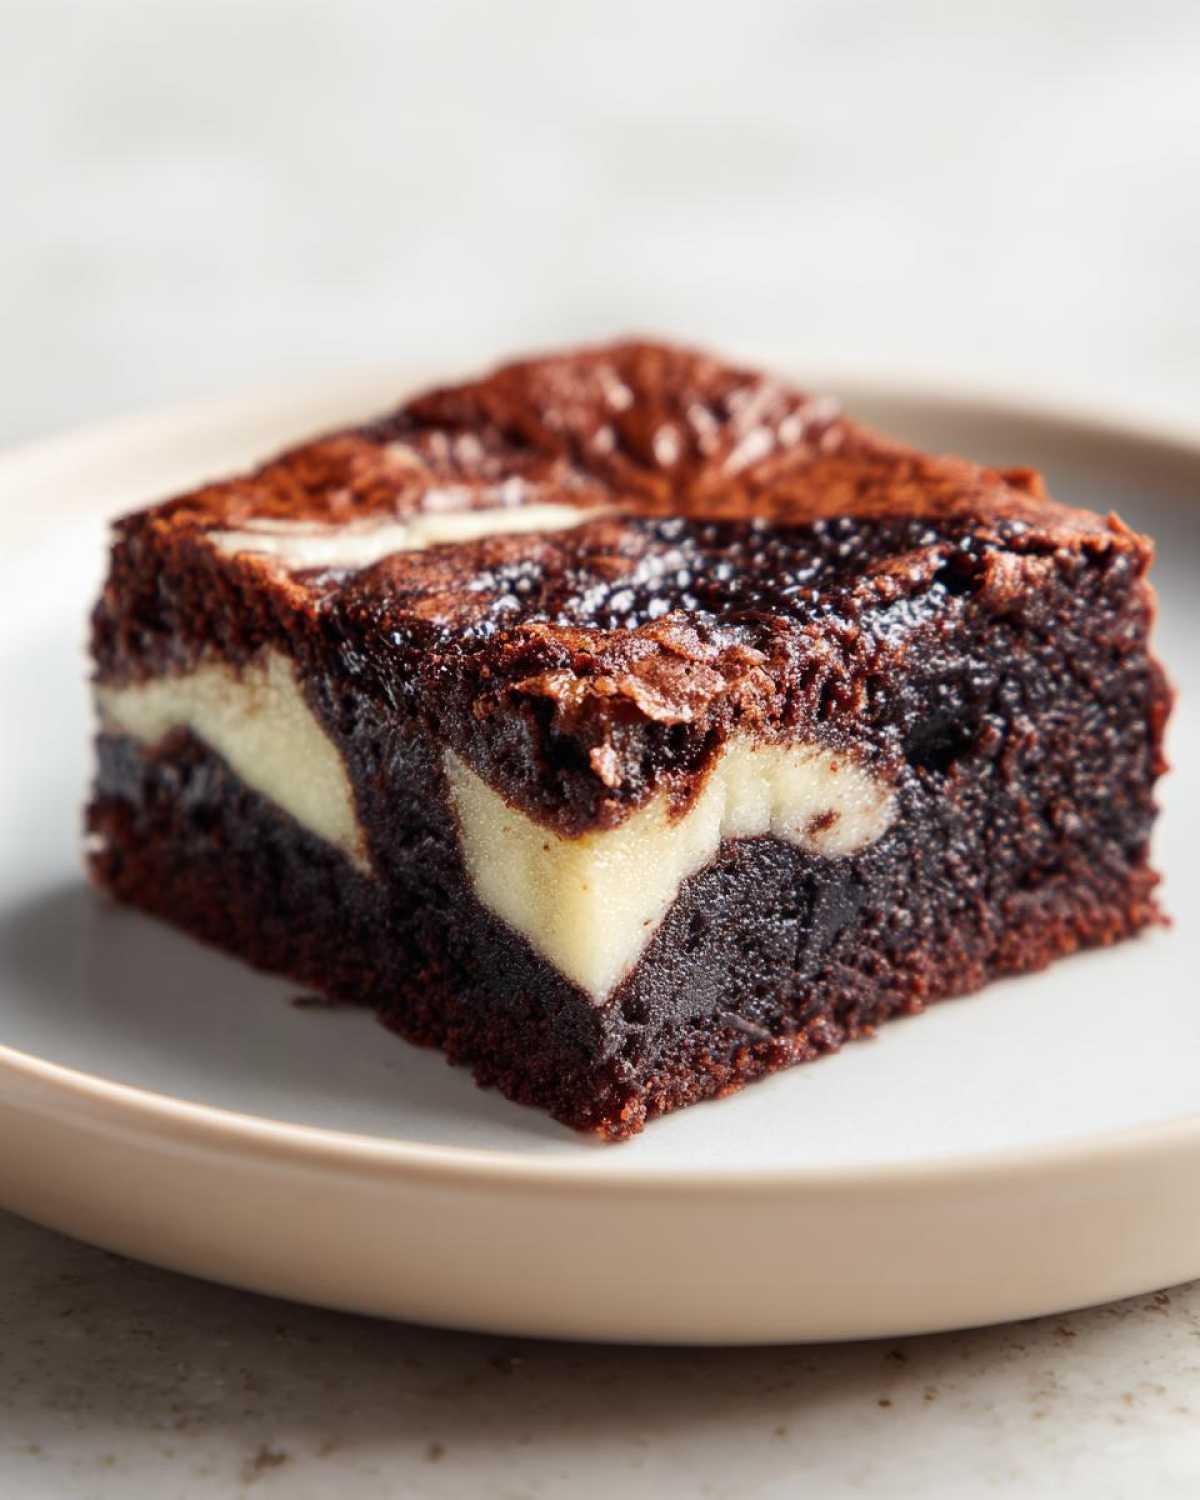
Tips for Achieving Perfect Mochi Textures in Baking
Look, I’m not going to lie—the mochi part of Black Sesame Mochi Brownies can throw people off if they haven’t worked with glutinous rice flour before. This stuff behaves nothing like regular flour! Getting that lovely bouncy pull is all about understanding how it absorbs liquid and how critical cooling time is. This goes beyond a basic recipe; this is about mastering mochi textures in baking.
Here are the hard-won lessons I learned through all those failed, sticky batches:
- Don’t Substitute the Flour: Seriously, don’t even try regular rice flour or wheat flour in place of the glutinous rice flour (sometimes called sweet rice flour). Regular rice flour results in a gritty, sandy texture. Glutinous rice flour is what gives you that signature, slightly elastic, delightfully chewy pull—it’s the magic dust!
- The Rest is Essential: I cannot stress this enough: these brownies *must* cool completely. When they come out of the oven, the mochi layer is soft, almost lava-like. As it cools to room temp (or colder!), the starches gelatinize and set up that wonderful, firm chew. If you cut them warm, you’ll just have a chocolate, sticky mess. Patience, my friend!
- Watch the Swirl Carefully: Remember how we only swirled the top once or twice? If you mix too much, the chocolate base and the sesame mochi batter combine fully, and you end up with a uniformly dense, dark brownie, losing that great textural contrast. Keep the layers mostly separate for the best effect.
- Baking Time Adjustments: Because the mochi layer is dense and wet, it can steam a little instead of baking dry. If your edges look done but the center still seems wobbly after 45 minutes, turn the heat down slightly and let it bake another 5-7 minutes. You want minimal moisture left on that toothpick!
If you’re interested in achieving that ridiculously shiny top on the brownie layer (totally separate from the mochi part, but equally important!), I have a few tricks up my sleeve over on my post about fudgy brownies with brown butter that might help your top layer look magazine-ready!
Ingredient Notes and Substitutions for Black Sesame Mochi Brownies
When you’re dealing with fusion baking like this—mixing a classic American treat with traditional Asian elements—the quality of a few key ingredients makes all the difference. We really need to talk about sourcing that black sesame paste because it’s the star of the show, and we also need to cover the easy swaps if you’re catering to dietary needs.
First off, let’s chat sesame paste. You want the purest, deepest flavor possible, right? If you can find a pre-made paste (often found in Asian grocery stores), look for one where the ingredients list is just black sesame seeds and maybe a little oil. If you can’t find it, don’t panic! I included the workaround in the recipe: just take some black sesame tahini (which is easier to find) and whisk in some extra black sesame powder. You get that intense color and flavor boost without changing the wet/dry balance too much.
Working with Glutinous Rice Flour (The GF Connection)
Remember how I harped on needing glutinous rice flour (sweet rice flour)? I want to be clear here: this is naturally gluten-free, which is fantastic! So, a lot of people ask about my thoughts on Gluten Free Mochi Brownies Ideas, and I always tell them this recipe is usually a winner right out of the gate, provided you stick to the right brand of flour. Since the structure relies on the properties of rice starch rather than wheat gluten, we don’t need a special GF blend here.
The warning is about cross-contamination. If you have severe allergies, make sure the package explicitly states it’s certified gluten-free, just to be safe!
Making This Recipe Vegan? Easy Swaps!
If you want to keep the chocolate fudgy but skip the dairy, you’re in luck! The mochi layer handles non-dairy milk like a champ. Swap out your butter for good quality vegan butter sticks—don’t use the soft tub margarine, it has too much water and will throw off your ratios. For the eggs, you could try using flax eggs, but honestly, with four eggs driving the structure here, I actually prefer using a commercial egg replacer designed for baking if I’m going fully vegan, or just swapping the four eggs for four applesauce portions (about 1/2 cup total) in the brownie layer, though that might sacrifice a tiny bit of the fudginess. Test that one at your own risk!
Chocolate Chip Choices
I used bittersweet chips because I love that deep dark chocolate contrast against the nutty sesame, but feel free to use semi-sweet if you like it traditionally sweeter. If you are dairy-sensitive, always double-check your chocolate chip bag for hidden milk solids. There are so many great dark chocolate options out there now that bake up beautifully without any dairy involved!
Serving Suggestions for Your Rich Sesame Chocolate Squares
Once you’ve waited those agonizing hours and finally cut into your perfect, chewy **Rich Sesame Chocolate Squares**, you need the perfect drink or topping to go with them! These aren’t your average sprinkle-covered treats; the deep sesame flavor demands something that either complements that earthiness or cuts through the richness with a little brightness. Trust me, serving them plain is great, but pairing them right takes them to another level.
When I’m serving these **Black Sesame Mochi Brownies** to guests—especially for a dessert platter—I always lean toward contrasting temperatures. The warmth of the brownie (once you’ve warmed it up slightly!) next to something icy is unbeatable. So, my absolute go-to suggestion is a nice, high-quality vanilla bean ice cream. The pure, sweet creaminess washes over the nutty sesame perfectly.
Temperature Contrast is Key
The chewy mochi section sometimes firms up a bit too much in the fridge. If you’ve stored yours cold, try this trick: microwave a single square for about 10 to 15 seconds. It just barely softens the chocolate and brings back that beautiful, tender elasticity to the mochi layer. It’s heavenly!
If you serve it warm, maybe skip the ice cream and go for a lightly sweetened whipped cream. You can fold a tiny bit of lemon zest into the cream for a bright counterpoint to the deep chocolate and sesame notes. That little bit of acid cuts through the fat beautifully.
The Perfect Drink Pairing
Because the flavor profile here leans so wonderfully toward Japanese Inspired Desserts, I often pair these treats with tea rather than coffee. Rich chocolate and strong sesame need something that offers soothing warmth without competing too aggressively.
The best pairing, in my opinion, is a lightly spiced tea. Think about an Earl Grey or even a delicate London Fog. Speaking of lovely tea drinks, if you’re looking for a perfect iced pairing for a warmer day, check out my recipe for a London Fog Iced Latte—it’s subtle enough not to overpower the brownies!
If you must have coffee, go for something dark and medium-roast. An Americano or a simple black drip kept on the lighter side works best. Avoid heavily flavored lattes, as they tend to clash with the earthy sesame notes. Enjoy them slowly!
Storage and Reheating Instructions for Gooey Sesame Brownies
This is where people go wrong with **Mochi Brownies**, so listen up! Because of that special chewy layer made with glutinous rice flour, you can’t just treat these like regular brownies. They get hard and stiff if you store them the wrong way. Proper storage keeps them gooey and bouncy!
My general rule for these **Gooey Sesame Brownies** is simple: airtight containers are your best friends, and refrigeration is only necessary if you plan to keep them longer than two days. Do not skip cutting them before storing, though; once they’ve set up hard, cutting them is impossible!
Room Temperature Storage – The First Few Days
If you plan on eating these **Black Sesame Brownie Recipe** treats within about 48 to 72 hours, keep them right on the counter. It’s the best way to maintain that perfect textural contrast—fudgy bottom, chewy top.
- Make sure they are completely cool—I mean bone cold—before you stash them. If there’s any residual heat, they will sweat in the container and get soggy.
- Cut them into serving squares first. Storing one giant slab isn’t practical and can encourage condensation.
- Place them in a truly airtight container. I usually put just one layer down, then maybe a piece of parchment paper if I have a second layer.
- Keep the container away from direct sun or any heat source, which can make the fudgy part melt slightly and smear the mochi layer.
Refrigeration for Longer Keeping
If you know you won’t get through the batch in three days, you need to chill them down. The cool air helps set the mochi structure a bit more firmly, preventing any early staling, but it **will** make them noticeably denser.
When you put them in the fridge, make absolutely sure they are wrapped tightly. I usually wrap the whole cooled batch tightly in plastic wrap first, then place that wrapped block into an airtight container. This double-barrier system is critical to keep them from drying out in the cold air.
Remember, however, that chilling these **Chewy Sesame Desserts** stiffens them up quite a bit. They won’t be nearly as soft right out of the fridge, so you *must* reheat them!
How to Reheat Your Stiffened Sesame Brownies
If they come straight from the fridge, they will be firm—that’s normal! Trying to bite into a cold **Black Sesame Mochi Brownie** right away can disappoint you because the chewiness tightens up too much. We need gentle heat to reactivate that texture.
- Microwave is Fastest: This is my preferred method for an individual square. Place the square on a microwave-safe plate and heat it for just 10 to 15 seconds on medium power. You want it warm, not hot. This melts the chocolate just enough and softens the mochi back to its bouncy state.
- Oven for a Batch: If you want to serve several warmed up at once, wrap them loosely in foil and place them in an oven preheated to 300°F (150°C) for about 8 minutes. Check them after 5 minutes; you are aiming for warmth throughout so the layers separate nicely when you bite in.
Never freeze these! The high moisture content in the mochi layer doesn’t freeze and defrost well; it tends to weep water when thawed, making the brownie soggy. Stick to the counter or the fridge for best results.
Frequently Asked Questions About Black Sesame Brownie Recipe
It’s always great when readers have questions! After all this fuss about texture and flavor depth, I know you might have a few lingering thoughts about making your own **Black Sesame Brownie Recipe**. These are common concerns, especially when mixing textures like this. Jump into these FAQs, and if you still have questions, you can always check out my thoughts on handling cream cheese brownies for comparison!
Can I use regular rice flour instead of glutinous rice flour?
Oh, honey, please don’t try this swap if you want the signature chew! This is the biggest texture trap in this whole recipe. Regular rice flour (the kind you might use for dusting or thickening sauces) lacks the specific starch structure that makes mochi… well, mochi. If you use regular rice flour, you will end up with a baked good that is crumbly, sandy, and kind of dry in that layer. We need that high amylopectin content that only **Glutinous Rice Flour Brownies** provide to get that bouncy, stretchy texture. Regular flour gets gritty; glutinous rice flour gets delightfully chewy!
How do I intensify the Black Sesame Flavor Profile?
That’s a great question if you really love that deep, slightly earthy, nutty note! While using a high-quality black sesame paste gets you most of the way there, you can definitely amp it up. My trick is simple: always lightly toast your sesame seeds before you grind them into a paste OR before you mix them in as an extra powder component. Toasting them—just in a dry pan over medium heat until you can really smell them, about 3-4 minutes—wakes up all the oils and seriously boosts the flavor intensity. That simple step makes a huge difference in the overall **Black Sesame Flavor Profile**. You could also add a tiny pinch of sea salt to the mochi batter to help those nutty notes pop even harder!
Can I make these brownies ahead of time?
Yes, you absolutely can prep them ahead, but you need to be mindful of the texture change! Remember, these aren’t just fudgy; they have that chewy mochi layer. If you make them and leave them on the counter for two days, the texture will be perfect—the brownie part soft and the mochi bouncy. If you refrigerate them for more than a day, that mochi layer WILL stiffen up significantly. So, yes, they are great to make ahead, but if you refrigerate them, you *must* follow the reheating instructions I gave you (a quick 10 seconds in the microwave!) to bring that beautiful chewiness back to life!
PrintBlack Sesame Mochi Brownies

A recipe for rich, fudgy brownies featuring a chewy, bouncy layer created with glutinous rice flour, flavored deeply with toasted black sesame.
- Prep Time: 20 min
- Cook Time: 40 min
- Total Time: 60 min
- Yield: 16 squares
- Category: Dessert
- Method: Baking
- Cuisine: Asian Fusion
- Diet: Vegetarian
Ingredients
- 1 cup (226g) unsalted butter, melted
- 1 1/4 cups (250g) granulated sugar
- 3/4 cup (150g) packed light brown sugar
- 4 large eggs
- 1 tablespoon vanilla extract
- 3/4 cup (75g) unsweetened cocoa powder
- 1/2 cup (60g) all-purpose flour
- 1/2 teaspoon salt
- 1/2 cup (120g) black sesame paste (or tahini mixed with 2 tablespoons black sesame powder)
- 1 cup (120g) glutinous rice flour (sweet rice flour)
- 1/2 cup (100g) granulated sugar (for mochi layer)
- 1/2 cup (120ml) whole milk or non-dairy milk
- 1/4 cup (60ml) neutral oil (like canola or vegetable)
- 1/2 teaspoon baking powder
- 1/2 cup (85g) bittersweet chocolate chips (optional)
Instructions
- Preheat your oven to 350°F (175°C). Line a 9×9 inch baking pan with parchment paper, leaving an overhang on two sides for easy removal. Lightly grease the paper.
- In a large bowl, whisk the melted butter with the granulated and brown sugars until fully combined.
- Whisk in the eggs one at a time until the mixture is smooth and glossy. Stir in the vanilla extract and the black sesame paste until the color is uniform.
- In a separate bowl, whisk together the cocoa powder, all-purpose flour, and salt. Gradually add the dry ingredients to the wet ingredients, mixing only until just combined. Do not overmix. Fold in the chocolate chips if using. This is your brownie batter.
- Prepare the mochi layer: In a medium bowl, whisk together the glutinous rice flour, the second portion of sugar, and the baking powder.
- Whisk in the milk and neutral oil until you have a smooth, thick batter. This is your mochi batter.
- Pour half of the brownie batter into the prepared pan and spread evenly.
- Gently pour the mochi batter over the brownie layer. It will be thick.
- Carefully spoon the remaining brownie batter over the mochi layer. Use a knife or offset spatula to gently swirl the layers together slightly, creating a marbled effect, but try not to fully mix them.
- Bake for 35 to 45 minutes. The edges should look set, and a toothpick inserted near the center should come out with moist crumbs attached, not wet batter.
- Let the brownies cool completely in the pan on a wire rack before lifting them out using the parchment overhang. Cooling fully is essential for the mochi texture to set.
- Cut into squares and serve.
Notes
- For a stronger black sesame flavor, toast the sesame seeds lightly before grinding them into a paste, or use a high-quality store-bought paste.
- Glutinous rice flour is necessary for the chewy texture; do not substitute with regular rice flour.
- If you want a distinct layer, pour the mochi batter, then gently dollop the remaining brownie batter on top and spread very lightly.
- For a vegan option, substitute the butter with vegan butter sticks and use a plant-based milk for the mochi layer.
Nutrition
- Serving Size: 1 square
- Calories: 320
- Sugar: 30
- Sodium: 120
- Fat: 18
- Saturated Fat: 10
- Unsaturated Fat: 8
- Trans Fat: 0
- Carbohydrates: 38
- Fiber: 2
- Protein: 5
- Cholesterol: 65