

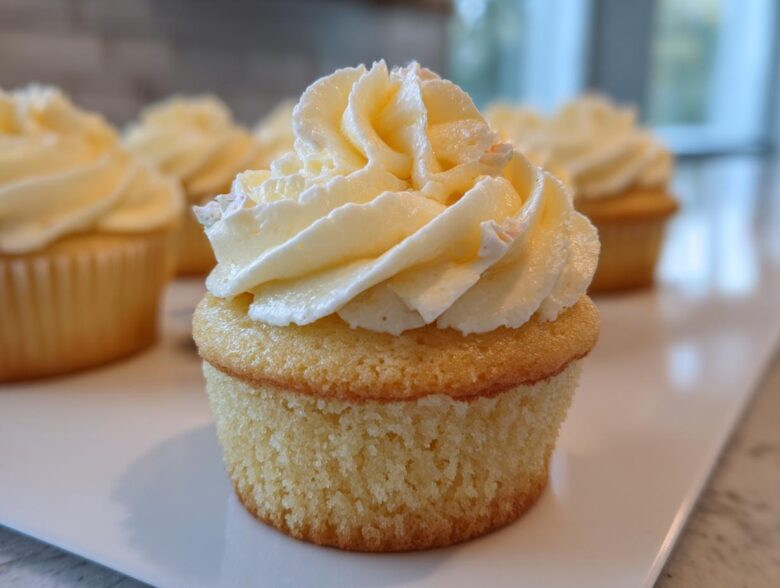
If there’s one thing Chloe can never quite manage to replicate without my help, it’s the structure of a perfect baking project. Her wild, intuitive spirit is great for dinner, but when it comes to baking, you need a map! That’s why I know, without a doubt, that these vanilla cupcakes are the ultimate triumph of our partnership. I promise you, these are the most incredibly moist and fluffy classic vanilla cupcakes you’ll ever pull out of your oven. Forget dry, crumbly disappointments; we’re going straight for that sought-after bakery-style tenderness that melts the second it hits your tongue. I took my love for exact measurements and applied it rigorously, and the result is this foolproof recipe that sings with pure, rich vanilla flavor.
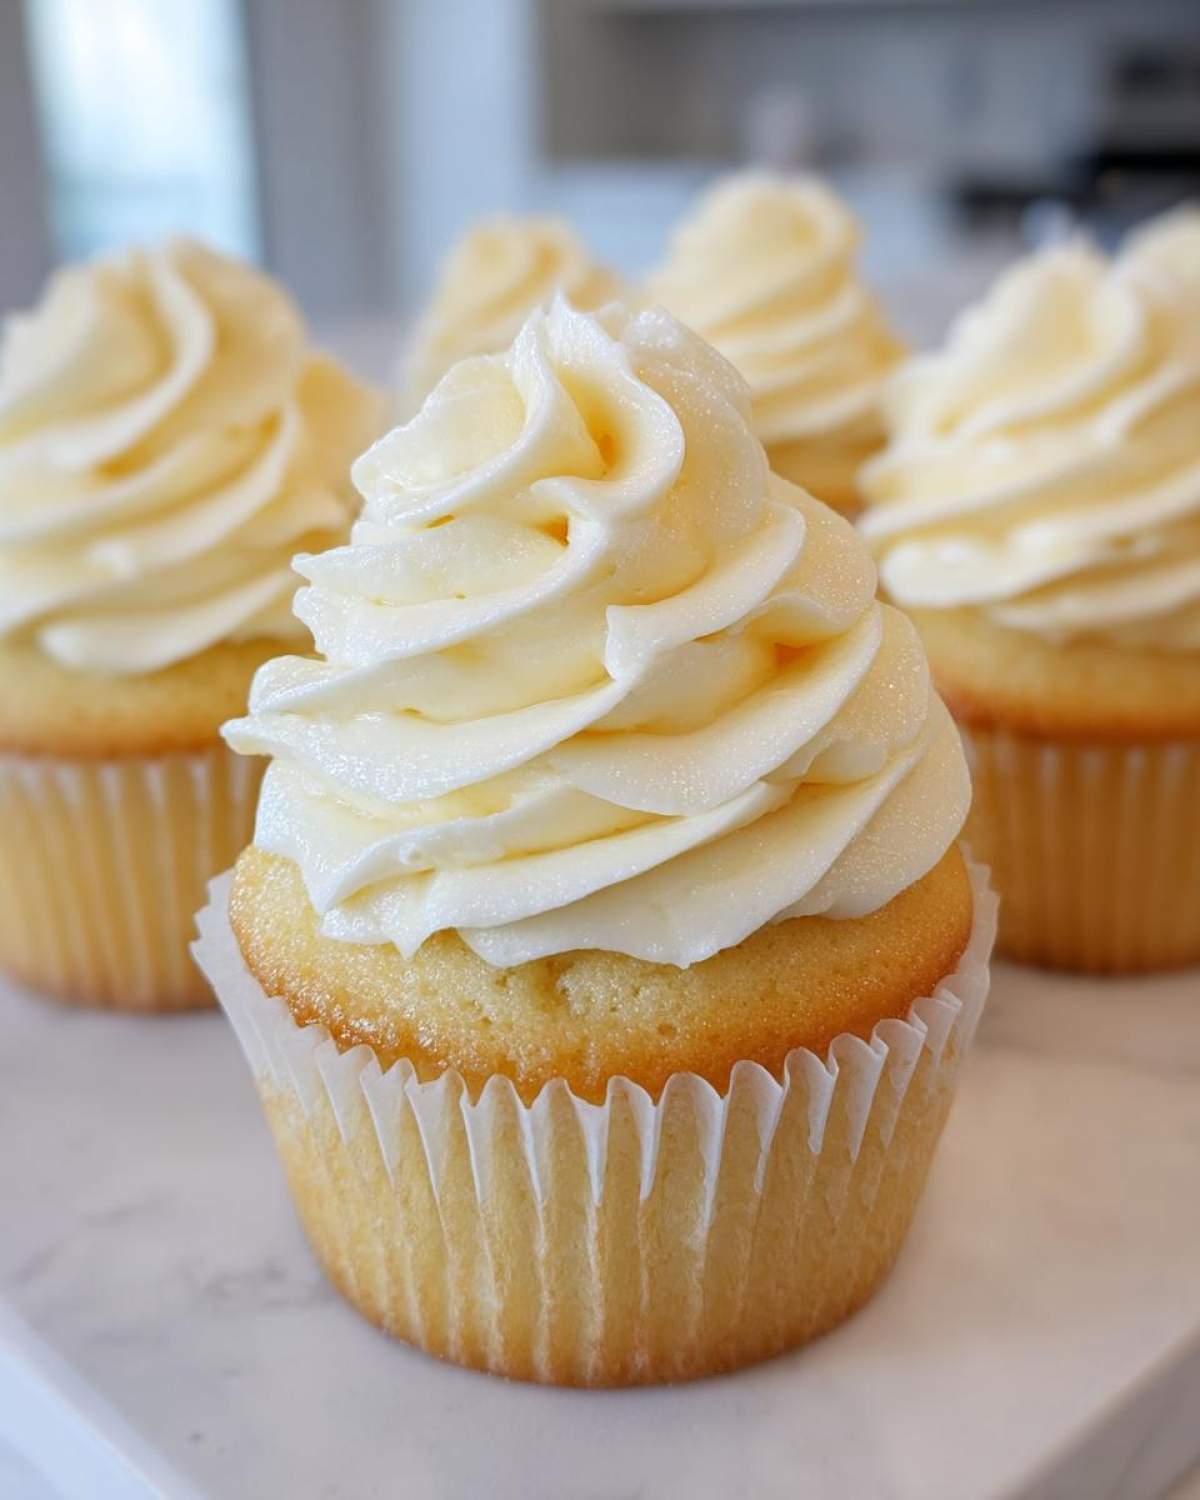
We’ve spent ages honing this specific balance because, for me, baking success lives and dies in the precision of the recipe. When you follow these steps exactly—especially regarding ingredient temperature—you get that signature fluffy texture that others only dream about. Welcome to the fleet; I’m Ethan, and I’m handing you the blueprint for baking perfection. If you want to know more about how we navigate the kitchen chaos together, you can always check out our story over at the About Us page.
Why These Are The Best Vanilla Cupcakes You Will Ever Make
I’ll be honest, I have tasted some truly sad excuses for vanilla cupcakes in my life. They are either too dense, taste mostly like sugar, or dry out the second they hit room temperature. Not these! These are hands-down the best vanilla cupcakes because they hit that sweet spot every single time. We’re talking about melt-in-your-mouth tenderness that shouts ‘bakery style vanilla cupcakes’ the second you bite in.
What makes them so impossibly good? It really comes down to the math—the precise ratio of fat to liquid that Chloe always wants to eyeball, but I insist on measuring! This specific combination of ingredients is what guarantees the perfect vanilla cupcake texture. You don’t have to worry about heavy crumbs here; this recipe is light, airy, and wonderfully soft. If you want a different kind of perfectly tender treat, you should also check out our guide for the best soft and chewy snickerdoodle recipe next!
Achieving That Signature Moist Vanilla Cupcakes Texture
Moisture starts before you even turn on the mixer. You absolutely must use room temperature butter, eggs, and milk. When those colder ingredients hit the creamed butter and sugar, the emulsion breaks, and you end up with heavy batter. Also, that initial creaming step? It’s not just mixing; it’s creating tiny air pockets! Those pockets are what give you that incredibly moist vanilla cupcakes quality when they bake up. Trust me, skipping the room temp step means skipping the fluffiness.
Gathering Ingredients for Your Fluffy Cupcake Recipe
Okay, this is where my planning skills really shine! Since we are aiming for that coveted light and airy structure, we cannot get lazy with our ingredient preparation. Chloe jokes that I treat the ingredient list like a military operation, and honestly? For fluffy cupcake recipe success, you kind of need to! Every single component plays a crucial role in creating superior easy homemade cupcakes.
Make sure you’ve got everything measured out precisely before you even think about turning on that mixer. We’ve separated the list below so you know exactly what’s going into the cake and what’s reserved for that amazing topping. No swooping in to grab the milk for coffee halfway through, please!
Ingredients for the Classic Vanilla Cupcakes
When you look at this list, you’ll notice everything for the cake section is pretty standard, but the temperatures are everything. I can’t stress this enough: room temperature milk and room temperature eggs are non-negotiable if you want truly moist vanilla cupcakes. Cold ingredients fight the creamed butter, and that fights the fluff!
- 1 1/2 cups all-purpose flour
- 1 1/2 teaspoons baking powder
- 1/4 teaspoon salt
- 1/2 cup (1 stick) unsalted butter, softened—and I mean properly softened, not melted!
- 1 cup granulated sugar
- 2 large eggs, making sure they are at room temperature
- 1 teaspoon pure vanilla extract
- 1/2 cup whole milk, also at room temperature
Ingredients for the Simple Vanilla Buttercream
For the frosting, we are going classic all the way. Making the simple vanilla buttercream from scratch means you control the sweetness, and it tastes a million times better than anything you get out of a can. The secret to velvety smooth frosting, versus grainy stuff, is sifting the sugar. Don’t skip it—that’s how you reach best vanilla cupcake frosting quality.
- 1 cup (2 sticks) unsalted butter, softened
- 4 cups powdered sugar, sifted! Heavily sifted!
- 1 teaspoon pure vanilla extract
- 3-4 tablespoons heavy cream or milk (this is where you adjust for perfection)
- Pinch of salt
Step-by-Step Guide to Making Easy Homemade Cupcakes
Alright, let’s get our hands dirty! This is the main event where we go from bowls of ingredients to actual, beautiful, fluffy baked goods. Since this recipe is fantastic for beginner cupcake baking, I’ve broken down the steps logically. Remember what I said? Structure matters here, so pay attention to the mixing order. If you stick with this method, you’ll end up with those easy homemade cupcakes that taste like they took hours, not just 40 minutes total!
Preparing the Batter for Perfect Vanilla Cupcakes
First things first: Get that oven up to 350°F (175°C) and get your liners ready. The absolute most crucial step for a soft cupcake recipe is Step 3: creaming. Don’t rush beating that softened butter and sugar until it looks pale and fluffy—it takes a good three minutes, and you are whipping air into the batter! Slowly add those room-temp eggs, one by one.
Now for the tricky part (Chloe usually wants to dump it all in!): You have to alternate the dry ingredients with the milk, starting and ending with dry. When you add the flour mixture, switch the mixer to low speed and mix only until you don’t see white streaks anymore. Seriously, stop mixing! Overmixing develops gluten, and gluten is the enemy of a light, airy texture. We want soft, not chewy!
Baking and Cooling Your Vanilla Cupcakes
Once your batter is mixed just right, lovingly divide it among those 12 liners—don’t fill them past two-thirds full, or you’ll get those funny, pointy tops! Pop them into the preheated oven and set a timer for 18 minutes. Have your toothpick ready to test for doneness. As tempting as it is, resist the urge to open the oven door early; that’s how you get sunken centers.
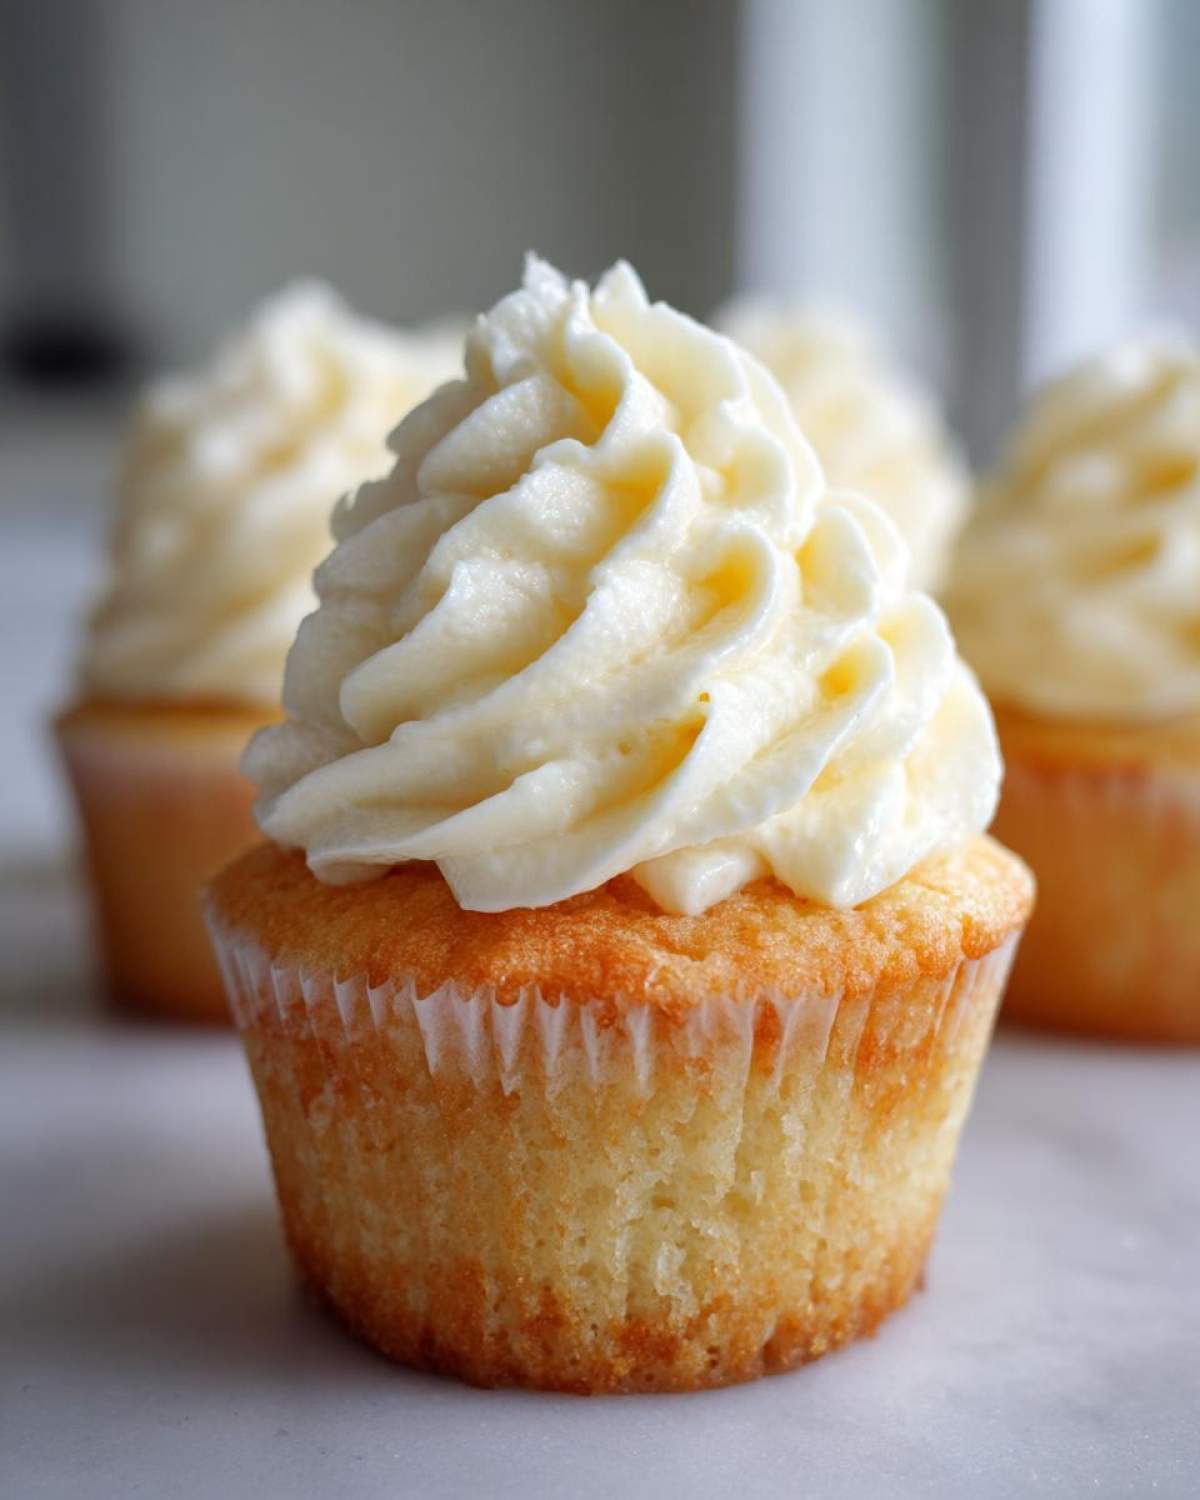
When the toothpick comes out clean, they’re done! Let them hang out in the hot pan for about five minutes—this lets them firm up a tiny bit before you move them. Then, transfer those warm beauties immediately onto a wire rack. And here’s the cardinal rule: they have to be 100% cool before you even think about frosting. If you frost a warm cupcake, you’re going to end up with a melted, sad puddle of buttercream. We don’t do sad here. If you need another great from-scratch recipe, check out my guide on chocolate cake!
How to Prepare the Best Vanilla Cupcake Frosting
Now that your vanilla cupcakes are cool—and I mean *completely* cool, trust me on this one—it’s time for the crowning glory! We are making that rich, smooth, simple vanilla buttercream. I know, I know, sometimes frosting seems intimidating, but this one is pure magic because it tastes exactly like what you get at the best local bakeries. We are aiming for luxurious, fluffy goodness here, not that greasy stuff that separates when it sits out.
The key to achieving the best vanilla cupcake frosting is totally about technique, just like the cake batter. You have to beat the butter until it’s practically a cloud before you even introduce the sugar. If you dump the powdered sugar into hard butter, you’re just going to end up with sugary dust flying everywhere, and a lumpy frosting!
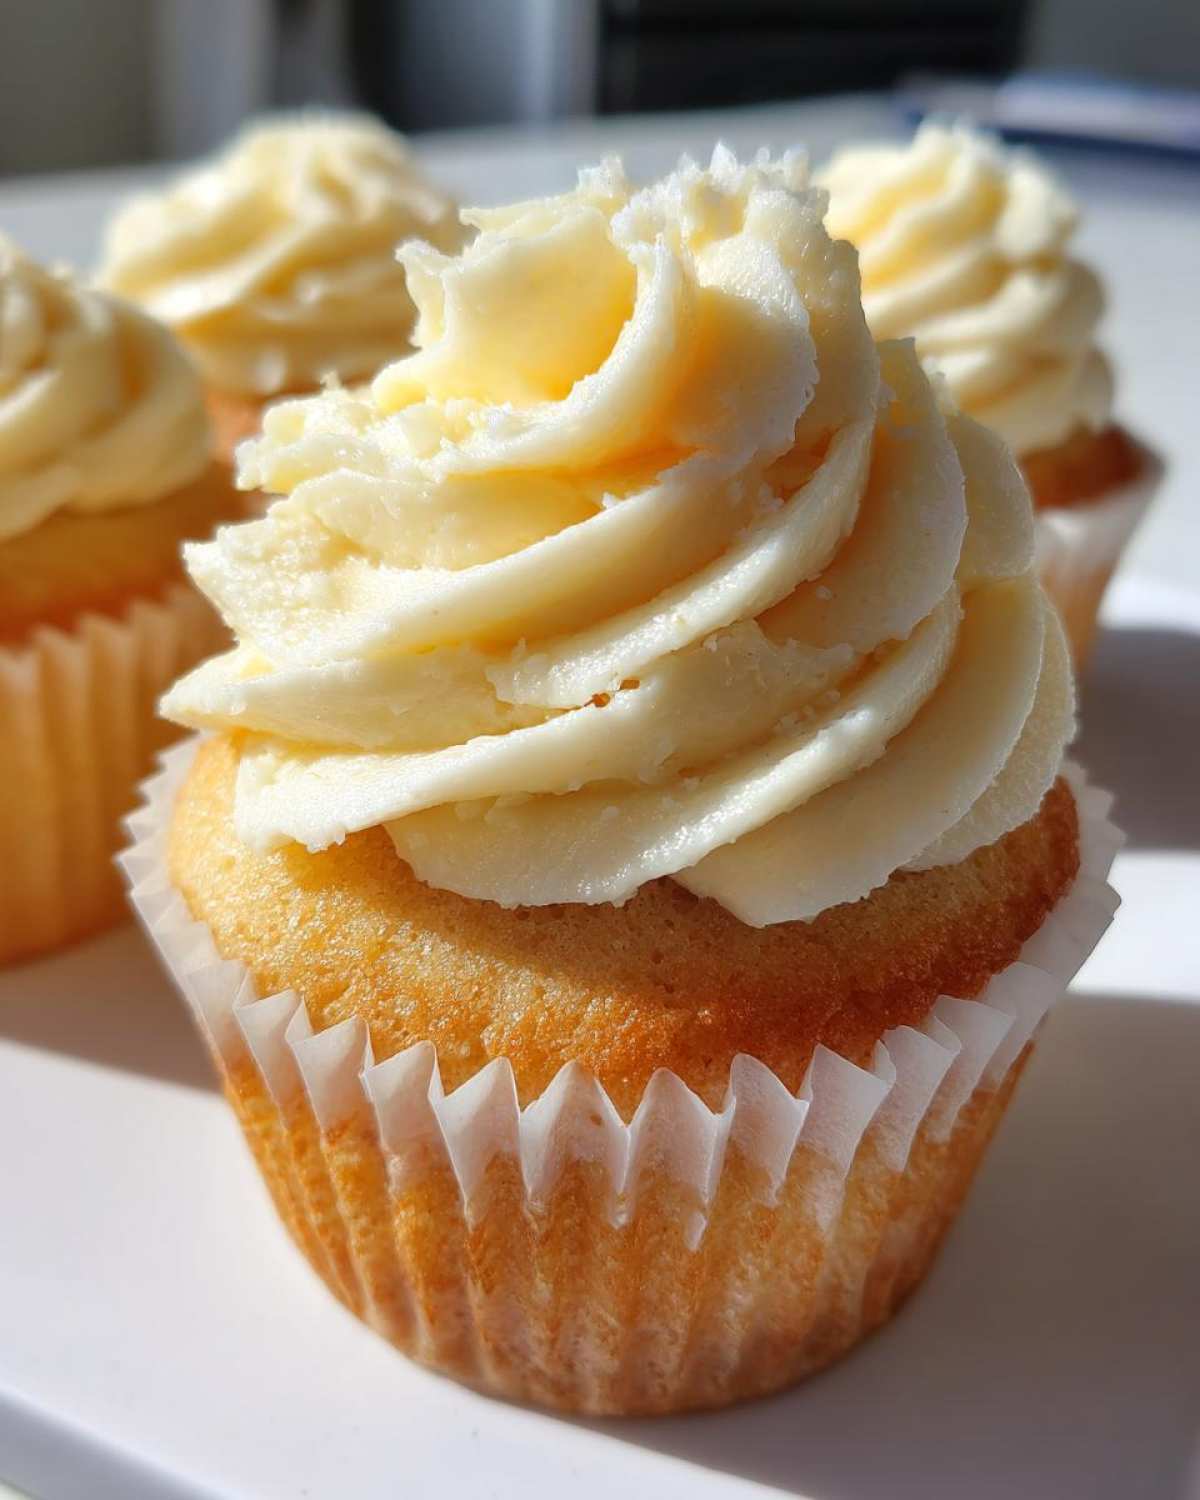
Start by taking your two sticks of softened butter—again, soft, not melted, please!—and whip them alone until they are noticeably lighter and creamy. This might take two or three minutes on medium speed. Once the butter is happy, start adding your sifted powdered sugar, one cup at a time. This patient approach is what saves you from a sugar explosion and guarantees that beautifully smooth texture. If you love creamy texture, you have to check out our cream cheese brownies recipe next, because that cream cheese base acts a lot like super-soft butter!
Once the sugar is mostly incorporated, it’s time for the liquid element. Add that vanilla and the tiny pinch of salt—that salt is crucial because it cuts the intense sweetness. Then, introduce the heavy cream or milk, just a tablespoon at a time. You are watching the consistency here. If it looks stiff, add more liquid, a teaspoon at a time, until it’s spreadable or pipeable, depending on what your heart desires for your classic vanilla dessert. It should hold a peak but still look glossy and soft. If you follow this, you’ll have the fluffiest topping imaginable for your moist vanilla cupcakes!
Tips for Success When Baking Vanilla Cupcakes From Scratch
Even using my precise measurements, sometimes things go a little sideways, right? That’s totally normal! Chloe reminds me often that cooking, especially baking your vanilla cupcakes from scratch, is all about learning from those little bumps in the road. I pulled the essential notes from our recipe card—the stuff that moves these from good to truly spectacular—so you can feel confident nailing that light and airy cupcakes texture.
Our biggest secrets relate to temperature and handling the batter. If you want that textbook, bakery-perfect crumb, you have to respect the ingredients’ state. And please, keep checking out the latest adventures on our blog for more solid baking tips!
Troubleshooting Common Vanilla Cupcakes Issues
So, what if they don’t turn out perfectly fluffy? Don’t panic! The two biggest culprits for issues are overmixing and impatience.
If your fluffy cupcake recipe resulted in sunken centers, you probably opened the oven door too early, or you mixed the flour in for way too long. When you overmix, you activate too much gluten, which makes the cake structure collapse slightly as it cools. For dry results, it’s usually just simple overbaking. Check them right at the 18-minute mark; if the toothpick is clean, pull them out! They continue cooking slightly on the rack, which keeps them beautifully soft.
Also, don’t forget that little tip about the vanilla—if you can splurge, switching to vanilla bean paste makes a huge difference in the taste of these simple vanilla treats, pushing them right up to that unforgettable level.
Making Vanilla Cupcakes for Parties and Celebrations
This recipe is truly the workhorse of my baking collection. When you need a crowd-pleaser that satisfies everyone from picky toddlers to sophisticated adults, you reach for these vanilla cupcakes. They are absolutely the star for birthday cupcake ideas because they are basically edible blank canvases, waiting for whatever frosting color or sprinkle combination you dream up!
While the texture is what keeps people coming back for more, presentation is what gets them picked up first on the party table! Since these are such easy homemade cupcakes, you can afford to spend an extra minute or two on the topping to make them look like they came straight from a fancy downtown bakery.
Chloe is the master of presentation on our crew, though I prefer the simple swirl. She almost always busts out the piping bag. Using a large star tip makes even the simplest simple vanilla buttercream look dramatic—it makes the cupcake look huge and impressive! You just load up the bag and pipe a nice, tall swirl, finishing it with a few colorful sprinkles or a dusting of edible glitter. It takes practically no extra time but elevates these vanilla cupcakes for parties instantly.
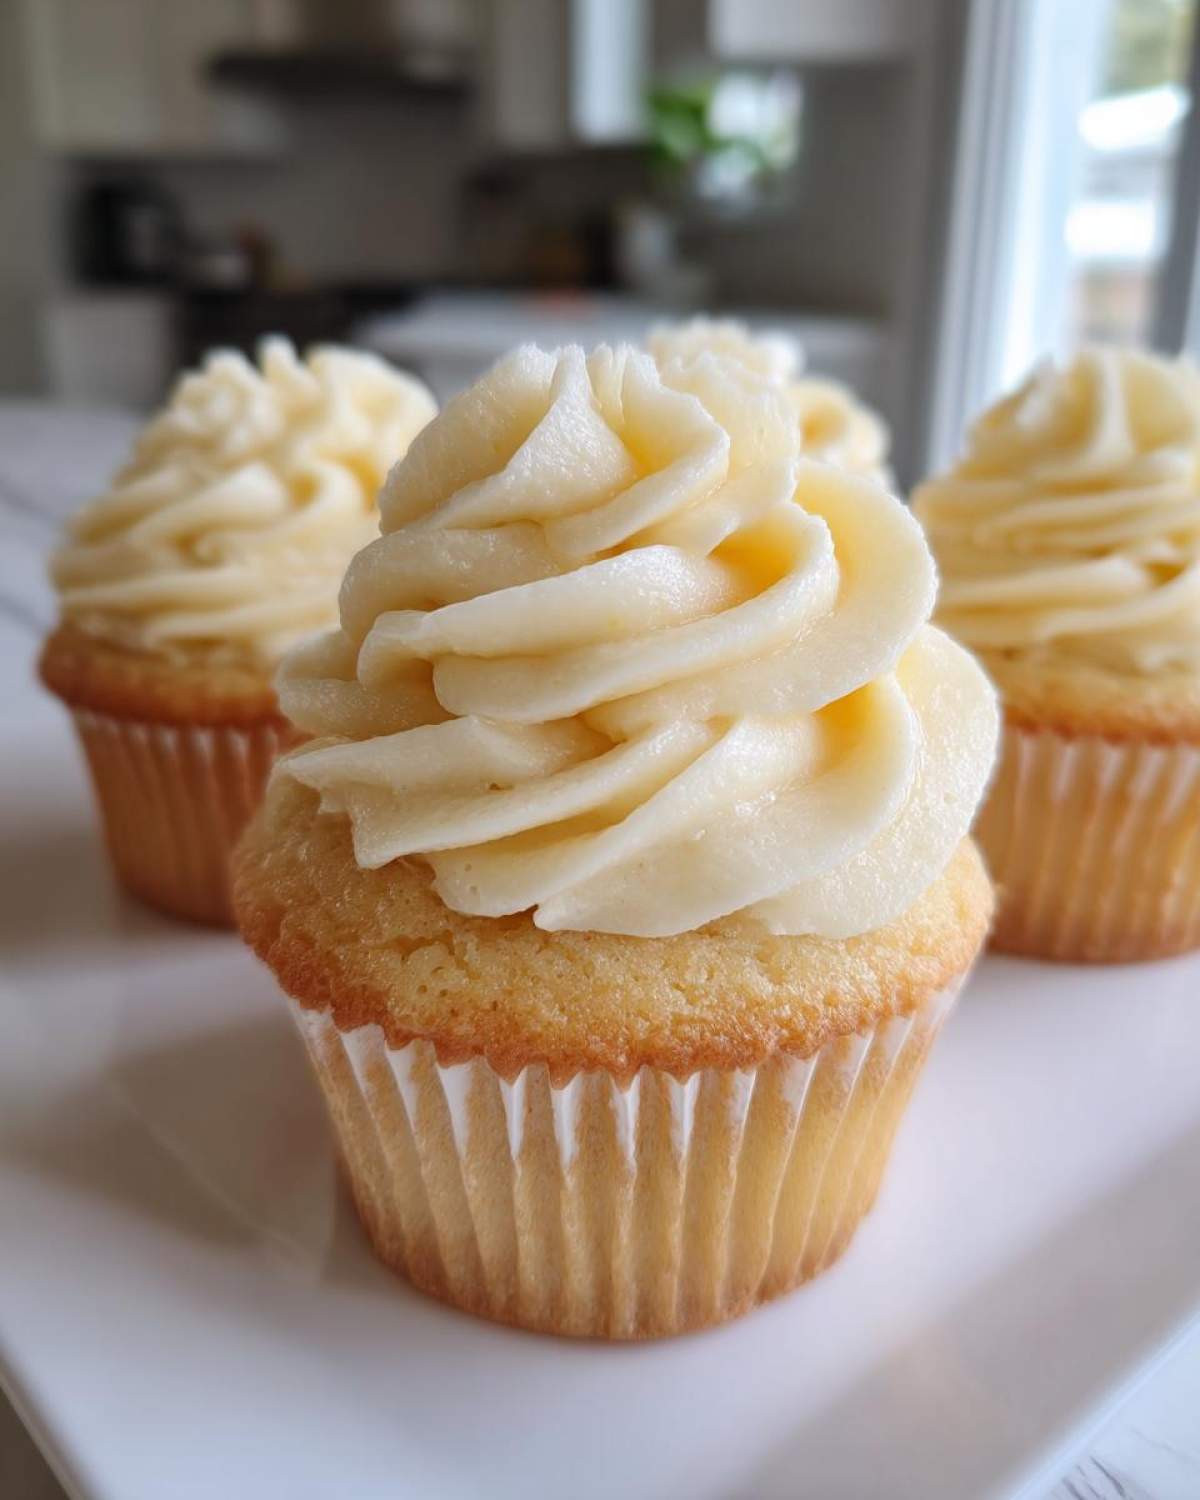
If you’re running short on time and just want a quick spread, don’t worry; a simple spreading knife works fine, too! Just make sure you get a decent dollop on there. For me, part of the fun of these simple vanilla treats is seeing them stacked up waiting for kickoff or a birthday candles. If you’re planning a full celebration menu, you absolutely have to try our recipe for caramel apple martinis to go alongside them!
Storage and Reheating Instructions for Your Classic Dessert
Even though these vanilla cupcakes are basically impossible to resist, you might have leftovers, right? (Don’t look at me like that, I’ve definitely eaten three before they even cooled down.) Since we worked so hard to achieve that light and airy cupcakes texture, storing them correctly is super important to maintaining that fluffiness!
For the absolute best flavor and texture, these cupcakes really should be eaten on the day you bake them. That’s when they are at their peak—that tender crumb hasn’t had time to firm up at all. However, life happens, so here is the system Chloe and I use to store them without ruining my glorious simple vanilla buttercream.
Room Temperature Storage: If you’re keeping them for less than two days, storing them at room temperature is actually better than the fridge! Pop them into a covered container. Make sure the lid isn’t pressing down on the frosting, or you’ll smush all my hard piping work. Room temp keeps them softest. Just keep them somewhere cool, away from direct sunlight, which can melt that butter!
Refrigeration Rules: If you need them to last longer than two days, you have to use the fridge. The downside? The cold air dries out the cake part a little faster, even though the frosting stays firm. If you store them in the fridge, you must bring them back out about an hour before you plan to serve them. Let them come back up to room temperature so that buttery flavor blooms again and the cake softens up. You’ll be amazed how much better they are when they aren’t fridge-cold.
If you’re planning way ahead, you can totally freeze them unfrosted! Once cooled, wrap the naked cupcakes tightly first in plastic wrap, then foil. They’ll last a month easily, and when you thaw them overnight in the fridge and bring them to room temperature, they’ll be just as fluffy as when you baked them. This is great for holidays! Speaking of planning ahead, if you love baking sweets that last beautifully, you really ought to check out how we manage our famous chocolate chip banana bread recipe.
Frequently Asked Questions About Fluffy Vanilla Cupcakes
I know you have questions! Honestly, I have about a hundred questions every time Chloe tries a new variation on one of my core recipes. Baking is all about experimentation, but when you nail a structure like this one, you want to know the ‘why’ behind all the rules. Here are the things people always ask me when they try to achieve the perfect vanilla cupcake texture.
Can I substitute the milk in this recipe?
Generally, I tell people to stick to whole milk if they can, especially since our goal is moist vanilla cupcakes. Whole milk has a higher fat content, which contributes directly to that rich, soft mouthfeel. If whole milk isn’t an option, you can use 2% or even skim, but you might find them just a tiny bit less luxurious. If you’re dairy-free, Chloe has had success using a full-fat oat milk blended with a teaspoon of melted butter stirred in. That extra fat helps mimic the structure. Avoid watery alternatives, though, or you’ll end up having to add too much flour, which ruins the light and airy cupcakes goal!
How do I make sure my vanilla cupcakes taste bakery style?
Ah, the secret of the pros! It’s three things coming together, but the biggest game-changer is the vanilla itself. If you really want that intense flavor you find in those amazing bakeries, ditch the plain extract and use vanilla bean paste—it has those lovely little specs, and the flavor is so much deeper. Also, remember the creaming step: beating the butter and sugar for a good three minutes until it’s nearly white and fluffy? That process incorporates the air that gives the cake body, making them structurally bakery style vanilla cupcakes rather than dense, homemade ones. Finally, don’t overbake! They are done when the toothpick has moist crumbs, not when it comes out perfectly dry.
Can I make these ahead of time for my party?
Yes, you absolutely can, and mastering this timeline is key for stress-free vanilla cupcakes for parties! The cakes themselves bake up wonderfully and will stay fresh at room temperature, covered, for about two days. However, I strongly recommend baking the cakes one day, letting them cool completely, wrapping them tightly, and storing them on the counter overnight. Then, the morning of the party, you make the simple vanilla buttercream fresh and frost them. Frosting tends to get a little soft or weepy if it sits on the cake for more than 24 hours, especially if your party room is warm. If you need to make them further ahead, freeze the UN-FROSTED cakes instead—they keep wonderfully!
Is there a way to make these taste more like a classic yellow cake?
That’s a great question about shifting the flavor profile! If you want to turn this into a more traditional classic vanilla dessert flavor, the easiest tweak is swapping out some of the vanilla extract for almond extract. Just use half the amount of vanilla called for and replace it with a half teaspoon of almond extract. Almond brings a complementary note that’s often found in classic yellow cake mixes. You’ll still have that soft, fluffy texture, but the flavor profile leans a little more familiar and nostalgic. No need to change any of the structure, just play with that extract!
If you’re looking for other quick dishes that bring that same homemade charm without much fuss, I highly recommend you check out our recipe for quick creamy dill dip—it’s a lifesaver for casual get-togethers!
Nutritional Estimate for These Simple Vanilla Treats
Now, I’m Ethan, so I love having the numbers, but I have to give you a big disclaimer here: treat this information like a guideline, okay? Since every brand of flour and sugar we use is slightly different, these figures are based on averages for one of these simple vanilla treats. If you’re tracking nutrition strictly, just know that the real numbers will shift slightly based on how much frosting you pile on!
For a single cupcake, here’s what we are looking at based on the recipe outlined above. For the full breakdown and details on how to interpret these numbers for your own kitchen, please check out our official Nutritional Disclaimer.
- Serving Size: 1 cupcake
- Calories: About 350
- Sugar: Around 40g
- Fat: Roughly 18g
- Carbohydrates: 45g
- Protein: 4g
See? Delicious, but definitely a treat! Worth every single bite of that fluffy cake, I promise.
PrintThe Ultimate Moist and Fluffy Classic Vanilla Cupcakes with Creamy Vanilla Buttercream
You can bake bakery-style vanilla cupcakes right in your own kitchen! This easy recipe delivers incredibly moist and fluffy vanilla cupcakes topped with a smooth, creamy vanilla buttercream. It is perfect for birthdays or any celebration.
- Prep Time: 20 min
- Cook Time: 20 min
- Total Time: 40 min
- Yield: 12 servings
- Category: Dessert
- Method: Baking
- Cuisine: American
- Diet: Vegetarian
Ingredients
- 1 1/2 cups all-purpose flour
- 1 1/2 teaspoons baking powder
- 1/4 teaspoon salt
- 1/2 cup (1 stick) unsalted butter, softened
- 1 cup granulated sugar
- 2 large eggs, room temperature
- 1 teaspoon pure vanilla extract
- 1/2 cup whole milk, room temperature
- For the Buttercream: 1 cup (2 sticks) unsalted butter, softened
- 4 cups powdered sugar, sifted
- 1 teaspoon pure vanilla extract
- 3-4 tablespoons heavy cream or milk
- Pinch of salt
Instructions
- Preheat your oven to 350°F (175°C). Line a standard 12-cup muffin tin with paper liners.
- In a medium bowl, whisk together the flour, baking powder, and salt. Set this dry mixture aside.
- In a large bowl, use an electric mixer to beat the softened butter and granulated sugar together until the mixture is light and fluffy, about 3 minutes. This step is key for fluffy cupcakes.
- Add the eggs one at a time, beating well after each addition. Mix in the vanilla extract.
- With the mixer on low speed, alternate adding the dry ingredients and the milk to the wet ingredients, beginning and ending with the dry ingredients (three additions of dry, two of milk). Mix only until just combined; do not overmix.
- Divide the batter evenly among the 12 cupcake liners, filling each about two-thirds full.
- Bake for 18 to 20 minutes, or until a toothpick inserted into the center comes out clean. Let the cupcakes cool in the pan for 5 minutes before transferring them to a wire rack to cool completely.
- To make the buttercream, beat the softened butter in a large bowl until smooth and creamy.
- Gradually add the sifted powdered sugar, one cup at a time, beating well after each addition.
- Mix in the vanilla extract and the pinch of salt.
- Add the heavy cream or milk, one tablespoon at a time, beating until the frosting reaches your desired smooth and spreadable consistency.
- Once the cupcakes are completely cool, frost them generously using a piping bag or a knife.
Notes
- For the best texture, make sure your butter, eggs, and milk are all at room temperature before you start mixing.
- Do not overmix the batter after adding the flour; this develops gluten and results in tough cupcakes instead of light and airy ones.
- If you want a stronger vanilla flavor, use vanilla bean paste instead of extract in both the cake and the frosting.
Nutrition
- Serving Size: 1 cupcake
- Calories: 350
- Sugar: 40g
- Sodium: 150mg
- Fat: 18g
- Saturated Fat: 11g
- Unsaturated Fat: 7g
- Trans Fat: 0.5g
- Carbohydrates: 45g
- Fiber: 0.5g
- Protein: 4g
- Cholesterol: 70mg